 minute read
Configure File Replication
Prerequisites
-
Review Replication Overview.
There are three basic steps to configure FlexSync to replicate your data.
- Step 1: Configure a Hostgroup
- Step 2: Configure a Host
- Step 3: Configure a Task

To configure a file replication task from the FlexSync dashboard, complete the following steps.
The hostgroup is a container for the hosts that you assign as a source and as a target system. If you have multiple systems you want to replicate, you can configure multiple Hostgroups. To configure a replication task, you must first add a hostgroup.
-
Log in to the FlexSync Dashboard.
 Access the FlexSync Dashboard
Do the following to access your FlexSync dashboard.
Prerequisites
- You will need a FlexSync user account before you can create a replication task. See Step 4: Manage FlexSync Users.
- In order to access the FlexSync GUI, the appliance host name must be resolvable through a DNS name or IP address. If you use a DNS name, it must be resolvable on the DNS or it must have a local entry in the local appliance /etc/hosts file.
-
Access the StorNext User Interface (new UI introduced in StorNext 7.0.1).
-
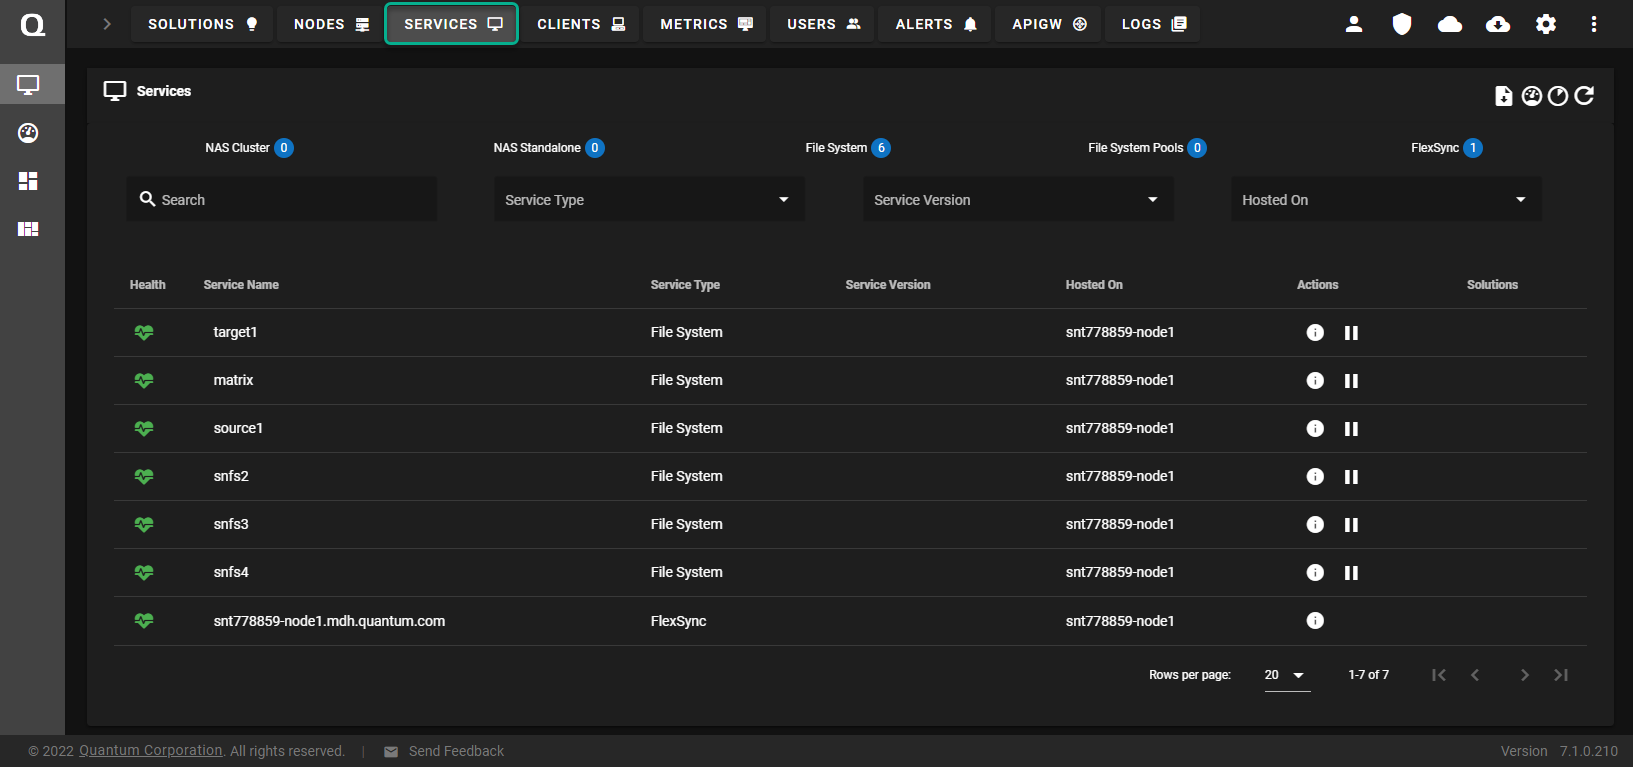
On the top navigation, click Services. The Services page appears.
-
Under the Service Name heading, click the service name that corresponds with your FlexSync service.
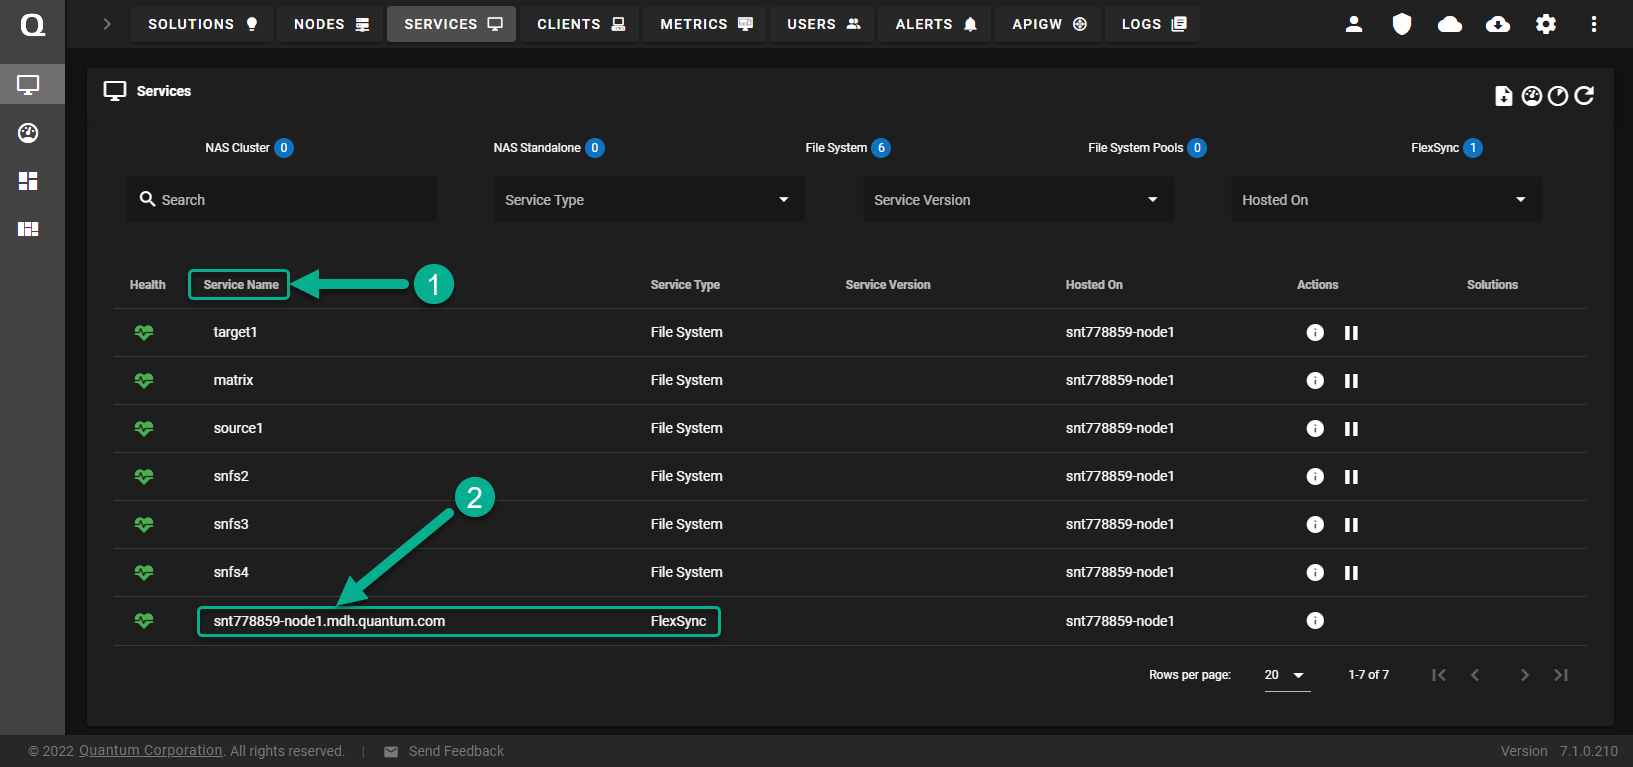
The FlexSync dashboard appears.
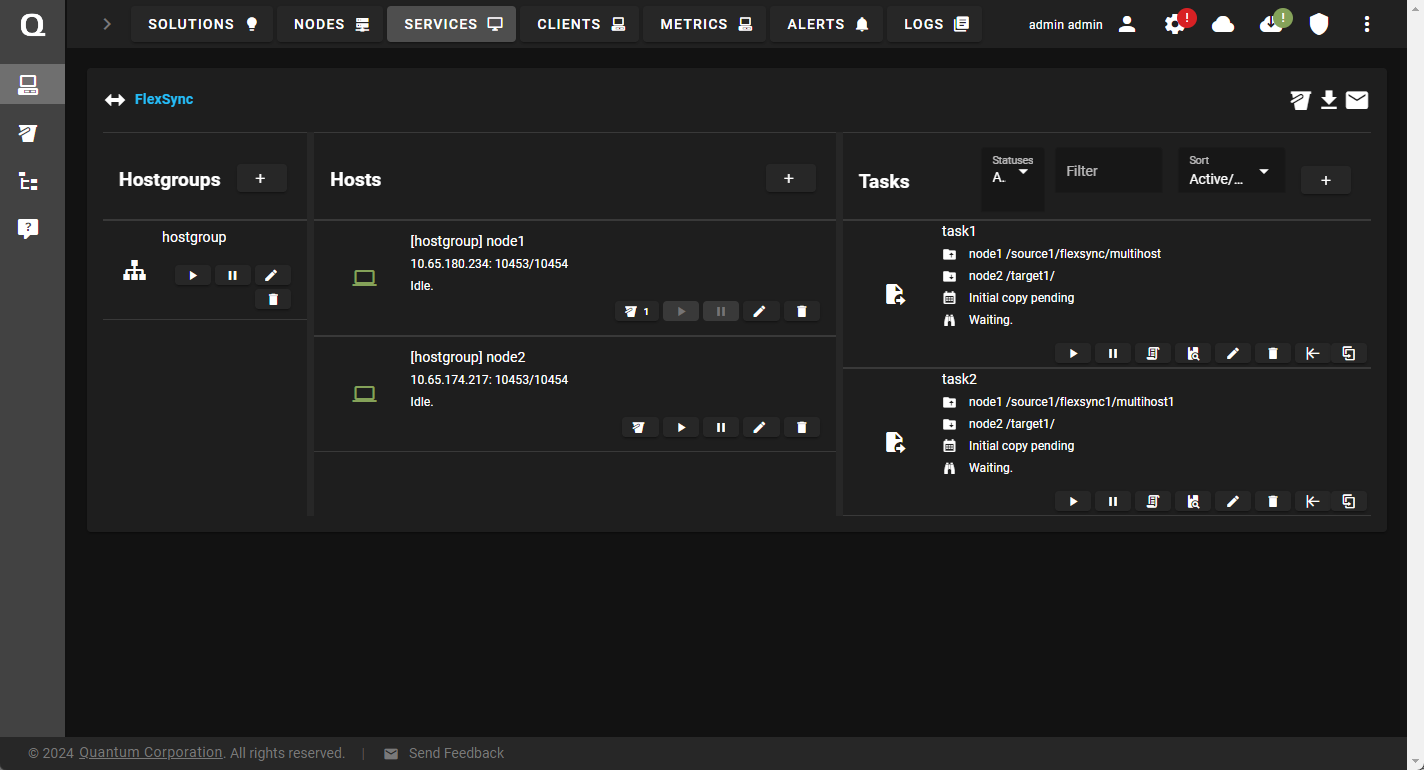
- In the Hostgroups column, click Add a hostgroup to display the Hostgroup configuration dialog box.
- In the Name field, enter a label for the hostgroup.
- Click Apply to add the hostgroup, or click Cancel to abort the operation and return to the previous page.
Note: Click the Edit icon to change the name of your hostgroup.
You can now add one or more hosts to your hostgroup. A host is what you assign as either a source or target system.
Note: The host's flexsyncd daemon must be running and reachable at its configured DNS name or IP address to successfully complete this task.
-
Log in to the FlexSync Dashboard.
Access the FlexSync Dashboard
Do the following to access your FlexSync dashboard.
Prerequisites
- You will need a FlexSync user account before you can create a replication task. See Step 4: Manage FlexSync Users.
- In order to access the FlexSync GUI, the appliance host name must be resolvable through a DNS name or IP address. If you use a DNS name, it must be resolvable on the DNS or it must have a local entry in the local appliance /etc/hosts file.
-
Access the StorNext User Interface (new UI introduced in StorNext 7.0.1).
-
On the top navigation, click Services. The Services page appears.
-
Under the Service Name heading, click the service name that corresponds with your FlexSync service.
The FlexSync dashboard appears.
-
In the Hosts column, click Add a host to display the Host configuration dialog box.
Basic Tab
- In the Name field, enter a label for the host.
- In the Hostgroup field, select a hostgroup.
-
In the Hostname field, enter the DNS name or IP address for the replication transport.
-
In the Admin port field, update the port number, as needed. The default port is 10453.
-
In the Data port field, update the port number, as needed. The default port is 10454.
-
In the SSL port field, update the port number, as needed. The default port is 10554.
-
In the Username field, enter your FlexSync user name.
-
In the Password field, enter your FlexSync password.
Advanced Tab
If needed, select Bandwidth Throttling.
This option restricts the bandwidth across all of the active tasks for the selected host, to the specified value.
-
By default, bandwidth throttling is disabled. To enable:
- Select Bandwidth Throttling.
-
In the Bandwidth limit field, enter a value.
Note: The minimum bandwidth limit value is 1 MiB per second (MiB/s).
- Select a data transfer rate from the list.
- Enter 0 to disable bandwidth throttling.
Note: If you enable bandwidth throttling, the rate I/O is not guaranteed. Initially, your data transfers might experience a bit of variation where the host’s transfer rate, as shown in the GUI, can be slightly higher or lower than the requested transfer rate. The transfer rate eventually settles in to the requested transfer rate. Also, the transfer rate shown by the GUI is an average across the running time of all active tasks. If you update the bandwidth limit mid-stream, then FlexSync throttles up or down to that limit immediately, but it might take an extended period of time for the average to reflect the updated bandwidth limit.
Caution: Use caution if you attempt to mix Bandwidth Throttling and Storage Manager. If you run FlexSync on a throttled link or if the link is substantially slower than the minimum tape drive read speed, see Considerations for Low Network Bandwidth Tape Retrieval for configuration options.
-
Click Apply to add the host, or click Cancel to abort the operation and return to the previous page.
Note: Click the Edit icon to change the name of your host.
- (Optional) Repeat the procedure for each host participating in data replication.
A task defines what files and directories to replicate from your source system to a location you define on the target system(s).
Note: When you configure a replication task, you can only configure one task to write to a destination directory. In other words, you cannot overlap or run multiple tasks to run the same replication on the same directory structure concurrently/simultaneously.
-
Log in to the FlexSync Dashboard.
Access the FlexSync Dashboard
Do the following to access your FlexSync dashboard.
Prerequisites
- You will need a FlexSync user account before you can create a replication task. See Step 4: Manage FlexSync Users.
- In order to access the FlexSync GUI, the appliance host name must be resolvable through a DNS name or IP address. If you use a DNS name, it must be resolvable on the DNS or it must have a local entry in the local appliance /etc/hosts file.
-
Access the StorNext User Interface (new UI introduced in StorNext 7.0.1).
-
On the top navigation, click Services. The Services page appears.
-
Under the Service Name heading, click the service name that corresponds with your FlexSync service.
The FlexSync dashboard appears.
-
In the Tasks column, click Add a task to display the Task Configuration dialog box.
- On the Basic tab, complete the information to define the source and destination directories.Basic Tab
- In the Task name field, enter a label for the task.
- In the Task Type list, select sync.
- In the Hostname list, select a source host.
In the /source/path field, enter the file system mount and relation path of the source host to replicate, such as /stornext/snfs1/data.
- In the Destination list, select the destination (or target) host.
In the /destnation/path field, enter the file system mount and relation path of the destination host to replicate data to, such as /stornext/snfs2/target.
Caution: Do not assign a StorNext file system mount point as a destination path. If you assign a StorNext file system mount point as a destination path, some FlexSync features behave unexpectedly (such as versioning and extraneous file deletion).
Additional Information
Keep in mind that the syntax of the directory path will determine how it is replicated.
Example 1: Replicate an Entire Directory
Source: /stornext/snfs1/data → Target: /stornext/snfs2/target
The entire source /stornext/snfs1/data directory is replicated to a new /stornext/snfs2/target/data directory on the target.
Example 2: Replicate All Files Within a Directory
Source: /stornext/snfs1/data/ → Target: /stornext/snfs2/target
All source files in the /stornext/snfs1/data/ directory are replicated directly to the /stornext/snfs2/target/ directory without the creation of a new /data directory.
(Optional) Click Allow mount point as a destination directory to confirm that you want to allow a mount point as a destination directory and disable a warning prompt, according to the rules below:
Caution: If you upgraded to FlexSync 2.2.0 (or later) and your configuration contains a destination that is also a mount point, then you MUST enable the Allow mount point as a destination directory option to edit your existing task.
- If your destination directory is a mount point, the source directory has a trailing slash and is NOT mounted then you receive a warning.
- If your destination directory is a mount point, the source directory has a trailing slash and is mounted, and the Delete extraneous files on destination option is enabled, then you receive a warning.
- If your destination directory is a mount point, the source directory has a trailing slash and is mounted, and the Delete extraneous files on destination option is NOT enabled, then you do NOT receive a warning.
- If you receive a warning prompt, then you must confirm to continue; the Submit button is disabled and you must do one of the following:
- Click Allow mount point as a destination directory to confirm.
- Configure your source or destination path by removing the trailing slash.
Note: If the destination path is a mount point and it is not mounted, then its contents and the results of a FlexSync replication can be hidden after it is mounted. If the destination path is a mount point and it is mounted, and the Delete extraneous files on destination option is enabled, then you can delete the files in the mounted directory.
- On the Schedule tab, modify the default task schedule, as needed.Schedule Tab
Task Scheduling Time Zone Behavior
FlexSync task schedules use Coordinated Universal Time (UTC) when interpreting cron expressions.
All cron expressions configured for sync_schedule (whether created in the CLI or UUI) are evaluated in UTC/GMT, not the system’s local time zone.
When you specify a time in a schedule, you must enter the time you want in UTC.
Example: To run a task at 06:00 local time in GMT‑6, configure the schedule for 12:00 UTC.
Upgrade impact from FlexSync 2.3.x to 3.x
FlexSync 2.3.x evaluated task schedules using the local system time zone. Starting with FlexSync 3.0.0, schedules are evaluated in UTC. Existing task definitions are not automatically adjusted during upgrade.
After upgrading from 2.3.x to 3.x, any existing schedules will continue to show the same cron expression (for example, 0 0 6 ? * MON-FRI), but that expression will now be treated as 06:00 UTC instead of 06:00 local time.
As a result, tasks may begin running at a different local clock time (shifted by your local system's offset from UTC).
Recommended action after upgrade from 2.3.x:
Review all existing FlexSync task schedules and, if you need them to run at the same local time as before the upgrade, manually adjust the cron expressions to the equivalent UTC time.
Edit the following values, as needed:
Value
Description
Scheduled Replication
By default, an automatic replication pass is scheduled every 15 minutes.
To configure the synchronization schedule, you can modify the following parameters:
- Minutes
- Hourly
- Daily
- Weekly
- Monthly
Advanced (You can optionally input a cron expression in the Schedule Cron Expression field in the Schedule > Advanced tab. See Construct a Cron Expression).
Note: If the current replication runs beyond the next scheduled pass, the next pass starts immediately after the current pass ends.
Expire Logs
The minimum amount of time before a replication pass log is deleted.
- The default is 30 days.
- Enter 0 to keep logs indefinitely.
Cool Down
The minimum file age before a file is replicated. Use this setting to skip replication of temporary files.
- The default is 5 minutes.
- Enter 0 to disables this option.
Force Rescanning
The number of days to force file system scans. FlexSync does not scan the file system with every replication pass.
- The default is 7 days.
- Enter 0 to disable file system scans.
Versioning
The smallest interval between version creations of replicated data.
- The default is 1 day.
- Enter 0 to disable this option.
Note: The versioning option is not supported if you attempt to configure it on a relation point.
Expire Versions
The period of time between when a version is created and when it is automatically removed.
Note: This option has no effect if the Versioning option is disabled.
- The default is 30 days.
- Enter 0 to disable this option.
Note: The Expire Versions feature is not supported if you attempt to configure it on a relation point.
- On the Attributes tab, modify the default values, as needed.Attributes Tab
Select a check box to enable a setting or clear a check box to disable a setting, as needed:
Check Box
Description
Preserve all
Preserve all standard attributes of the source.
Selecting this option selects all sub-values.
Note: This option must be selected separately.
Preserve Unix permissions Preserve original Unix file permissions of the source. Preserve Unix owner Preserve the source owner. Preserve Unix group Preserve the destination group name of the source. Preserve StorNext ACLs
Preserve StorNext ACL settings of the source.
Note: This option is only effective when source and destination file systems are both StorNext.
Preserve modification times
Preserve timestamps indicating the last time the source was updated.
Preserve Unix device files
Copy Unix device files from the source to the destination.
Preserve Unix special files
Transfer Unix named sockets and fifos from the source.
Preserve extended attributes
Copy extended attributes to the destination. When the source and the destination both use native Linux file systems such as ext4, enabling this option may preserve Posix ACLs as a side effect.
Note: This option is recommended for macOS clients
- On the Advanced tab, modify the default values, as needed.Advanced Tab
Select a check box to enable a setting or clear a check box to disable a setting, as needed:
Check Box
Description
Delete extraneous files on destination
Delete destination files not found on the source.
Ignore times
Force update even when the time and size of files on the source match those on the destination.
Extended logging
Enable auditing.
File System ID Check
This option is enabled by default.
The file system ID FSID is a file system identifier, and provides information about the underlying file system and if the file system has changed.
For example, the file system can change when you unmount a mount point or when you change the mount point. Another example is when you exchange a cartridge that you use in an R-series appliance, since the underlying device has a different FSID.
You must disable this option if you are using a work-flow where the source is a cartridge drive that can be exchanged.
Caution: Do not disable this option for any normal file system to file system operations.
Delta Compression
This option is enabled by default.
The Delta Compression feature allows you to store and transmit the data in the form of differences (deltas) between sequential data rather than complete files.
For example, this feature is particularly useful where archival histories of changes are required.
Caution: The primary advantage of the delta compression option is to save network bandwidth; however, you must consider the trade-off between bandwidth usage and overall performance. The delta compression option can decrease the duration of the replication process if network speed is slow because it only transfers changed data rather than the full files. If the network speed is fast, then the delta compression option might increase the duration of the replication process due to the additional disk reads and heavy calculations required to calculate the deltas between source and target files; in this case, it might be faster to transfer the entire files by disabling the delta compression option.
Dry Run
Click to enable dry-run mode. When you enable dry-run mode and then run your task, it performs an estimation pass to determine the following:
The number of files to replicate.
The number of truncated files to retrieve and replicate, and the total amount of data associated with the files.
The number of on disk files to replicate, and the total amount of data associated with the files.
The number of metadata-only file changes to replicate.
The number of non-data files to replicate.
The number of directories to replicate.
Note: To access the estimated data, click Task Report for your task, and then click Show Log Content.
To disable dry-run mode for your task, click Edit Task, click Advanced, clear the Dry Run option, and then click Apply to save your changes to your task.
Skip newer files
Skip files that are newer on the destination.
Don't cross file system boundaries
Do not allow file system mount points to cross.
Transmit data using SSL
Enable encryption.
Use Shared Connection Pool
Use a task shared connection pool to replicate your data.
Continue on Meta Failure
If an attempt to set the metadata on a file fails, this option allows your task to proceed with the replication process.
Ignore non UTF8
Enable this option to ignore non-UTF8 files and not report an error if this type of file is found on your system.
Be default, if non-UTF8 files are found on your system, an error is reported.
Forced durability Select one of the following options to define the durability of replicated data.
NoneThis option provides the least amount of durability to your replicated data.
Example
If you experience a power outage, you might lose content that has not been completely replicated. In addition, there might be gaps in data protection.
After each task runThe synchronization process does not wait for each file to synchronize before beginning the next replication pass. Instead, it waits for the whole file system to be synchronized at the end of the replication pass.
After each task run mode has a much lower performance impact than After each file mode, so we recommend it for transfers within a single appliance's file system. However, After each task run mode is not effective in ensuring durability in all cases, such as across multiple appliances sharing a StorNext file system.
Example
If the kernel experiences a problem with the synchronization process, you may not be able to troubleshoot an issue.
After each fileThe synchronization process waits for each file to finish writing and to be synchronized to the physical storage before beginning the next replication pass.
After each file mode can significantly decrease replication performance, but it offers the most durability to your replicated data. We recommend this setting for environments supporting multiple appliances sharing a StorNext file system.
Example
If you experience a power outage, the file(s) should be guaranteed to survive.
Exclusions
In the Exclusions field, you can specify an exclusion list of glob patterns, separated by a space, describing files the task should exclude.
Note: You cannot use a leading space, an ending space, a file name that contains a space, and/or a directory that contains a space.
Note: The pattern is applied in the order it is specified.
The example below excludes all files whose names end with ".tmp" and ".pdf", respectively.
Example
*.tmp *.pdf
You can also exclude a full path directory.
Note: All paths are relative to the source path of the task to exclude.
For example, to exclude the following directories:
/stornext/source/group1/dir0
/stornext/source/group1/dir01
/stornext/source/group2/dir0
/stornext/source/group2/dir01
Where the task source path is:
/stornext/sourceIn the Exclusions field, enter the pattern:
group?/dir*The pattern explicitly excludes any directory labeled group followed by a single character, along with any sub directory beginning with dir.
The pattern does not exclude the following directory:
/stornext/source/group3/mediaNote: Path names matching an exclusion pattern are not considered for any operation on the destination, including removal due to the Delete extraneous files on destination feature being enabled.
Caution: The Delete extraneous files on destination feature does not apply to files on the exclusion list. If you add an exclusion list to a task that contains the Delete extraneous files on destination feature enabled, then the task discontinues to make new versions of the specified file, but the destination still contains the existing versions of the file made prior to adding the exclusion.
-
Click Apply to add the task. The configured file replication task appears on the FlexSync dashboard.

-
Start the file replication task (see Start a Task).
