 minute read
Manage a Host
Use the following tasks to manage a host.
Re-adding a Host After Removal or Factory Reset
If a previously configured host has been permanently removed or factory reset, and you wish to re-add it to your FlexSync setup, you must first clear its existing configuration.
To do this, run the following CLI command:
Note: You must remove all tasks and repository registrations associated with the host_name prior to running the remove-host command.
After running the command, you’ll need to manually recreate these objects to restore synchronization.
| Item | Description |
|---|---|
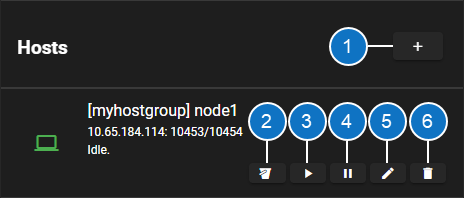
| 1 |
This button adds a new host (see Add a Host). A host is what you assign as either a source or target system. Note: The host's flexsyncd daemon must be running and reachable at its configured DNS name or IP address to successfully complete this task. |
| 2 |
This button manages a registered repository (see Manage a Registered Repository). |
| 3 |
This button resumes a host (see Resume a Host). When you resume a host, then all replication tasks associated with the host are resumed. |
| 4 |
This button suspends a host (see Suspend a Host). When you suspend a host, then all replication tasks associated with the host are temporarily paused. |
| 5 |
This button edits the name (label) of a host (see Edit a Host). |
| 6 |
This button deletes a host (see Delete a Host). |
-
Log in to the FlexSync Dashboard.
 Access the FlexSync Dashboard
Do the following to access your FlexSync dashboard.
Prerequisites
- You will need a FlexSync user account before you can create a replication task. See Step 4: Manage FlexSync Users.
- In order to access the FlexSync GUI, the appliance host name must be resolvable through a DNS name or IP address. If you use a DNS name, it must be resolvable on the DNS or it must have a local entry in the local appliance /etc/hosts file.
-
Access the StorNext User Interface (new UI introduced in StorNext 7.0.1).
-
On the top navigation, click Services. The Services page appears.
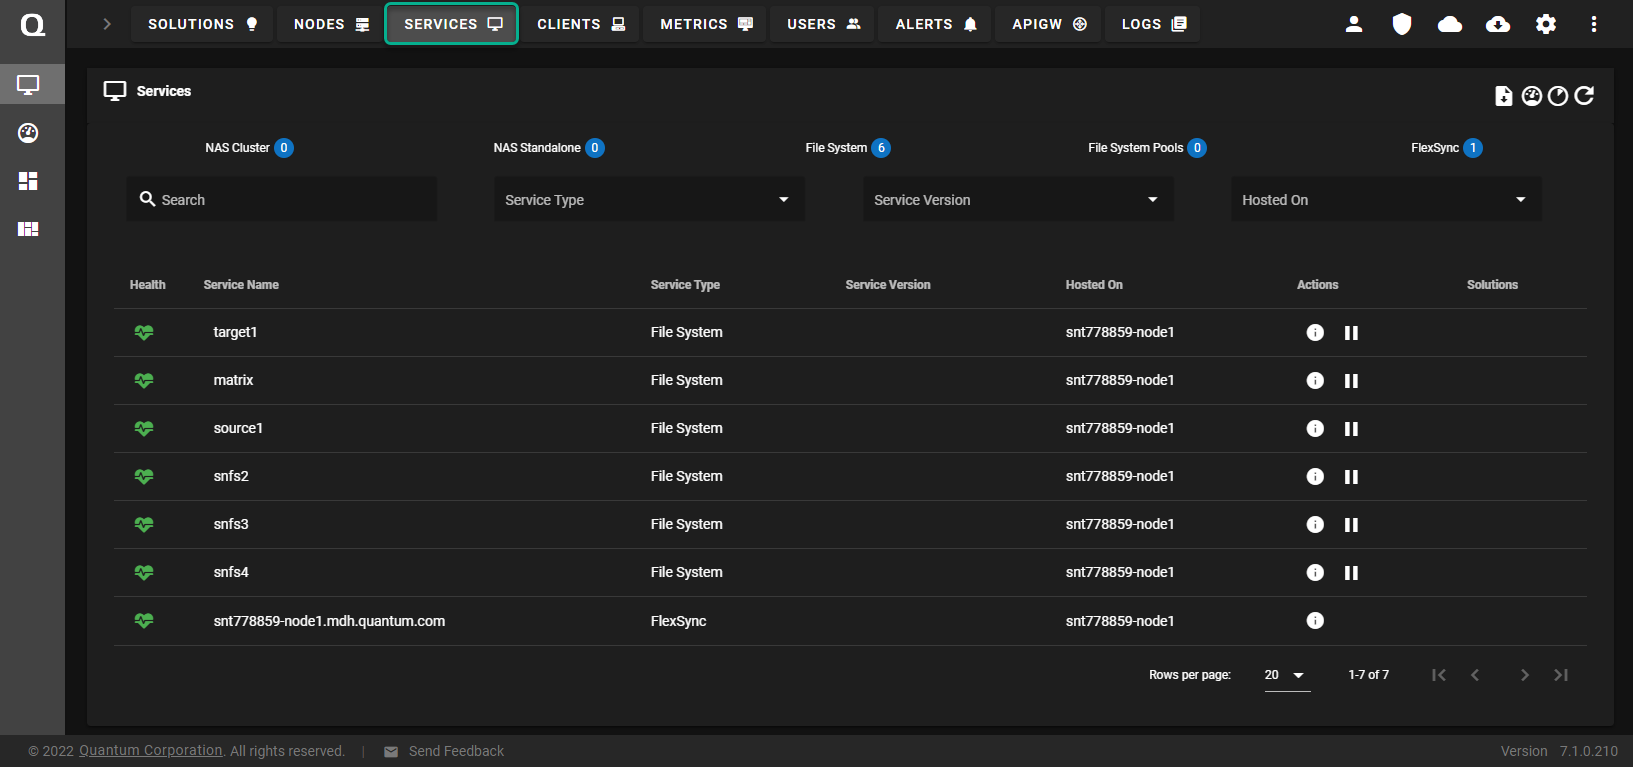
-
Under the Service Name heading, click the service name that corresponds with your FlexSync service.
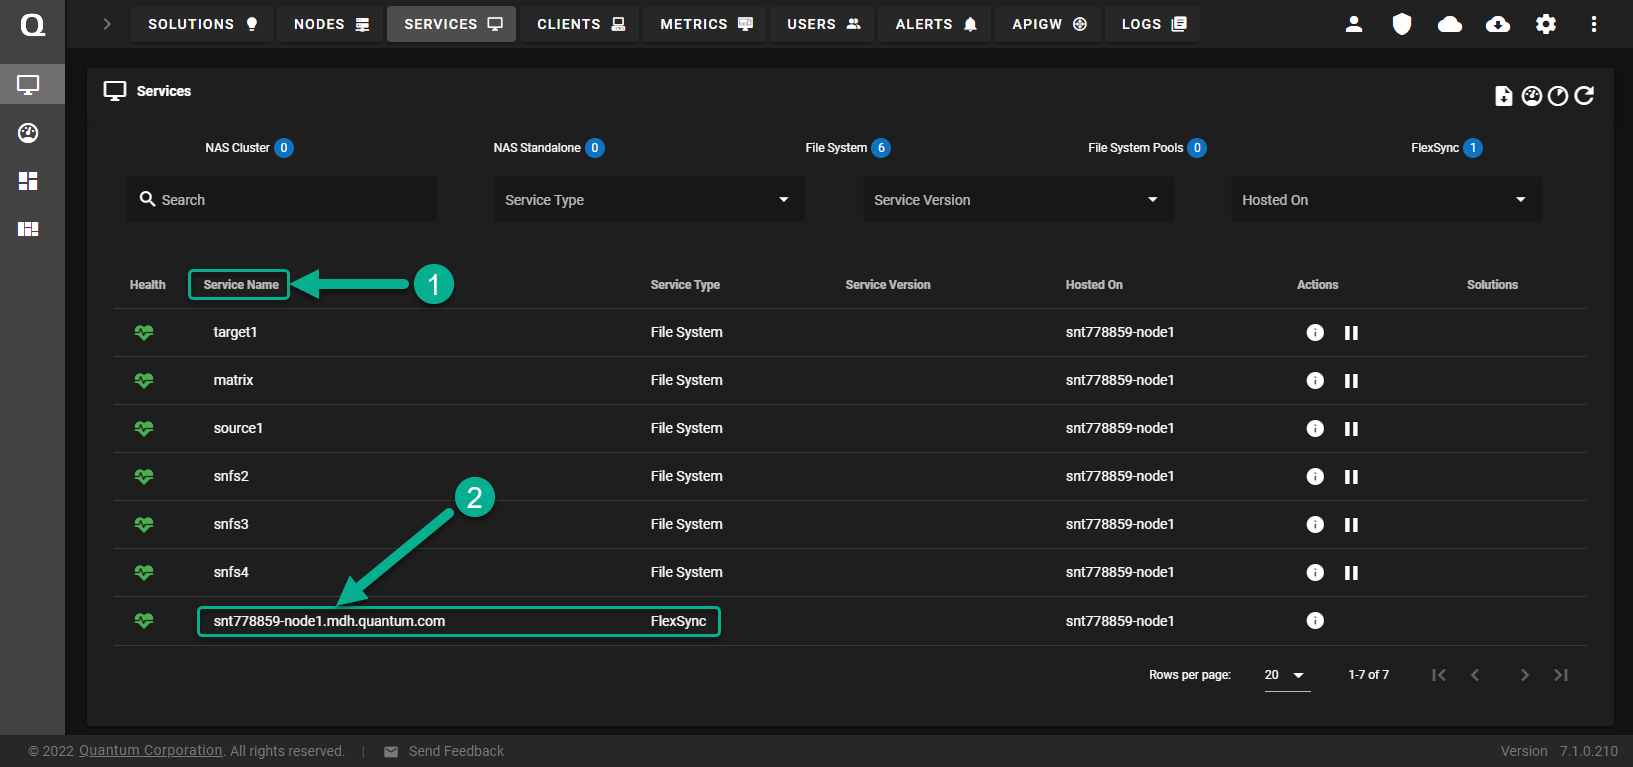
The FlexSync dashboard appears.
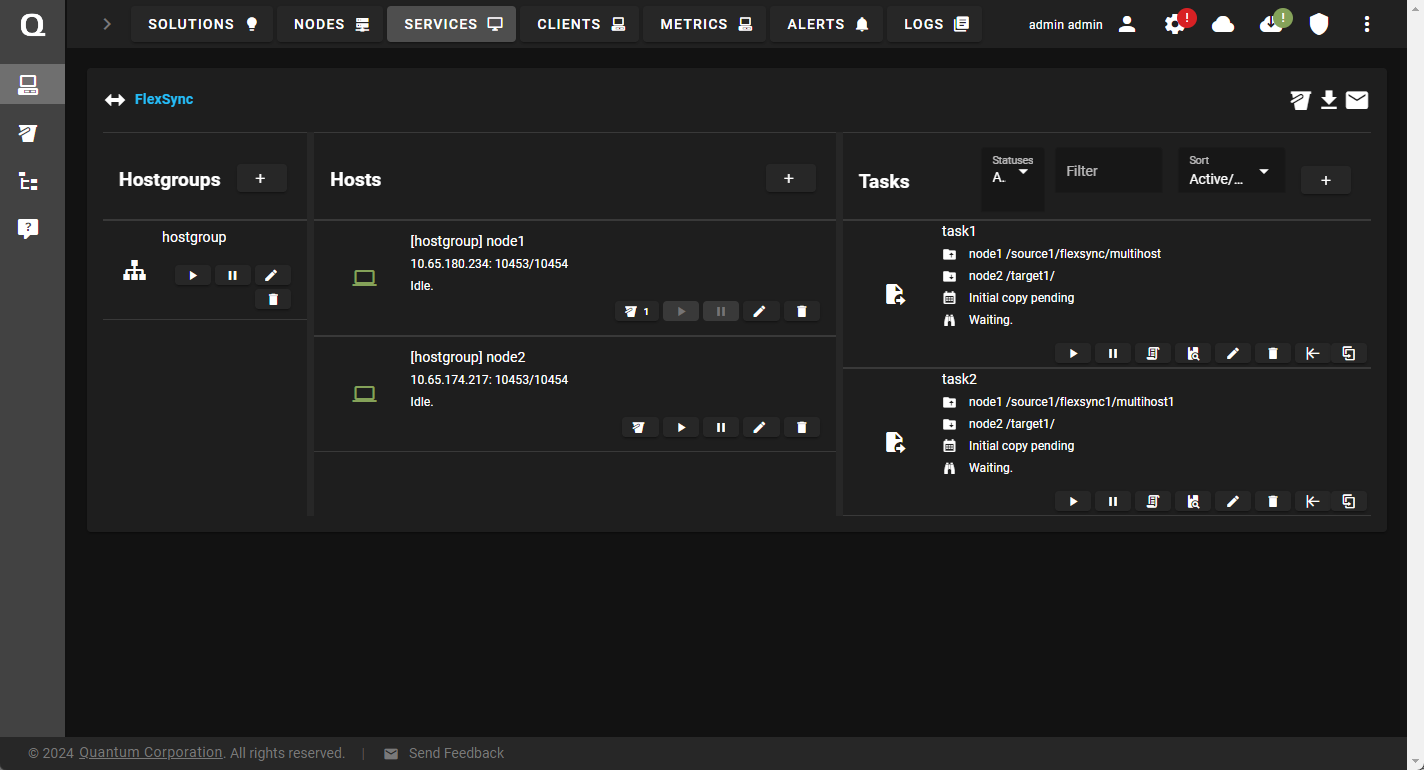
- In the Hostgroups column, click Add a hostgroup to display the Hostgroup configuration dialog box.
- In the Name field, enter a label for the hostgroup.
- Click Apply to add the hostgroup, or click Cancel to abort the operation and return to the previous page.
-
Log in to the FlexSync Dashboard.
Access the FlexSync Dashboard
Do the following to access your FlexSync dashboard.
Prerequisites
- You will need a FlexSync user account before you can create a replication task. See Step 4: Manage FlexSync Users.
- In order to access the FlexSync GUI, the appliance host name must be resolvable through a DNS name or IP address. If you use a DNS name, it must be resolvable on the DNS or it must have a local entry in the local appliance /etc/hosts file.
-
Access the StorNext User Interface (new UI introduced in StorNext 7.0.1).
-
On the top navigation, click Services. The Services page appears.
-
Under the Service Name heading, click the service name that corresponds with your FlexSync service.
The FlexSync dashboard appears.
- In the Hosts column, click Resume to resume the replication tasks for the selected host.
-
Log in to the FlexSync Dashboard.
Access the FlexSync Dashboard
Do the following to access your FlexSync dashboard.
Prerequisites
- You will need a FlexSync user account before you can create a replication task. See Step 4: Manage FlexSync Users.
- In order to access the FlexSync GUI, the appliance host name must be resolvable through a DNS name or IP address. If you use a DNS name, it must be resolvable on the DNS or it must have a local entry in the local appliance /etc/hosts file.
-
Access the StorNext User Interface (new UI introduced in StorNext 7.0.1).
-
On the top navigation, click Services. The Services page appears.
-
Under the Service Name heading, click the service name that corresponds with your FlexSync service.
The FlexSync dashboard appears.
- In the Hosts column, click Suspend to pause the replication tasks for a host.
-
Log in to the FlexSync Dashboard.
Access the FlexSync Dashboard
Do the following to access your FlexSync dashboard.
Prerequisites
- You will need a FlexSync user account before you can create a replication task. See Step 4: Manage FlexSync Users.
- In order to access the FlexSync GUI, the appliance host name must be resolvable through a DNS name or IP address. If you use a DNS name, it must be resolvable on the DNS or it must have a local entry in the local appliance /etc/hosts file.
-
Access the StorNext User Interface (new UI introduced in StorNext 7.0.1).
-
On the top navigation, click Services. The Services page appears.
-
Under the Service Name heading, click the service name that corresponds with your FlexSync service.
The FlexSync dashboard appears.
- In the Hosts column, click Edit to display the Host configuration dialog box.Basic Tab
- In the Name field, enter a label for the host.
- In the Hostgroup field, select a hostgroup.
In the Hostname field, enter the DNS name or IP address for the replication transport.
In the Admin port field, update the port number, as needed. The default port is 10453.
In the Data port field, update the port number, as needed. The default port is 10454.
In the SSL port field, update the port number, as needed. The default port is 10554.
In the Username field, enter your FlexSync user name.
In the Password field, enter your FlexSync password.
Advanced TabSelect a check box to enable a setting or clear a check box to disable a setting, as needed:
Check Box
Description
Select this option to restrict the bandwidth across all of the active tasks for the selected host, to the specified value.
By default, bandwidth throttling is disabled. To enable:
- Check Bandwidth Throttling.
In the Bandwidth limit field, enter a value.
Note: The minimum bandwidth limit value is 1 MiB per second (MiB/s).
- Select a data transfer rate from the list.
- Enter 0 to disable bandwidth throttling.
Note: If you enable bandwidth throttling, the rate I/O is not guaranteed. Initially, your data transfers might experience a bit of variation where the host’s transfer rate, as shown in the GUI, can be slightly higher or lower than the requested transfer rate. The transfer rate eventually settles in to the requested transfer rate. Also, the transfer rate shown by the GUI is an average across the running time of all active tasks. If you update the bandwidth limit mid-stream, then FlexSync throttles up or down to that limit immediately, but it might take an extended period of time for the average to reflect the updated bandwidth limit.
Caution: Use caution if you attempt to mix Bandwidth Throttling and Storage Manager. If you run FlexSync on a throttled link or if the link is substantially slower than the minimum tape drive read speed, see Considerations for Low Network Bandwidth Tape Retrieval for configuration options.
-
Click Apply to apply your changes, or click Cancel to abort the operation and return to the previous page.
-
Log in to the FlexSync Dashboard.
Access the FlexSync Dashboard
Do the following to access your FlexSync dashboard.
Prerequisites
- You will need a FlexSync user account before you can create a replication task. See Step 4: Manage FlexSync Users.
- In order to access the FlexSync GUI, the appliance host name must be resolvable through a DNS name or IP address. If you use a DNS name, it must be resolvable on the DNS or it must have a local entry in the local appliance /etc/hosts file.
-
Access the StorNext User Interface (new UI introduced in StorNext 7.0.1).
-
On the top navigation, click Services. The Services page appears.
-
Under the Service Name heading, click the service name that corresponds with your FlexSync service.
The FlexSync dashboard appears.
- In the Hosts column, click Delete to delete a specific host.
- In the confirmation dialog, click Delete to remove the selected host, or click Cancel to abort the operation and return to the previous page.
