|
|
QXS 56-Drive Chassis Power Cabling |

Use the following task to cable and power on the QXS 56-drive chassis.
Prerequisites
- Make sure that the QXS SAS cables are installed. See Connect the QXS RAID Chassis to the Expansion Chassis.
- Make sure all disk drives have been installed in the chassis so that the Controller module can identify and configure the drives when powered on. See Install the QXS Drives.
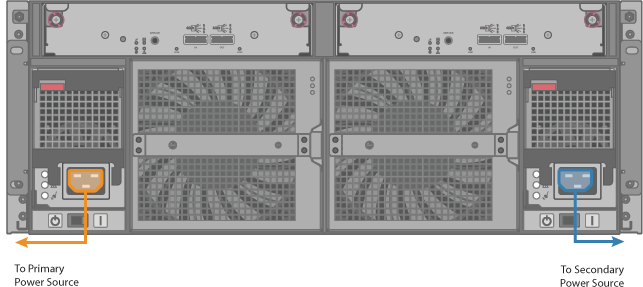
- Plug a power cord into each of the power supplies on the rear of the expansion chassis.
- Plug the other end of the power cord into the rack power source.
- Repeat this sequence for the other AC PSU on the expansion chassis.
Figure 1: Power Connections onQXS 56-Drive Expansion Chassis
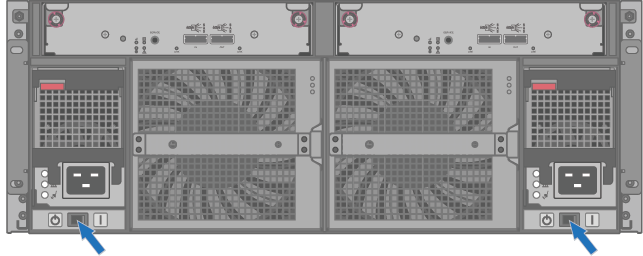
- Turn both power switches to the ON position.
- Repeat these steps for any additional expansion chassis, as needed.
Figure 2: Power Switches on QXS 56-Drive Expansion Chassis
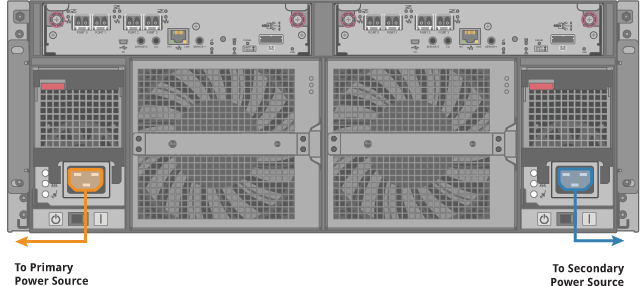
- Plug a power cord into each of the power supplies on the rear of the RAID chassis.
- Plug the other end of the power cord into the rack power source.
- Repeat this sequence for the other AC PSU on the RAID chassis.
Figure 3: Power Connections on QXS 56-Drive RAID Chassis
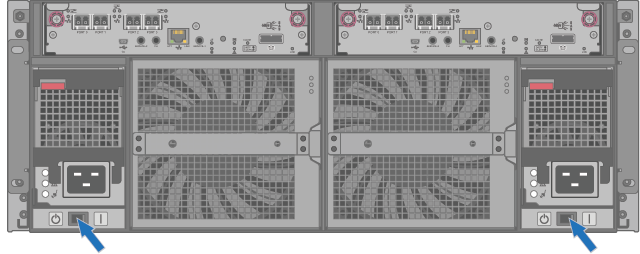
- Turn both power switches to the ON position.
- Wait several seconds to allow the disks to spin up.
- Repeat these steps for any additional RAID chassis, as needed.
Figure 4: Power Switches on RAID Chassis
IMPORTANT
Do not power off the RAID or expansion chassis. The Connect Install App needs these to be powered on.
Continue to Install the Server: Install Considerations and Components >>
* Back to Checklist: QXS Chassis Installation *
* Back to Xcellis Foundation Hardware Installation Overview and Checklist (for systems). *
*Back to Hardware Installation Overview and Checklist *
