Manage an Initialized Repository
Use the following tasks to manage your initialized repository.
Before you Configure Object Synchronization, you must initialize access to your S3 repository. When you initialize a repository, the process:
-
Adds FlexSync components to the S3 repository.
-
This includes the first HEAD object of the repository.
-
This includes some configuration information.
-
If you select the Use Existing option, then this step is not performed; new information is not added to the repository but it is queried to get information for the local updates.
-
-
On your local system, the process:
-
Creates the database entries for the repository (configuration information).
-
Registers the repository to the root user on the host.
-
Note: If you want to allow access to a repository from multiple systems, then you must only initialize the repository one time. The initialization process places specific items in the S3 repository to use for replication. When you configure a subsequent system, then select the Use Existing option to take advantage of a repository that is already initialized.
Do the following to initialize access to your S3 repository:
-
Log in to the FlexSync Dashboard.
 Access the FlexSync Dashboard
Do the following to access your FlexSync dashboard.
Prerequisites
- You will need a FlexSync user account before you can create a replication task. See Step 4: Manage FlexSync Users.
- In order to access the FlexSync GUI, the appliance host name must be resolvable through a DNS name or IP address. If you use a DNS name, it must be resolvable on the DNS or it must have a local entry in the local appliance /etc/hosts file.
-
Access the StorNext User Interface (new UI introduced in StorNext 7.0.1).
-
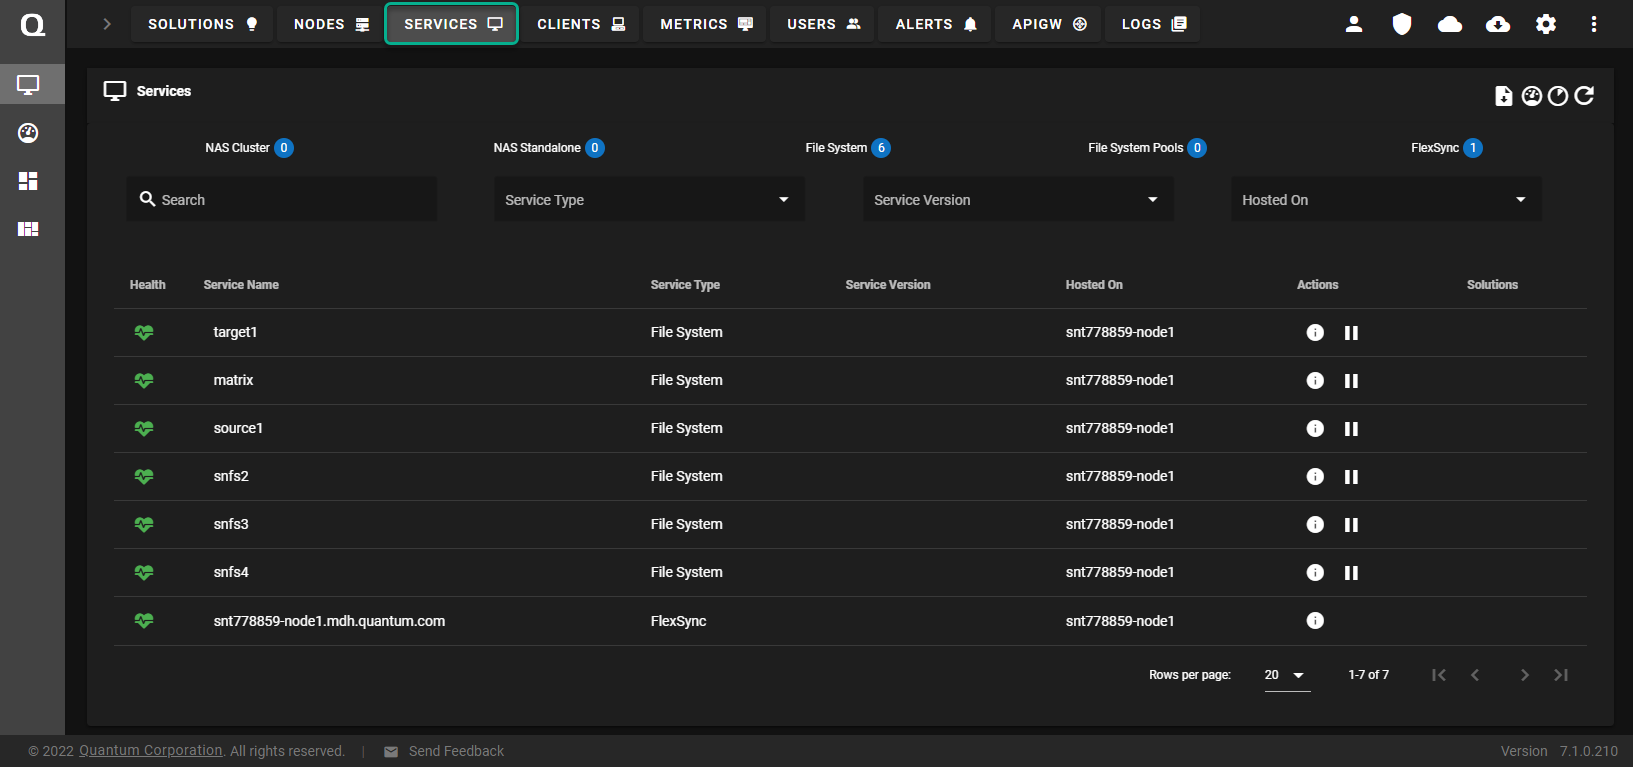
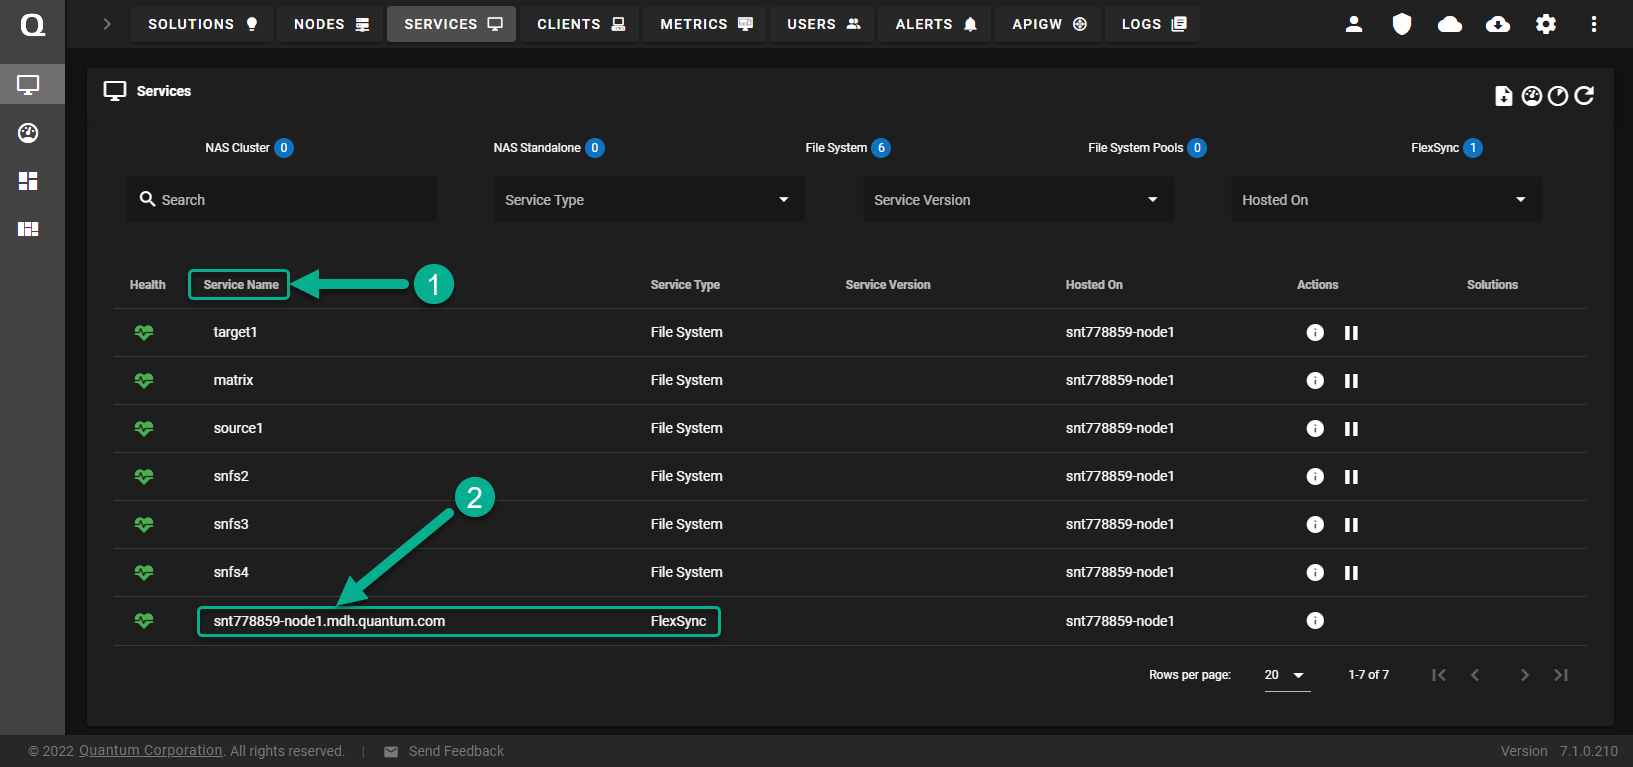
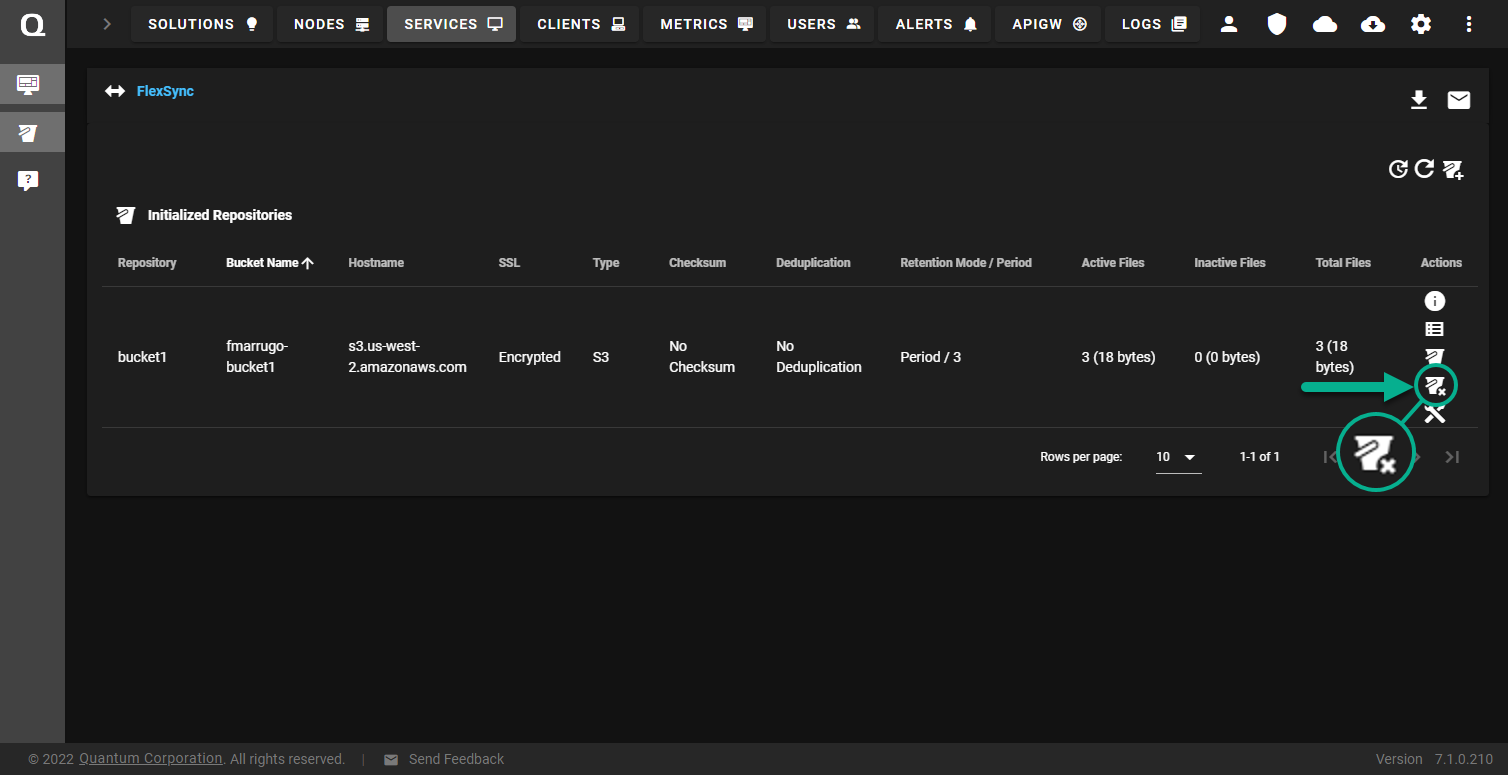
On the top navigation, click Services. The Services page appears.
-
Under the Service Name heading, click the service name that corresponds with your FlexSync service.
The FlexSync dashboard appears.
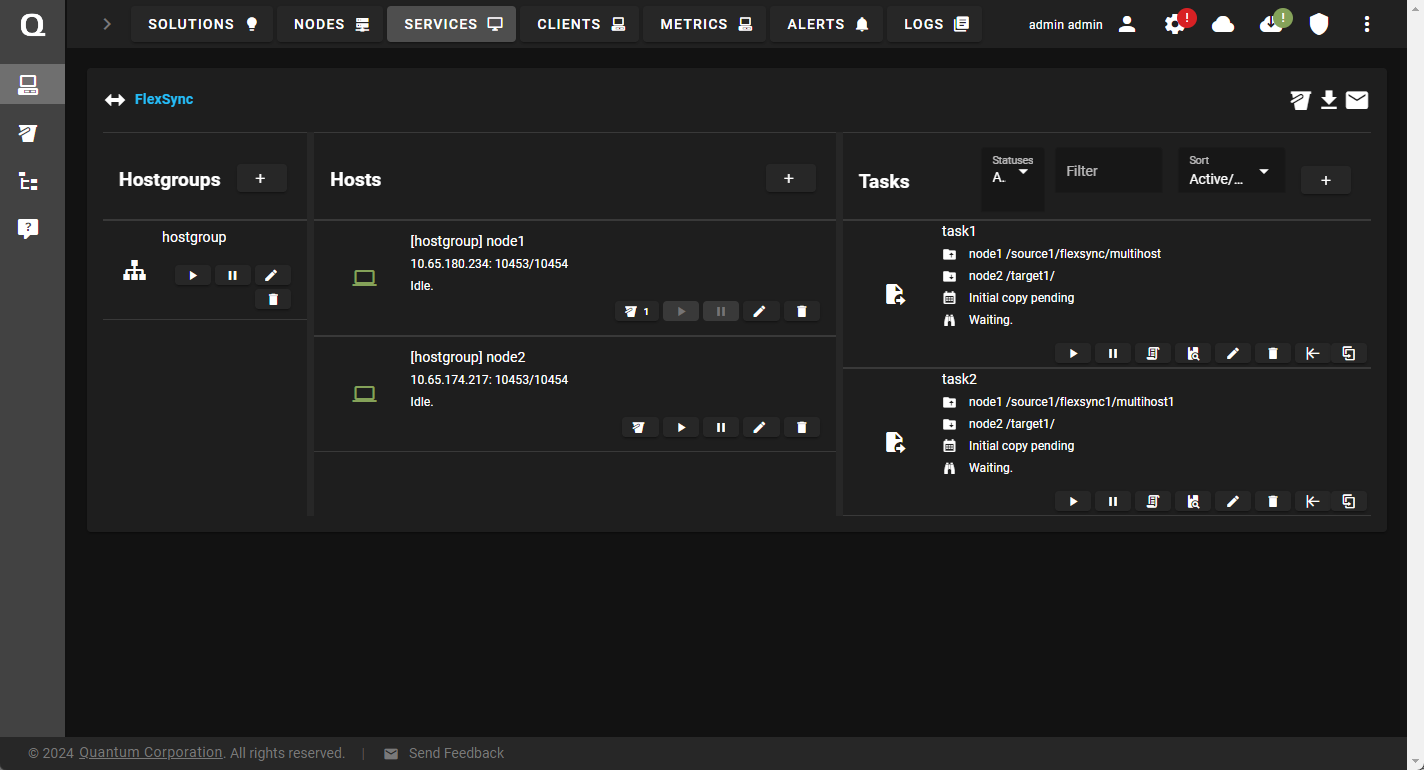
-
Click the Manage Initialized Repositories icon.
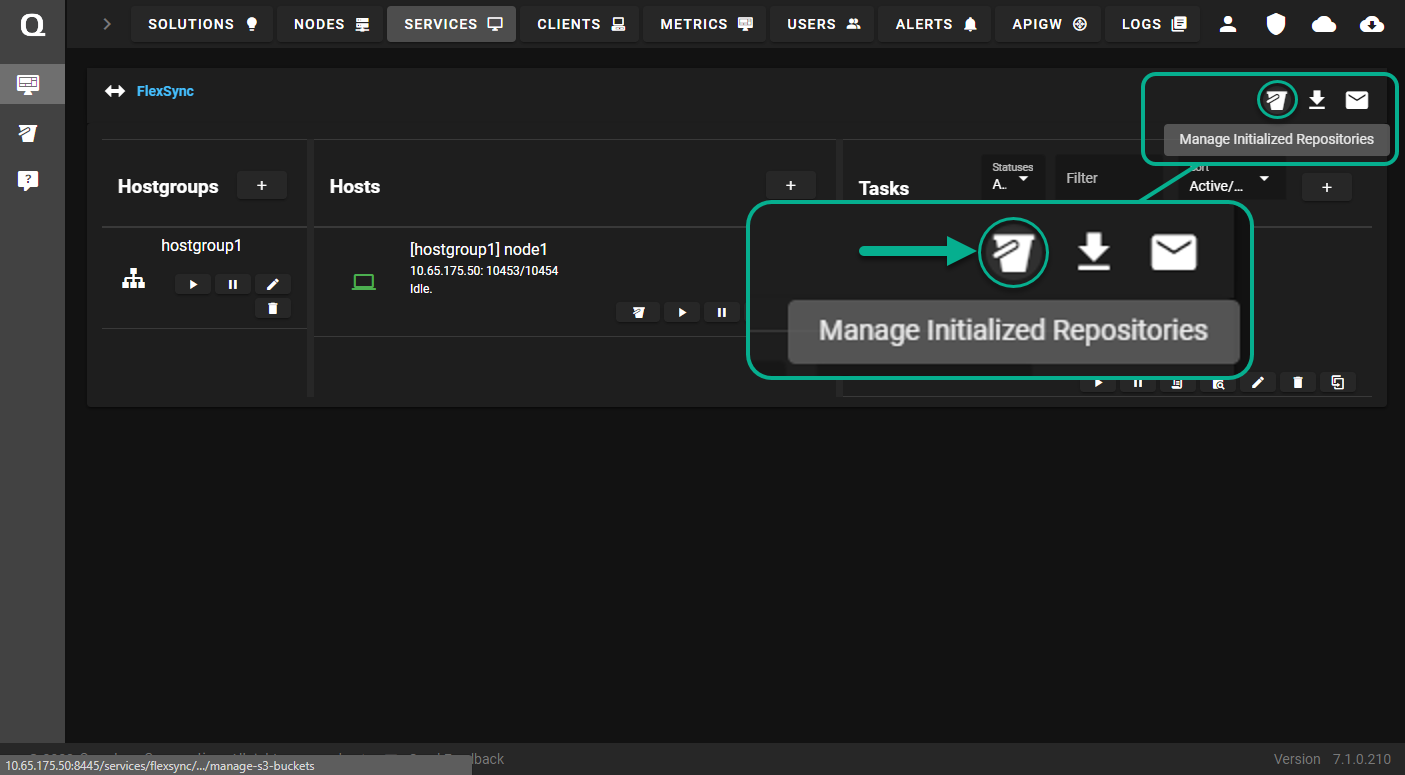
The Initialized Repositories page appears.
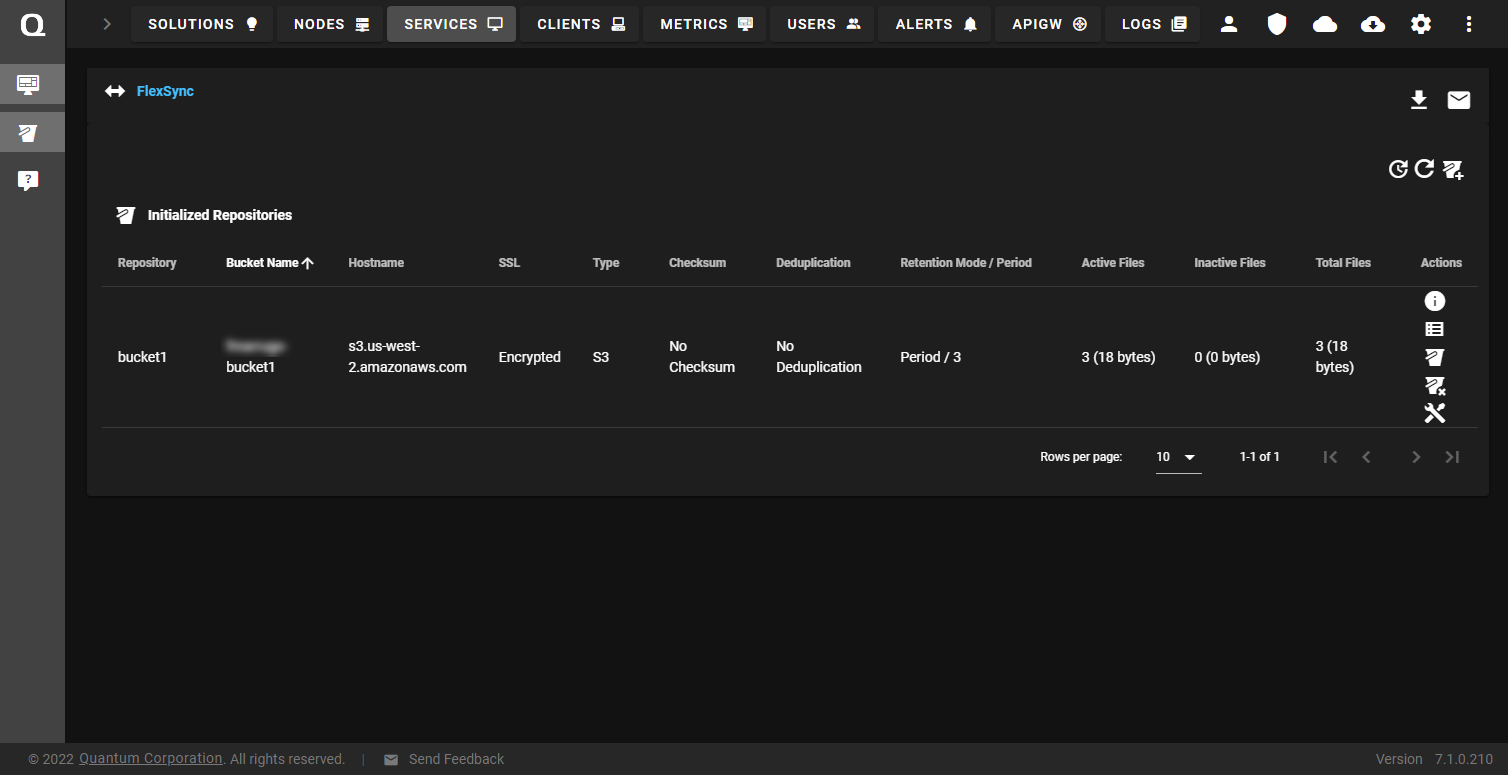
-
Click the Initialize New Repository icon.
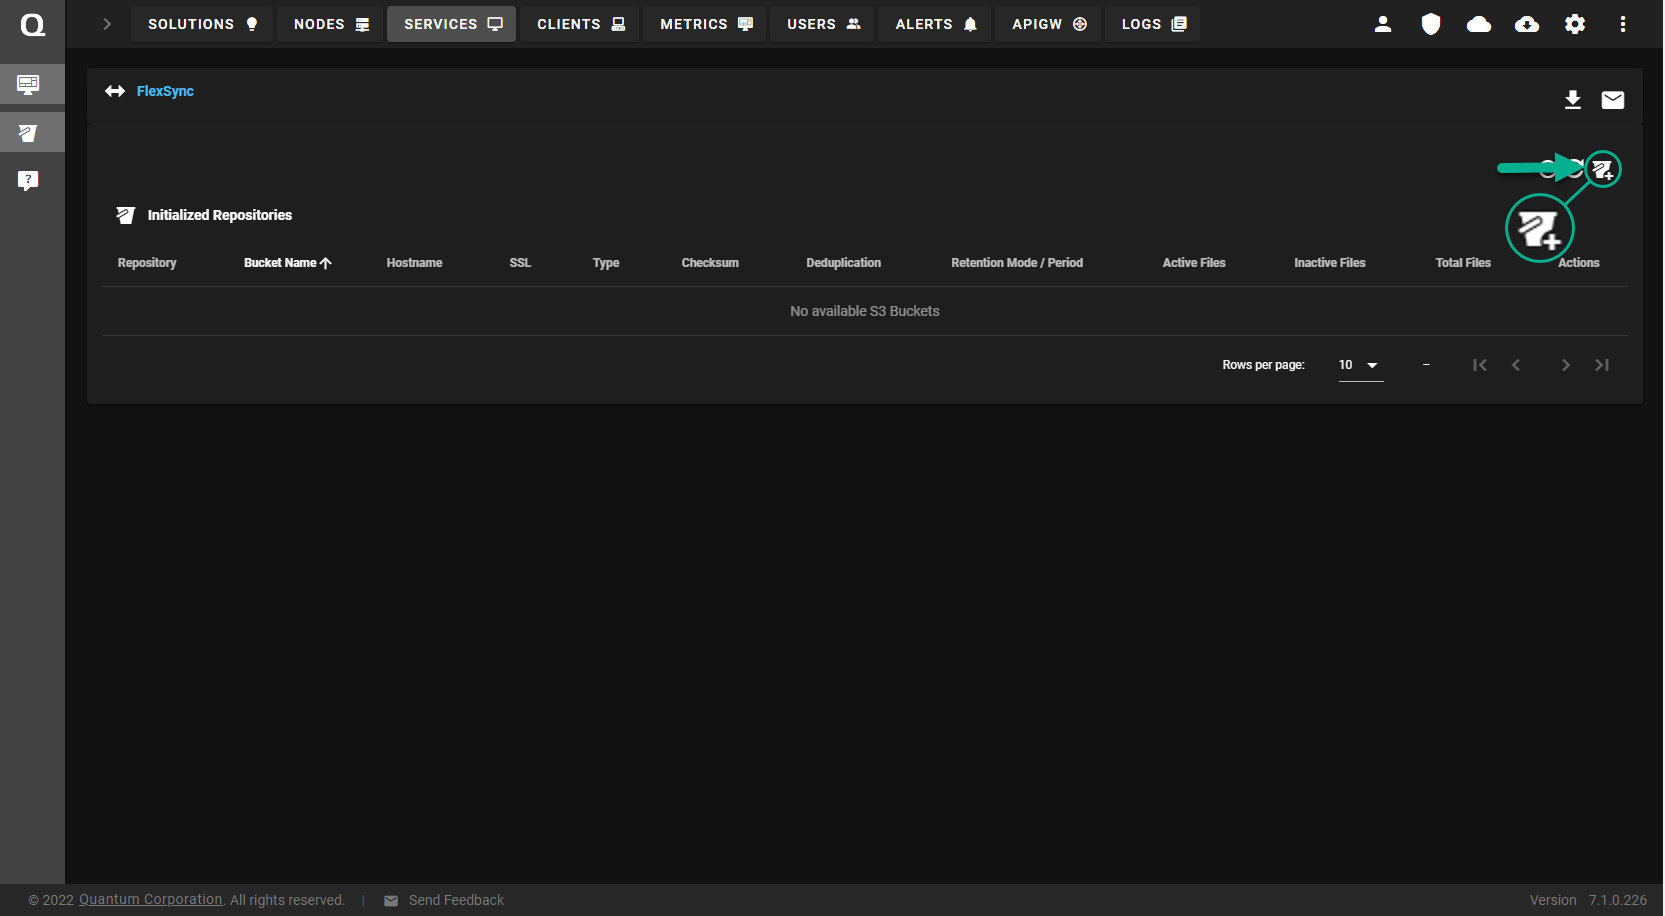
The Initialize New Repository dialog appears.
-
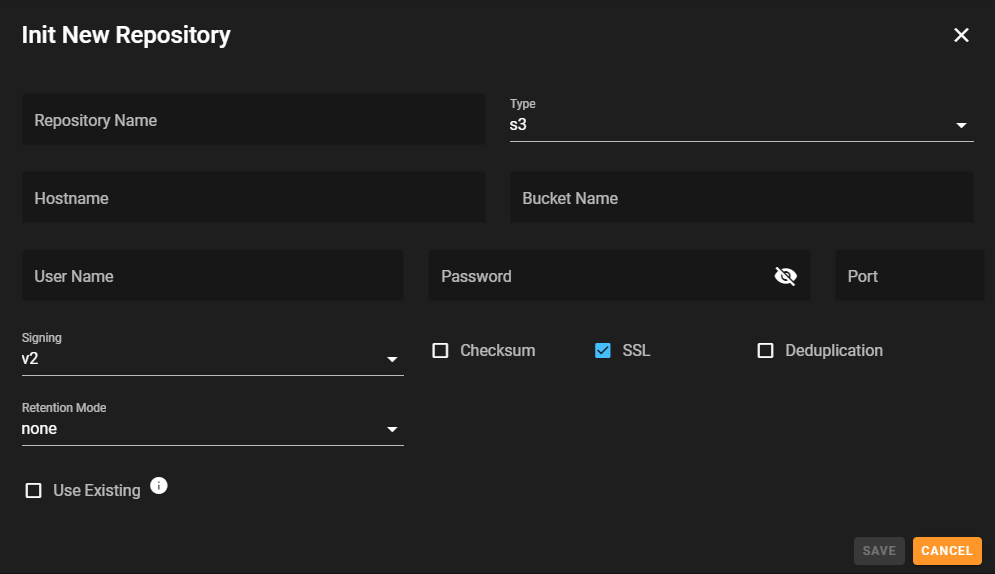
In the Initialize New Repository dialog, complete the information:
Parameter
Description
Repository Name Enter a name to assign to the repository.
Note: You cannot edit the repository name after you create it.
Type Select the type of repository.
The default is S3.
Hostname Enter the Uniform Resource Identifier (URI) of the S3 endpoint being used for the repository (for storage and retrieval of an object).
For example:
s3.us-west-2.amazonaws.comBucket Name Enter the name of the S3 bucket in which to store the repository's content. User Name Enter the user name or access key ID of your repository, assigned during creation of your S3 bucket. Password Enter the password or secret access key of your repository, assigned during creation of your S3 bucket. Port Enter the port on which the S3 endpoint is available. Signing Specifies the type of signing to use on S3 requests. Click V2 or V4.
The default is V2.
Checksum This option allows you to enable or disable file checksum verification. SSL This option allows you to enable or disable the SSL protocol. Deduplication This option allows you to enable or disable file deduplication.
For more information, see Best Practices for File Replication.
Retention Mode Specify the retention period for an old commit.
-
Permanent: This option indefinitely retains an old commit.
-
None: This option does not retain an old commit.
Note: If you want to remove an old commit, then perform the clean operation (see Clean Your Initialized Repository).
-
Days: This option allows you to specify the number of days to keep an old commit.
Note: After the time period is met, if you want to remove an old commit, then perform the clean operation (see Clean Your Initialized Repository).
Use Existing This option allows you to use a previously initialized repository. If you want to allow access to a repository from multiple systems, then you must only initialize the repository one time. The initialization process places specific items in the S3 repository to use for replication. When you configure a subsequent system, then select the Use Existing option to take advantage of a repository that is already initialized.
Note: You must use the same Repository Name label that is associated with the repository you previously initialized.
Enable this option if you receive the error:
Failed to initialize repository: Repository named <repository name> already exists in bucket. -
-
Click Save. If successful, the initialized repository appears in the Initialized Repositories page.
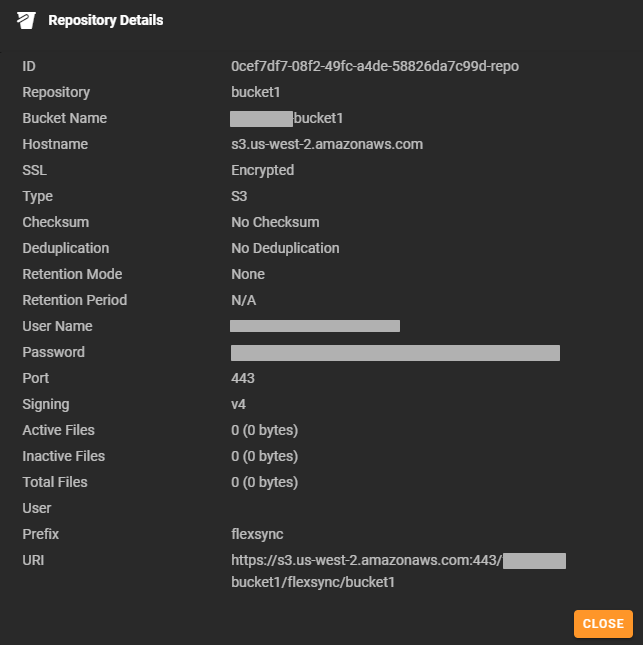
Do the following to view details of an initialized repository:
- Log in to the FlexSync Dashboard. See Access the FlexSync Dashboard.
-
Click the Manage Initialized Repositories icon.
The Initialized Repositories page appears.
-
Click the Repository Details icon.
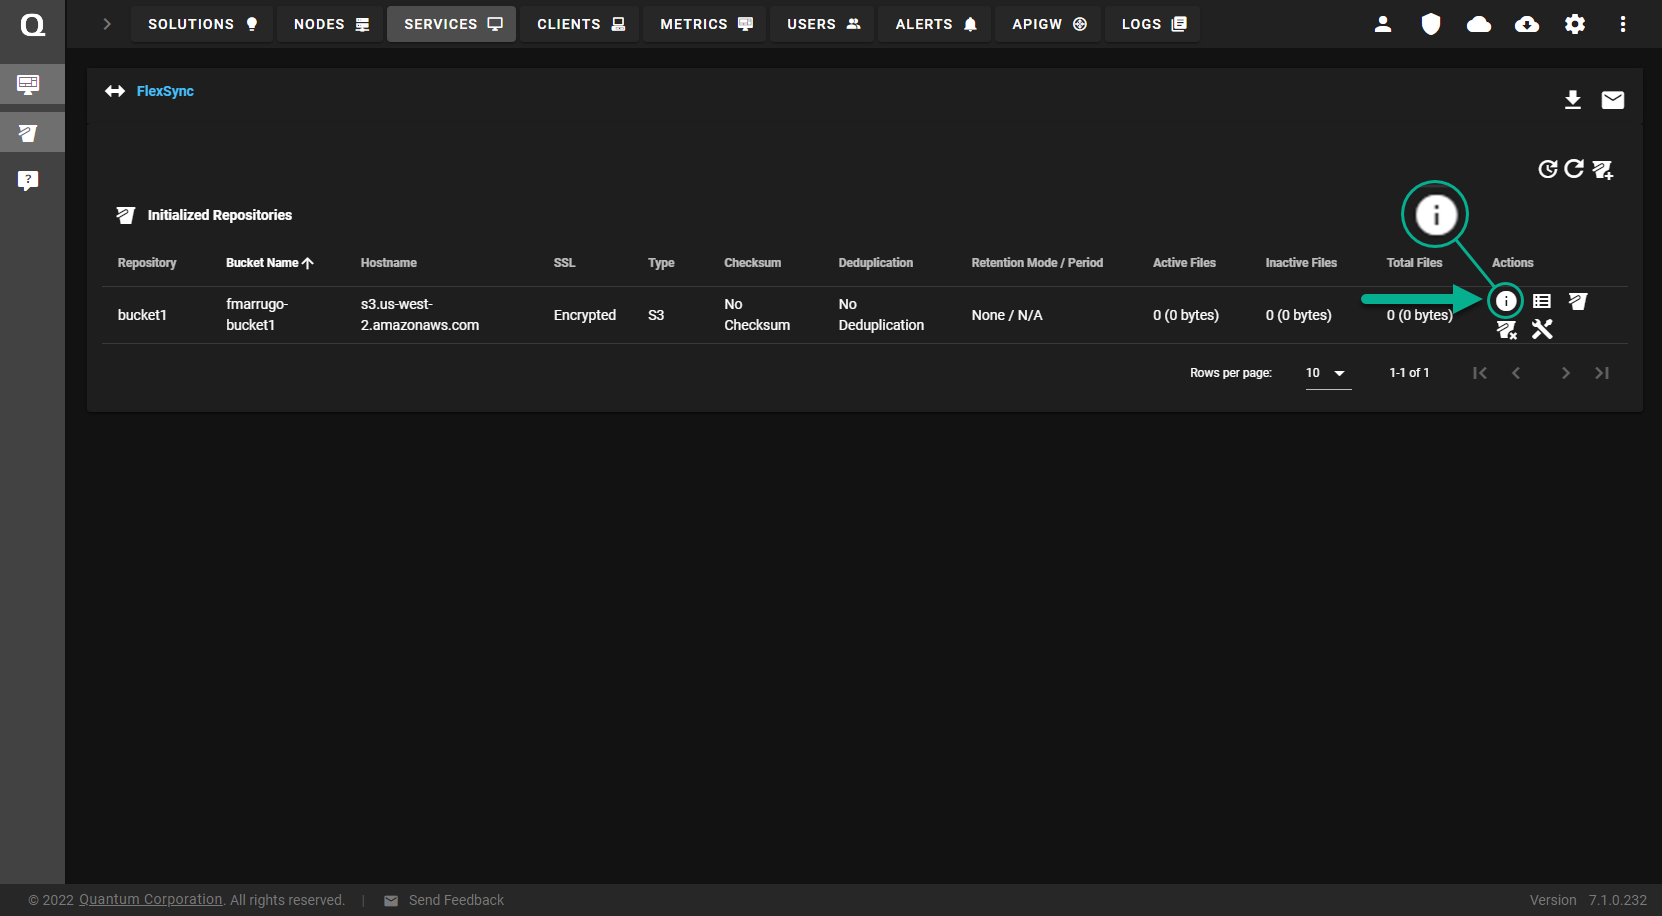
The Repository Details dialog appears.
Do the following to edit an initialized repository:
- Log in to the FlexSync Dashboard. See Access the FlexSync Dashboard.
-
Click the Manage Initialized Repositories icon.
The Initialized Repositories page appears.
-
Click the Edit Repository icon.
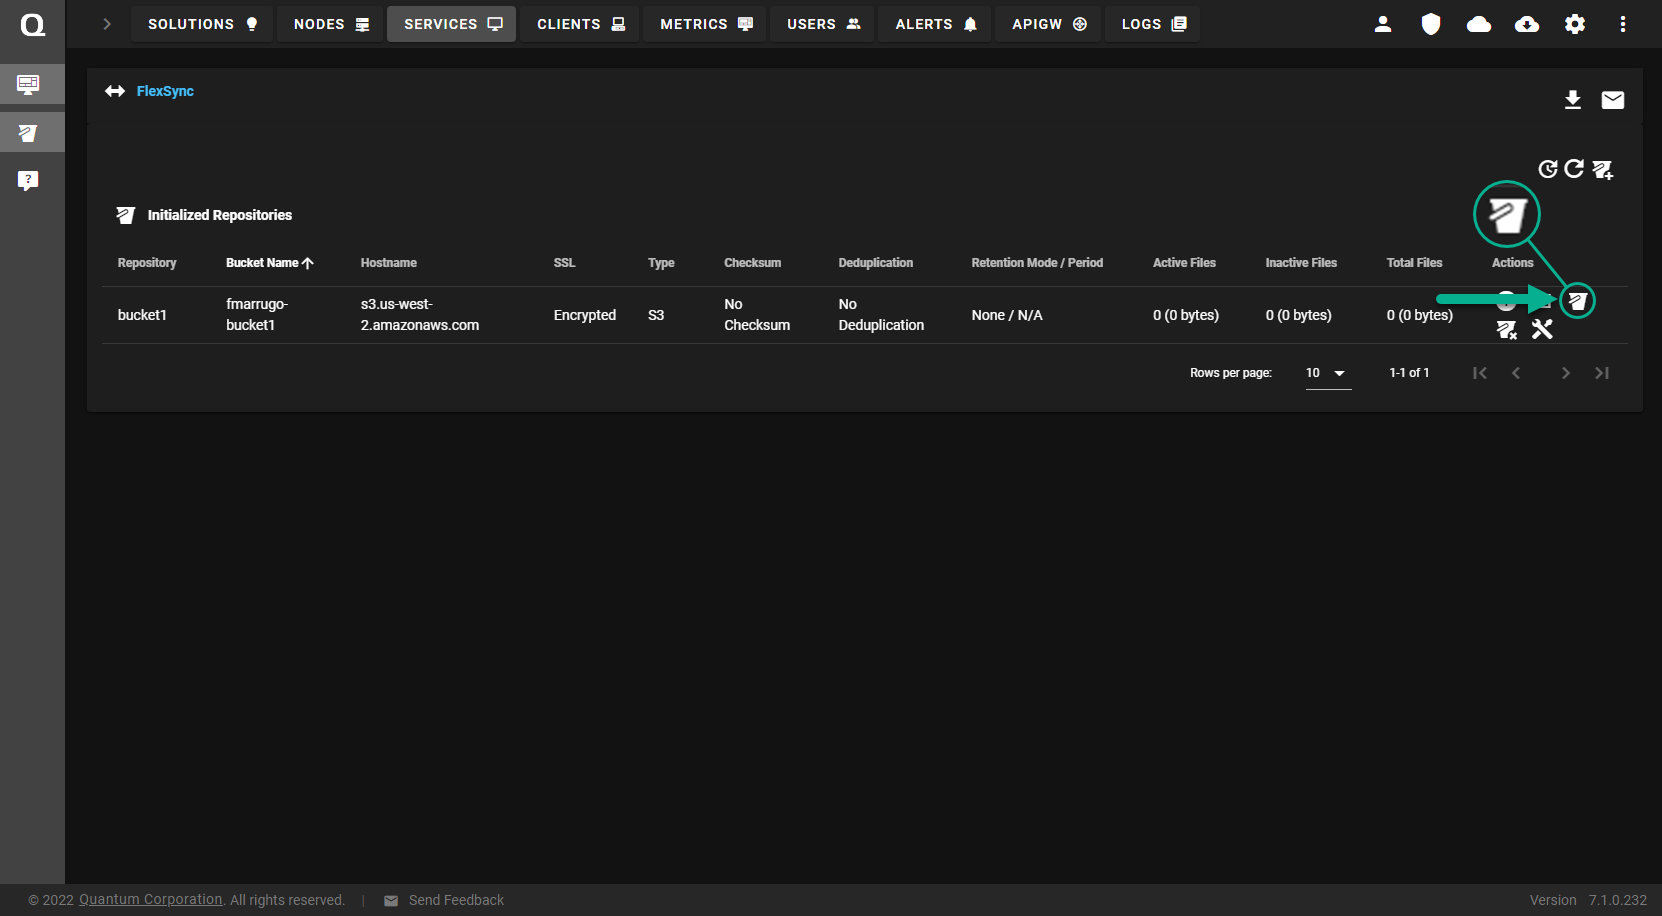
The Edit Repository dialog appears.
-
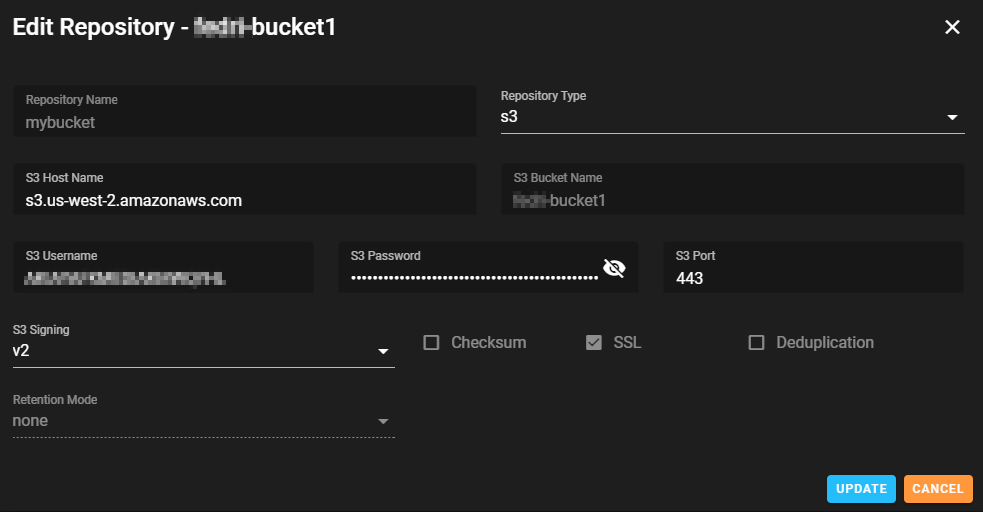
In the Edit Repository dialog, complete the information:
Parameter
Description
S3 Hostname Enter the Uniform Resource Identifier (URI) of the S3 endpoint being used for the repository (for storage and retrieval of an object).
For example:
s3.us-west-2.amazonaws.comS3 User Name Enter the user name or access key ID of your repository, assigned during creation of your S3 bucket. Password Enter the password or secret access key of your repository, assigned during creation of your S3 bucket.
Port Enter the port on which the S3 endpoint is available. Signing Specifies the type of signing to use on S3 requests. Click V2 or V4.
The default is V2.
-
Click Update. If successful, the initialized repository appears in the Initialized Repositories page.
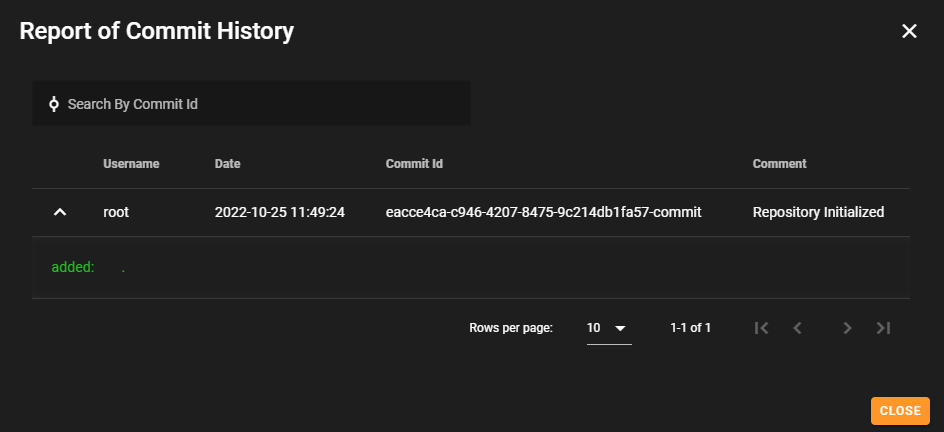
You can view the commit history of a repository based on the information captured during its commits. The following details are provided to you in the commit history:
| Parameter | Description |
|---|---|
| Username | Specifies the name of the user who performed the commit. |
| Date/Time | Specifies the date and time when the commit was performed. |
| Commit ID | Specifies a unique commit identifier number. |
| Comment | Specifies the comment/message entered when the commit was performed. |
Do the following to view the commit history of an initialized repository:
- Log in to the FlexSync Dashboard. See Access the FlexSync Dashboard.
-
Click the Manage Initialized Repositories icon.
The Initialized Repositories page appears.
-
Click the Report of Commit History icon.
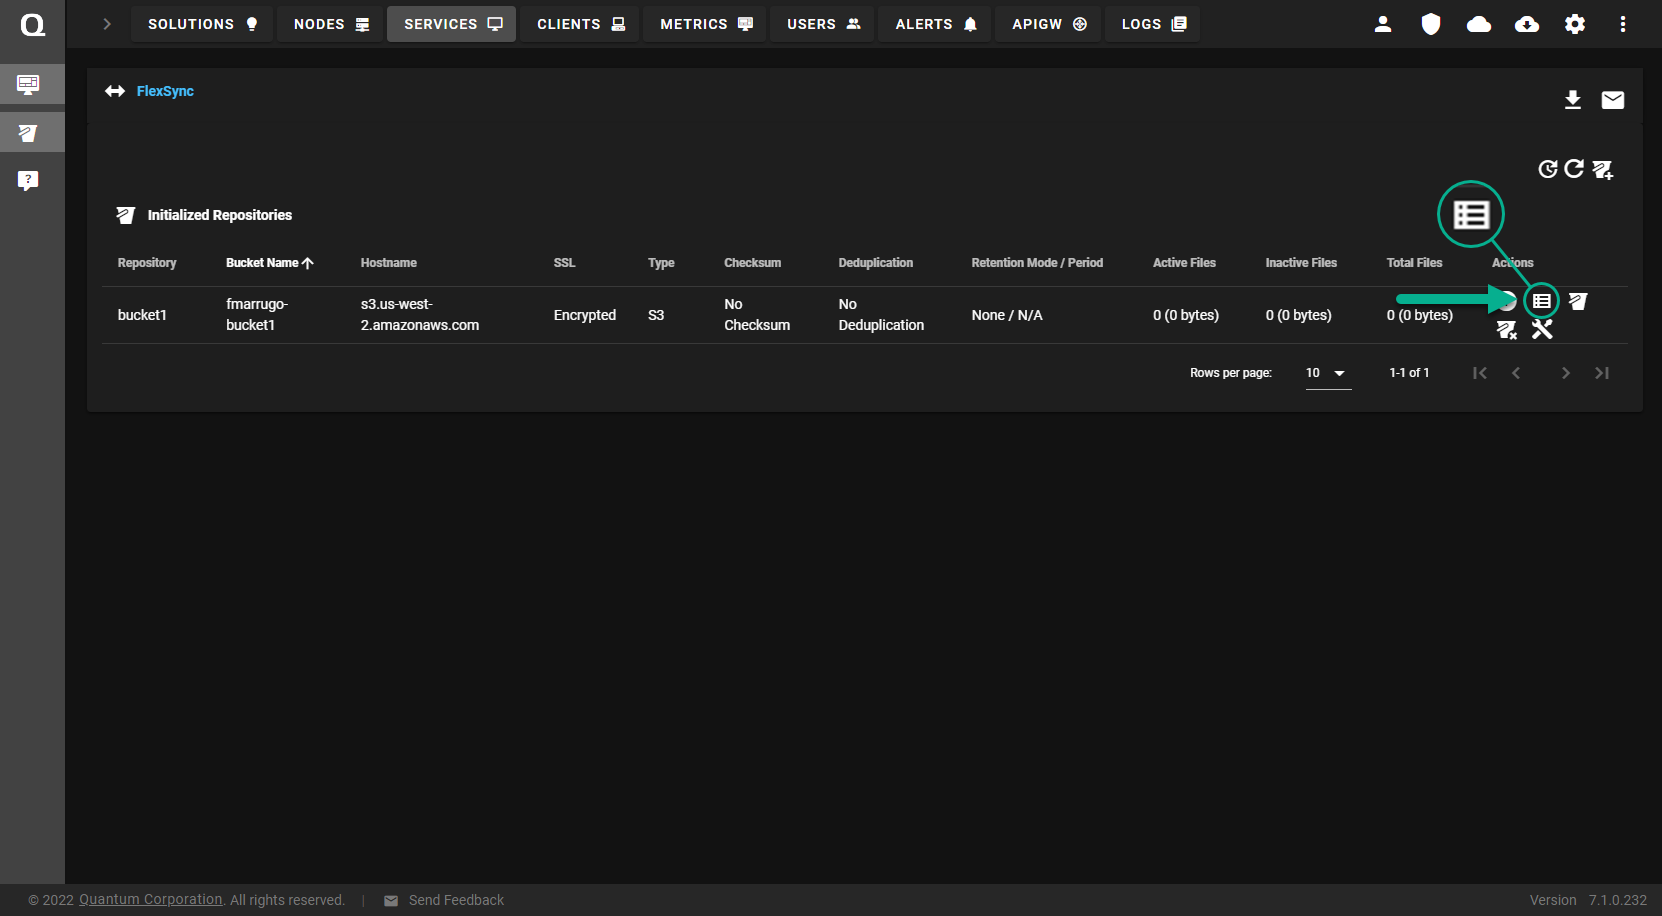
The Report of Commit History dialog appears.
-
To view additional details for a specific commit, click the
 icon to expand the row.
 -
(Optional) In the Search By Commit ID field, you can enter a commit identification number to search for a specific commit.
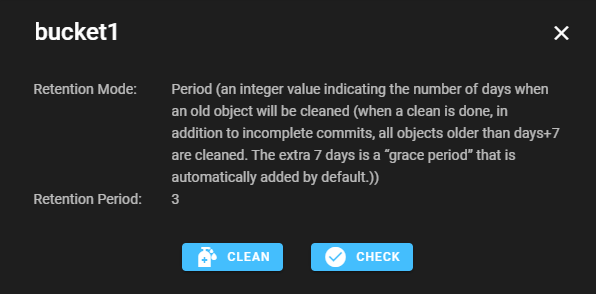
Use the Check option to verify the integrity of your repository by ensuring that all of the objects that should exist, do exist and have the appropriate attributes. The operation performs an S3 call on every object in your repository, but only downloads the metadata in the repository; the operation does not download the file data.
Note: If you enable the Checksum option on your repository, then the checksums are validated but not the actual data.
Do the following to check your repository:
- Log in to the FlexSync Dashboard. See Access the FlexSync Dashboard.
-
Click the Manage Initialized Repositories icon.
The Initialized Repositories page appears.
-
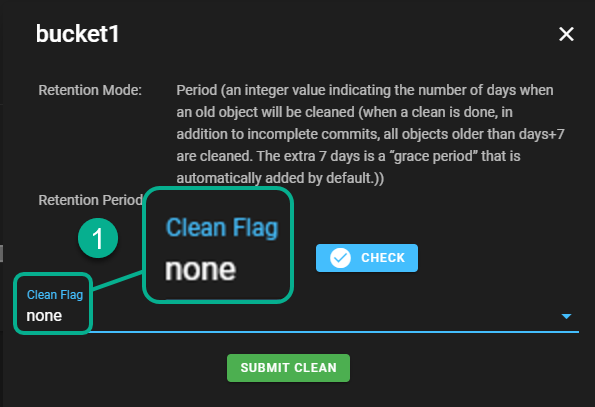
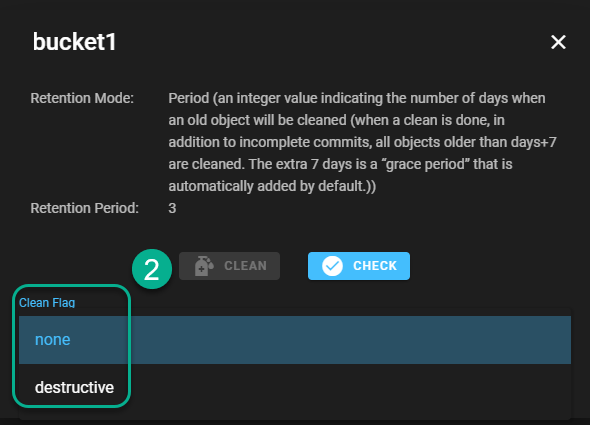
Under the Actions heading, click the Clean or Check Repository icon.
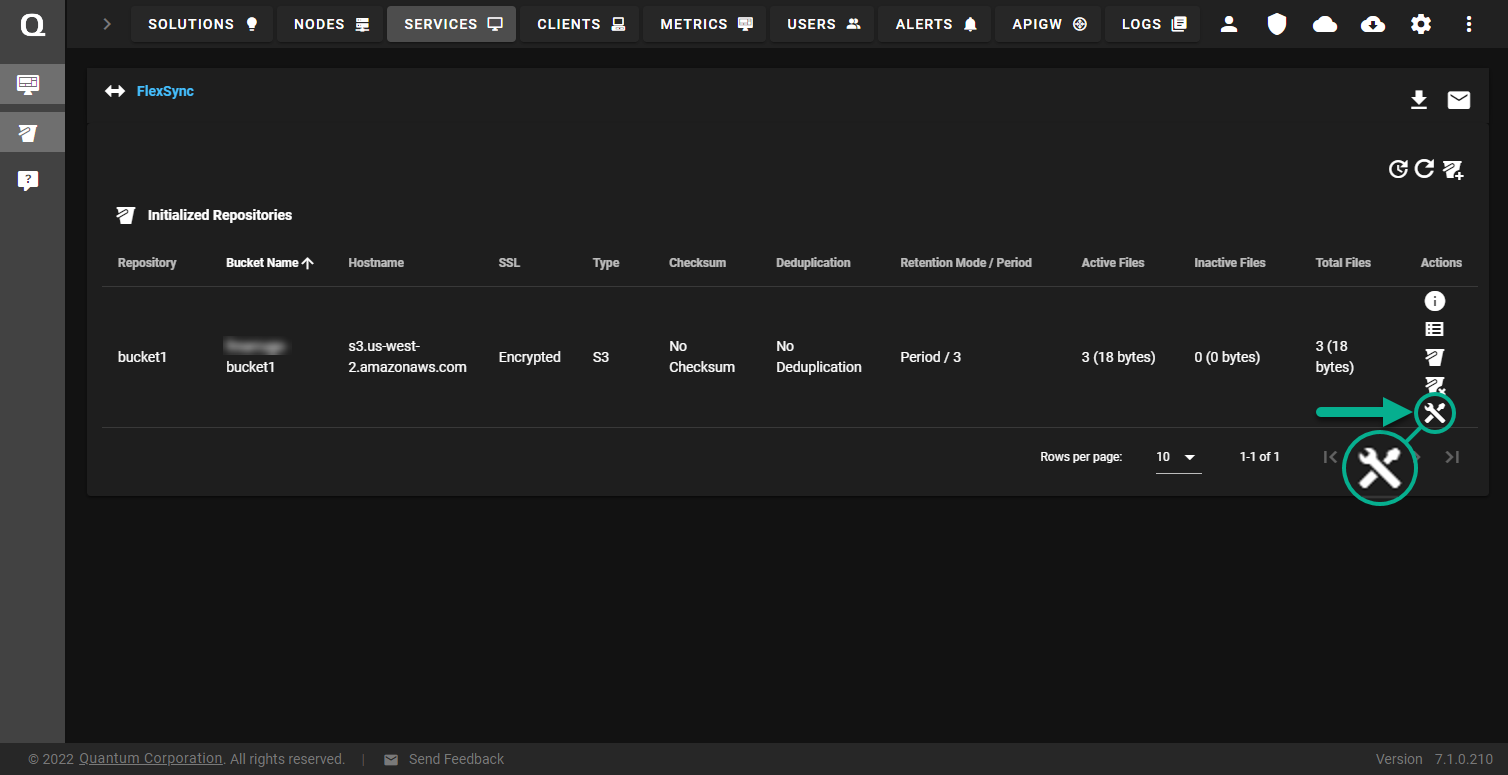
A dialog that contains your bucket Retention Mode and Retention Period properties appears.
-
Click Check. If successful, the Repository checked dialog appears.

Note: To perform an automated check process, you must configure a custom cron job. Currently, the user interface does not allow you to configure an automated schedule to check your repository.
Use the Clean option to recover space in your repository by removing objects that you no longer need. For example:
-
An object representing an old version of a file that has expired.
-
An object that was uploaded as part of failed commit transfer due to a network issue.
Caution: If you clean your content, then it is not recoverable (it is completely removed from your system). This operation is not reversible.
The following objects are removed:
-
Objects referenced by a commit with a time-stamp older than now plus the Retention Period plus the Grace Period, and a modification time on the server that is older than the Grace Period.
Note: The Grace Period is one week.
-
Objects not referenced by any commit; likely, the result of a failed commit.
You can configure a Retention Mode for an old commit operation when you create a repository (see Initialize a Repository) and it can be one of the following:
-
Permanent: This option indefinitely retains an old commit.
-
None: This option does not retain an old commit.
Note: If you want to remove an old commit, then perform the clean operation (see Clean Your Initialized Repository).
-
Days: This option allows you to specify the number of days to keep an old commit.
Note: After the time period is met, if you want to remove an old commit, then perform the clean operation (see Clean Your Initialized Repository).
Do the following to clean your repository:
- Log in to the FlexSync Dashboard. See Access the FlexSync Dashboard.
-
Click the Manage Initialized Repositories icon.
The Initialized Repositories page appears.
-
Under the Actions heading, click the Clean or Check Repository icon.
A dialog that contains your bucket Retention Mode and Retention Period properties appears.
-
Click Clean.
-
In the Clean Flag field, select one of the following clean operations:
-
None: This option takes into account the Retention Mode, the Retention Period, and the Grace Period to determine what object to remove.
-
Destructive: This option takes into account the Retention Mode, and the Retention Period to determine what object to remove. The Grace Period is ignored.
-
-
Click Submit Clean. If successful, the Repository cleaned dialog appears.

-
Note: To perform an automated clean process, you must configure a custom cron job. Currently, the user interface does not allow you to configure an automated schedule to clean your repository.
Use the Delete option to delete a previously initialized repository. When you delete a repository, the operation removes the repository from your local FlexSync environment. The operation does not clean or remove the data on your S3 storage destination.
Note: You cannot delete a repository when it is registered to a host or used in a replication task. To deregister a repository from a host, see Manage a Registered Repository or to delete a replication task, see Configure File Replication.
Caution: If you delete your repository, then it is not recoverable (it is completely removed from your system). This operation is not reversible.
Do the following to delete your repository:
- Log in to the FlexSync Dashboard. See Access the FlexSync Dashboard.
-
Click the Manage Initialized Repositories icon.
The Initialized Repositories page appears.
-
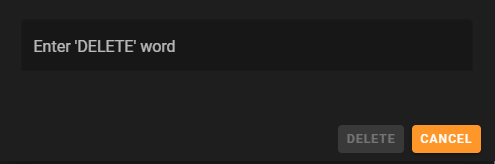
Under the Actions heading, click the Delete Repository icon.
A confirmation dialog appears.

-
Click Delete to confirm the operation, or click Cancel to abort the operation and return to the previous page. A confirmation dialog appears.
-
In the confirmation field, enter DELETE and then click Delete. If successful, the Repository <repository> deleted dialog appears.

