|
|
Install the 56-Drive Chassis Rails |

The following applies to systems.
To install rack rails for the 56-drive chassis, you will need to complete the following steps.
Prerequisite
Review all prerequisites in Install the QXS Chassis.
Note: The two rail kit installation images immediately following show the left and right rails viewed from the front and looking rearward. An assembly and an exploded view is provided for each rail.
- Slide the rear rail insert into the front rail sleeve.
Figure 1: Rail components
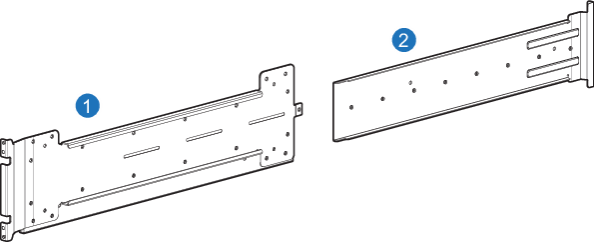
1. Front rail sleeve 2. Rear rail insert - Determine the chassis depth required by the rails.
- Fit the rail assembly to the rack and note the tapped holes in the rear rails that align with the slotted holes in the front rails.
- If cage nuts are pre-installed, remove them from the locations where hanger screws are inserted.
- Select two or three #8-32 x 3/8 flathead Phillips screws, depending on your chassis depth, to loosely attach the rear rail to the front rails.
- You will tighten the screws later.
- The screw part number is Screw code A - P/N: 021-00000262-00-01.
- Do one of the following depending on the type of holes in the rails:
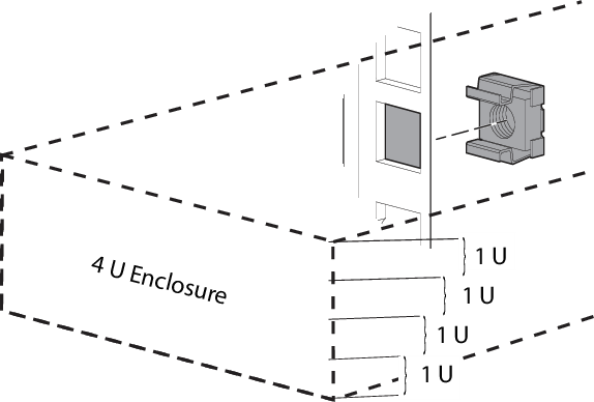
 Square-hole racks
Install front cage nuts 4 holes away from center-line of the 4U space, at the same square hole elevations—two per column—on all four rack posts.
Round-hole racksInstall clip nuts instead 4 holes away from center-line of the 4U space.
Figure 2: Cage Nut / Clip Nut Installation
- Select one of the following screws to attach the rear rail assembly to the rear of the rack:
- 2 #10-32 x 3/4 truss Phillips screws
- 2 #12-24 x 3/8 Phillips screws
- Appropriate 5 or 6 mm panhead screws
- Attach the rear rail rear assembly to the rear of the rack.Pre-tapped screw racks
Insert the 2 screws of the appropriate size — #10-32, #12-24, M5, or M6 — through the 2 countersunk holes.
Figure 3: Pre-tapped screw racks
 Square-hole or round-hole racks
Insert the 2 screws of the appropriate size — square-hole shoulder or round-hole shoulder — through the 2 tapped holes on the rear rail.
While tightening the screws, push the rails outward to maximize the opening width.
Figure 4: Square-hole or round-hole racks
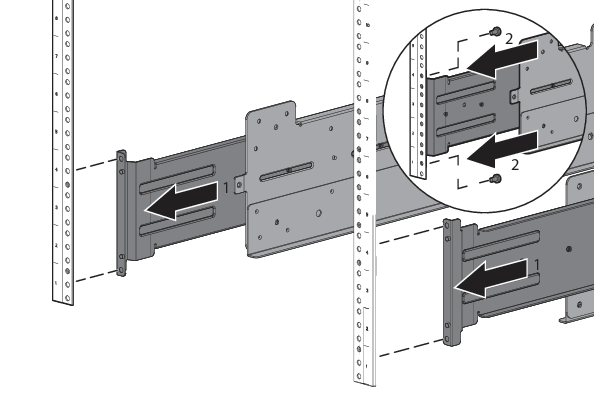
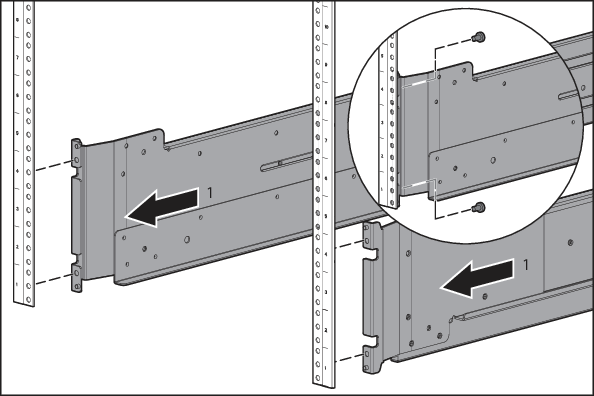
- Attach the front of the rail assembly to the front of the rack.Rack with pre-tapped holes
Insert the 2 flathead screws of the appropriate size — #10-32, #12-24, M5, or M6 — through the 2 countersunk holes.
Figure 5: Rack with pre-tapped holes
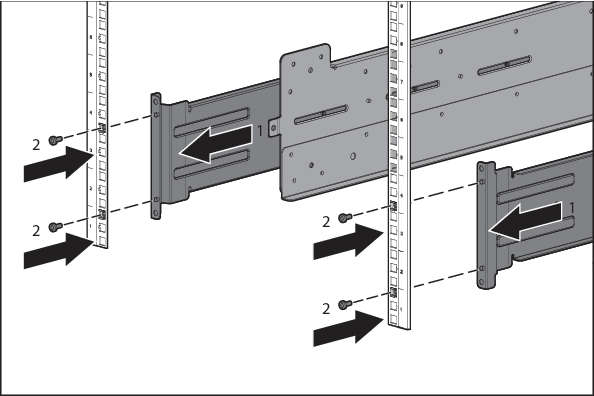
 Square-hole or round hole racks
Insert the 2 screws of the appropriate size — square-hole shoulder or round-hole shoulder — through the 2 tapped holes on the rear rail.
Figure 6: Rack with square holes or round holes
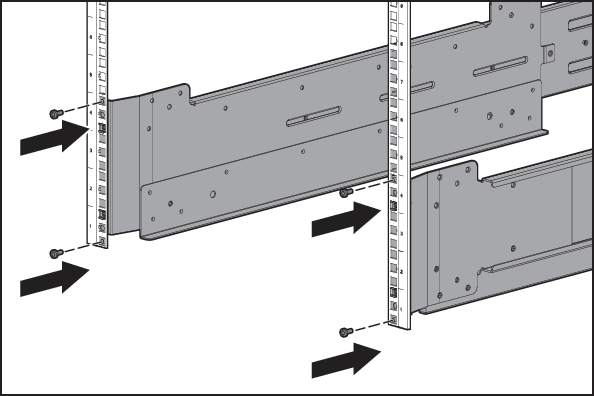
- Tighten the screws that you loosely attached in Step 3.
Figure 7: Tighten rack screws
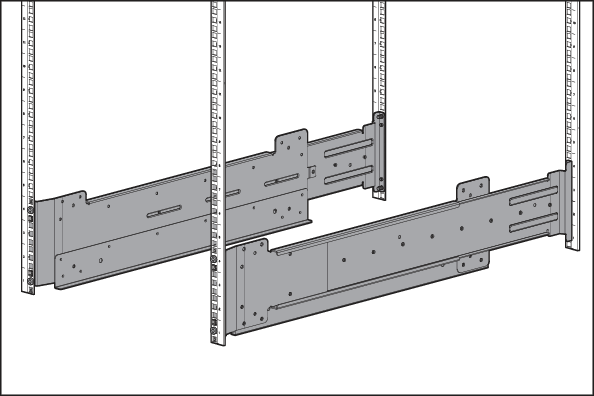
- Repeat steps 1-8 to secure the other side of the rail kit
Continue to Install the QXS Chassis >>
* Back to Checklist: QXS Chassis Installation *
* Back to Xcellis Foundation Hardware Installation Overview and Checklist
Xcellis Foundation Hardware Installation Overview and Checklist (for systems). *
*Back to Hardware Installation Overview and Checklist *
