|
|
Installation the QXS 56-Drive Chassis |

Use the following task to install the QXS 56-drive chassis.
IMPORTANT
You MUST adhere to the following:
- Make sure that the chassis is level (parallel to floor). Otherwise, the rails might bend when the chassis is inserted.
- If the rail becomes deformed as a result of inserting the chassis in an unlevel position during installation, replace the rail.
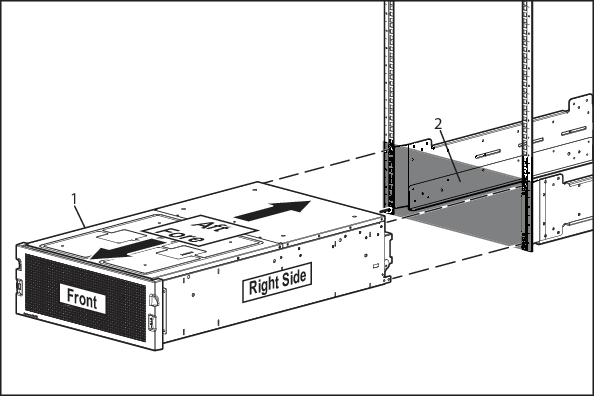
- At least two people are required to raise and move the chassis into the rack. Optionally, you can use a mechanical lift to raise and move the chassis.
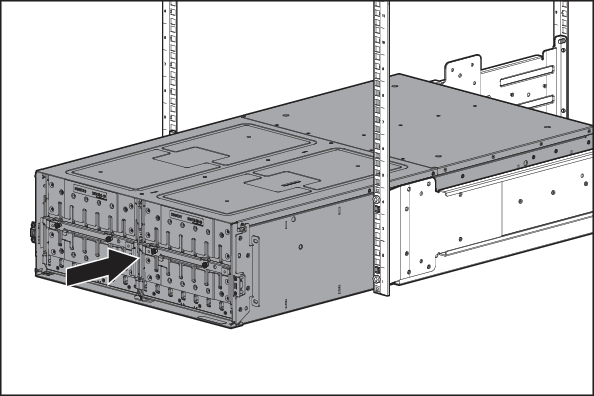
- Carefully lift and align the chassis and slide it into the rack.
- Ensure that the chassis is level.
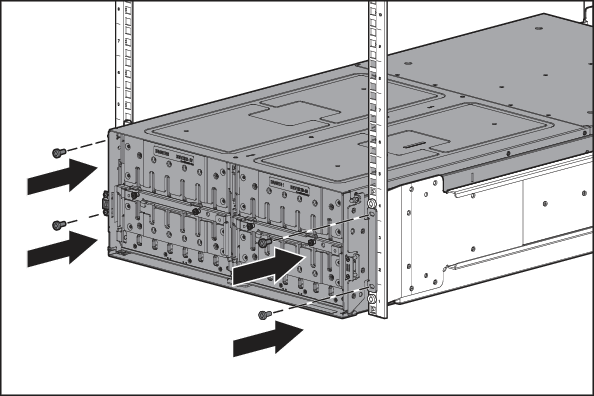
- Secure the mounting ears on the front of the chassis to the rack using one of the following sets of screws:
- 4 #10-32 x 3/4 truss Phillips screws (2 / ear)
- 4 #12-24 x 3/8 Phillips scres ( 2/ ear)
- Appropriate 5 or 6 mm panhead screws (2 / ear)
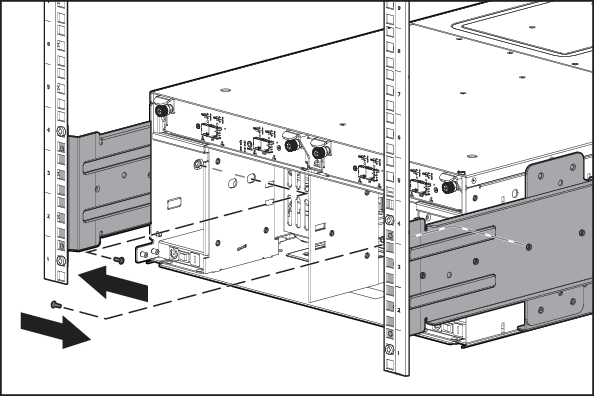
- Remove both fan modules and PSUs.
- Insert a screwdriver into the PSU cavity access hole and secure the chassis to the rail using one #10-32 x 0.217 flathead Phillips screw.
- Repeat for the other side of the chassis.
- Reinstall the PSUs and fan modules.
- Ensure that the chassis is level.
- Secure the mounting ears on the rear of the chassis to the rack using one of the following sets of screws:
- 4 #10-32 x 3/4 truss Phillips screws (2 / ear)
- 4 #12-24 x 3/8 Phillips scres ( 2/ ear)
- Appropriate 5 or 6 mm panhead screws (2 / ear)
- Repeat for each additional chassis.
Continue to Install the QXS Drives >>
* Back to Checklist: QXS Chassis Installation *
* Back to Xcellis Foundation Hardware Installation Overview and Checklist (for systems). *
*Back to Hardware Installation Overview and Checklist *
