|
|
Install the QXS 12-Drive and 24-Drive Chassis |

The following applies to , , , and systems.
Use the following task to install the QXS 12-drive and 24-drive chassis.
Note: Illustrations in this procedure show the chassis with drives installed, but drives are shipped separately so the chassis does not arrive containing drives or drive blanks.
- Carefully lift and align the chassis and slide it into the rack.
Figure 1: Installing the Chassis into the Rack
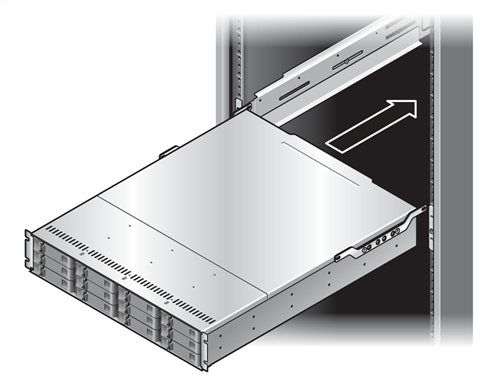
- Ensure the chassis is level.
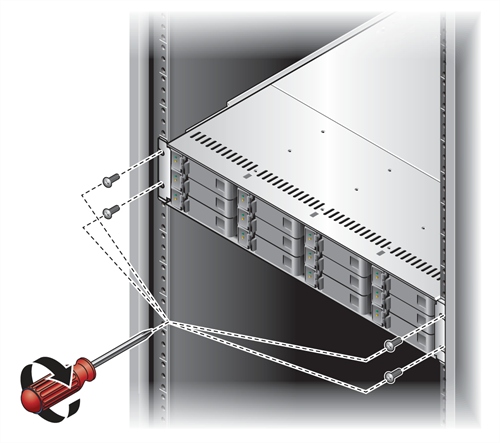
- Secure the mounting ears on the front of the chassis to the rack using one of the following sets of screws:
- 4 #10-32 x 3/4 truss Phillips screws (2 / ear)
- Appropriate 5 or 6 mm panhead screws (2 / ear)
Figure 2: Securing Front of Chassis to the Rack Face
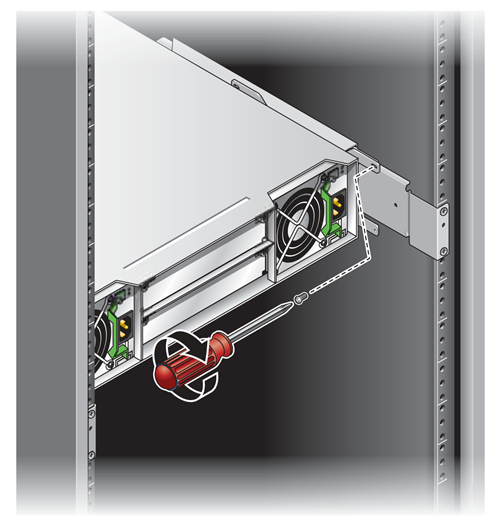
- Secure each rear bracket of the chassis to the horizontal rail that spans the depth of the rack with a #6-32 1/4 panhead Phillips screw.
To more easily access the rails and brackets, remove the power supplies from the 12-drive chassis.
Figure 3: Securing Rear of Chassis to the Rail
- Repeat for each additional chassis.
For , since drives are pre-installed, continue to Connect the Power Cables and Power on the QXS Chassis >>
Continue to Install the QXS Drives >>
* Back to Checklist: QXS Chassis Installation *
* Back to Xcellis Foundation Hardware Installation Overview and Checklist (for systems). *
*Back to Hardware Installation Overview and Checklist *
