minute read
Overview of myStorNext
The myStorNext website is a critical component of the setup process for your StorNext environment.
In addition, the myStorNext website provides file downloads for products and features in your StorNext environment.
Go to the myStorNext website:

Note: Use a supported browser so that the myStorNext website display and work properly. See Supported Browsers and Device Operating Systems for a list of supported browsers.
Beginning with StorNext 7.1, if you purchase a new system, or perform a new/fresh installation of the StorNext Unified User Interface (UUI) software package, then you must perform the registration and activation steps outlined below. If you perform an upgrade to StorNext 7.1 (or later), then you can access the StorNext User Interface (new UI introduced in StorNext 7.0.1) directly [see Access the Quantum Unified User Interface (UUI)] and do not need to perform the registration and activation steps.
Do the following to register and activate a myStorNext account.
-
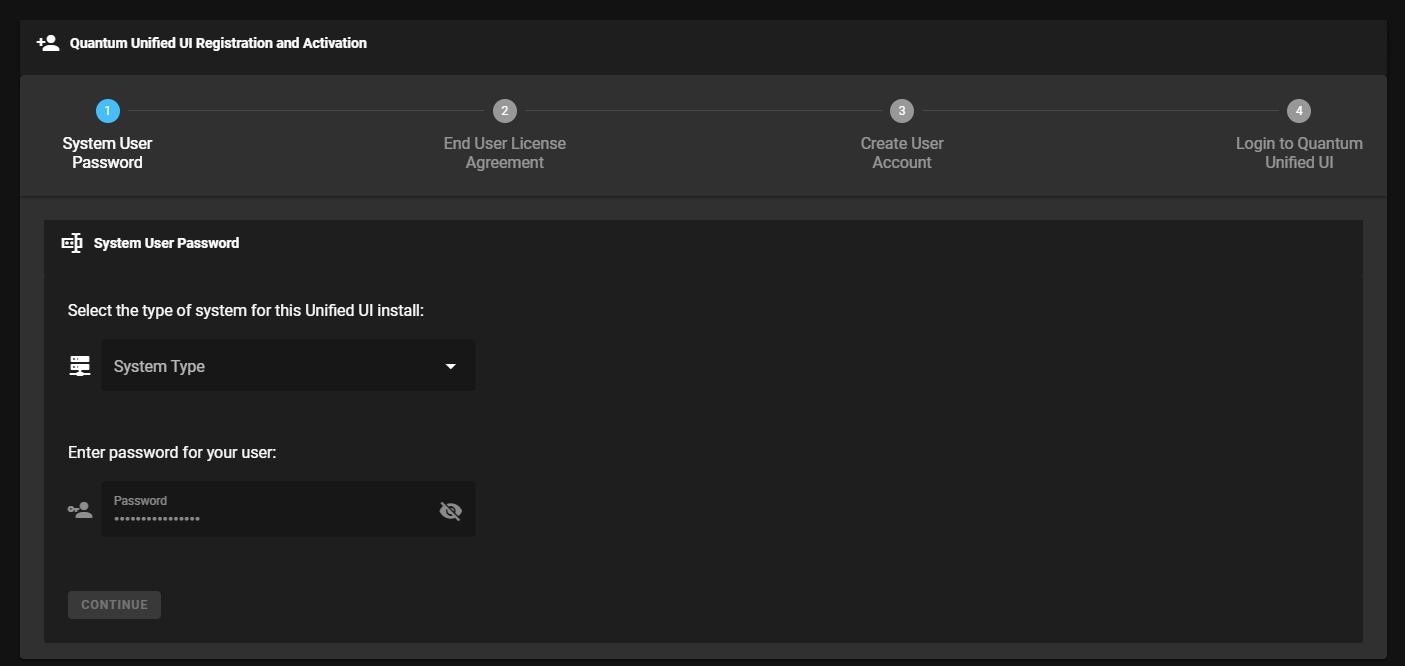
Access the Quantum Unified User Interface (UUI). The System User Password page appears.
-
On the System User Password page:
-
Select the type of system.
-
Click StorNext to create an account associated with a Quantum appliance.
-
Click Unified UI RYO to create an account associated with your own hardware.
-
-
Enter the StorNext or root user password.
-
Click Continue. The End User License Agreement (EULA) page appears.
-
-
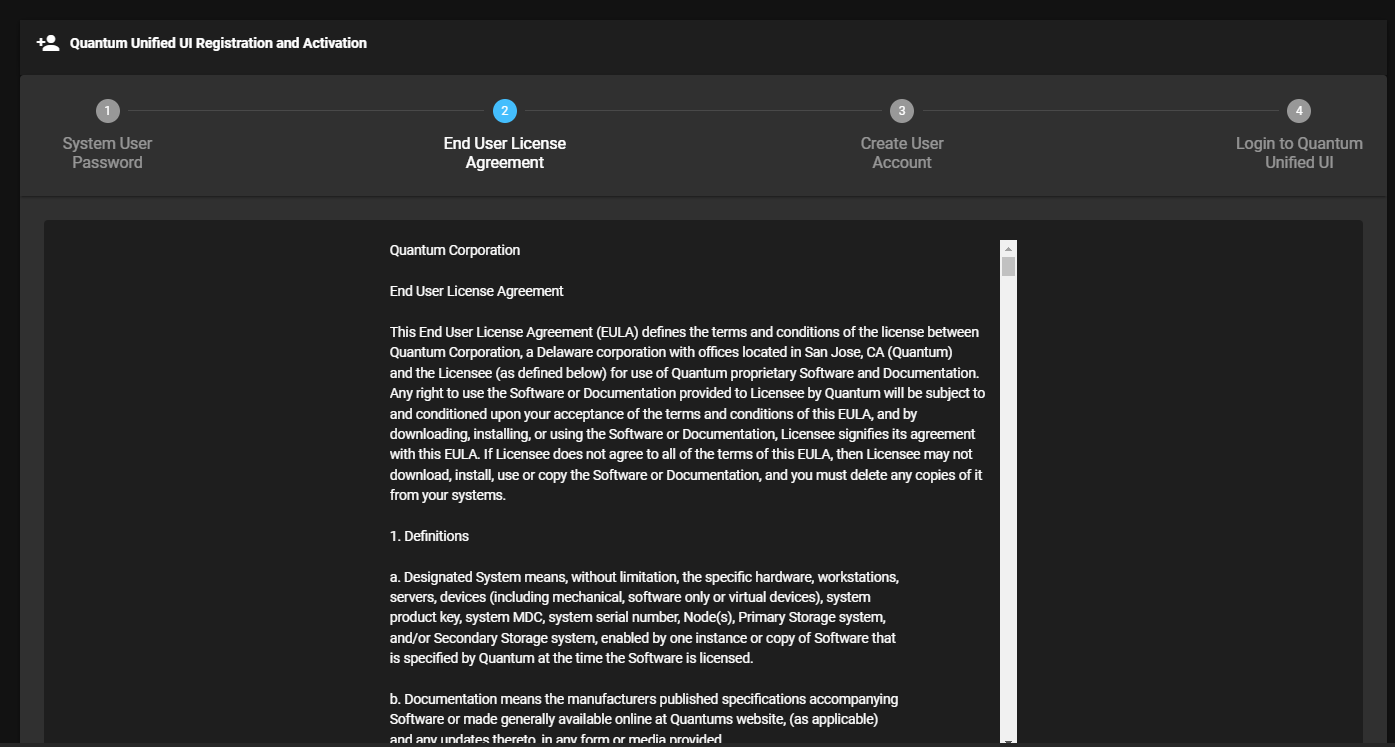
On the End User License Agreement page, scroll down to view the complete EULA, select I Agree, and then click Continue. The Create User Account page appears.
-
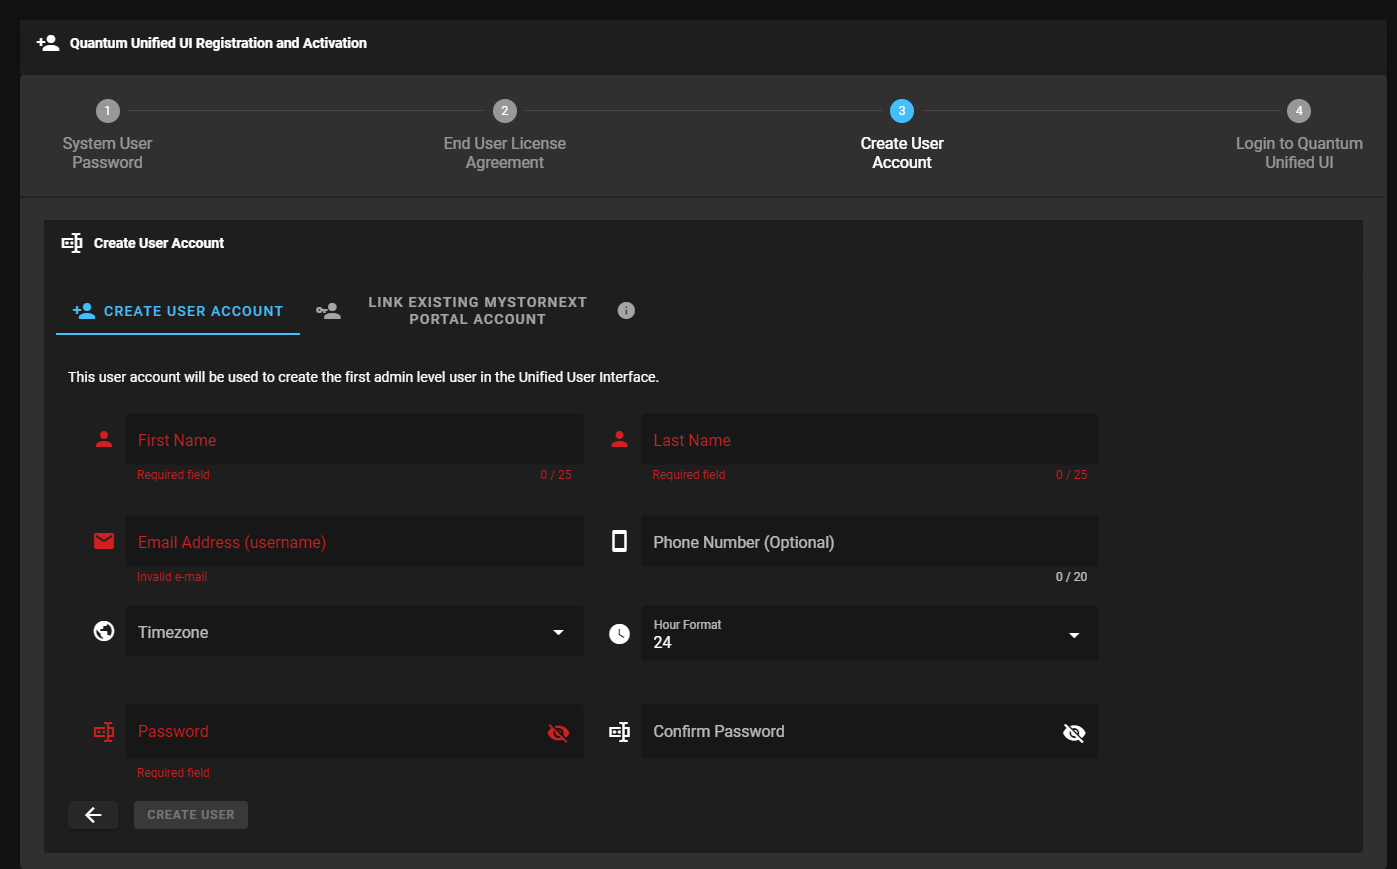
On the Create User Account page, you can create a local user account or link an existing myStorNext account.
Password Rules
-
Must contain at least 12 or more characters.
-
The first character cannot be a special character (for example, #Myp@ssw0rd1, or @Myp@ssw0rd1).
-
Must contain at least one special character.
-
Must contain at least one upper case character.
-
Must contain at least one lower case character.
-
Must contain at least one number.
-
Cannot contain a space.
-
Cannot contain the string password.
-
Cannot be the same as the current password.
-
The password field cannot be the same as the Last Name.
-
The password field cannot be the same as the First Name.
Note: If you link an account, then all the information from your myStorNext account (for example, First Name, Last Name, Time Zone, and so on) is imported to your local user account. If you do not have an existing myStorNext account, see Register and Create an Account on myStorNext.
-
To create a local user account, complete the form and click Create User. The Login to Quantum Unified UI page appears.
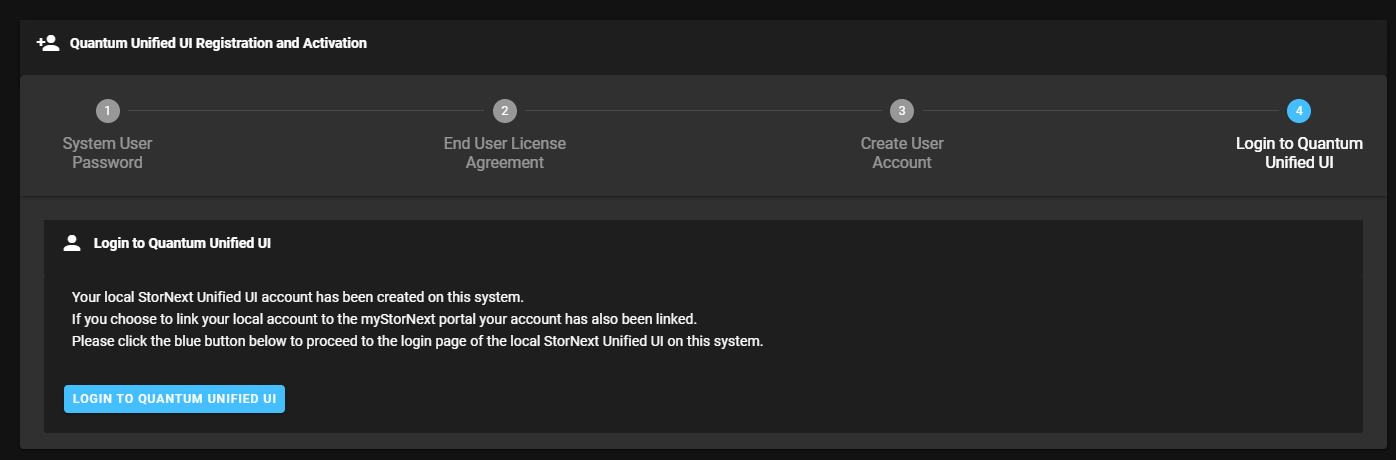
Click Login to Quantum Unified UI.
-
To link an existing myStorNext account, complete the form and click Link Account.
Note: If you do not have an existing myStorNext account, see Register and Create an Account on myStorNext.
-
-
On the Login to Quantum Unified UI page, click Login to Quantum Unified UI. The myStorNext log in page appears where you can log in using the account you created [see Access the Quantum Unified User Interface (UUI)].
Begin by registering your Quantum appliance on the myStorNext website and creating a myStorNext account.
You can create multiple accounts for the myStorNext website for different users by providing unique login and user information (email address, password, phone number, and time zone). In a scenario with multiple systems and multiple website user accounts, each user must add entries for all systems to be associated with the account.
The initial myStorNext website account is also the first myStorNext account. Additional myStorNext user accounts can be added through the Users page in the StorNext User Interface (new UI introduced in StorNext 7.0.1) after initial system installation and configuration.
- Using a supported browser, go to mystornext.quantum.com.
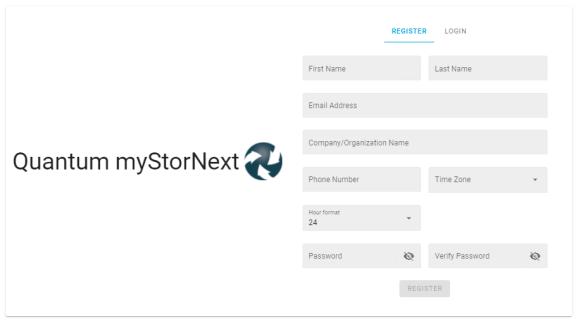
- Click Register to display the registration form.
-
Complete the registration form on the website to create your login credentials for the account, and then click Register.
-
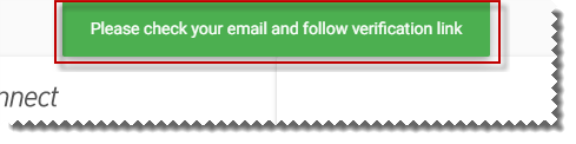
Click Submit. A welcome email with the Subject line myStorNext Validate Email is delivered.
-
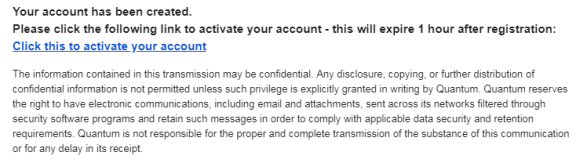
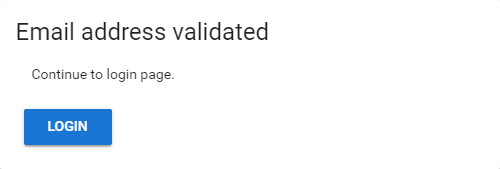
Click Click this to activate your account to activate the myStorNext account and to validate your email address.
-
Click Login.
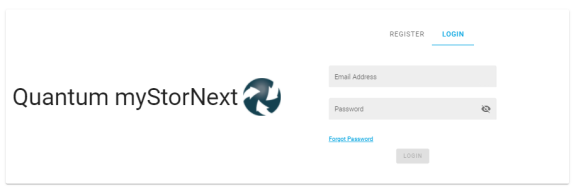
- Log in to the myStorNext website with the email address and password created when filling out the registration form.
- Click the Quantum icon to display the home page.
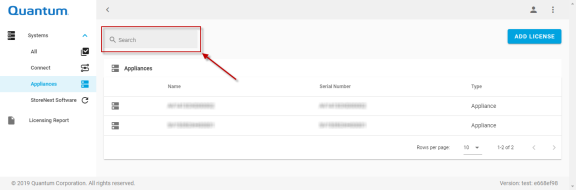
- On the left navigation panel, click Systems, and then click one of the following menu options to display your system by its type:
- All (displays all of your systems)
- Appliances (displays only appliance systems)
- StorNext Software (displays only StorNext software-based systems)
- (Optional) Click any of the following column labels to sort (ascending or descending) the list according to the specified column label:
- Name
- Serial Number
- Type
- Owner
- In the Search field on any of the four system type pages (All, Connect, Appliances, and StorNext Software), type the string you want search for. You can search for the following components:
- Name
- Serial Number
- Type
- Owner
-
In the Search field on the Licensing Report page, type the string you want search for. You can search for the following components:
- Registration ID
- Last Report
- Last Upload
- Total Nodes
- Last Quantum Update
- Owner
-
Click the
 icon, and then click Profile. The Profile page appears.
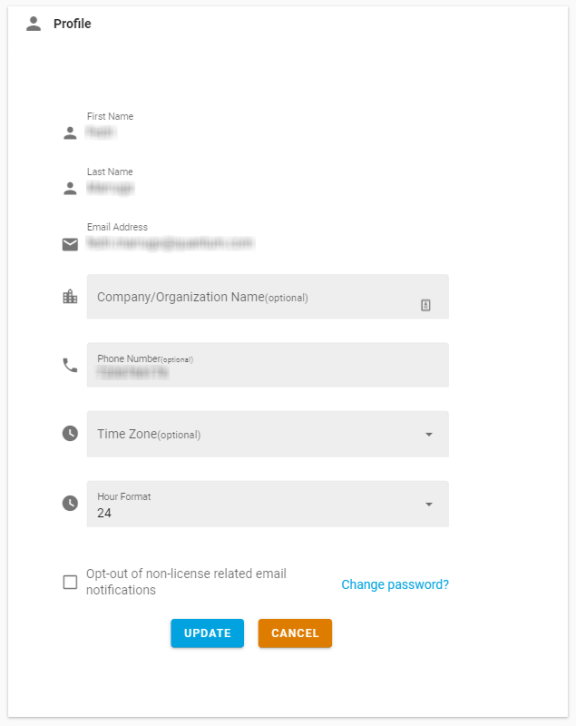
- On the Profile page, update the respective field(s) on the form:
- First Name
- Last Name
- Email Address
- Company/Organization Name (optional)
- Phone Number (optional)
- Time Zone (optional)
- Hour Format
- Click Update to submit your changes, or click Cancel to abort the process and return to the previous page.
-
Click the
icon, and then click Change Password. The Change Password page appears.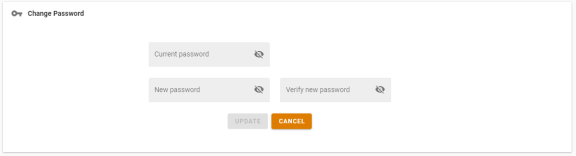
- Complete the form:
- In the Current password field, input your current password.
- In the New password field, input your new password.
- In the Verify new password field, input your new password again.
- Click Update to submit your changes, or click Cancel to abort the process and return to the previous page.
You can subscribe to (or unsubscribe from) myStorNext email notifications which provide information on application updates that are available or information about important data that is available.
-
Click the
icon, and then click Profile. The Profile page appears.
-
Do one of the following:
- To subscribe to email notifications, select the Opt-in to informational license emails and portal alerts check box.
-
To unsubscribe from email notifications, clear the Opt-in to informational license emails and portal alerts check box.
- Click the icon, and then click Logout.
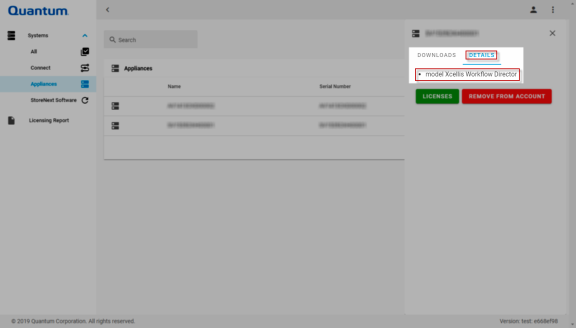
- Click a row corresponding to the system you want to view details for. The side bar appears on the right side of your browser window.
-
Click Details. The details for your system appear under the heading.
- Click a row corresponding to the system you want to view details for. The side bar appears on the right side of your browser window.
- Click Details. The details for your system appear under the heading.
- Click Licenses. The licenses dialog appears for the specified system.
After installation, system admins should return to the myStorNext website periodically to obtain updates.
- Log in to the myStorNext website (mystornext.quantum.com).
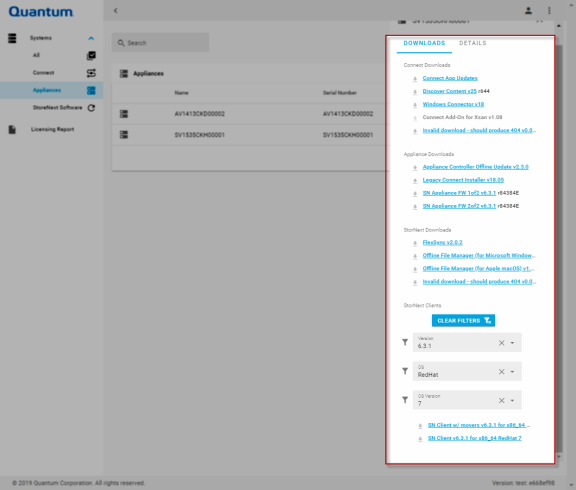
- Click a row corresponding to the system you want to update. The side bar appears on the right side of your browser window.
-
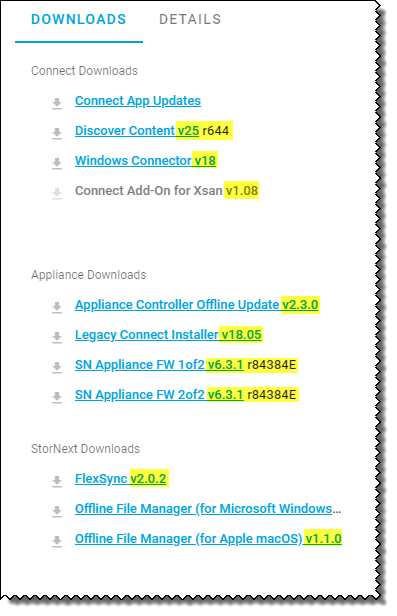
Click Downloads. The list of available updates appears under the Downloads section. The list of available updates and other downloads depends on the type of system, as illustrated in the table below.
Type of System Available System Updates Appliance Connect StorNext Software Connect Add-On for Xsan
✓ ✓ Connect App Updates
✓ ✓ Discover Content
✓ ✓ FlexSync * ✓ ✓ Legacy Connect Installer
✓ Appliance Controller Software * ✓ StorNext Appliance Firmware ✓ StorNext Client Software
✓ ✓ StorNext Offline File Manager (for Apple macOS) *
✓ ✓ StorNext Offline File Manager (for Microsoft Windows) *
✓ ✓ StorNext Windows Connector
✓ ✓ *This is an optional feature that provides additional functionality to your StorNext environment. Although registration and an account on the myStorNext website are required to access the optional feature. The version of an available download is displayed immediately after the link text, in the format (vnnn). For example:
-
Click a respective link to download application updates, Connector content updates, and StorNext release content files, as needed.
 Download the Connect Add-On for Xsan
To monitor an Xsan system's I/O, download the Connect Add-On for Xsan disk image, which contains the Connect Add-On for Xsan application.
Included with the disk image file is Add-On for Xsan Product Tips (PDF), which includes instructions to install and use the add-on.
Download the Windows Connector
To monitor StorNext Windows clients, download the Windows Connector package and install it on StorNext Windows clients to be monitored.
Download the Appliance Controller Offline Update Software
To download the current version of the Appliance Controller upgrade package, click the Appliance Controller Offline Update link. Beginning with Appliance Controller 1.4.1, upgrade packages encompass all Appliance Controller features, including StorNext NAS. The content is packaged in a tar.gz file and includes the upgrade packages for supported Operating Systems. Use the package that corresponds to your Operating System. See Appliance Controller Console and StorNext NAS Upgrades in the Appliance Controller Documentation Center for information about upgrading the NAS software from the local /var/upgrade directory.
Download the Appliance Firmware Files
You can download the appliance firmware files to perform a firmware upgrade on your system. Depending on the version being applied, the firmware upgrade includes:
- Updates to the firmware running on an appliance server (if applicable).
- Updates to the server appliance OS (if applicable).
- Updates to the StorNext software.
- Updates to the firmware for the metadata array (if needed for the upgrade).
Note: Firmware files are large - around 2 GB each (or larger) for releases where both files are required (typical), so plan time to download the file(s) required for the upgrade.
Note: Controller firmware upgrades for QXS must be done according to the firmware upgrade instructions found in the Installation Instructions section of the QXS Release Notes at www.quantum.com/qxshybriddocs (look for the applicable Release Notes for the release you need).
To upgrade your system (upgrade the firmware), see Upgrade the System (Upgrade Firmware).
Download Connect App Updates
If the system does not have an Internet connection, the Connect App Updates link allows you to download updates for the applications. The updates are packaged in a tar.gz file, which you upload from your computer to the system over the management network.
Download Discover Content (StorNext Linux Connector)
If the system does not have an Internet connection, the Discover Content link allows you to download updated StorNext Linux Connector content for the system's Discover Components application. The content is packaged in a tar.gz file, which you upload from your computer to the system over the management network.
Download the FlexSync Software
FlexSync provides a simple, fast, and highly efficient tool for creating local or remote replicas of file system data and metadata.
Note: FlexSync is a Quantum-licensed, stand-alone feature available with the StorNext File System and is managed through a stand-alone graphical interface. See Obtain and Install StorNext Perpetual Licenses – GUI-based Appliances and Customer-supplied MDCs for information about obtaining a FlexSync license. See the FlexSync Documentation Center for information about licensing, installing, and using FlexSync.
Download the Offline File Manager (for Apple macOS)
The Offline File Manager (for Apple macOS) provides visibility through MacFinder for Apple Xsan clients into the online/offline state of files and access to services to request Storage Manager store, retrieve, or truncate content via menu items. See Offline File Manager (for Apple macOS) for additional information about the Offline File Manager (for Apple macOS) client.
Download the Offline File Manager (for Microsoft Windows)
The Offline File Manager (for Microsoft Windows) provides visibility through Windows Explorer for Windows clients into the online/offline state of files and access to services to request Storage Manager store, retrieve, or truncate content via menu items. See Offline File Manager (for Microsoft Windows) for additional information about the Offline File Manager (for Microsoft Windows) client.
StorNext Client Downloads
From the drop-down lists, select the StorNext release/version, Operating System type, and Operating System version.
Click the link that corresponds to the client download for your system. For example, click SN Client v6.2.0 for x86_64 CentOS 7 for the client software only, or click SN Client w/ movers v6.2.0 for x86_64 CentOS 7 to download client software with distributed data mover (DDM), if there are clients in the environment that are used as DDMs.
Download the Legacy Connect Installer
The Legacy Connect Installer file allows you install the latest version of software and applications on an appliance that is running any release prior to StorNext 6.1.
- Save the file to a location on your computer.
If you have multiple orders or an order with more than one Quantum appliance, create an entry on the account for each additional appliance.
Note: Before you proceed, you must have a valid license file (license.dat) available locally. Save the license.dat file to a temporary location on your computer, as you will need to upload this file during this procedure. See How to Obtain a New StorNext license.dat File in Obtain and Install Perpetual StorNext Licenses for GUI-based Appliances and Customer-supplied MDCs.
- On the home page of the myStorNext website, click Add StorNext 6 License.

The Upload License dialog appears.

-
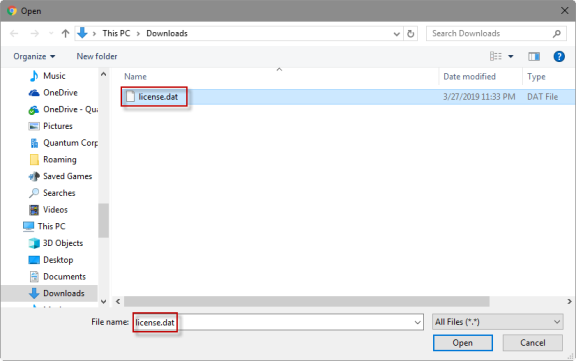
Click Browse, and then locate the license.dat file for your system.
-
Click Open. The license file appears in the upload dialog.
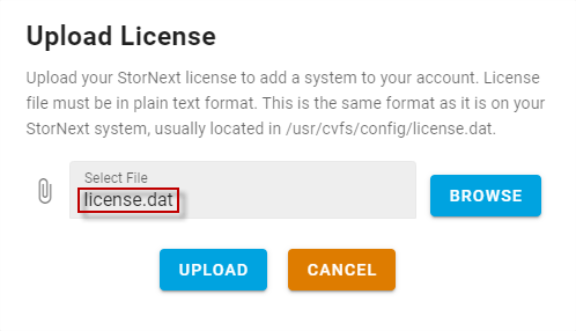
- Click Upload. Your system is added to the account.
You can remove a system from your account, if necessary.
- Click a row corresponding to the system you want to remove. The side bar appears on the right side of your browser window.
- Click Details.
-
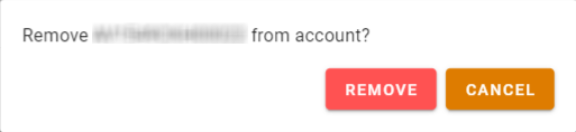
Click Remove From Account. You are prompted to confirm the removal of the system from your account.
-
Click Remove to remove the system from the account, or click Cancel to abort the operation and return to the previous page. A confirmation dialog appears informing you that your system has been removed successfully.
Note: This feature is only for systems using the StorNext 7 (or later) licenses. This applies to a new system pre-installed with StorNext 7 (or later) software, or if you convert/migrate your system from the perpetual (license.dat) license model to the StorNext 7 subscription (product key) license model. To convert/migrate your system, see Convert from a Perpetual License to a Subscription (Product Key) License. See StorNext Licenses for complete details on the license types. Contact your Quantum Sales representative to determine which subscription license type is best suited for your environment.
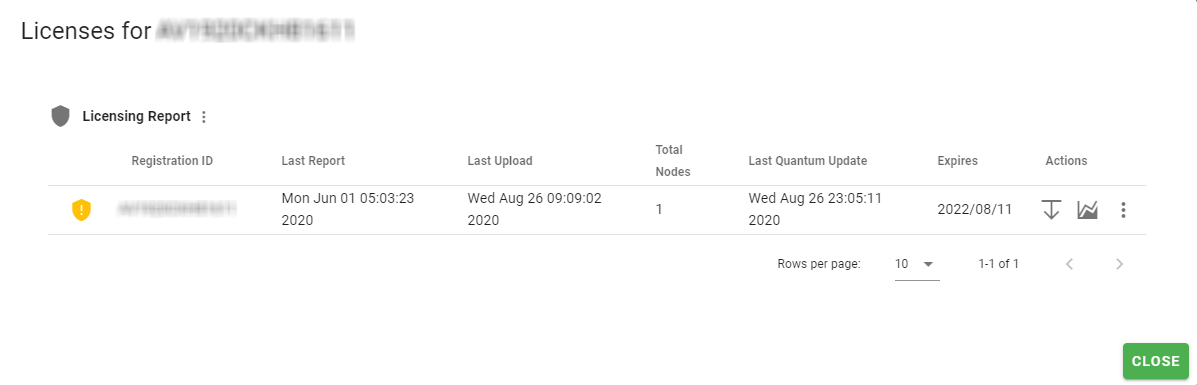
The Licensing Report page on myStorNext (https://mystornext.quantum.com/) allows you to monitor your usage and perform other activities related to your license installed on your system.
Before you can view licensing report data, you must register with your API gateway.
- To register your MDC with your API gateway, see Register Your MDC with Your API Gateway.
- To register your Appliance Controller with your API gateway, see Register Your Appliance Controller with Your API Gateway.
- To register FlexSync with your API gateway, see Register FlexSync with Your API Gateway.
After you register with your API gateway, the licensing report data is automatically retrieved on a randomly selected hour and minute of the day (see Configure the License Report Schedule for myStorNext on Your API Gateway to configure the schedule to a specific hour and minute of the day).
Note: You will automatically receive an informational alert email if your capacity for any given license is approaching out of compliance with the authorized use (the email notification is triggered if you reach 85% of your capacity). You can opt-out of the informational alert email (to opt-out see Overview of myStorNext).
Do the following to access the Licensing Report page.
-
On the left pane of the myStorNext website, click Licensing Report. The Licensing Report page appears.
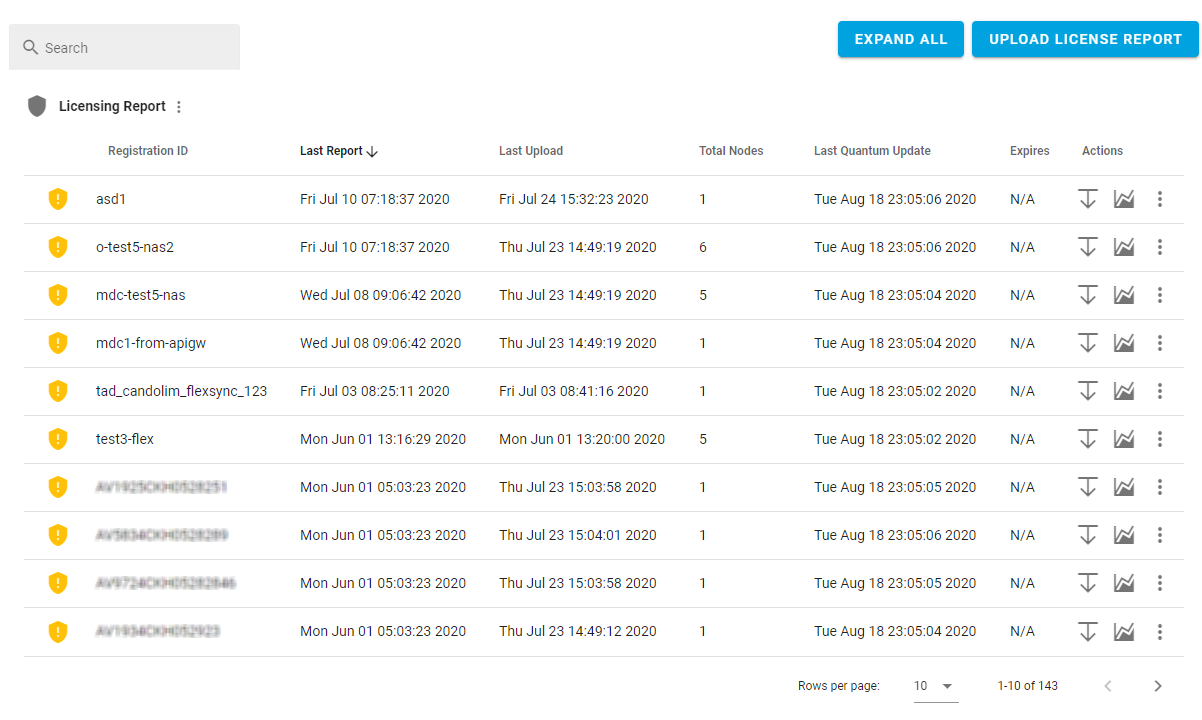
The table below provides information about the various labels and icons on the Licensing Report page.
| Label or Icon | Description |
|---|---|
|
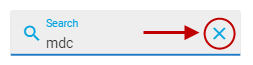
Search |
In the Search field on the Licensing Report page, type the string you want search for. You can display a specific Registration ID or multiple IDs that contain the characters in the string.
To reset the search field, click the cross icon on the right of field.
If your search query does not result in a match, the following is displayed: No matching records found. |
|
Expand All |
Click Expland All to display all rows on the page.
|
|
Collapse All |
Click Collapse All to minimize all rows on the page.
|
|
Upload License Report |
Click Upload License Report to manually upload your StorNext license report. The license file must be in plain text format and contain a JSON string.
See Create a License Report for myStorNext on Your API Gateway to export the license report file to a local destination so that you can manually upload the file using the Upload License Report feature on myStorNext. |
|
Display Modes
|
|
| Registration ID | Displays the serial number of your system. |
| Last Report | Displays the last time your license report file was received from your API gateway. |
| Last Upload |
Displays the last time your manually uploaded your license report file. See Create a License Report for myStorNext on Your API Gateway to export the license report file to a local destination so that you can manually upload the file using the Upload License Report feature on myStorNext. |
| Total Nodes | Displays the total number of licensed nodes on your system. |
| Last Quantum Update |
Displays the last time your license report information was updated with the latest information from Quantum. See Update From Quantum. |
| Expires | Displays the expiration date of your license. |
| Actions | |

|
Click to expand the row. |

|
Click to collapse the row. |

|
Click to open a new browser window and log in to your Cloud-Based Analytics account. |
| Licenses |
Click to display the following information about your license:
|
| System Information |
Click to display the following information about your system:
|
| Update From Quantum | Click to update your license report for the specific registration ID with the latest information from Quantum. |
| Show Report JSON |
Click to display the license report JSON file. (Optional) In the Preview window, click Download to download the license report JSON file to a local destination. |
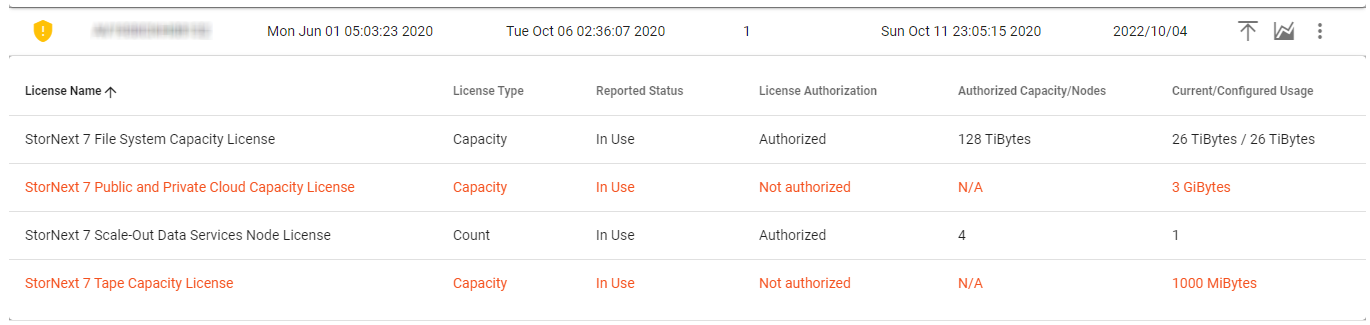
| License Name | Displays the name of the license you have installed on your system. |
| License Type | Displays the type of license you have installed on your system. |
| Reported Status | Displays the use status of the license you have installed on your system. |
| License Authorization |
Displays whether the license on your system is authorized or not authorized. Authorized: You installed a valid StorNext 7 (or later) product key, and your use or scope of use of StorNext software on the system is in compliance with the authorized use and the StorNext Software End User License Agreement (EULA). See Enter your StorNext 7 (or later) License Product Key. Not authorized: You have not installed a valid StorNext 7 (or later) product key, and your use or scope of use of StorNext software on the system is out of compliance with the authorized use and the StorNext Software End User License Agreement (EULA). See Enter your StorNext 7 (or later) License Product Key.
|
| Authorized Capacity/Nodes | Displays the total number of the authorized capacity and the total number of authorized nodes for the license you have installed on your system. |
| Current/Configured Usage | Displays the total number of current usage and the total number of configured usage for the license you have installed on your system. |

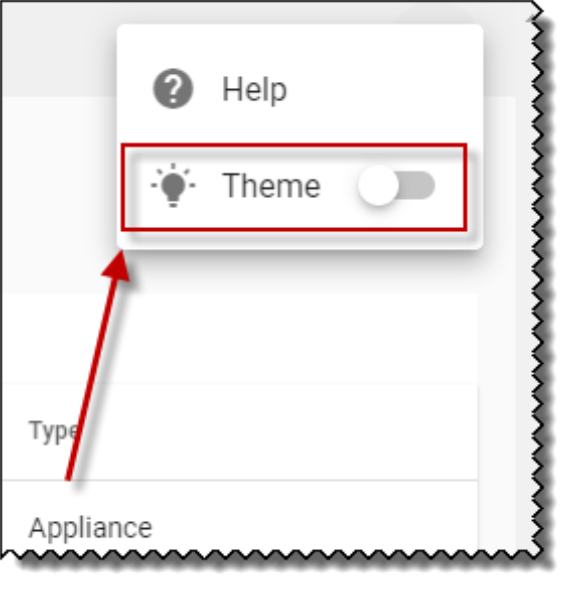
The dark theme available in the myStorNext Website offers a unique visual interface environment to work in, shifting nearly all onscreen visual elements to dark grays and blacks.
Note: The dark theme is enabled by default.
You can easily switch between the dark theme and the light theme appearance at any time by adjusting the Theme.
-
To turn the dark theme on or off, click the More
 icon and then click the Theme key.