 minute read
To provide an S3 presentation layer to StorNext, you can use MinIO; MinIO is a high performance, distributed object storage system. It is software-defined, runs on industry standard hardware and is 100% open source under the Apache V2 license.
In a more practical form, MinIO is a simple server binary that runs on multiple platforms, and offers S3 presentation for traditional file systems; hence, offering an easy to implement private cloud instance.
This combination provides an Object presentation of the same data allowing file system access as well as an on-premises S3 solution.
A traditional StorNext environment is made of one or two servers that act as metadata controllers (MDCs), as well as clients that are connected to the file system(s) via either one of the following methods:
-
Native StorNext client that mounts the file system using traditional block devices (either using fibre channel or RDMA over converged ethernet);
-
Distributed LAN client (DLC);
-
NAS (using SMB and/or NFS).
Additional servers or gateways can be added to a StorNext environment to offload the DLC and NAS services and free additional resources on the metadata controller(s), and to provide additional bandwidth for clients.
In the case of a dual server setup, High Availability (HA) is placed, and every file system managed by StorNext is owned by a single server, while the other one is passively waiting for a failover condition under which it overtakes the failed server’s services.
Xcellis is our StorNext server platform and is used to describe the StorNext MDC(s) running in a StorNext environment. Xcellis Workflow Extender (XWE) is our gateway server and is used to describe any gateway server running in the same StorNext environment.
MinIO is an Open Source offering and a high performance, distributed object storage system. It is software-defined, runs on industry standard hardware and is purpose-built to serve only objects, a single-layer architecture.
For more information on MinIO see https://min.io/product/overview.
What MinIO Does Not Support
-
MinIO does not support object versioning, which means that it is possible to overwrite an existing object by copying a file using the same name into the same bucket, if permissions allow it.
-
MinIO also does not rename objects systematically when uploading them, which means that an object retains its original file name once in a bucket. However, you can use the MinIO client to define the actual name of an object, in the same way a traditional cp command does.
MinIO Functionality Not Covered
-
MinIO offers erasure coding (EC); this feature is not covered in this topic. Since the vast majority of StorNext file systems run on RAID-protected hardware, we assume the file systems MinIO are implemented on benefit from this first line of defense against data loss.
See https://docs.min.io/docs/minio-erasure-code-quickstart-guide.html for further details on how MinIO implements EC.
There are several ways to accomplish the integration of StorNext and MinIO. This topic focuses on the preferred method of integrating on either a StorNext native client or an XWE. Although you can install on the XWD, Quantum recommends you do not perform the installation on the standard model or a system with a high level of activity.
Below are three possibilities, ranked in order of preference, for the MinIO installation.
|
Option |
Integration Method | Details |
|---|---|---|
|
A |
On a native StorNext client. |
Installing MinIO on a native client offers the best flexibility and more predictability in terms of resources. Ensure you have the appropriate Ethernet interfaces installed and working on the client. Make sure the client is accessible from the other hosts that use MinIO. See Install MinIO. |
|
B |
On an XWE, when available. |
This approach offers a workable alternative to option A, as they share the same primary advantage:
XWEs are also very capable servers that offer substantial amounts of memory, high-speed access to the file systems, a variety of Ethernet connectivity options. Depending on the nature of the presentations used for StorNext, if a system is running the NAS services, Quantum recommends you assess performance needs and analyze the current load on the XWE to determine if there are sufficient resources available. A look at the top command output can help determine the amount of free memory as well as the overall system load. |
|
C |
Directly on Xcellis. |
Caution: Use caution if you select this approach, as MinIO, although very lightweight, uses additional resources on the Xcellis. Consider the amount of data that is expected to flow through MinIO, and determine if appropriate network interfaces are present on the Xcellis system. For example, if 10Gb connectivity is needed, a free, dedicated 10Gb or greater interface is the preferred way of pointing users to MinIO. Do not connect to MinIO using a 1Gb metadata network interface, especially if many users intend to use MinIO, as this might have negative consequences, such as increased latency for metadata operations. |
Perform the following to install MinIO in your StorNext environment.
- Step 1: Configure MinIO as a Service on a CentOS 7 StorNext Client
- Step 2: Configure Your Firewall
- Step 3a: Manage a User and Password
- Step 3b: (Optional) Manage a Certificate to Enable TLS/SSL
- Step 4: Enable and Start NTPD on the MinIO Server
- Step 5: Start the MinIO Service
- Step 6: (Optional) Install and Configure the MinIO Client on the Server
- Step 7: Access the MinIO Web Interface
- Step 8: (Optional) Configure MinIO as a Storage Manager Storage Destination
Considerations
This procedure is adapted from the following sources:
-
In your console/shell, become the root user:
# su - -
Create a MinIO user:
# adduser -s /sbin/nologin -d /opt/minio minio -
Create a MinIO subdirectory under /opt, download MinIO and make it executable:
# mkdir -p /opt/minio/bin
# wget \
https://dl.min.io/server/minio/release/linux-amd64/minio \
-O /opt/minio/bin/minio
# chmod 755 /opt/minio/bin/minio
-
Create a MinIO data directory on the StorNext file system. In this example, the file system is mounted under /stornext/FS1, and a minio directory is created in this path:
# mkdir /stornext/FS1/minio -
Create the configuration file for MinIO, incorporating the path from Step 4:
# echo "MINIO_VOLUMES=/stornext/FS1/minio" > /opt/minio/minio.conf -
Change ownership of the files under /opt/minio and the MinIO data directory (/stornext/FS1/minio) to the newly-created minio user:
# chown -R minio.minio /opt/minio# chown -R minio.minio /stornext/FS1/minio -
Create a minio.service systemctl file in /etc/systemd/system:
# vi /etc/systemd/system/minio.serviceCopy and paste the following lines and save the file:
[Unit]
Description=Minio
Documentation=https://docs.minio.io
Wants=network-online.target
After=network-online.target
AssertFileIsExecutable=/opt/minio/bin/minio
[Service]
WorkingDirectory=/opt/minio
User=minio
Group=minio
PermissionsStartOnly=true
EnvironmentFile=-/opt/minio/minio.conf
ExecStartPre=/bin/bash -c "[ -n \"${MINIO_VOLUMES}\" ] || echo \"Variable MINIO_VOLUMES not set in /opt/minio/minio.conf\""
ExecStart=/opt/minio/bin/minio server $MINIO_OPTS $MINIO_VOLUMES
StandardOutput=journal
StandardError=inherit
# Specifies the maximum file descriptor number that can be opened by this process
LimitNOFILE=65536
# Disable timeout logic and wait until process is stopped
TimeoutStopSec=0
# SIGTERM signal is used to stop Minio
KillSignal=SIGTERM
SendSIGKILL=no
SuccessExitStatus=0
[Install]
WantedBy=multi-user.target
Note: You might need to comment out the User=minio and Group=minio lines in order to enable the minio service in Step 8 below.
-
Run systemd-analyze to verify the minio.service systemctl configuration file, and update the file if you experience an error:
# systemd-analyze verify minio.service
-
Enable the minio service:
# systemctl enable minio.service
Created symlink from /etc/systemd/system/multi-user.target.wants/minio.service to /etc/systemd/system/minio.service.
Considerations
This procedure is adapted from the following source:
MinIO uses port 9000 to handle requests; you must allow traffic to flow through port 9000 for MinIO’s host system.
Note: You can use a browser user interface on port 9000 to browse buckets and objects.
Depending on your implementation, you can limit to specific interfaces. Below is an example for a CentOS 7 StorNext client, where the interface p7p1 is used for MinIO.
You must run the commands as root:
# firewall-cmd --get-zone-of-interface=p7p1
public
# firewall-cmd --zone=public --add-port=9000/tcp \
--permanent
success
# firewall-cmd --reload
success
You must provide MinIO with both a user and password to store and retrieve files.
-
Edit the /opt/minio/minio.conf file to store the user and password values:
# vi /opt/minio/minio.conf -
Add the following lines in the minio configuration file and replace the user and password values respectively:
MINIO_ROOT_USER="minio user"
MINIO_ROOT_PASSWORD="minio password"
Considerations
See https://docs.min.io/docs/how-to-secure-access-to-minio-server-with-tls.html for information regarding MinIO and its use of a certificate. This procedure does not illustrate how to use a certificate.
If you need to use a certificate, obtain your certificate(s), and then do the following:
-
Create the certs directory:
# mkdir /opt/minio/certs -
Copy the certificate file(s) to the certs directory:
# cp [path to private.key file] /opt/minio/certs
# cp [path to public.crt file] /opt/minio/certs
-
Add the path to MinIO’s configuration file:
# chown -R minio.minio /opt/minio/certs
# echo 'MINIO_OPTS="--certs-dir /opt/minio/certs' >> \ /opt/minio/minio.conf
Note: After you configure MinIO to use a certificate, it does not accept an HTTP protocol. You must use an HTTPS protocol to connect to its interface.
This procedure is not covered in this topic; Quantum strongly recommends you synchronize the host on which MinIO is running with a time server. It is important that you synchronize all systems to a common time server.
Note: A difference of 15 minutes (or less) is allowed between the MinIO server and the client that is transferring an object.
Run the following command to start the MinIO service:
Note: You might need to comment out the User=minio and Group=minio lines in the /etc/systemd/system/minio.service file to start the minio service.
This step enables you to perform S3 operations from the CLI, such as the following:
-
Add a user.
-
Create a bucket.
-
List a bucket.
-
Remove a bucket.
-
Put a file.
-
Retrieve a file.
Do the following as the root user.
Note: The MinIO client supports version 2 (v2) and version 4 (v4) encryption from the Amazon S3 API. This step is configured using v4.
-
Download the MinIO client:
# wget https://dl.min.io/client/mc/release/linux-amd64/mc -O \ /usr/local/bin/mc -
Run the following command to make it executable:
# chmod 755 /usr/local/bin/mc -
Determine the IP address to use to connect to MinIO. This example runs the MinIO client on the MinIO server, so you can use 127.0.0.1. If you configure the MinIO client to use an IP address from an external host, then the IP address must be reachable from your host.
Below is the MinIO client configuration command:
# /usr/local/bin/mc config host add <alias> <your S3 endpoint> [your minio user] [your minio password] [--api API signature]For example:
# /usr/local/bin/mc config host add fs1Minio http://127.0.0.1:9000 [your minio user] [your minio password] --api S3v4 -
Create a bucket:
# mc mb fs1Minio/test1
Bucket created successfully `fs1Minio/test1`.
-
Create a test file, and put it into the bucket:
# echo "this is a test" > /var/tmp/testfile1.txt
# mc cp /var/tmp/testfile1.txt fs1Minio/test1
...mp/testfile1.txt: 15 B / 15 B ┃▓▓▓▓▓▓▓▓▓▓▓▓▓▓▓▓▓▓▓▓┃ 1.44 KiB/s 0s
-
List the contents of the test1 bucket:
# mc ls fs1Minio/test1
[2020-04-13 11:04:45 MDT] 15 B testfile1.txt
-
Retrieve testfile1.txt as ~/test.txt:
# mc cp fs1Minio/test1/testfile1.txt ~/test.txt
...t1/testfile1.txt: 15 B / 15 B ┃▓▓▓▓▓▓▓▓▓▓▓▓▓▓▓▓▓▓▓▓▓▓▓┃ 796 B/s 0s
# cat ~/test.txt
this is a test
When you list the minio (/stornext/FS1/minio) directory on the StorNext file system, the following is an example of the output:
# ls -l minio/
total 0
drwxr-xr-x 3 minio minio 3 Feb 2 10:46 test1
# ls -l minio/test1/
total 0
drwxr-xr-x 2 minio minio 2 Feb 2 10:46 testfile1.txt
# ls -l minio/test1/testfile1.txt/xl.meta
-rw-r--r-- 1 minio minio 428 Feb 2 10:46 minio/test1/testfile1.txt/xl.meta
Do the following to access MinIO’s interface.
-
Use a browser to navigate to the system where MinIO is installed:
http://[IP address]:9000If you are using a TLS certificate, navigate using the HTTPS protocol:
https://[IP address]:9000 -
Enter your Access Key and Secret Key, and then click the login button.
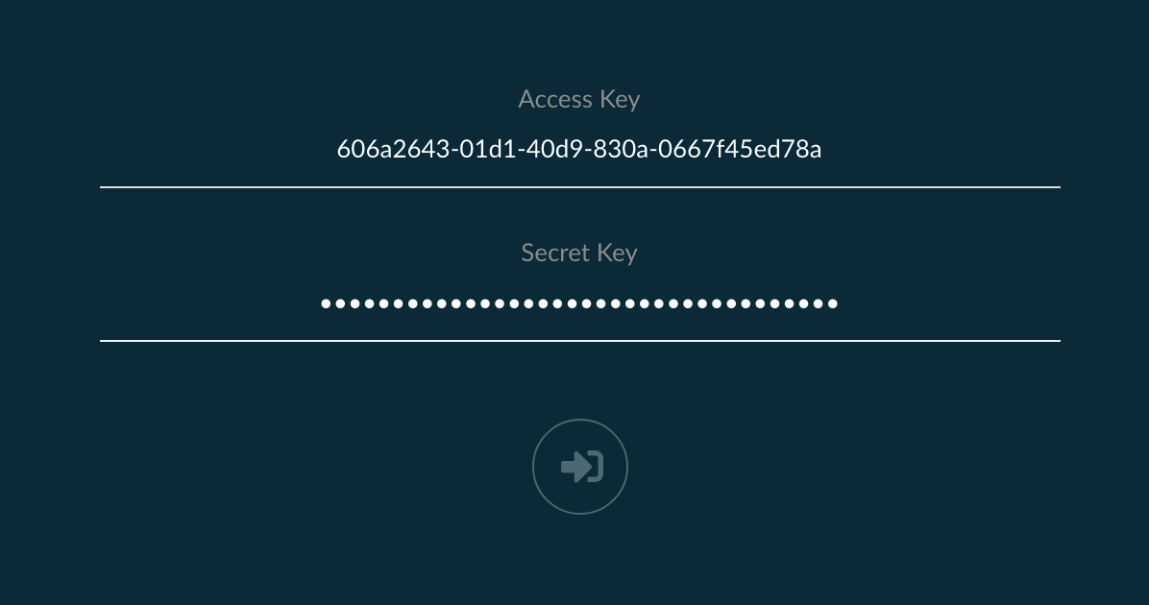
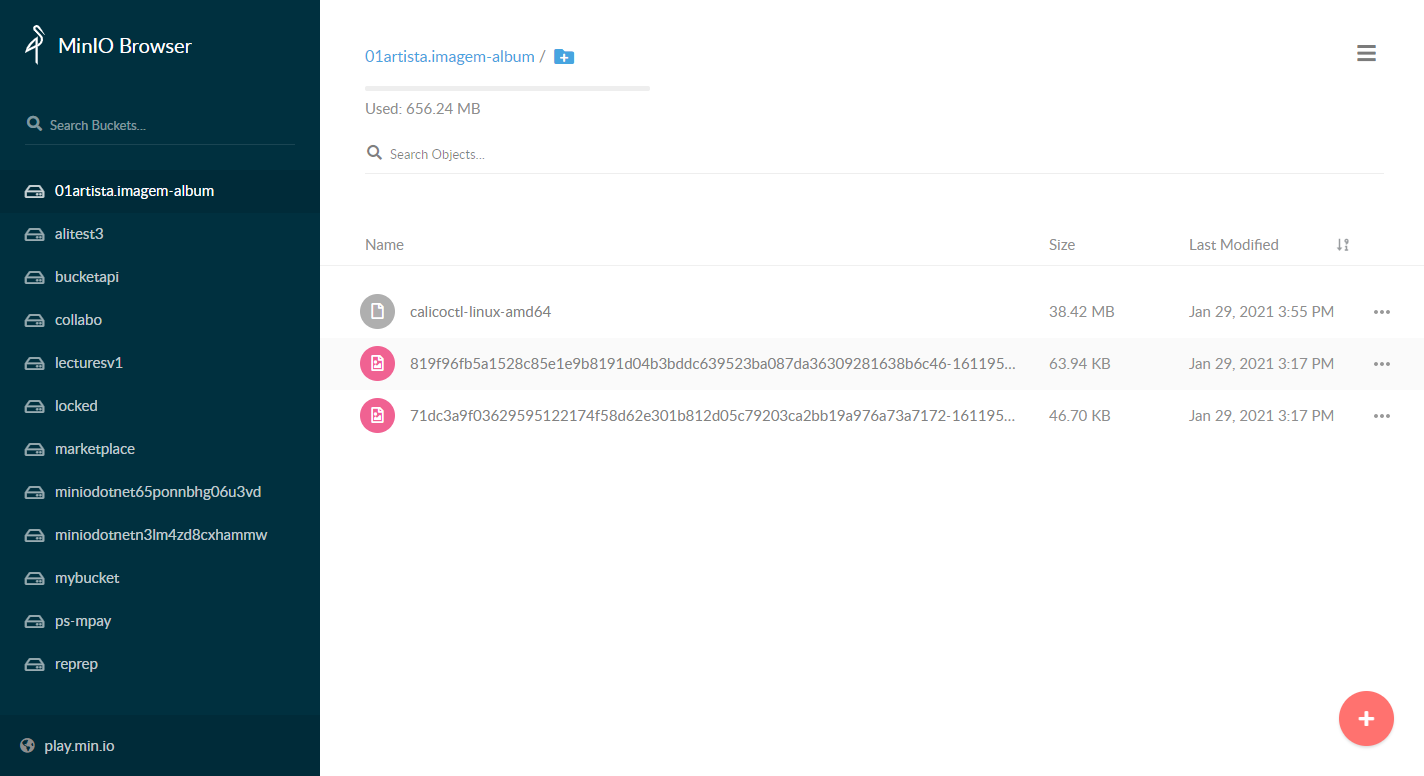
The MinIO Browser appears.
-
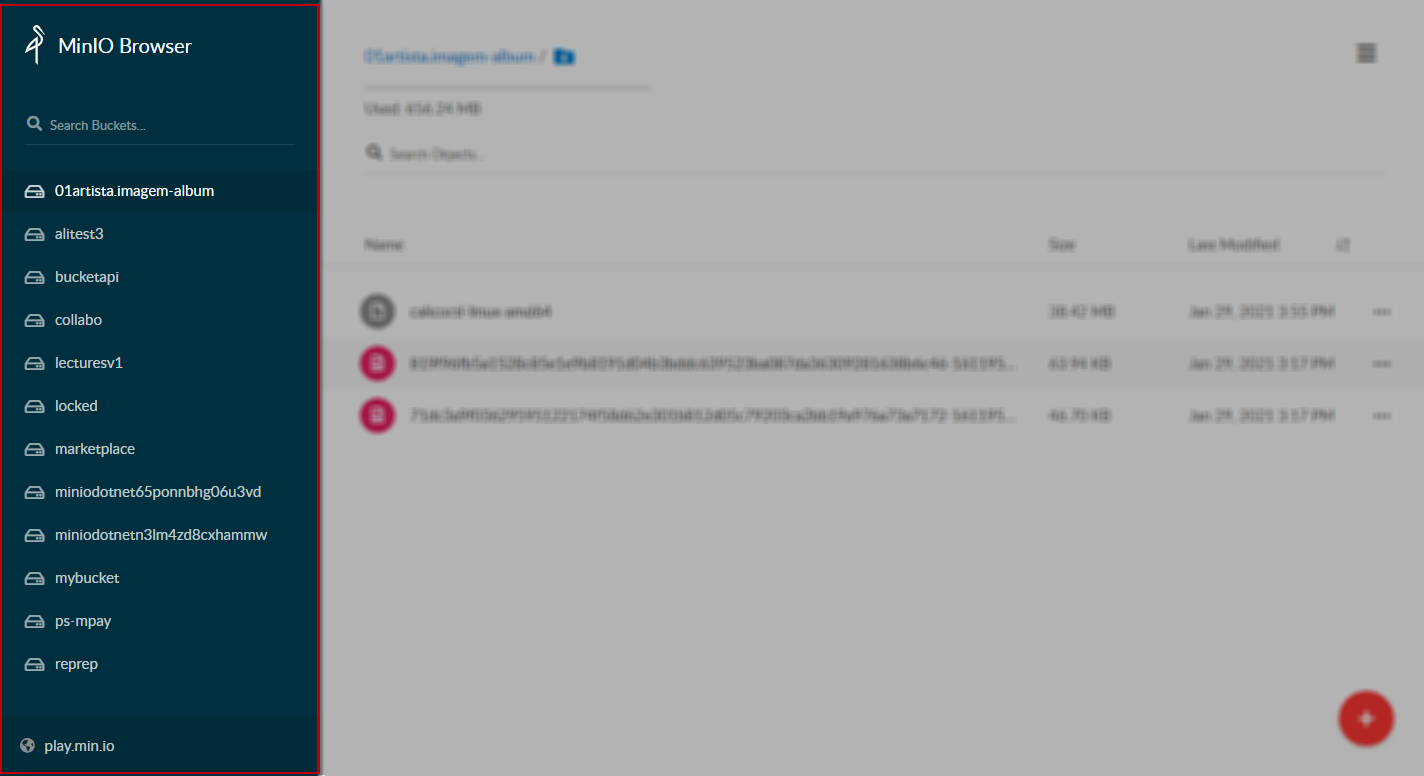
Buckets are listed on the left pane.
-
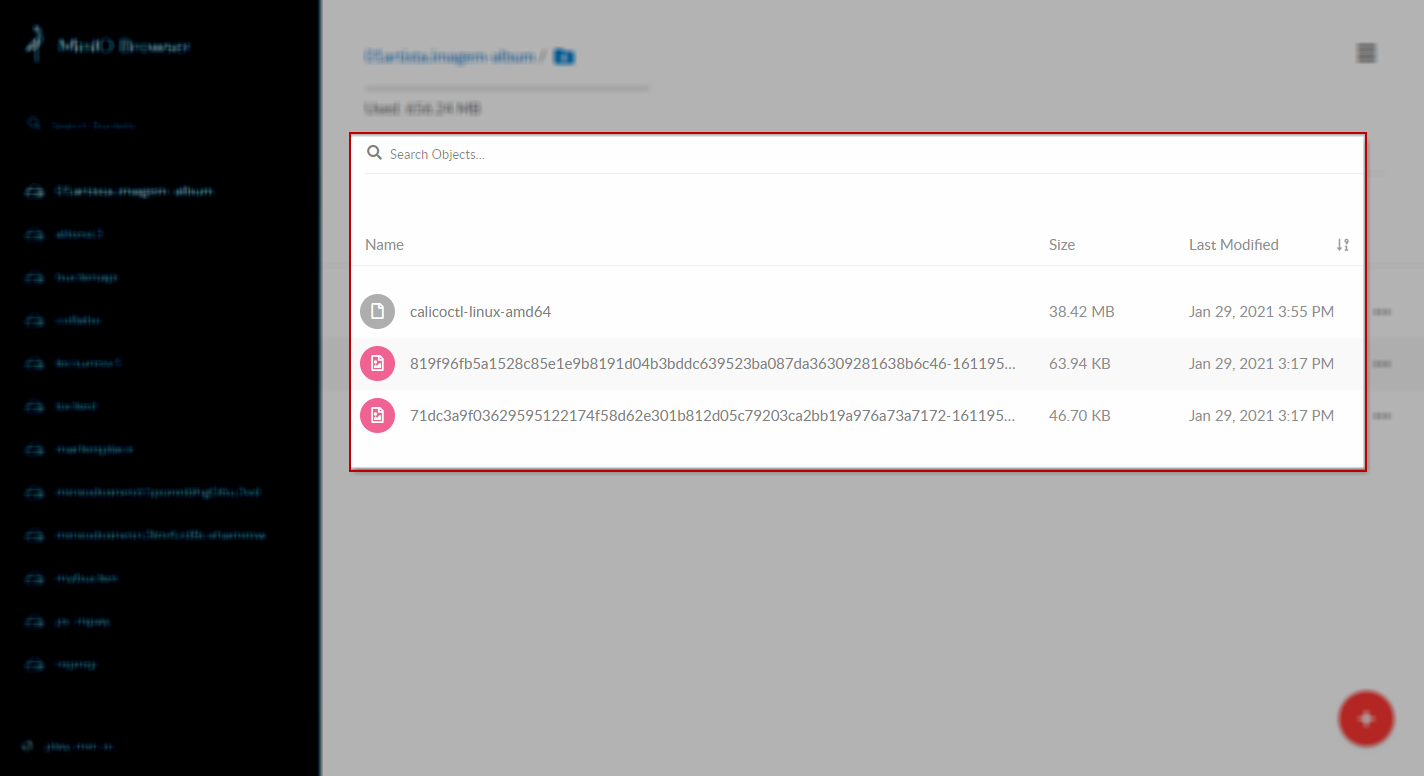
Objects are listed on the main pane.
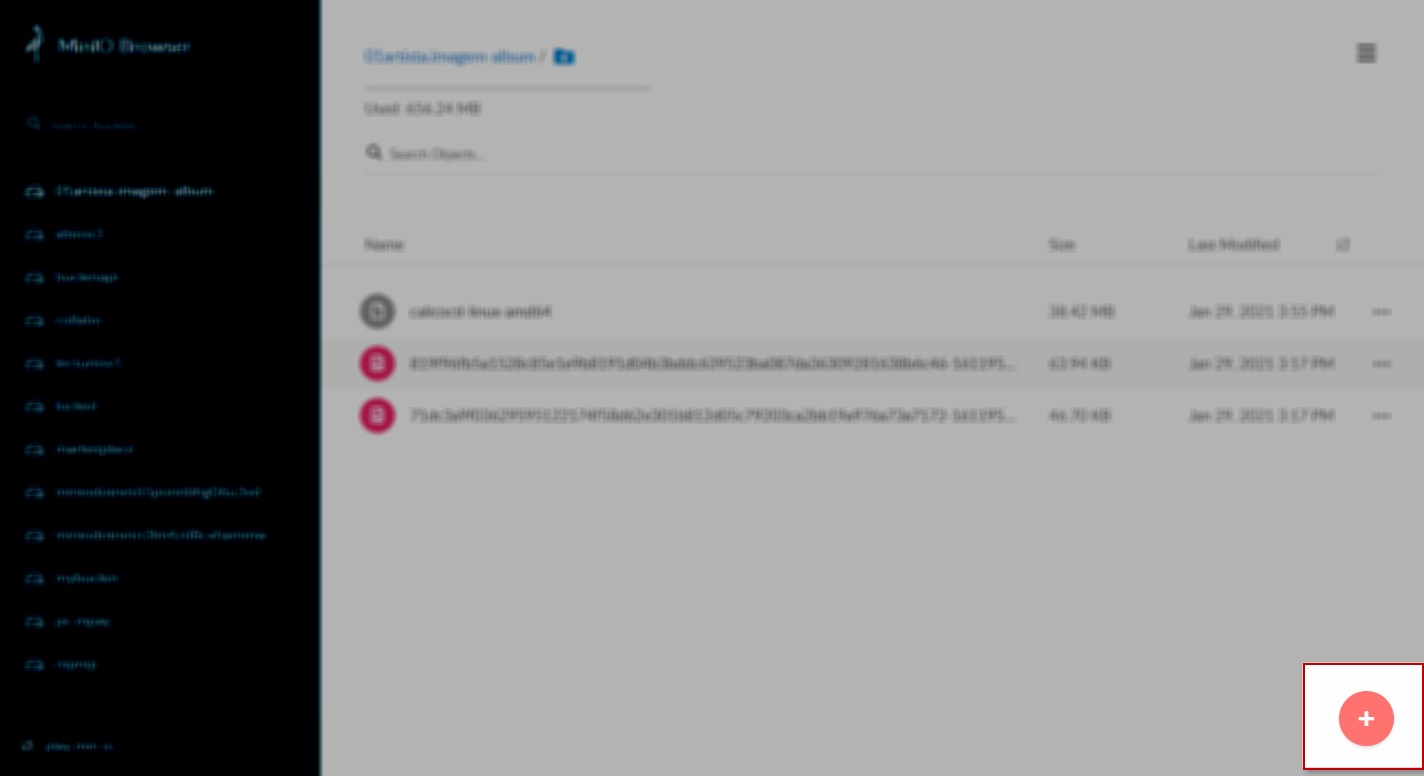
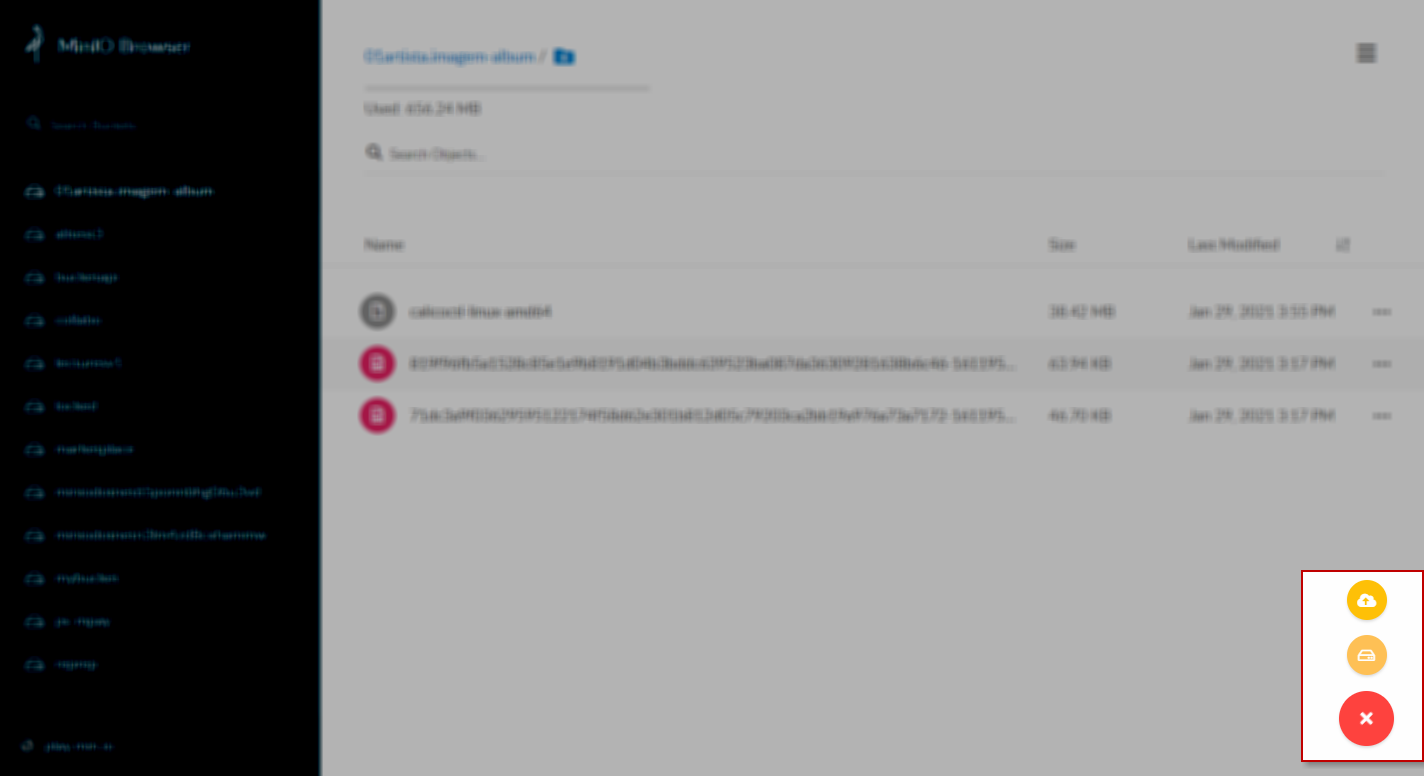
-
Click the + icon to display additional options to upload a file or create a bucket.
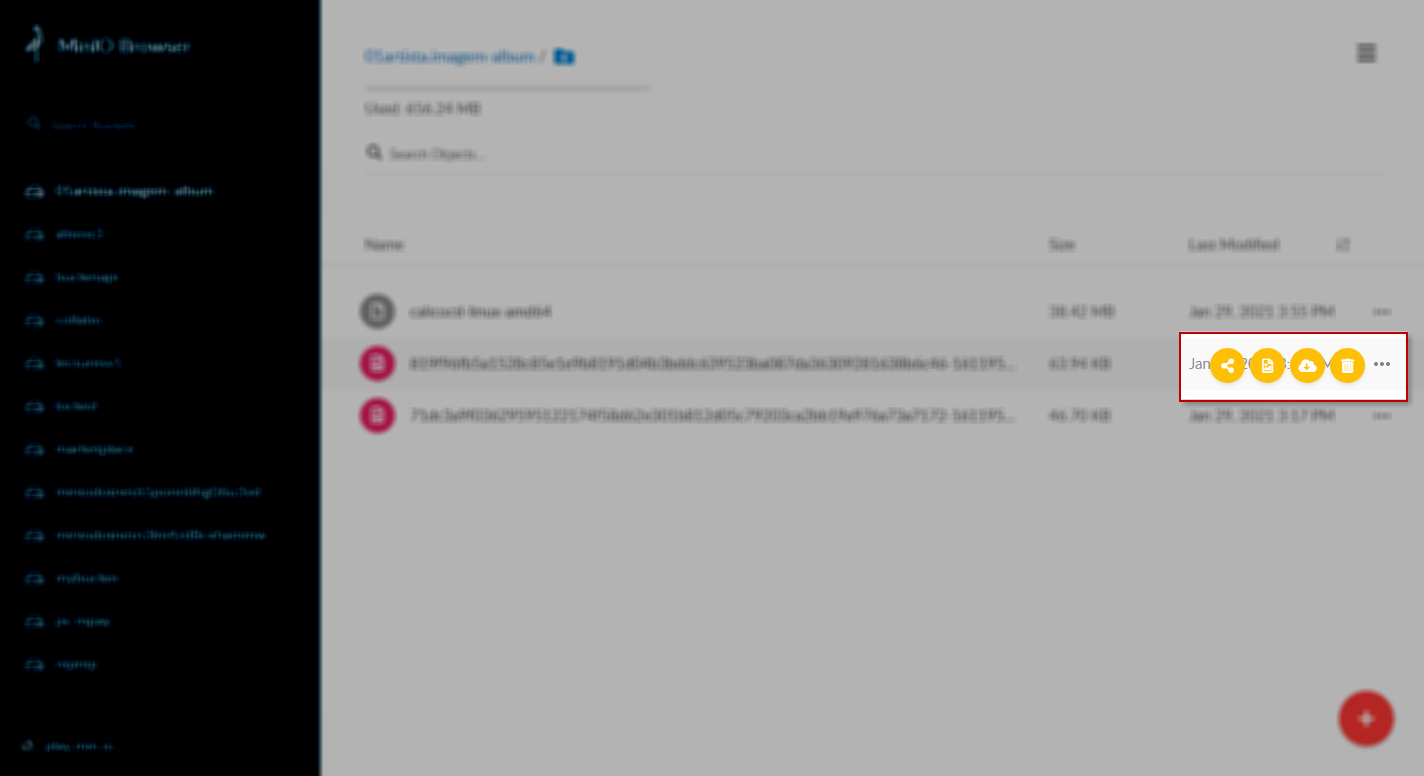
-
Click the ••• icon (located to the right of an object) to display additional options to share an object, preview an object, download an object, or delete an object.
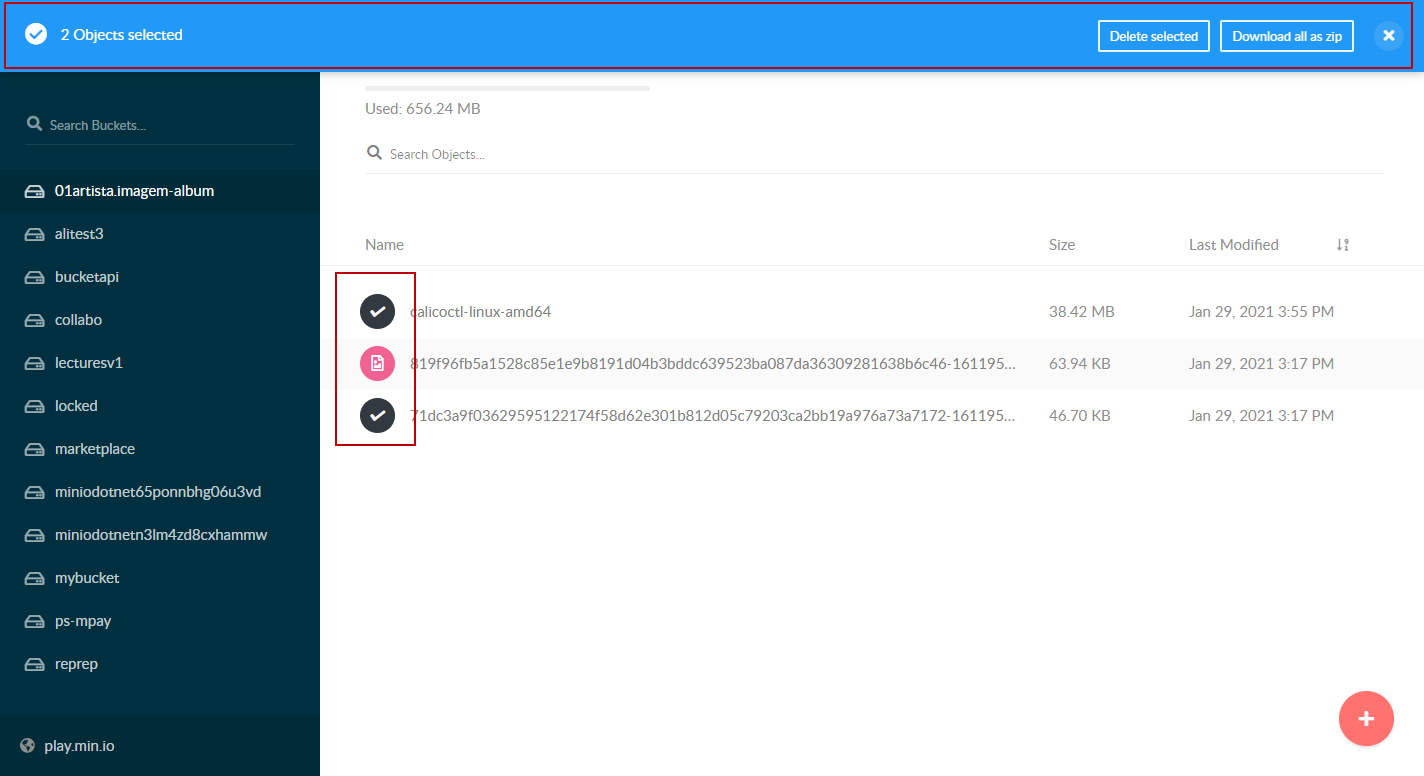
-
Click an object’s icon (located to the left of an object) to select it. A contextual menu appears at the top of the browser that allows you to delete the selected object, or download the selected object as a .zip file.
Note: You can multi-select objects.
-
Do the following to add the instance of the MinIO server as a storage destination for Storage Manager and allow StorNext the ability to use the MinIO server to store files as objects.
Note: You need the access key and the secret key used in the previous procedures.
Note: This procedure assumes the StorNext system is licensed for Storage Manager and you have a managed file system governed by storage policies you can point to the MinIO server.
-
Log in to the StorNext software GUI (see Accessing the StorNext GUI for additional information).
-
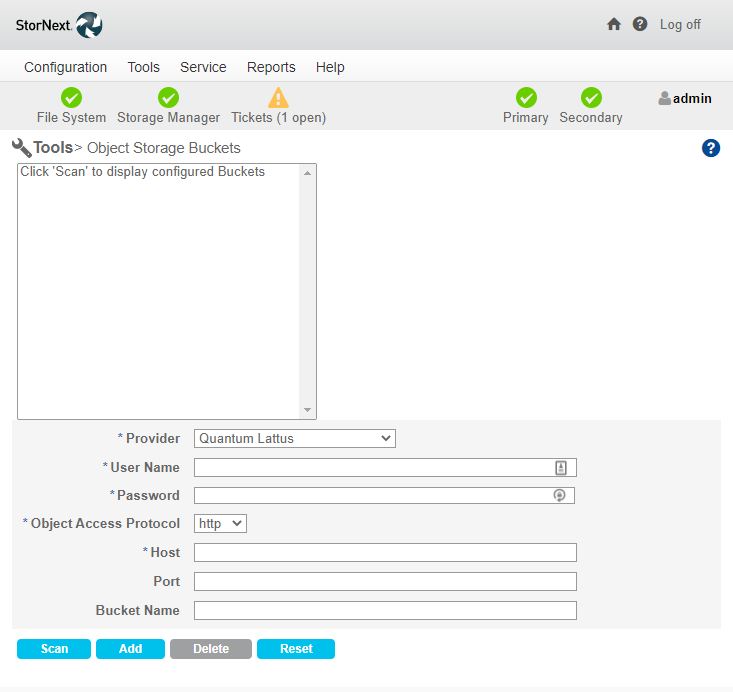
On the Tools menu, click Object Storage Buckets (see Tools > Object Storage Buckets for additional information). The Tools > Object Storage Buckets page appears.
-
On the Tools > Object Storage Buckets page, do the following to create a bucket:

-
In the Provider field, click S3 Compatible.
-
In the User Name field, enter the access key.
-
In the Password field, enter the secret key.
-
In the Object Access Protocol field, click http (or https if you are using the HTTPS protocol).
-
In the Host field, enter the host name or IP address of your MinIO instance.
Note: The host name or IP address must be reachable from the StorNext metadata controller.
-
In the Port field, enter the port MinIO is listening on. In this example, it is the default of 9000.
-
In the Bucket Name, enter any identifier for your bucket. In this example, it is fs1-minio.
-
Click Add. If the operation succeeds, you see the fs1-minio bucket in the list box
-
-
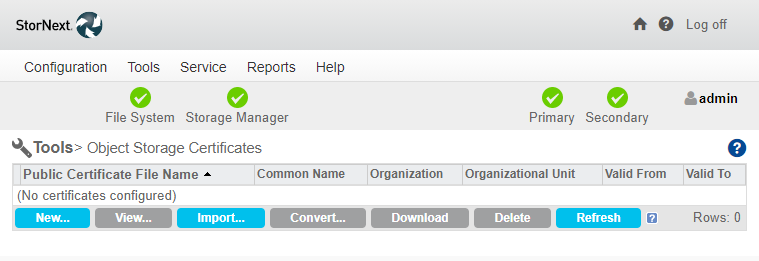
(Optional) If you use a TLS certificate with MinIO (for example, the HTTPS protocol), then install the certificate in StorNext. On the Tools menu, click Object Storage Certificates. The Tools > Object Storage Certificates page appears (see Tools > Object Storage Certificates for additional information).
-
Click Import…. The Import a Certificate dialog appears.
-
Click Choose File, and then select the certificate file (.pem) for the MinIO server.
-
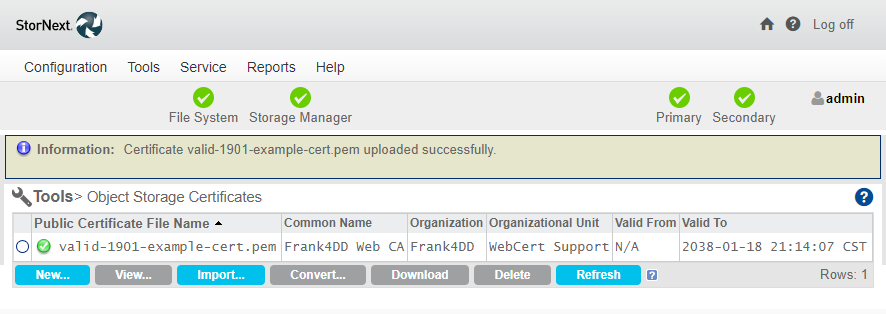
Click Open. If the import succeeds, the certificate appears on the Tools > Object Storage Certificates page.
-
-
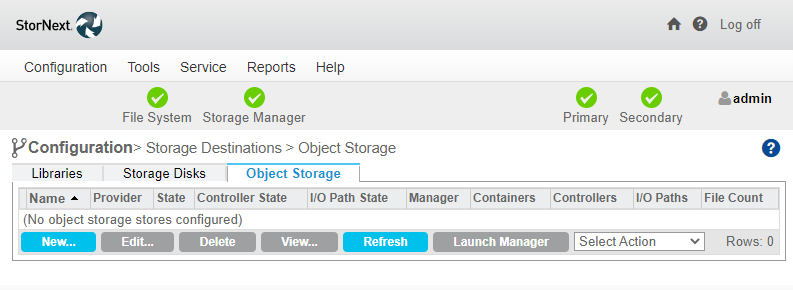
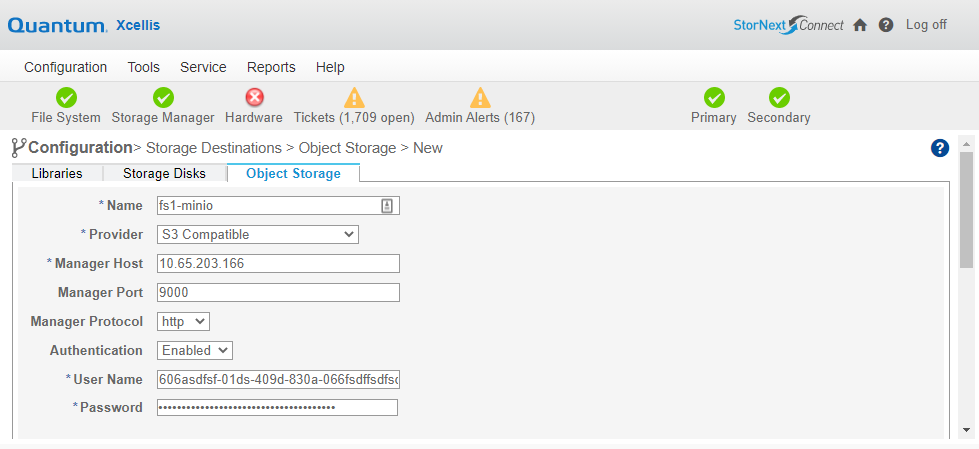
On the Configuration menu, click Object Storage. The Configuration > Object Storage page appears (see Configure Object Storage and Cloud Destinations for additional details).
-
Click New....
-
Complete the following general fields:
Field Description Name In this example, fs1-minio is used. Provider Click S3 Compatible. Manager Host Specifies the IP address of the host on which MinIO is installed. This is for management purposes, and not the data path itself. In this example, the 1 GbE link is used. Manager Port Specifies the port to use for MinIO. In this example, it is the default of 9000. Manager Protocol Click http (or https if you are using the HTTPS protocol). Authentication Click Enabled. User Name Enter the access key defined in Step 3a: Manage a User and Password. Password Enter the secret key defined in Step 3a: Manage a User and Password. -
In the Controllers section, click Add, and then enter c0 in the Name field.

-
In the I/O Paths section, click Add, and then enter p0 in the Name field, and then click c0 for the Controller Name. Also, complete the following fields:

Field Description Media Type Click S3COMPAT. URL Style Click PATH. Object Access Protocol Click http (or https if you are using the HTTPS protocol). Host[:Port] (Port Optional) Specify the IP address (including the port) on which the data transfers occur. It might be the same one you used for the Manager Host field, or a faster one, such as a 10/40/100 GbE interface. In this example, the same 1 GbE interface is used (for example, 10.65.203.166:9000).
-
In the Containers section, click Add, and then complete the following fields:
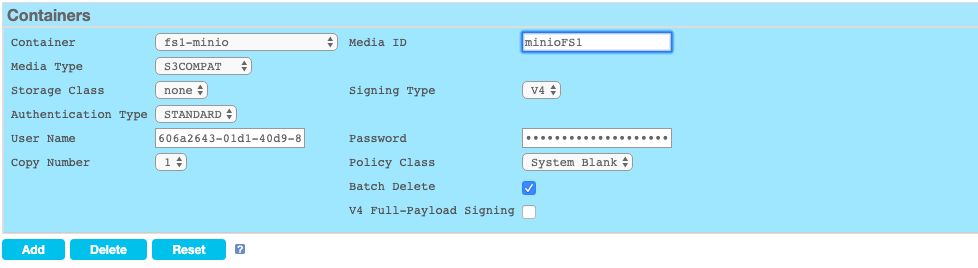
Field Description Container In this example, click fs1-minio. Media ID Enter minioFS1. Media Type Click S3COMPAT. Signing Type Click V4. User Name Enter the access key defined in Step 3a: Manage a User and Password. Password Enter the secret key defined in Step 3a: Manage a User and Password. Batch Delete Click to enable this option. -
Click Apply, and then click Yes. If the operation succeeds, then you can associate a storage policy with the S3COMPAT media type and begin to store files to MinIO (see Add a Storage Manager Policy for additional information on how to define a storage manager policy).
-
After an object is stored, using Storage Manager, into the fs1-minio bucket, the object is named using a UUID object file name.
To obtain the UUID of a file that is stored on MinIO, use the fsfileinfo -u (or -o) command. For example:
# fsfileinfo -u example.txt
-------------------------------------------------------------------------------
 File Information Report                       Tue Apr 14 14:04:28 2020
 Filename:    /stornext/FS1/minio/example.txt
 Stored Name: /stornext/FS1/minio/example.txt
-------------------------------------------------------------------------------
      Last Modification: 13-apr-2020 18:48:38
      Owner:             root               Location:        DISK AND ARCHIVE
      Group:             root               Existing Copies: 1
      Access:            664                Target Copies:   1
                                            Expired Copies:  0
      Target Stub:       0 (KB)             Existing Stub:   n/a
      File size:         18                 Store:           MINTIME
      Affinity:          n/a                Reloc:           MINTIME
      Class:             to_minio           Trunc:           MINTIME
      Alt Store Copy:    Disabled           Clean DB Info:   NO
      Media:      minioFS1(1)
      Checksum:   N
      Encryption: N
     Compression: N
      Object Ids: Y

      Object URLs(1):
        http://10.65.203.166:9000/fs1-minio/19EE60FE-94C8-485D-A334-916C0D96DDDA (S3COMPAT)

  Media        Namespace                              Copy Medtype Appliance
  --------     ---------                              ---- ------- ---------
  minioFS1     fs1-minio                              1    S3COMPAT fs1-minio

  Component          Protocol  IP Address           Port(s)  Provider  Medtype  Urlstyle
  --------------     --------  ---------------      -------  --------  -------  --------
  fs1-minio          http      10.65.203.166        9000     S3COMPATIBLE
    c0
      p0             http      10.65.203.166:9000                      S3COMPAT PATH
