 minute read
Checkout a Repository
Prerequisites
-
You must have an initialized repository (see Initialize a Repository).
-
You must have a registered repository (see Register an Initialized Repository).
You can perform a checkout process to download part or all of the contents of an existing repository. The contents are used to create a working directory that you can update, change, and commit.
Do the following to download the content of a repository to your local system.
Note: To perform this action, the owner of the file system directory must be a registered user (see Register an Initialized Repository).
-
Log in to the FlexSync Dashboard.
 Access the FlexSync Dashboard
Do the following to access your FlexSync dashboard.
Prerequisites
- You will need a FlexSync user account before you can create a replication task. See Step 4: Manage FlexSync Users.
- In order to access the FlexSync GUI, the appliance host name must be resolvable through a DNS name or IP address. If you use a DNS name, it must be resolvable on the DNS or it must have a local entry in the local appliance /etc/hosts file.
-
Access the StorNext User Interface (new UI introduced in StorNext 7.0.1).
-
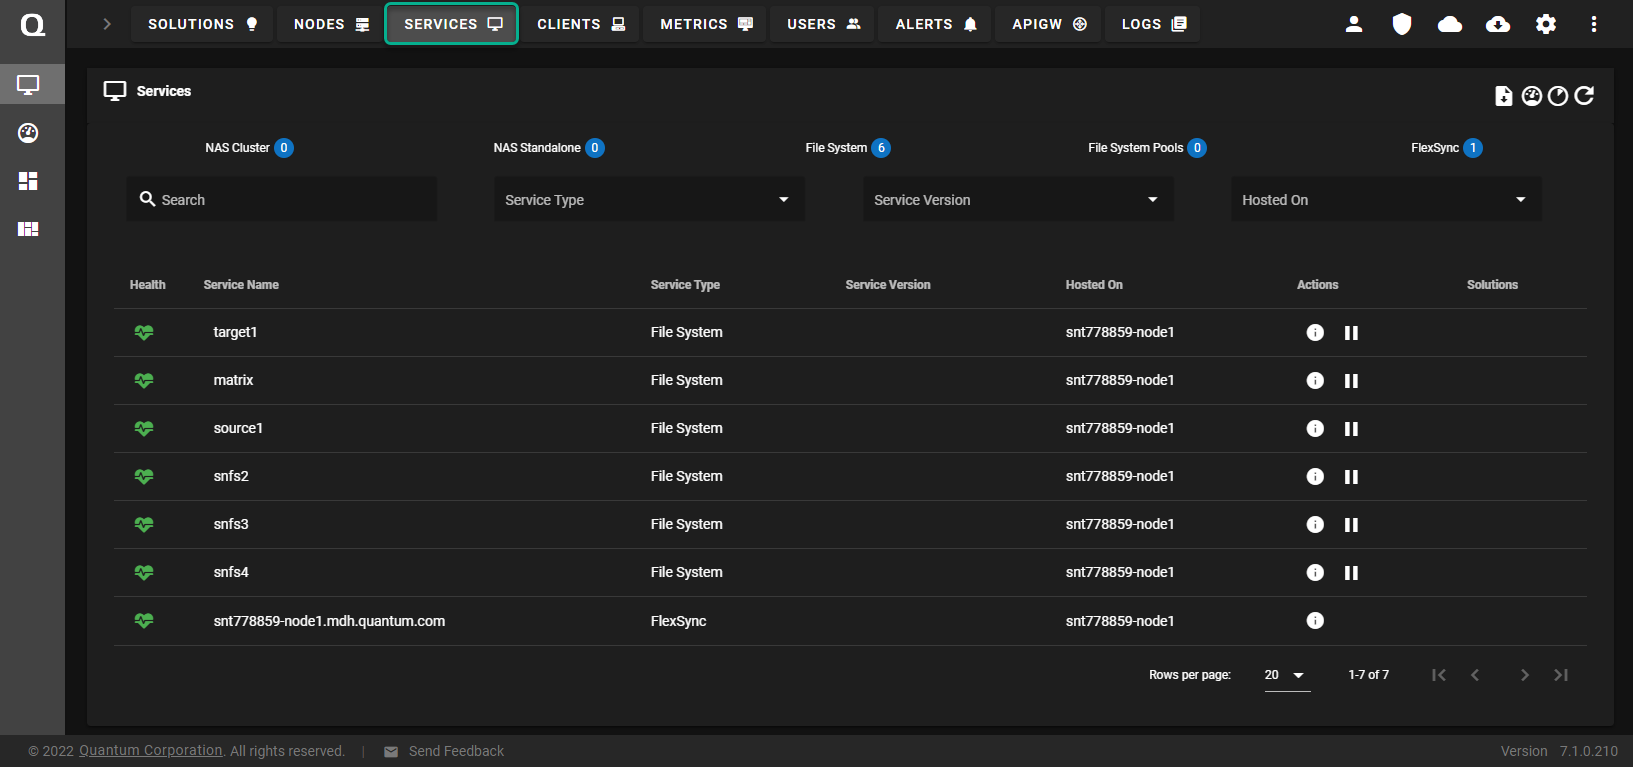
On the top navigation, click Services. The Services page appears.
-
Under the Service Name heading, click the service name that corresponds with your FlexSync service.
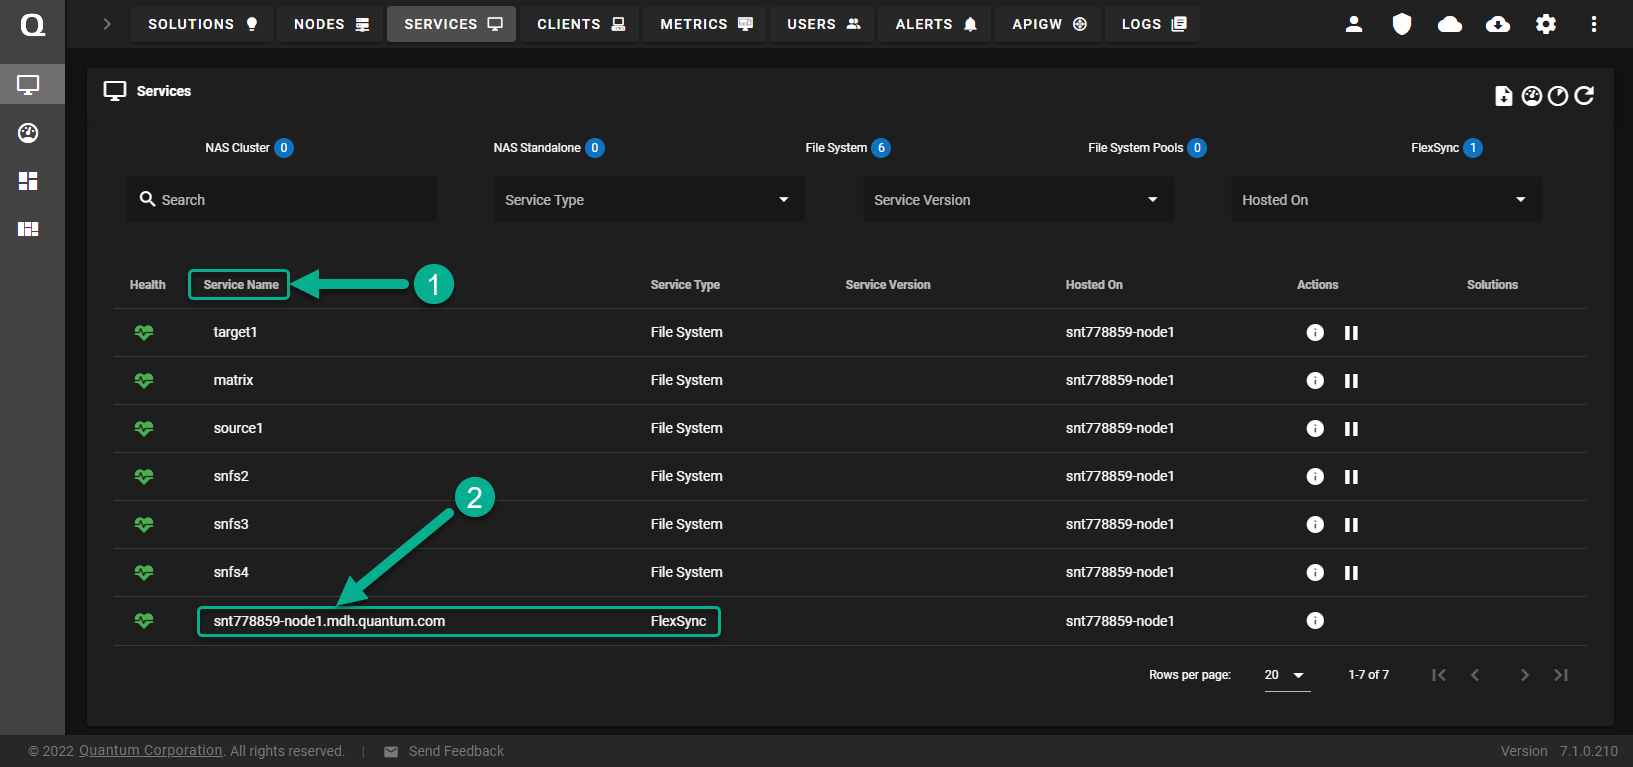
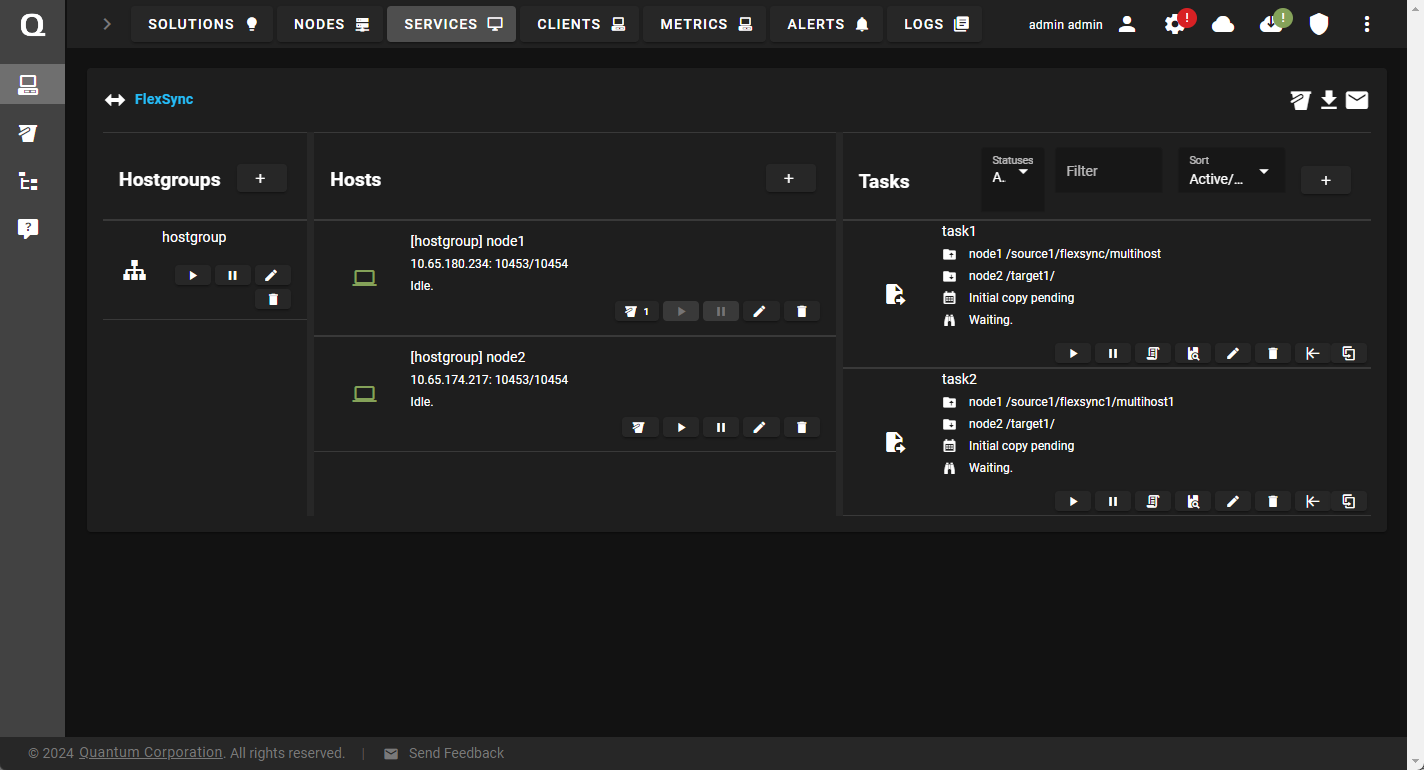
The FlexSync dashboard appears.
-
In the left navigation, click the File System Browser icon.
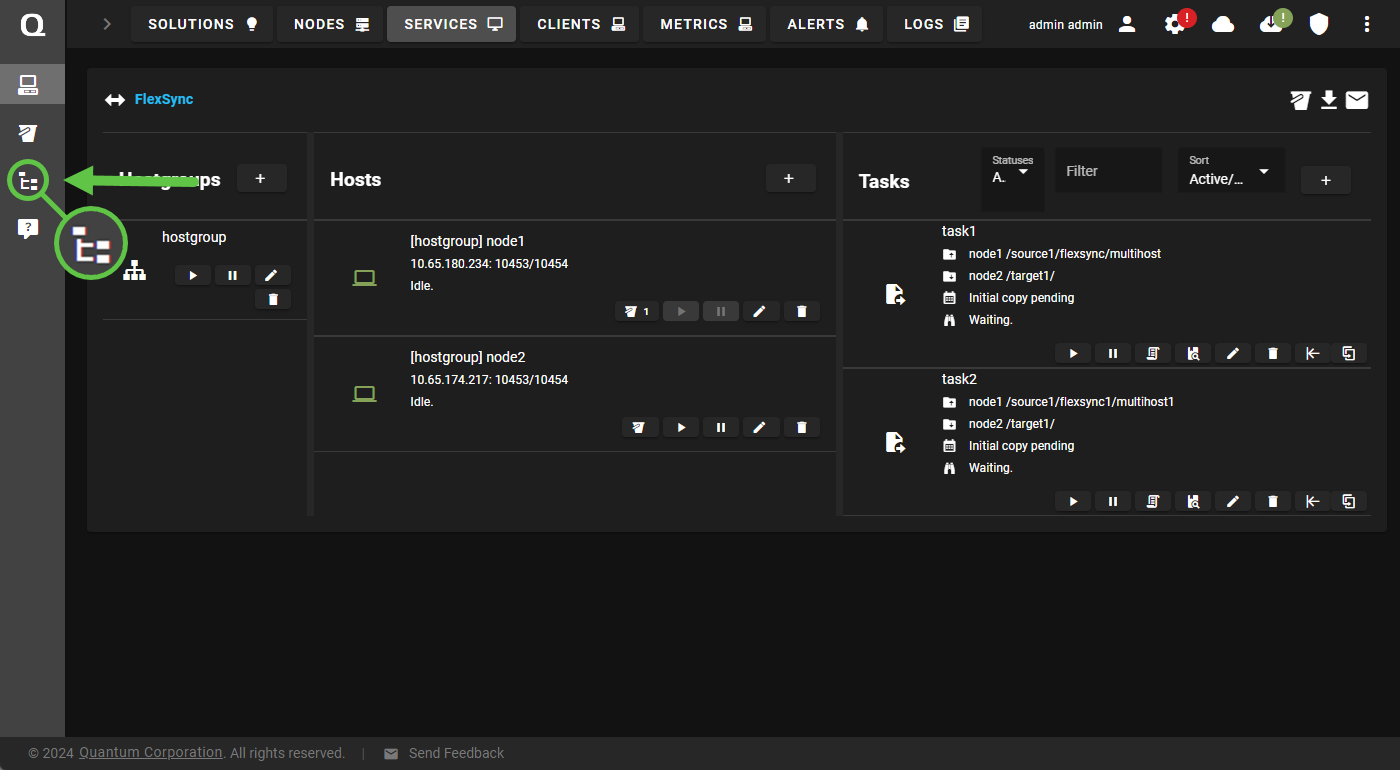
The File System Browser page appears.
-
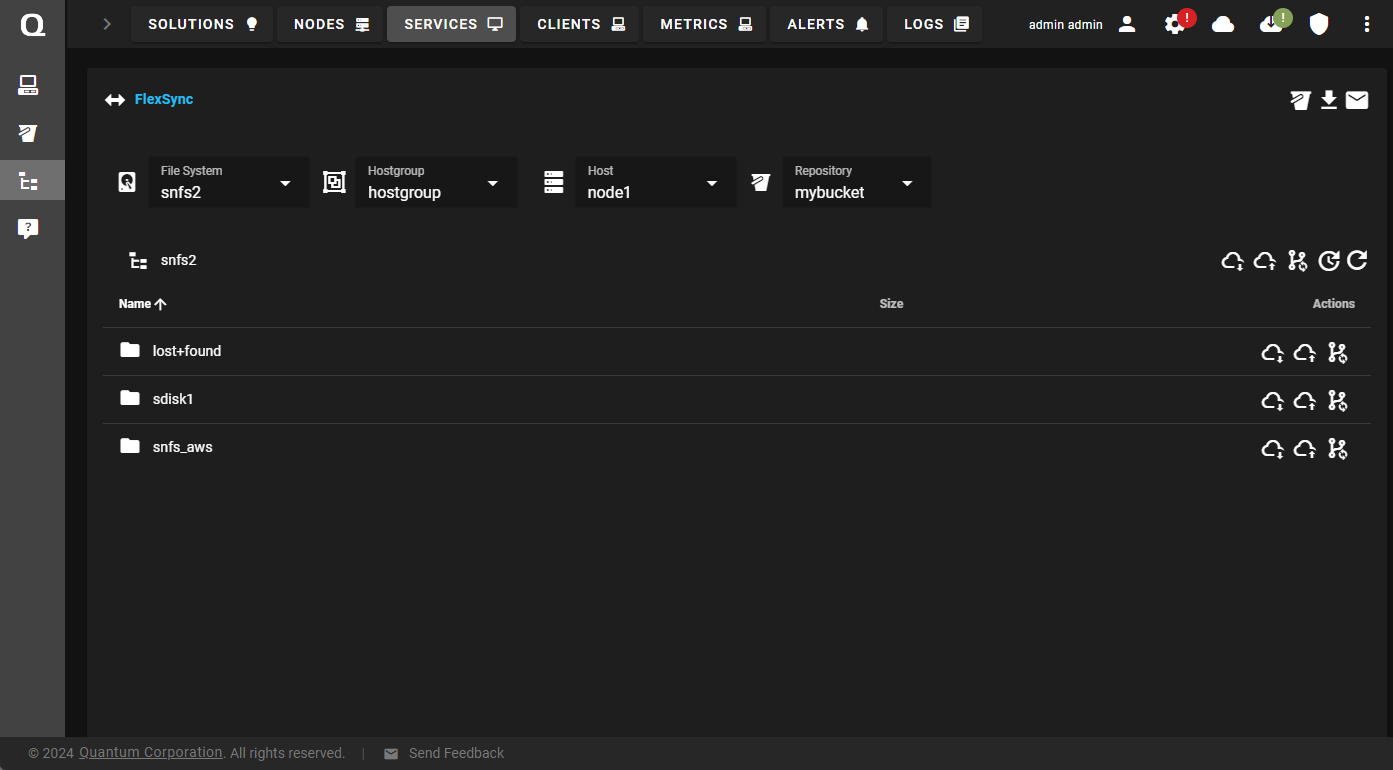
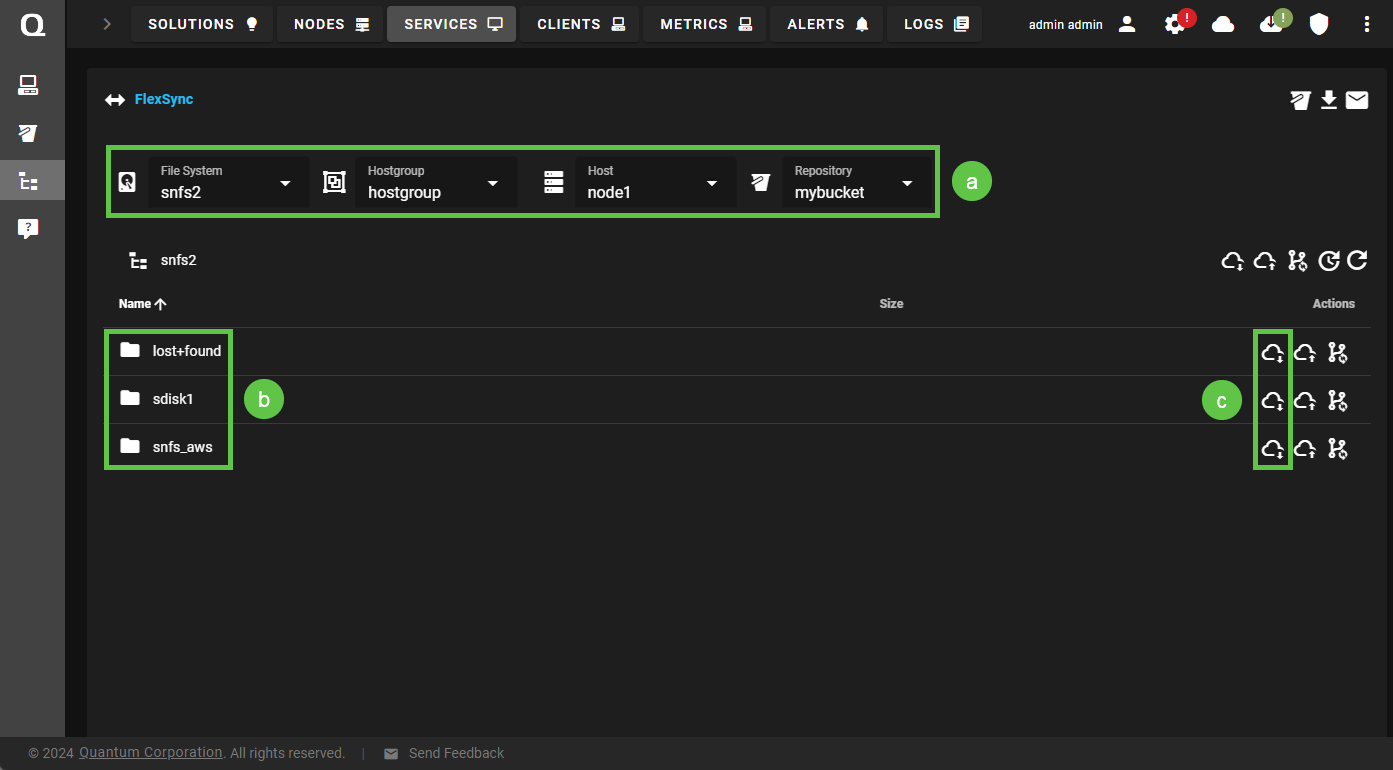
On the File System Browser page, do the following:
-
Select your file system, hostgroup, host, and repository.
-
You can checkout the contents of a repository to a directory that appears on the file browser page, or click a directory to display its sub-directories.
-
Click the Checkout to this folder icon.
Note: To checkout to the root folder of the file system, click the Checkout to root folder icon.
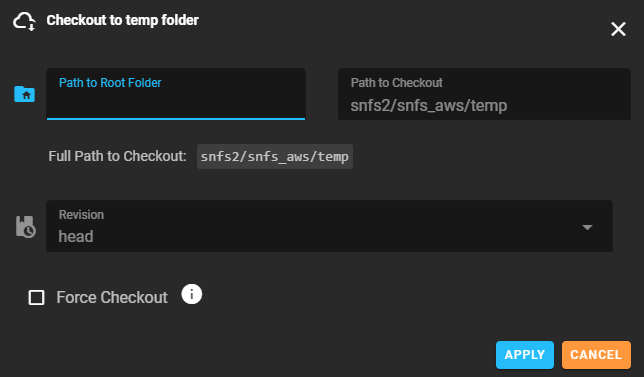
The Checkout to <name of folder> folder dialog appears.
-
-
In the Checkout to <name of folder> folder dialog, enter the path to your root folder in the Path to Root Folder field.
Note: If you want to checkout to an already existing directory, click Force Checkout and then specify the conflict resolution in the Conflict Resolution Mode field.
-
Click Apply. If successful, Checkout completed successfully appears on the page.

Revert a Checkout of a Repository
If you accidentally checkout a repository to a directory on your local workstation, then you can use the flexsyncadmin checkout <directory> --undo CLI command to revert the checkout. This option only deletes the FlexSync workspace information in the directory where you performed the checkout.
-
Any files created in the directory on your local workstation are not removed.
-
Any data synchronized to your S3 repository is not removed.
Caution: Before you perform this operation, you must not have an automated object task associated with the directory (see Delete a Task).
Note: You can only perform this process using the FlexSync CLI flexsyncadmin checkout <directory> --undo command. For complete details, see the FlexSync Man Pages Reference Guide.
