Licensing Your DXi V5000
Note: Adding license keys through the DXi GUI using the License Keys page, RestAPI or CLI commands is disabled for the DXi. That page is now read-only and displays all currently installed licenses in your system. If you try to add a license key using the License Keys page, the system returns an error message stating that the operation is not allowed.
This topic provides instructions for adding a license to your V5000. After following these processes, see V5000 Capacity Expansion to learn how you can manage expanding your system's storage capacity.
Following your V5000 initial installation as a Community Edition, you can purchase and download licenses to convert your system to a Licensed Subscription Edition.
| Features Enabled Upon Installation | Features Not Supported for V5000 |
|
|
|
Note: Cloud-based Analytics and Email Home are available ONLY upon purchasing licenses to enable Quantum Service and Support. |
|
Community Edition vs. Licensed Subscription Edition Installations
Your base configuration is DXi V5000 Community Edition.
-
This edition is free to use.
-
Ingest is perpetual. It does not expire. Your system has a maximum of 5 TB available for storage.
-
Quantum Service and Support are not included in the Community Edition. Community Edition customers can use the ForumV community forum to discuss and communicate about features and issues.
After installation and without reinstalling your DXi Software, you can purchase and install licenses to make your installation a Licensed Subscription Edition:
-
With the purchase and installation of applicable licenses, your storage can be expanded up to 256 TB.
-
Licenses are time-based, so for example, a one-year Ingest license.
-
Service features are enabled and Quantum Service and Support are available.
Register Your DXi V5000
Note: If you are only going to use the free Community Edition you do not need to take any steps to register your product. If you decide to purchase a license to get full access to Quantum Support, you will need to set your system's serial number before beginning the licensing process.
This section illustrates associating your unique DXi V5000 Serial Number with your V5000 Community Edition installation.
Note: Following your completion of the DXi Getting Started Wizard, you will have a working V5000 Community Edition system with an auto-generated, temporary serial number, easily identified with a prefix of NSN. This serial number cannot be used to purchase licenses.
Home Page with Temporary Serial Number

To set your serial number in the system:
-
Open your browser and access https://<management_ip>/licenses where <management_IP> is the IP address shown in the Status Information window on your VM Console Desktop and in the System Overview section of your DXi V5000 home page.
Example: As shown here you would enter https://10.40.161.181/licenses
-
Enter your DXi System Administrator's Username of admin and the Password you created when you configured your system, then click Login.
-
Type the Quantum Serial Number that you received in your Welcome email that contained your system download link.
-
Click Set to set your Serial Number in your system.
-
Click on Logout and Restart to restart your system.
-
Use your System Administrator credentials to access your V5000.

The DXi V5000 Licenses page is displayed.

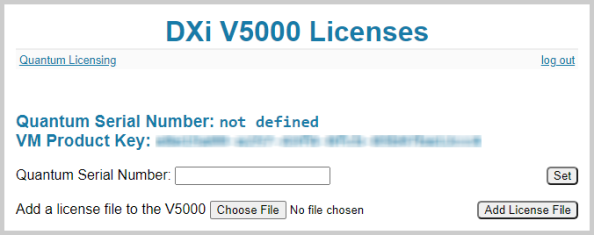
Note: Save your VM Product Key! Your system-assigned product key is unique and secure. In addition to your system Serial Number, the product key uniquely defines the single instance of your installation. You will need this key to register your system after you access your My Quantum page, which enables you to download purchased licenses.
Your DXi V5000 Licenses screen changes to display your Serial Number and now includes a message to Restart the V5000 VM now.
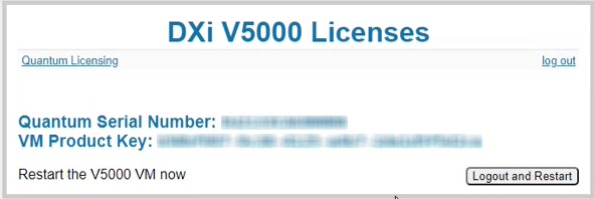
After reboot you will have to browse back to your DXi.
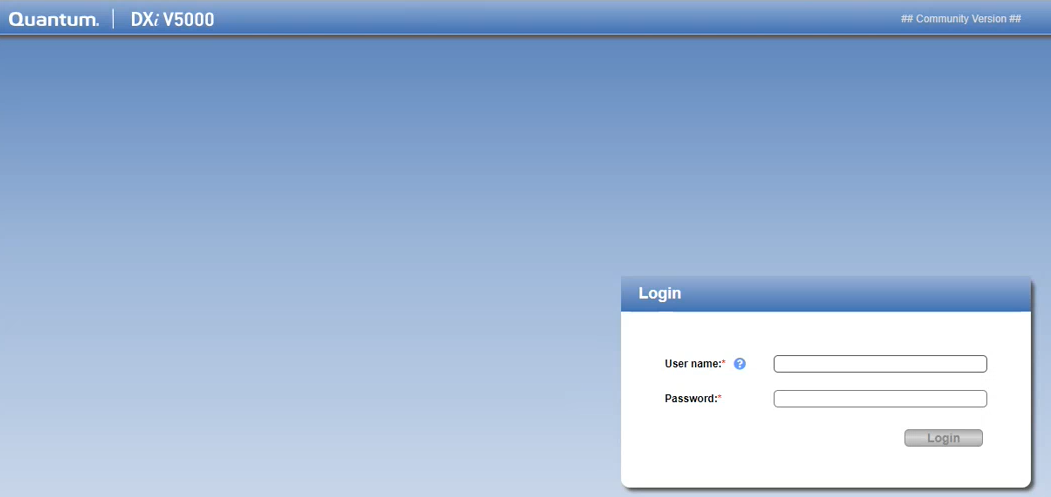
Your Serial Number now shows on your Home page.
Home Page with Quantum Serial Number

In this section you will sign up, then access your My Quantum page, which contains a list of your Quantum-registered systems, along with several useful tools and links to help you manage your system.
In 1. Set Your System's Serial Number, you logged on to your system using https://<management_ip>/licenses and this screen was displayed after you set your Quantum Serial Number.

Note: You will need VM Product Key assigned on this screen to complete this section.
-
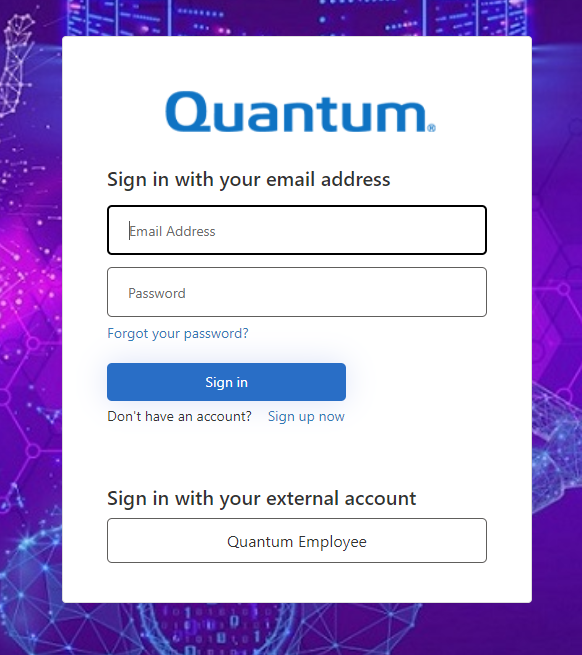
Click on Quantum Licensing in the top-left corner, which takes you to https://myservices.quantum.com.
Note: This URL will be changing to https://my.quantum.com.
-
Click on Sign up now.
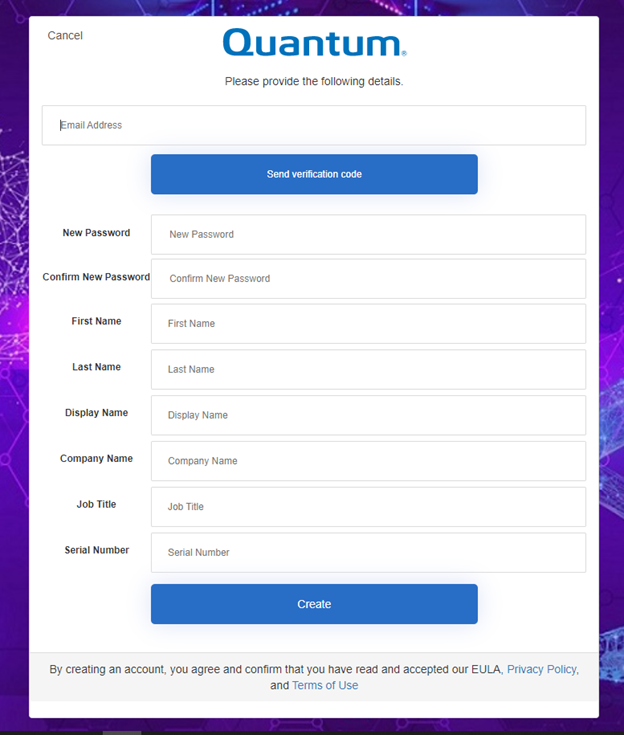
-
Enter your Email Address, then click on Send verification code.
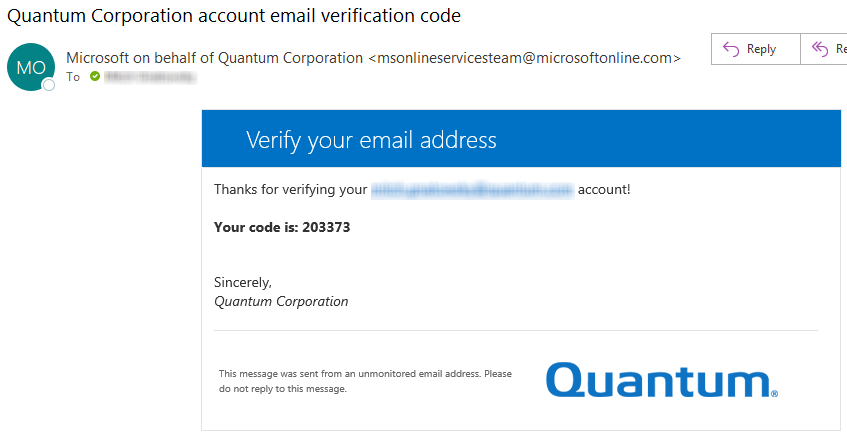
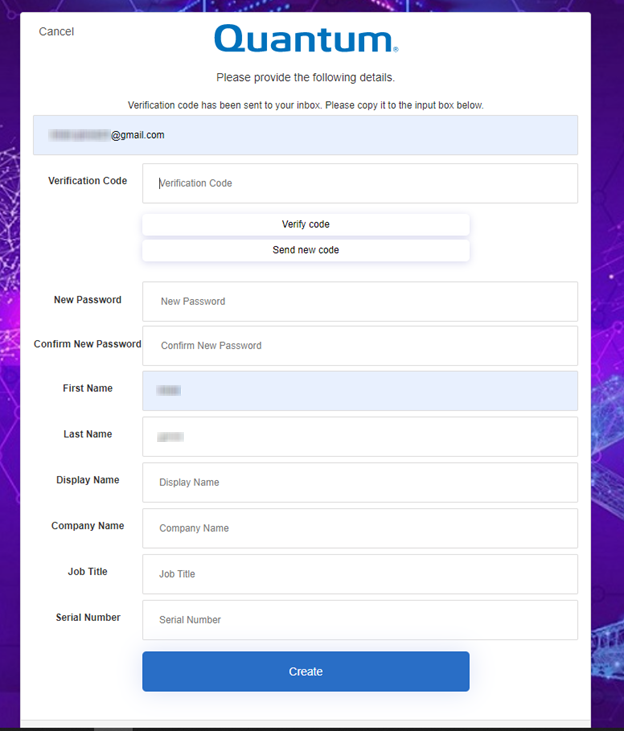
You will receive an email containing your verification code. Your registration screen changes to let you know the code has been sent and to enter it.
-
Enter the Verification Code, and then click Verify Code.
The screen changes to acknowledge that the code has verified your email.
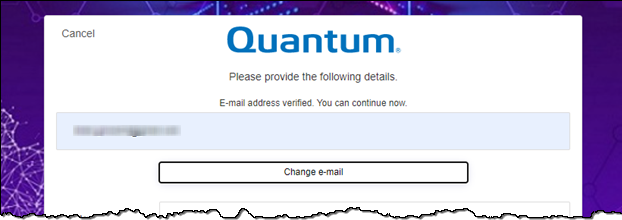
-
Complete the remaining information fields on the page and click on Create.
You are redirected to your My Quantum page.
IMPORTANT NOTES:
-
Passwords must meet all of the following requirements:Must be 8–32 characters long.Must contain at least 1 digit [0–9].Must contain at least 1 uppercase letter [A–Z].Must contain at least 1 lowercase letter [a–z].Must contain at least 1 non-alphanumerical character, for example, ‘+’ or ‘@’.
-
The Serial Number field will link your access to Service and Support pages.
-
Quantum Service supports your V5000 only if it is a Licensed Subscription Edition.
From the Home tab on the left, the My Assets section lists your registered Quantum devices. The example in the next step shows a number of installed V5000 Community Editions.
-
-
In the Action column in the row for the system to register with your Product Key, click on Pending Registration.
- In the V5000 Registration section, your system's Serial Number and the information you entered when registering to access your My Quantum page are pre-populated. Enter your Product Key and click on REGISTER.
- In the fields under Install to location, enter the physical information of your VM, then click Register.
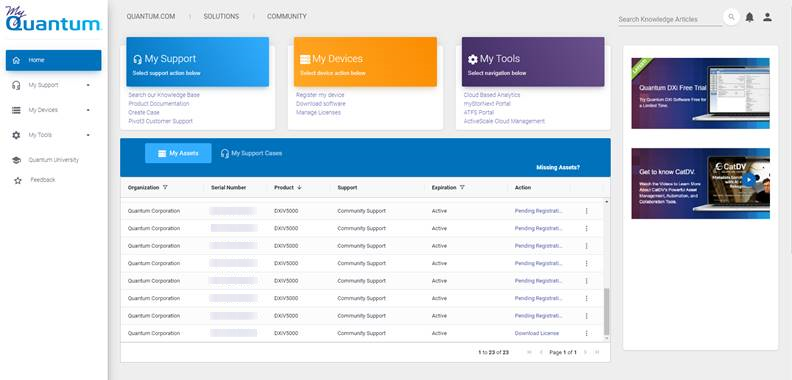
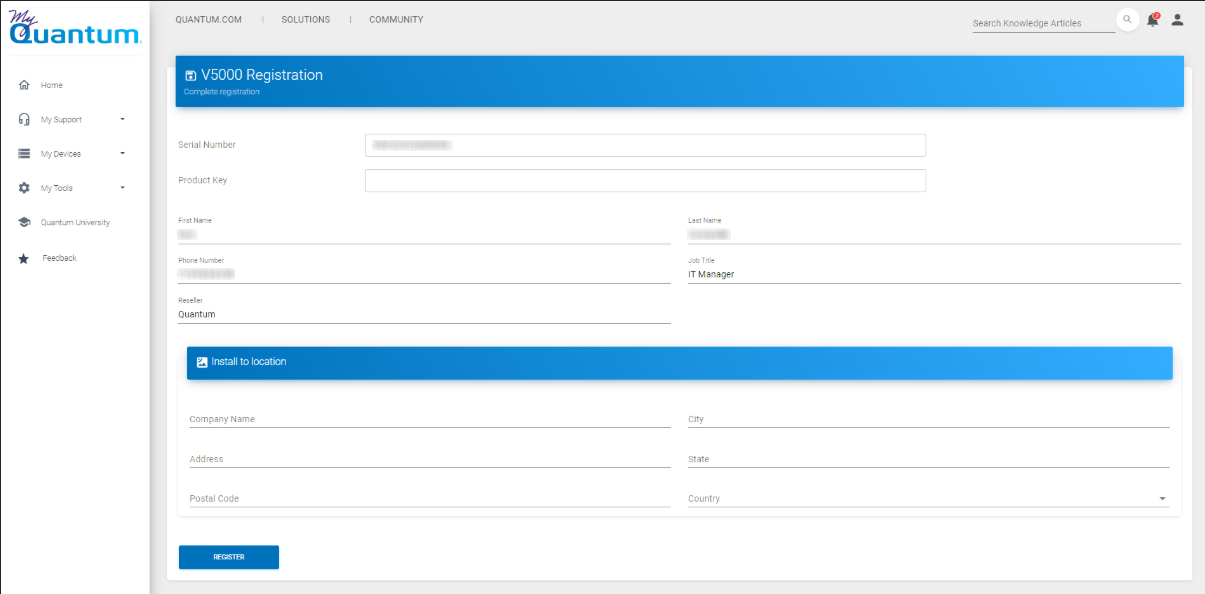
Your system is now fully registered on your My Quantum page.
Purchase, Download, and Install Licenses
Either contact Quantum Sales or from your fully installed V5000 Home page, below the left-side menu options, click on the Upgrade License button and complete the form at https://www.quantum.com/dxi-upgrade to purchase subscription licenses and service contract options for your V5000.
Use your My Quantum page to download Ingest and Capacity licenses for your V5000.
-
Click on the linked Serial Number for your registered systems and scroll down to the License section.
Your purchased licenses are available for download.
-
The Ingest license is used to control Ingest of data. It is a timed base license, so at expiration, Ingest and Replication features will be disabled. You can still access the data but it will be read-only.
-
The Ingest license has defined start and end dates.
-
You will receive admin notifications at 60, 45, 30, 14, and 7 days prior to your Ingest license expiration.
-
You must set the admin alert notification level to High in order to receive Ingest expiration admin alert email notifications.
-
Click DOWNLOAD LICENSE to download your available licenses to your local system's management computer, from which you will install licenses in your system.
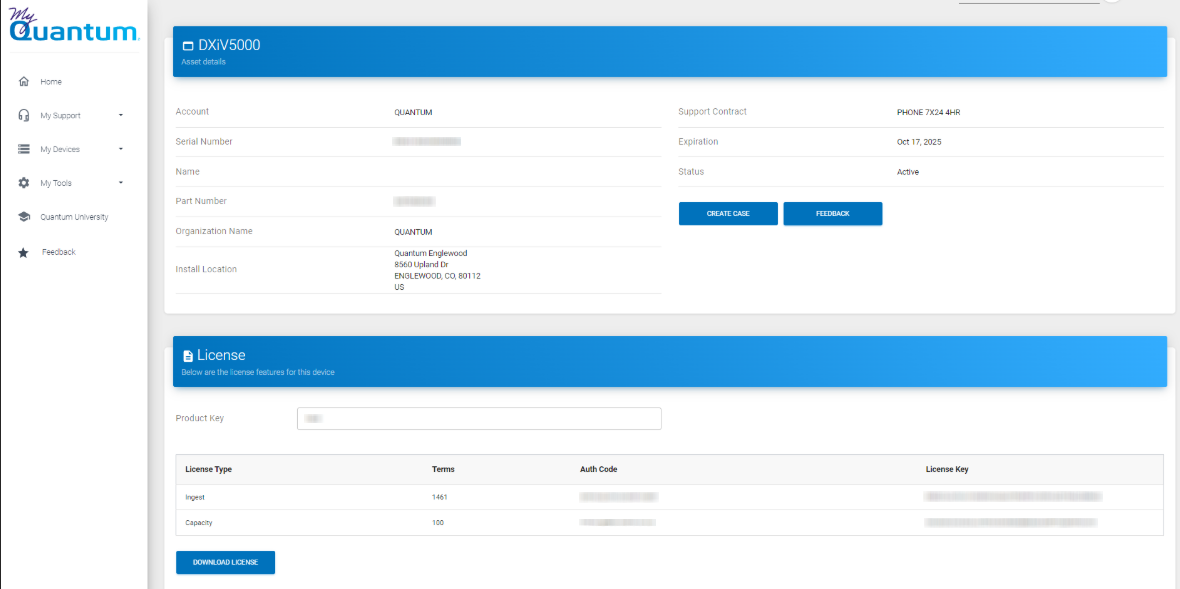
Note: As noted in V5000 Capacity Expansion, your initial license purchase and subscription to convert your system to a Licensed Subscription Editionrequires a minimum Capacity license for 5 TB. After that, you can buy storage capacity licenses in 1 TB increments, up to 256 TB.
Use the DXi V5000 Licenses screens to install your purchased and downloaded licenses.
-
Open a browser window and enter https://<management_IP>/licenses using the management IP address available in your VM desktop Console's Status Information window or in the System Overview section of your DXi V5000 home page.
For example, https://10.40.161.181/licenses
-
Enter your system's admin credentials and click Login.
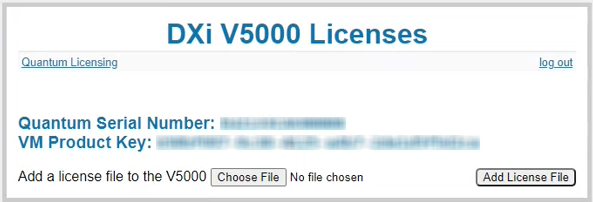
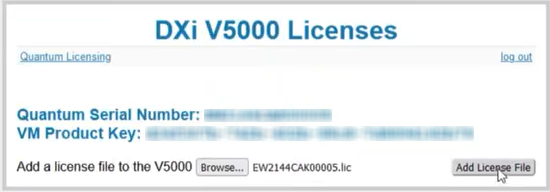
Click on Choose File and select your downloaded license file.
Note: Your downloaded license files will have your system's Serial Number as the prefix and a file extension of .lic.
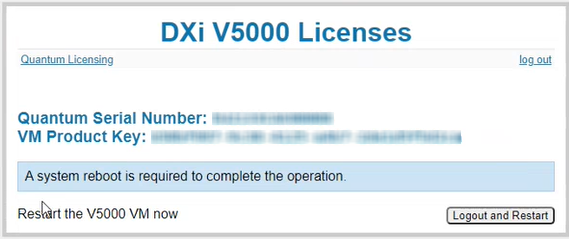
Your system needs to reboot for your system to recognize your installed license.
-
Click on Logout and Restart to restart your V5000.
Your VM reboot time depends on a few factors, including your network bandwidth and your system's existing storage capacity.
WHEN IS A SYSTEM RESTART REQUIRED?
The only times you are required to restart your system are when you:
-
Set the Serial Number for your system.
-
Upgrade from a Community Edition system to a Licensed Subscription Edition.
-
If you have purchased expanded storage.
Note: Renewing your time-based Ingest license does not require a system restart.
-
-
Return to your VM Console Desktop or your system's IP address and log on to your V5000.

The DXi V5000 Licenses login page is displayed.

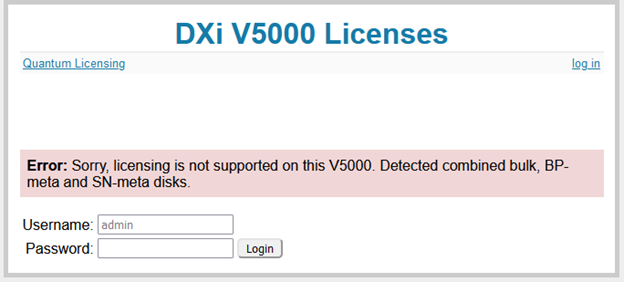
You cannot install licenses on V5000 systems configured with a Boot Disk and a single SCSI disk. After login, the following error message is displayed. You are welcome to install another V5000 VM with proper disk choices for your license. After that you can replicate data from this free Community Edition V5000 to the new one.
