|
|
Rack Mount Positions and Hole Types |

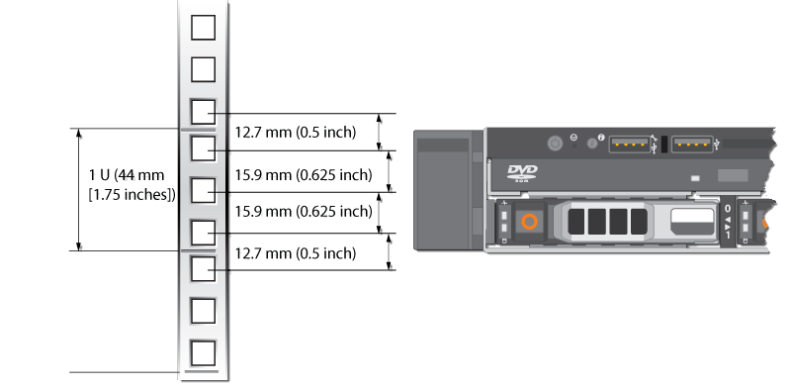
Before installing system components, locate the hole pattern in the rack rails to allow adequate Unit height (U) of vertical space.
Rack cabinets that meet EIA-310 standards have an alternating pattern of three holes per rack unit. For the front and back vertical rails, the center-to-center hole spacing begins at the top hole of a 1U space of 15.9 mm, 15.9 mm, and 12.7 mm (0.625 inch, 0.625 inch, and 0.5 inch).
Before installing the system components, you need to mark the rack and familiarize yourself with rack hole types.
- Place a mark (or tape) on the rack's front vertical rails
where you want to locate the bottom of the system component.
- The bottom of each 1U space is at the middle of the narrowest metal area between holes. This space is marked with a horizontal line on some rack cabinets.
- You will install the system components at the beginning of the hole pattern.
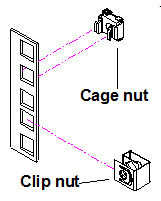
Square rack holes are the most common type of rack holes, although some racks contain round holes.
Square holes can accept either cage nuts that mount from the back of the rail, or clip nuts that clip on from the side of the rack rail. Cage and clip nuts are generally supplied with the rack.
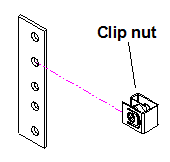
Round holes require clip nuts to accept the mounting hardware. Clip nuts are generally supplied with the rack.
Continue to Xcellis Foundation Rack Order for systems >>
OR
Continue to Xcellis Workflow Director Rack Configurations for
and systems >>
OR
Continue to Artico Rack Configurations for Artico systems >>
*Back to Hardware Installation Overview and Checklist *
