WebGUI
The WebGUI is a web-based graphical user interface. The WebGUI is the primary way you will interact with the library. All library operations can be performed through the WebGUI. You access the WebGUI by typing the library IP address into a web browser. All library communication will be redirected to use the HTTPS communication protocol for secure command and response communication between the browser and tape library.
The WebGUI browser automatically refreshes when you are logged in. Do not manually refresh the browser using the browser refresh button. Manually refreshing the browser will end your session and require you to login again.
Web Browser Support
The Scalar i6000 WebGUI supports the following web browsers. Quantum recommends upgrading to the latest version of the browser.
| Web Browser | Versions Supported |
|---|---|
| Internet Explorer | Not supported. |
| Google Chrome | Recommend latest version. |
| Mozilla Firefox | Recommend latest version. |
| Apple Safari | Recommend latest version. |
| Microsoft Edge | Recommend latest version.. |
Chrome Issue in macOS Catalina
Apple has introduced new requirements for SSL certificates to be accepted by macOS Catalina. The new requirements are documented at https://support.apple.com/en-us/HT210176.
This has caused issues with accessing the Scalar i6000 WebGUI in Chrome. If you experience issues, type "thisisunsafe" in the Chrome browser URL field. This will white list the Scalar i6000 library and allow access to the WebGUI.
WebGUI Login
To log on to the Scalar i6000 library WebGUI, enter the system IP address in a web browser. The login page will appear.
Enter your User Name and Password. Library users are created by the Admin User (see Scalar i6000 User Access).
Note: Do not use the same browser with to log in as different users in multiple browser tabs. You MUST sign off in order to log in as a different user, or use a different browser. Alternatively, you can use two different browsers to sign as different users. For example, User #1 can log into a Fireforx browser, and User #2 can log into a Chrome browser.
Navigating the WebGUI
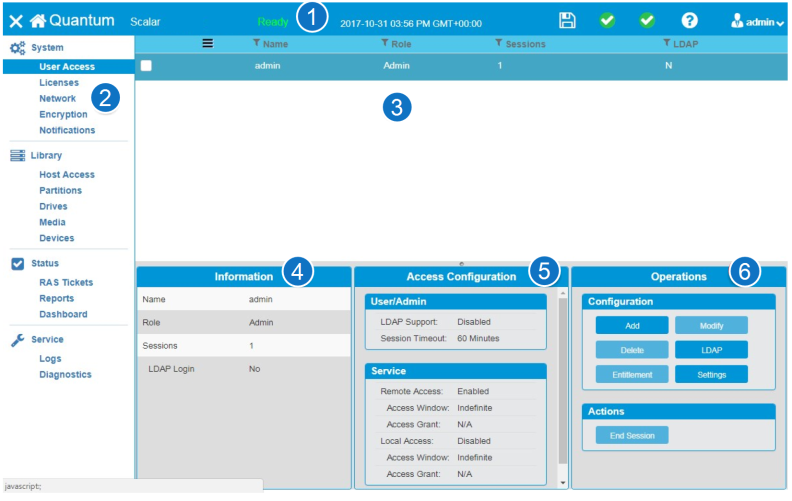
| Item | Name | Description |
|---|---|---|
|
1 |
Header | Provides visual indications of library status and quick access to frequently used functions. |
| 2 | Menu | Allows you to select the main functional areas within the library. The menu is in the order you would use to configure your library the first time. |
| 3 | North Panel | Displays the choices available for each menu selection. Select an item in the north panel by selecting the item’s checkbox. This may change your available options in the operations panel. If you click on another item in the north panel while a checkbox is selected, the item will be highlighted and the information panel and the center panel will change to reflect the highlighted item. The operations panel, however, will reflect the checked item. |
| 4 | Information Panel | Displays contextual information based on what is highlighted in the north panel. |
| 5 | Center Panel | Displays information based on the selection highlighted in the north panel. If there is graphical information for the highlighted selection it will appear in this panel. |
| 6 | Operations Panel | Allows you to make changes to the library and perform procedures. The changes and procedures are dependent on what is selected in the north panel. |

| Item | Name | Description |
|---|---|---|
| 1 | Hide/Show Menu | Hides or shows the menu |
|
2 |
Library Type | Displays the type of library |
| 3 | Library Name | Displays the name of the library |
| 4 | Ready Status |
Displays the library’s ready status. There are four states of ready:
It is important to note that this status indicates the library physical/robotic ready status, not the logical partition ready status. For example, after a library reboot, drives in a partition may be in an initialization status after the library is in a physical ready state. During this drive initialization, the library and drives would not be available to the host application, even though the library physical/robotic state indicates Ready. |
| 5 | Date/Time | Displays the date and time |
| 6 | Current Configuration | Indicates whether the current configuration is saved |
| 7 | Device Status | Displays the status of library devices, such as the robot, the I/E area and storage |
| 8 | System Status | Displays the number of RAS tickets and the severity of the most severe ticket |
| 9 | Help | Allows you to access library help |
| 10 | Current User |
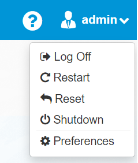
Displays the user name and the role of the person logged in to the library. Allows you to log off, restart, reset, shut down, and access preferences.
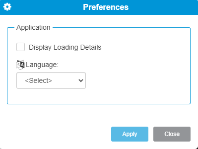
Log Off Logs the current user out of an active session and prevents further user requests until a new user login session is re-established. Restart Initiates a library reboot operation. Robot(s) will be parked and all library processors and drives will restart operation and re-initialize operation. Any drive data path operations or library control path operations will be interrupted and restarted. If the robot is varied off before the restart occurs, it will be automatically varied back on after a restart of the library. Reset Initiates a library reboot operation, but does not reboot drives (drive sleds and tape drives). The library will restart and initialize, while drive data path operations remain functional and allow for drive I/O to continue. Library control paths will remain active, but report SCSI Sense Data 2/0401, Not Ready, and Becoming Ready, until the library is re-initialized and becomes fully operational again. A reset can interfere with drive operations if the library is configured to install a newly loaded, not activated library firmware version upon the next library initialization sequence. Shutdown Shuts down library controller operations and will power off all library processors, including drives and robots. Note: If the shutdown library is unplugged from power, the library will automatically restart once power is reapplied. Preferences Provides a user with a configuration option (Display Loading Details) to view library interface calls and progress status display for any WebGUI command request. Depending on the product and model, a language preference may also be chosen such that WebGUI information displays menus and dialogs in the selected language.
|

The north panel displays the choices available for each menu selection. Select an item in the north panel by selecting the item’s checkbox. This may change your available options in the operations panel. If you click on another item in the north panel while a checkbox is selected, the item will be highlighted and the information panel and the center panel will change to reflect the highlighted item. The operations panel, however, will reflect the checked item.
| Item | Name | Description |
|---|---|---|
|
1 |
Column Selection Navicon | Clicking this navicon opens a dialog box where you can select the columns you want to display in the north panel. |
| 2 | Filter Symbol |
Clicking the filter symbol allows you to filter the rows in the north panel based on the column. Please note the filter for each column is to the left of the column name. In the example shown, clicking the filter symbol would allow you to filter the north panel rows by Role.
|
Sorting North Panel Columns
To sort columns in the North Panel, hover over the column header text and click.
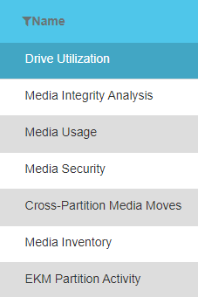
Once you click the column header text, a small triangle pointer will appear and the column will sort the information in the column in ascending order.
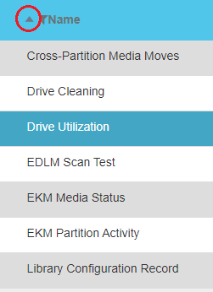
To sort the column in descending order, hover over the column header text and once again click.
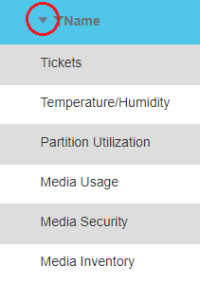
Additional Information
-
When a WebGUI page initially loads North Panel data is unsorted.
-
You can only sort data in the North Panel one column at a time.
-
If a North Panel column is sortable the mouse pointer changes to finger pointer when you hover over the column header text. If a column is not sortable the mouse pointer remains the same.
-
Sorting and filtering reset after a WebGUI page reloads.
| Name | Description |
|---|---|
| Operations Panel Buttons |
This is where you make changes to the library and perform procedures. The changes and procedures are dependent on what is selected in the north panel. Note that some buttons have an ellipse - the three dots to the right - and some don’t. Buttons without an ellipse will cause an immediate action when pressed. For instance, if you press the Offline button, you will take the partition selected in the north panel offline immediately. If you press a button with an ellipse, another dialog window will open that will allow you to make selections before you take an action. If you hover your cursor over an inactive button, a popup will appear that will tell you why the button is inactive. |
