Configuring EMC NetWorker for PTT
To use EMC NetWorker with the DXi Backup Application Specific Path to Tape (PTT) feature, you must configure the backup application, as follows:
Note: EMC NetWorker 8.1 and later are not supported for Backup Application Specific Path to Tape.
Prerequisites
Do the following before configuring EMC NetWorker for PTT
- Install and configure the DXi for Backup Application Specific Path to Tape. See Configuring the DXi For Path to Tape.
- Ensure that you have the required licenses.
 Required Licenses
- Backup Application Specific Path to Tape license on the DXi
A separate license is required on DXi systems to support Backup Application Specific Path to Tape. The Backup Application Specific license is pre-installed on all DXi6700, DXi6800, and DXi8500 systems.
- Autochanger license for the physical tape library (PTL) based on the number of cartridge slots
- One license for each logical shared drive in the DXi
Example
A PTL with two physical drives requires the following:
- Two digital data storage (DDS) licenses to share the two physical Network Data Management Protocol (NDMP) drives.
- Two DDS licenses to share the two virtual tape library (VTL) NDMP drives.
- Storage Node License
- EMC's license to perform basic backups to the DXi in VTL mode
Contact EMC for license specific license information.
- Backup Application Specific Path to Tape license on the DXi
Before configuring the NDMP storage node, you must configure the SCSI storage node paths to both the VTL and the PTL.
- From the NetWorker Administration console, right-click on the SCSI storage node and select Scan for Devices to display the Scan for Devices dialog box.
- In the device list, make sure that the device is the VTL and PTL are selected.
- For the Device Scan Type option, select scsi.
- Click the Start Scan button to scan the VTL and PTL.
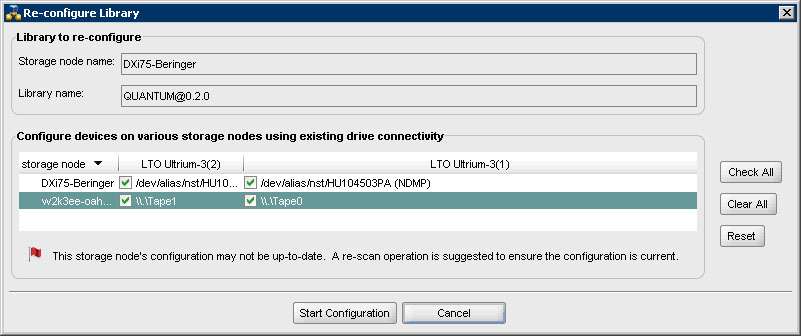
- After the scan completes, right-click the displayed VTL and select Configure Library to display the Re-configure Library dialog box.
Figure 1: Re-configure Library Dialog Box

- Select each remaining SCSI path to the VTL's tape drives.
- Click Start Configuration.
- Repeat steps 5-7 for the connected PTL.
After configuring SCSI paths, you must configure an NDMP storage node for the DXi. This configuration requires the following tasks.
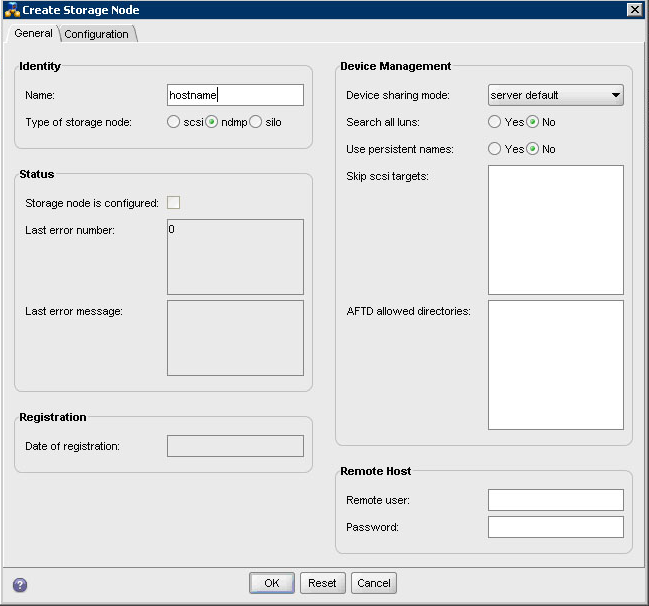
- From the Networker Administration console's left pane, right-click Storage Nodes and select New to display the Create Storage Node dialog box.
Figure 2: Create Storage Node

- In the Name field, enter the fully qualified device name for the DXi.
- For the Type of storage node option, select ndmp.
- In the Remote Host area, enter the remote user name and password for the NDMP user account. See Configuring the DXi For Path to Tape.
- Click OK to create the NDMP storage node for the DXi.
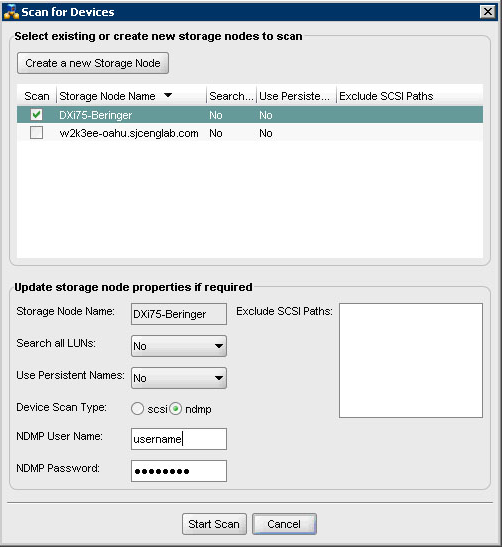
- From the NetWorker Administration console, right-click on the NDMP storage node and select Scan for Devices to display the Scan for Devices dialog box.
Figure 3: Scan for Devices Dialog Box

- In the device list, make sure that the NDMP storage node is selected.
- For the Device Scan Type option, select ndmp.
- Click the Start Scan button to scan the DXi.
- After the scan completes and the NDMP paths are visible for the VTL and PTL on the SCSI storage node, right-click the displayed VTL and select Configure Library to display the Re-configure Library dialog box.
Figure 4: Re-configure Library Dialog Box
- Select each remaining NDMP path to the VTL's tape drives.
- Click Start Configuration.
- Repeat steps 5-7 for the connected PTL.
- From the NetWorker Administration console, click the Configuration tab.
- In the left pane, select Clients.
- Right-click the client to clone, and select Properties to display the Properties dialog box.
-
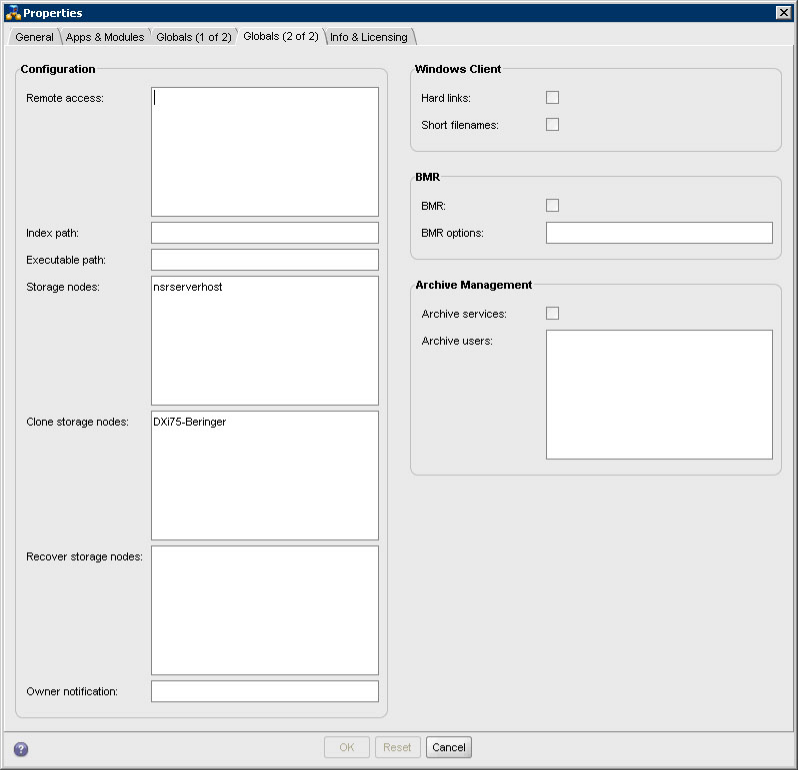
Click the Globals (2 of 2) tab.
Figure 5: Client Properties Dialog Box – Globals (2 of 2) Tab

- In the Clone storage nodes box, enter the hostname of the NDMP storage node on the DXi.
- In the Recover storage nodes box, enter the hostname of both the SCSI storage node and the NDMP storage node.
- Click OK to complete the configuration of the clone storage node.