Software Upgrades
Software upgrades allow you to update the software running on the DXi to the latest version. Software upgrades can include new features as well as bug fixes.
There are two methods for upgrading the DXi software:
| Check for an upgrade (Home page) |
The system can automatically check for software upgrades on the Home page, or you can manually perform an upgrade check. If an upgrade is found, you can choose to download and install it. See Checking For Software Upgrades. This is the recommended method for upgrading, but it requires that the system be able to access the Internet. Caution: Configure your firewall so that the system can send data to and received data from updates.Quantum.com using port 80 (HTTP). |
| Upload a software upgrade file (Software Upgrade page) |
You can download a software upgrade file from the Quantum Service and Support Web site and then manually upload it to the DXi using the Software Upgrade page. See Uploading a Software Upgrade File. You can use this method if the DXi cannot access the Internet. Note: Uploading a software upgrade file may be useful if you are upgrading multiple system systems, as the file only needs to be downloaded once. Also, this method assures that all systems will be running the same software version following the upgrade. |
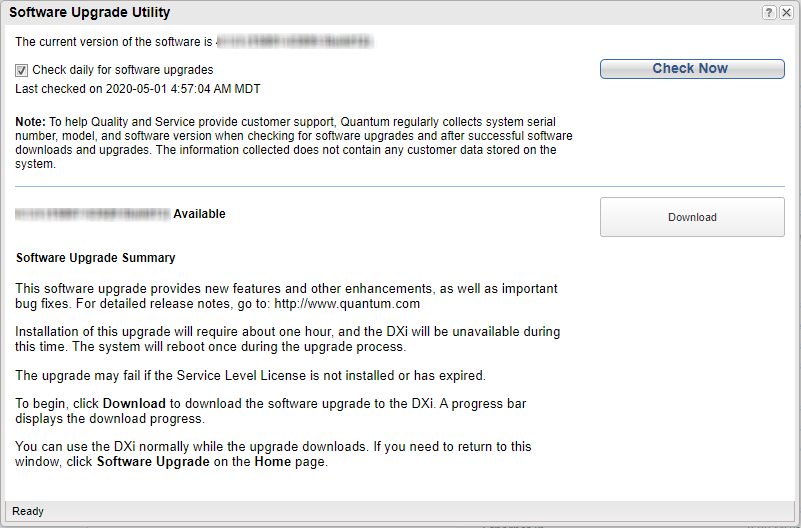
The Software Upgrade Utility (accessible from the Home page) allows you to check for available system software upgrades and, if available, download and install them. You can also configure the DXi to automatically check for software upgrades.
Note: To check for and download software upgrades, the system must be able to access the Internet. If the system cannot access the Internet, see Uploading a Software Upgrade File.
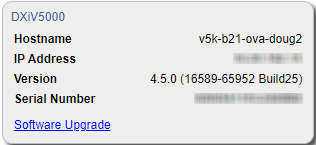
To access the Software Upgrade Utility, click Home on the main menu, and then click the Software Upgrade link.

Tasks
Use the Software Upgrade Utility to perform the following tasks:
- Configure the DXi to automatically check for software upgrades. See Automatically Checking for Upgrades.
- Manually check for software upgrades. See Manually Checking for Upgrades.
- Download and install available software upgrades. See Downloading and Installing Upgrades.
The DXi can automatically check for available software upgrades on a daily basis. If a software upgrade is found, you will be notified by an admin alert as well as by a Quick Tip icon on the Home page, next to the current software version.
On the Software Upgrade Utility, select the Check daily for software upgrades check box to enable automatic upgrade checking. Automatic upgrade checking is enabled by default. To disable automatic upgrade checking (not recommended), clear the Check daily for software upgrades check box.

To check for available software upgrades at any time, on the Software Upgrade Utility click Check Now.
If a software upgrade is available, you can read information about the contents of the upgrade and, if you choose, download and install it.
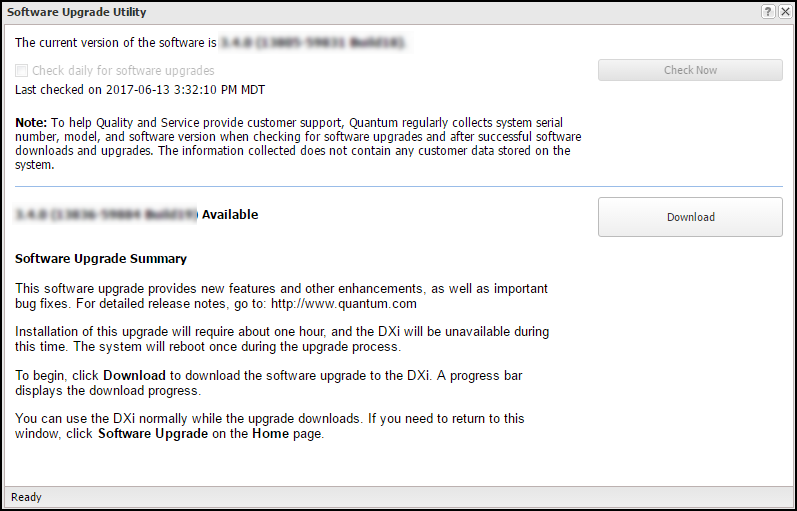
If a software upgrade is available (after automatically or manually checking for upgrades), a summary describing the upgrade displays on the Software Upgrade Utility.
To download and install an available software upgrade:
-
On the Software Upgrade Utility, click Download.
The bottom status bar displays download progress. It will take several minutes to download the upgrade, depending on network speeds. You can use the system normally while the upgrade downloads. If you need to return to this window, click Software Upgrade on the Home page.
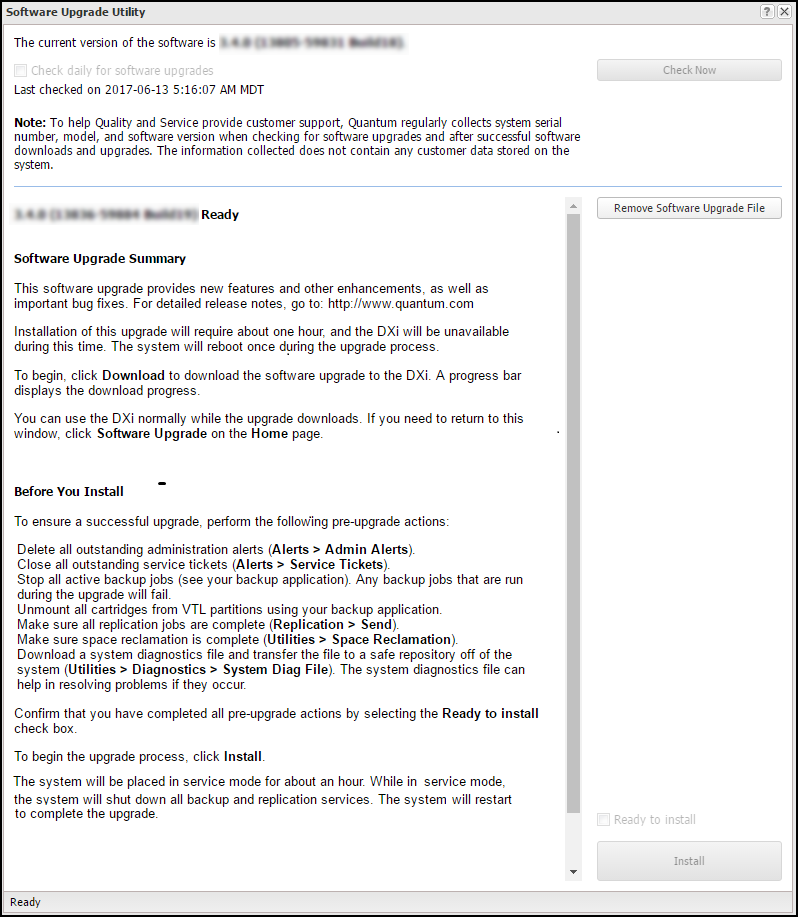
When the download is complete, a list of pre-upgrade actions displays. These are important actions you should take prior to installing the upgrade.

-
To ensure the system is healthy before upgrading, read and follow the instructions in each of the pre-upgrade actions. The pre-upgrade actions can differ depending on the type of upgrade, but typical actions include the following:
- Address and delete all outstanding administration alerts. See Admin Alerts.
- Resolve and close all outstanding service tickets. See Service Tickets.
Note: Quantum recommends taking the following actions before upgrading.
- Stop all active backup jobs (see your backup application). Any backup jobs that are run during the upgrade will fail.
- Make sure all replication jobs are complete. If replication or synchronization jobs are nearly complete, Quantum recommends allowing them to complete before upgrading. See Replication.
- Make sure space reclamation is complete. If space reclamation is nearly complete, Quantum recommends allowing it to complete before upgrading. See Space Reclamation.
- Download a system diagnostics file and transfer the file to a safe repository off of the system. The system diagnostics file can help in resolving problems if they occur. See System Diagnostics File.
-
Confirm that you have completed all pre-upgrade actions by selecting the Ready to install check box.
Note: The Ready to install check box and the Install button are disabled if there are any outstanding administration alerts or service tickets.
-
To begin the upgrade process, click Install.
Read the onscreen information to learn what to expect during the upgrade. The bottom status bar displays installation progress, and a message displays if a reboot is required.
Depending on the type of upgrade, the system may be placed in service mode for about an hour. While in service mode, the system will shut down all backup and replication services. If necessary, the system will restart one or more times to complete the upgrade.
Note: If you decide not to install the software upgrade after downloading it, click Remove Software Upgrade File to remove the current download from the system.
Clear your Web browser cache before logging on to the remote management console for the first time following the software upgrade. This will ensure the remote management console displays correctly.
The Software Upgrade page allows you to upload and install a software upgrade file on the DXi.
Before you begin, download the software upgrade file on a computer connected to the Internet, and then copy the software upgrade file (.fw) to the computer you will use to access the system remote management console.
http://www.quantum.com/ServiceandSupport/Index.aspx
To access the Software Upgrade page, click the Utilities menu, and then click the Software Upgrade tab.

To upload a software upgrade file:
- Click the Browse button to browse the system and locate the software upgrade file.
- Click Upload.
-
Click Start to begin the upload process.
Do not close the window until the uploading and unpacking process is complete. An Information message displays stating the software upgrade file was uploaded successfully.
-
Click OK.
The Software Upgrade page indicates that a software upgrade file has been uploaded.

-
Click Install.
Additional Information
- If necessary, click the link to delete any outstanding administration alerts before proceeding.
- If you decide not to install the software upgrade file after uploading it, click Remove on the Utilities > Software Upgrade page to remove the uploaded software upgrade file from the system.
The Software Upgrade Utility displays.

-
To ensure the system is healthy before upgrading, read and follow the instructions in each of the pre-upgrade actions. The pre-upgrade actions can differ depending on the type of upgrade, but typical actions include the following:
- Address and delete all outstanding administration alerts. See Admin Alerts.
- Resolve and close all outstanding service tickets. See Service Tickets.
Note: QQuantum recommends taking the following actions before upgrading.
- Stop all active backup jobs (see your backup application).
- Make sure all replication jobs are complete. If replication or synchronization jobs are nearly complete, Quantum recommends allowing them to complete before upgrading. See Replication.
- Make sure space reclamation is complete. If space reclamation is nearly complete, Quantum recommends allowing it to complete before upgrading. See Space Reclamation.
- Download a system diagnostics file and transfer the file to a safe repository off of the system. The system diagnostics file can help in resolving problems if they occur. See System Diagnostics File.
-
After you have completed all pre-upgrade actions, confirm that you are ready to continue by selecting the Ready to install check box.
Note: The Ready to install check box and the Install button are disabled if there are any outstanding administration alerts or service tickets.
-
To begin the upgrade process, click Install.
Read the on-screen information to learn what to expect during the upgrade. The bottom status bar displays installation progress, and a message displays if a reboot is required.
Depending on the type of upgrade, the system may be placed in service mode for about an hour. While in service mode, the system will shut down all backup and replication services. If necessary, the system will restart one or more times to complete the upgrade.
Important - Clear Your Web Browser Cache
It is important to clear your Web browser cache before logging on to the remote management console for the first time following the software upgrade. This will ensure the remote management console displays correctly.
