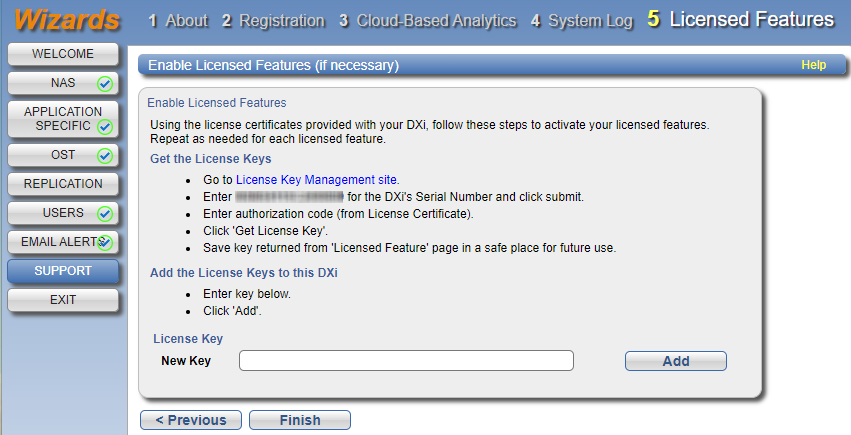
Support Wizard
The Support wizard provides guided assistance to help you enable licensed features on the DXi9000 Series and register your system. The wizard also guides you through other tasks that will aid DXi customer support in assisting you, such as creating a system log.
To begin the Support wizard, on the Wizards menu, click Support.
- Read the information about the wizard.
- Click Next to continue.
Note: At any time while using the wizard, you can click Previous to return to the previous step.
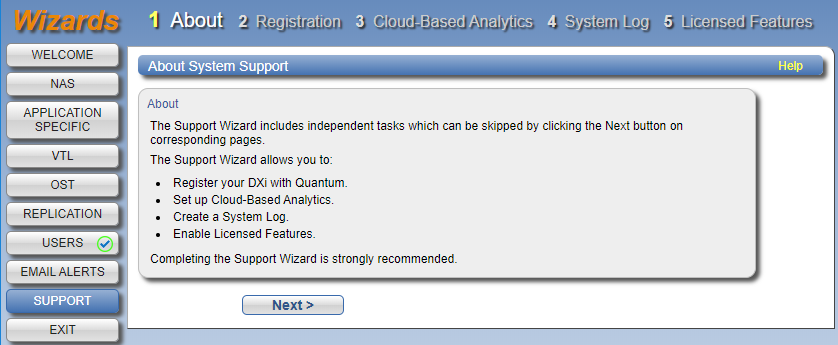
You must register your DXi9000 Series to receive service and support from Quantum.
- Click the link for Quantum’s Product Registration site.
- Follow the onscreen instructions to register your system.
- When you are finished, switch back to the Support wizard.
- Click Next to continue.
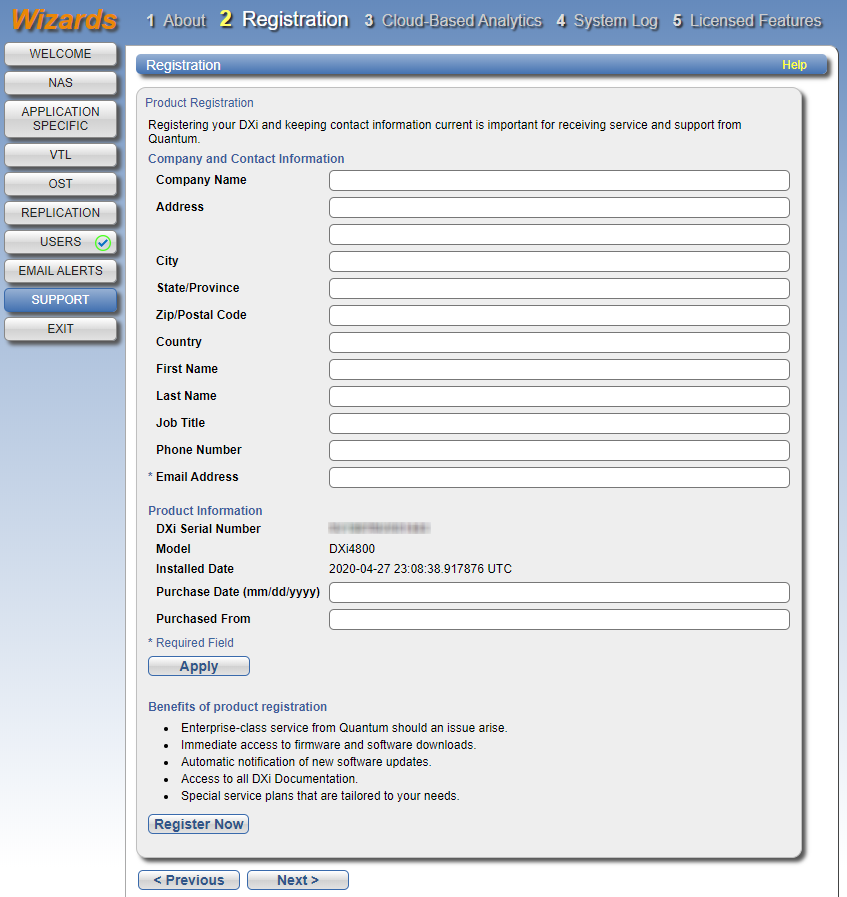
Cloud-Based Analytics (CBA) is the latest technology for ensuring world class support for Quantum DXi products.
-
To configure CBA for your system, complete the steps in Configure Cloud Based Analytics (CBA).
For an overview of CBA capabilities, see Enable and Disable Cloud-Based Analytics.
-
Click Apply, then Next to continue.
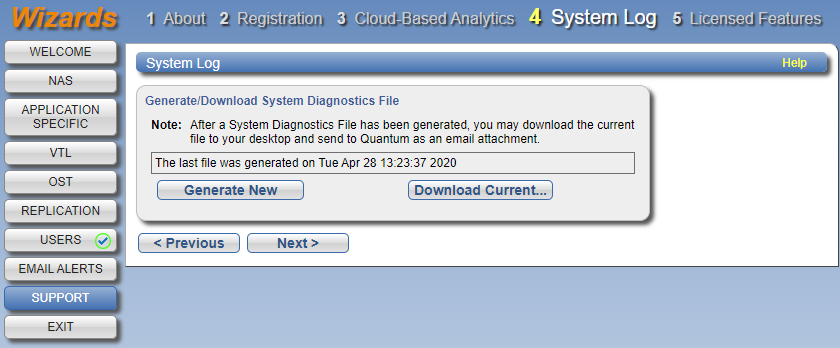
This system diagnostics file contains the diagnostic logs for all of the system components. The diagnostic files are helpful when troubleshooting problems on the DXi9000 Series. You should generate a system diagnostic file after setting up your DXi9000 Series and save it for future reference.
-
Click Generate New to generate a new system diagnostics file.
The system generates a new diagnostics file. This can take several minutes.
- After the file finishes generating, click the link to enable the Download Current button.
-
To download the generated diagnostics file, click Download Current.
A dialog box displays asking if you want to open or save the file.
- Click Save or OK to download the file.
- Click Next to continue.
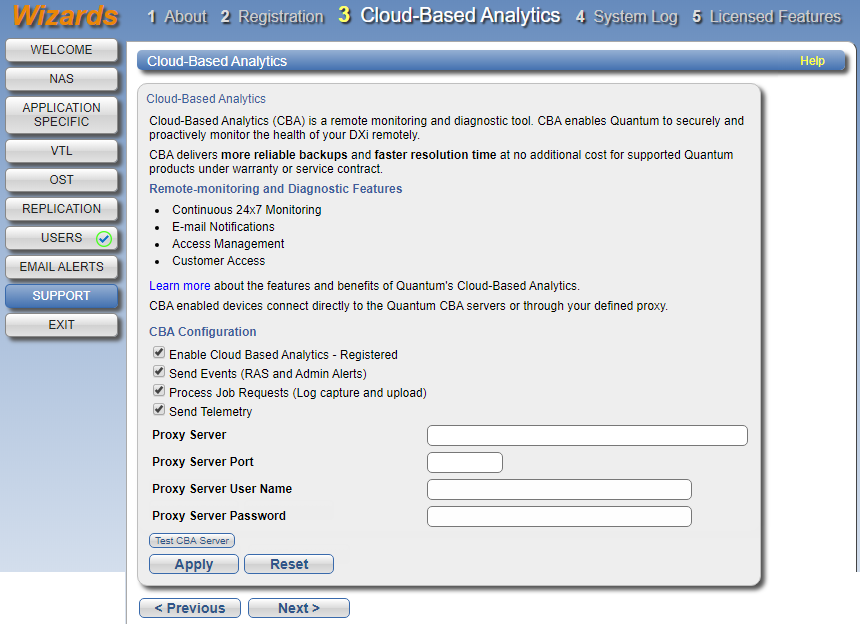
Add a license key to enable new functionality on the DXi9000 Series. To install a license key, you must first obtain a License Certificate containing an authorization code.
Contact your Quantum sales representative to purchase a license. After you purchase the license, you will receive a License Certificate containing an authorization code.
Add a license key to enable new functionality on the DXi9000 Series, for example, to add capacity or extend a Time-Based license.
Contact your Quantum sales representative to purchase a license. You will receive a License Certificate with instructions for obtaining and installing the license key.
Note: Some licenses are pre-installed on the DXi9000 Series. In addition, License Certificates for some licenses may be sent with the purchase of a DXi9000 Series. For more information about licensed features, see License Keys.
- Select the DXi system serial number (displayed under Enable Licensed Features) and press <Ctrl+C> to copy it.
-
Click the link for Quantum's License Key Management site.
The License Key Management page displays.
- Click to place the cursor in the Serial Number box and press <Ctrl+V> to paste the DXi system serial number.
-
Click Submit.
The Licensed Feature page displays.
-
Enter the authorization code (included on the License Certificate) and click Get License Key.
The Licensed Feature page returns a license key. Select the license key and press <Ctrl+C> to copy it. You should also print out or write down the license key, or save it to a text file, for future use.
- Switch back to the Support wizard.
-
Enter the license key in the New Key box, and then click Add.
The license key is added to the system, and the new feature is enabled.
- (Optional) To add additional license keys, repeat Steps 1–7.
- Click Finish to complete the Support wizard.
Use this method to install a license if Internet access via HTTPS (port 443) is not available and you have a license key.
To manually enter a license key:
- Follow the instructions on the License Certificate you received to obtain the license key.
- On the License Keys page, select the License Key option.
- Copy the license key and then paste it into the License Key box.
-
Click Apply.
The license key is installed on the system.
- Click Finish to complete the Support wizard.
