Manage Accounts
The Accounts page has tabs for Accounts By Capacity, Accounts By Activity, Accounts and User Management, and System Bucket.
Table 1: Tabs on the Accounts page
|
Icon |
Description |
|---|---|
|
Accounts By Capacity |
Displays each account's total number of objects and average object size. |
|
Accounts By Activity |
Displays each account's total number of read, write, and delete operations, and average object size. |
|
Accounts and User Management |
Provides an interface for you to manage accounts/users and to download account information. This tab is further divided into sections for: Administrator account password |
|
System Bucket |
Provides an interface for you to manage access to the system bucket and to download access information. |
Add
An account creates, deletes, and sets permissions on buckets, and is the billable identity (if required). See also: Upload (Bulk Create) Accounts.
-
Click Accounts > Accounts and User Management.
-
Click Add Account. The Add Account form appears.
-
Enter a name and email address for the account, and click Add.
Note: The account name can't include spaces, but can include upper and lower case letters, numbers, and the symbols + = , . @ _ - and be at most 128 characters long and does not need to be unique. The email address must be unique across the system.
-
Generate API keys for the account:
-
Click Accounts > Accounts and User Management.
-
Select the account/user and click the key icon in its Actions column.
-
Click Close.
-
As a security precaution, the system sends separate messages with the access and secret keys to the email address associated with that account/user.
A user is the application or person that initiates S3 operations. It belongs to a specific account.
Note: The system cannot associate a single email address with both an account and a user.
-
Click Accounts > Accounts and User Management.
-
Click the desired account.
-
Click Add User under the Actions column. The Add User form appears.
-
Enter a name and email address for the user, and click Create.
Note: The user name must be unique within the account, but user names may be reused in different accounts. The user email must be unique across the system. User names can't include spaces, but can include upper and lower case letters, numbers, and the symbols + = , . @ _ - and be at most 64 characters long.
-
Generate an access key for the user:
-
Click Accounts > Accounts and User Management.
-
Select the account/user and click the key icon in its Actions column.
-
Click Close.
-
As a security precaution, the system sends separate messages with the access and secret keys to the email address associated with that account/user.
API
WARNING: Verify that your SMTP settings are working first. Otherwise, if the system tries to send email with account access keys and fails, those access keys will be lost, as the system does not resend failed email messages.
API keys consist of one access key (public), and one secret key (private). API keys are tied to an email address. In order to create additional API keys for an account/ user you must use a different email address for them.
-
Click Accounts > Accounts and User Management.
-
Select the account/user and click the key icon in its Actions column.
-
Click Close.
As a security precaution, the system sends separate messages with the access and secret keys to the email address associated with that account/user.
-
Click Accounts > Accounts and User Management.
-
Scroll down to the target account or user, and click Show Access Keys.
Figure 1: Show API keys
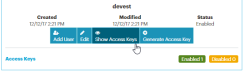
-
Click the Delete icon above the Delete label next to the key you want to delete.
Figure 2: Delete the API key of an account or user


If an API key is ever lost, create a new one and disable or delete the old one.
Change
-
Click Accounts > Accounts and User Management.
-
Select the Account under Email.
-
Select the user you want to modify.
-
Click the pencil (Edit) icon under Actions.
Contact Quantum Support to change the maximum number of buckets per account to 101-2000.
See Replication Commands in the ActiveScale Command Line Interface (CLI).
Dashboard
-
Click Accounts > Accounts and User Management.
-
Expand the browser window until the Launch AS View column is visible in the list of accounts.
-
Click the link icon in the Launch AS View column for the target account.
ActiveScale View launches in a new browser tab/window. You are automatically logged in as this account person. You can do most, but not all, operations supported for that account. You can't delete buckets or change their public/user permissions.
-
Click Accounts > Accounts and User Management.
-
In the list of accounts, click the desired account's Link to AM icon.
The ActiveScale View dashboard opens in a new tab in your browser.
Delete
You cannot delete an account.
Deleting users is supported via the ActiveScale IAM API.
Disable/Enable
Disabling/enabling an API key does not restrict the owner of the key if the owner has other API keys. Although the owner can no longer use the disabled API key, they can continue to use any (non-disabled) API keys they have.
-
Click Accounts > Accounts and User Management.
-
Select the desired account/user. The system displays the API keys belonging to that account/user.
-
Click the plus icon under Email.
-
Select/clear the Disable check box to the right of the desired key.
You cannot disable an account, but you can recycle it (rename it and change its email account and API key).
A disabled user can no longer execute any S3 requests with any API key. The system does not grant access to any user attempting to use an enabled API key of a disabled user. If you re-enable that user, they can start using their existing API key(s).
-
Click Accounts > Accounts and User Management.
-
Expand the account to which the user belongs.
-
Select the user, and click Disable or Enable under the Actions column.
-
(Optional) Modify the user's email/name to indicate its disabled/enabled status.
-
(Optional) If disabled, delete all API keys belonging to the user: see Delete an API Key.
List
-
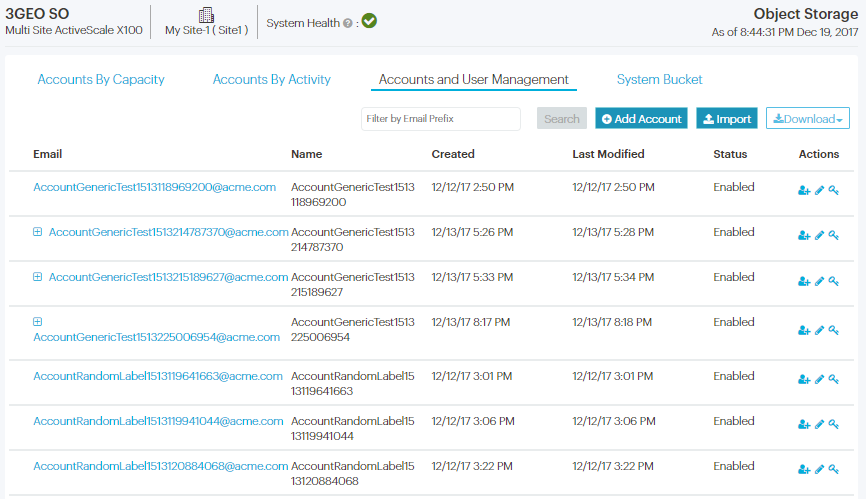
Click Accounts > Accounts and User Management.
-
(Optional) To download a report, click Download and choose an output format.
Figure 3: Accounts > Accounts and User Management
-
Click Accounts > Accounts by Activity.
ActiveScale SM displays a maximum of ten accounts that were active in the last 24 hours, in ascending order of total reads/writes, as of the time indicated in the timestamp next to the Top 10 Accounts By Activity label. This list might change hourly because it's based on the metering files that the system generates once every hour.
Note: This list only shows accounts with activity in the last 24 hours. Your system might have more accounts than these, but if they haven't been active in the last 24 hours, they aren't shown.
-
(Optional) Click Download to download a report.
ActiveScale SM displays a maximum of ten accounts that were active in the last 24 hours, in ascending order of total reads/writes, as of the time indicated in the timestamp next to the Top 10 Accounts By Capacity label.
-
Click Accounts > Accounts by Capacity.
Figure 4: Accounts > Accounts by Capacity
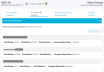

Note: This list doesn't reflect real-time status; it's updated once a day because it's based on the capacity metrics that the system generates once every day. Depending on the time of day the system generates capacity metrics, when you look at this list it may or may not reflect usage of capacity on the system.
-
(Optional) Click Download to download a report.
-
Click Accounts > System Bucket.
-
Click Accounts > Accounts and User Management.
-
Expand the target account.
-
Click Accounts > Accounts and User Management.
-
(Optional) Click Download and select an output format.
Note: As system administrator you cannot see anyone's secret key.
Miscellaneous
You can download a report of all S3 identities in PDF or CSV format.
-
Click Accounts > Accounts and User Management.
-
In the Download pull-down menu, select CSV. ActiveScale SM generates a CSV of UTF-8 encoded characters.
Note: To view the generated file with a spreadsheet editor such as Microsoft Excel, use the editor's import wizard and specify UTF-8 encoding. Otherwise, if the generated file contains any non-ASCII characters (such as, in displaynames), a spreadsheet editor may not display them properly.
Table 2: S3 identities
|
Reported Field Name |
Internal Field Name |
|---|---|
|
|
identityEmail |
|
Name |
identityDisplayName |
|
ID |
identityCanonicalId |
|
Type |
identityType (valid values are User or Account) |
|
Status |
identityEnabled (valid values are Enabled or Disabled) |
|
Creation Date |
identityCreationTime in UTC |
|
Last Modified |
identityModificationTime |
|
Parent Account EMail |
parentAccountEmail (empty if on account level) |
|
Parent Account ID |
parentAccountCanonicalId (empty if on account level) |
|
Access Key |
apiKeyAccessKey (empty if this identity has no API keys) |
|
Key Status |
apiKeyEnabled (non-empty at the account and user level only if an API key has been generated) |
|
Key Creation Date |
apiKeyCreationTime (non-empty at the account and user level only if an API key has been generated) |
If an identity has multiple S3 key-pairs, there are multiple rows in the CSV file. These rows only differ in the apiKey* columns.
You can import a CSV-formatted file of account and user identities. Create a file of up to 300 lines of comma-separated values with the following syntax:
accountEmail,accountName,userEmail,userName
name1@somedomain.com,accountName1,user1@somedomain.com,userName1
name1@somedomain.com,accountName1,user2@somedomain.com,userName2
name1@somedomain.com,accountName1,user3@somedomain.com,userName3
Note: Account and user names can’t include spaces, but can include upper and lower case letters, numbers, and the symbols + = , . @ _ - . Account names are limited to 128 characters and do not need to be unique. User names are limited to 64 characters and need to be unique within an account. Account and user email addresses must be unique across the system.
For example:
accountEmail,accountName,userEmail,userName
account2@yourdomainsample.com,sampleaccount2,account2user1@domainnameofyouruser.com,user1
account2@yourdomainsample.com,sampleaccount2,account2user2@domainnameofyouruser.com,user2
account2@yourdomainsample.com,sampleaccount2,account2user3@domainnameofyouruser.com,user3
WARNING: Line 1 of the CSV file must be the header row.
-
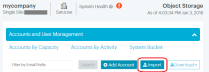
Click Accounts > Accounts and User Management.
-
Click Import. The Import CSV File form appears.
Figure 5: Import CSV
-
Type the password for admin.
-
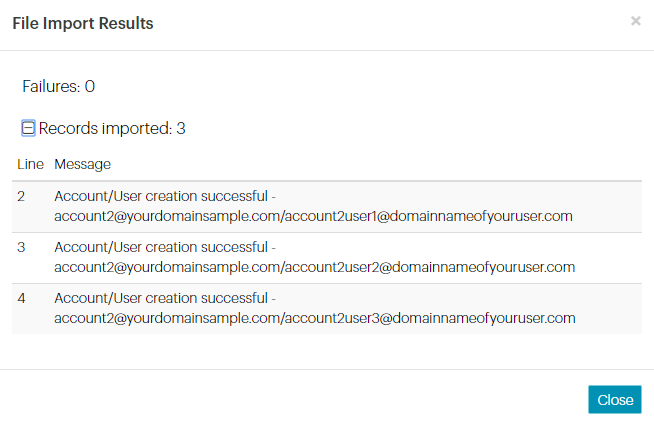
Point the file browser to the CSV file, and click Import.A successful import results in a pop up like the figure below.
Figure 6: Import success

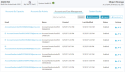
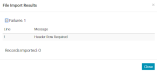
If the import fails, expand the Failures line in the File Import Results dialog box to see exact errors:
-
Click Close.
-
Generate an API key for each new account:
-
Click Accounts > Accounts and User Management.
-
Select the account/user and click the keyicon in its Actions column.
-
Click Close.
As a security precaution, the system sends separate messages with the access and secret keys to the email address associated with that account/user.
WARNING: You must have SMTP set up in order for the system to send email. If it tries and fails, the email is not re-sent.
You cannot see anyone's secret key, but you can obtain a list of all access keys from Accounts > Accounts and User Management.
-
-
Notify the account. A sample notification is below.
Welcome to the ActiveScale system. Your account identity on this system has been created. Details are as follows:
S3 Over HTTPhttp://SystemNodePublicIP:80
S3 Over HTTPsHTTPs https://SystemNodePublicIP:443
Account Namedisplay_name_of_account
Account Email email_address_of_account
Your API keys have been sent to the email address above. With your API keys, you can create/delete bucket(s) using your own S3 client. After you create bucket(s) you can request us to add users to your account (please specify a name and unique email address for each user), or you can simply use your account identity with your S3 client to read/write data from/into your bucket(s). For more information on connecting your S3 client to the ActiveScale system, see the ActiveScale OS S3 API Reference


System Bucket
ActiveScale SM displays the name of the system bucket under the System Bucket Info label:
-
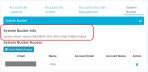
Click Accounts > System Bucket.
Figure 7: Accounts > System Bucket

You can give READ permission to any account/user for the system bucket. By default, no account/user has READ permission.
-
Click Accounts > System Bucket.
-
Click Grant Read Access.
-
Type the email address of the account/user and click Grant.
-
Give the account/user the name of the system bucket, its structure, and access instructions. ActiveScale SM displays the name of the system bucket under the System Bucket Info label:
Reading the System Bucket with s3cmd
Use your API key on the s3cmd command line. For example:
s3cmd -c s3cmd.cfg lss3://system-8ee785d9-0710-4d41- a4de-348dcd9fc3b4/
DIR
s3://system-8ee785d9-0710-4d41-
a4de-348dcd9fc3b4/8ee785d9-0710-4d41-
a4de-348dcd9fc3b4_5c5363f8-3a41-423d-b656-a2ca254d8e47/
Note: Make sure that the bucket address contains a trailing slash (/). If you forget the trailing slash, the response is empty.
Reading the System Bucket with Cyberduck
Create a new Cyberduck bookmark, but instead of using / for Path, use
/system_bucket_name.
To increase the maximum number of buckets per account to 101-10,000, contact Quantum Support.
-
Click Accounts > System Bucket.
-
Click the X icon under Actions for that account/user.
