Getting Started
Figure 1: You are here

ActiveScale SM runs on the management system nodes in a rack. The first three nodes in a single rack or the first system node in each rack of a 3 GEO system. To access it, you need to know the public IP address and web interface port of any System Node.
If you have a DNS server, add the domain to refer to the public IP addresses of the System Nodes. If you don't have a DNS server, update your hosts file with the public IP address of one of the System Nodes; for example, System Node1_PublicNetworkIP.YourDomain.com.
Note: ActiveScale SM is compatible with Chrome v67-69 and Firefox v61-63. Desktop versions only.
-
Using a desktop web browser, navigate to the public IP address and web interface port of any System Node. For example, https://System Node3_PublicNetworkIP:10443.
The ActiveScale SM login page appears.
Figure 2: ActiveScale SM login page

-
Log in with the credentials of the system administrator, admin. The ActiveScale SM dashboard appears.
Figure 3: ActiveScale SM dashboard

Send a test email from the system. For details, see Test SMTP Settings.
WARNING: If the system tries to send email with account access keys and fails, those access keys will be lost, as the system does not resend failed email messages.
For details, see Manage Accounts.
Encryption at-rest can be enabled in ActiveScale SM under Configuration > System > Security.
Figure 4: Configuration > System > Security
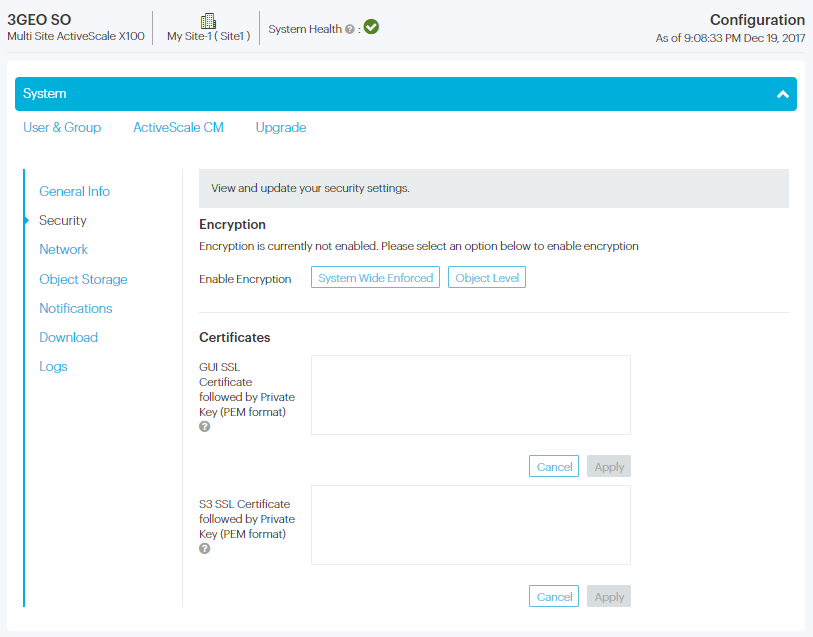
Two modes can be chosen:
-
System Wide Enforced: All newly uploaded data and metadata will be encrypted
-
Object Level: Only the data and metadata of objects that are written through an S3 PUT request containing the
x-amz-server-side-encryptionheader will be encrypted
A license key, to be provided by the team, should be entered to ensure the encryption setting can be applied.
The encryption chain is completely isolated within an S3 account, no encryption information is shared between different S3 accounts. More information can be found under Overview > Encryption.
For details, see Managing accounts.
