Access the Service Port and System Command Line
Each server node contains an integrated 1GbE Ethernet port that is dedicated to Service access. This Service Port is pre-configured with unique factory-set IP addresses:
- Server node 1 – 10.17.21.1
- Server node 2 – 10.17.21.2
Use the integrated 1GbE Service Port (em1) to connect directly connect to the system using a laptop, Ethernet cable, and the system command line.
In order to access the system from the Service Port, you will need to configure the network settings on a laptop, and then log on to the system command line.
You can configure your laptop by manually identifying the Service Port IP address in your laptop's IPV4 settings. You can access the system through the metadata network. In this case, see the procedures in Configure Network Settings for Your Laptop.
Note: This procedure assumes you are running Windows 7 on the laptop. The steps will be different if you are using another operating system, or a different version of Windows.
- Connect an Ethernet cable from your laptop's Ethernet port to the Service port (Em1) on the back of the server node to access.

- Access the Network Connects dialog box.
 Steps
Steps- Select the Start Menu.
- In the Search programs and files field, enter View Network Connections.
- From the displayed return list, select View network connections.
- From the displayed dialog box, right-click on the Ethernet port network connection — typically Local Area Connection — and select Properties.
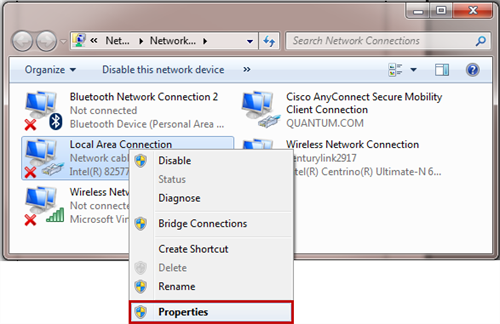
- From the Local Area Connection Properties dialog box, make note of the current settings.
Keep in mind that you will need these settings to reset your laptop to connect to your network.
- Select Internet Protocol Version 4 (TCP / IPv4) from the list of connections, and then click Properties.
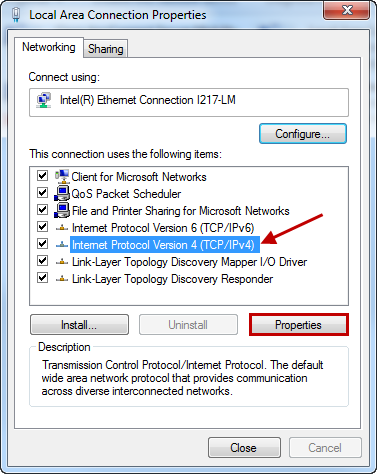
- From the Internet Protocol Version 4 (TCP/IPv4) Properties dialog box, do the following:
Select the Use the following IP address radio button.
- In the IP address field, enter 10.17.21.00.
In the Subnet mask field, enter 255.255.255.0.
- Click OK, and then click Close.
- Wait at least 2 minutes to ensure the laptop network connection is enabled.
You will need to use the system's command line to manage certain features for your appliance. Access the command line from a SecureShell (SSH) client as the StorNext Admin user. You can then access the root shell of the system command line, as needed.
- Open an SSH connection to the server node you with to access.
The default IP address for the server node on the Metadata network is 10.17.21.1. If the IP address assigned to your server node is different from the default IP address, use your server node's unique IP address.
- Log in to the server node with the following credentials:
- User name:
stornext - Password:
<stornext_account_password>The default StorNext account password is
password.
- User name:
- Log on the server node as the StorNext Admin user.
- At the prompt, enter the following command to access the root shell:
sudo rootsh
<stornext_account_password>
