 minute read
User Interfaces
The Quantum F1000 includes an interface that allows you to monitor and re-configure the system. A BMC Web user interface allows you to do more advanced procedures. This section describes what these interfaces are, and how to use them.
|
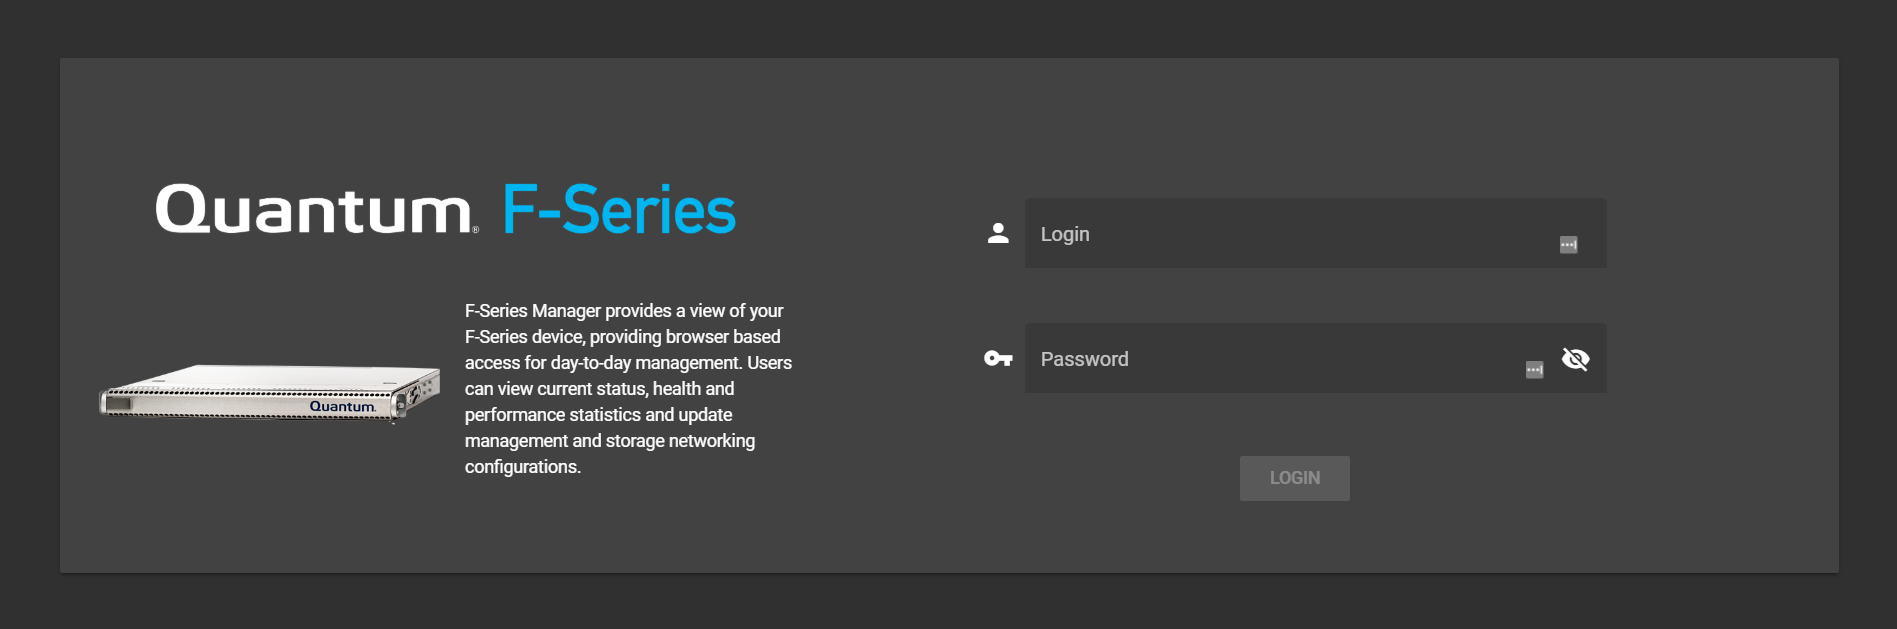
The F-Series UI is a web-based, graphical user interface (GUI) that you can use to view system status and change configuration settings. |
- Access the F-Series UI log in page using the management IP address assigned to the F1000 during initial system configuration on the log in screen.
- Enter
rootin the Login field, and enter the password you created during initial system configuration in the Password field.
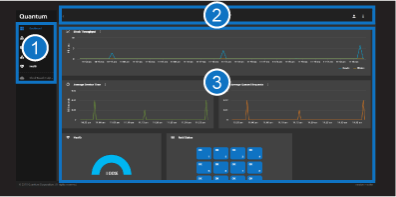
The F-Series UI includes the areas shown below. Click an area below for more information.
| Item | Description |
|---|---|
| 1 | Left Navigation Menu |
| 2 | Top Navigation Items |
| 3 | Main Content Area and Navigation (differs depending on option selected – Dashboard view shown) |
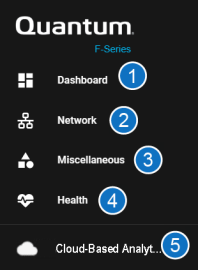
Opens the dashboard—the main content area—of the F-Series UI. See Main Content and Navigation for more information.
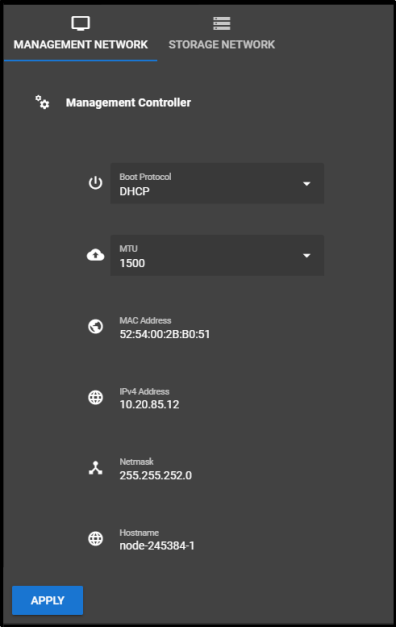
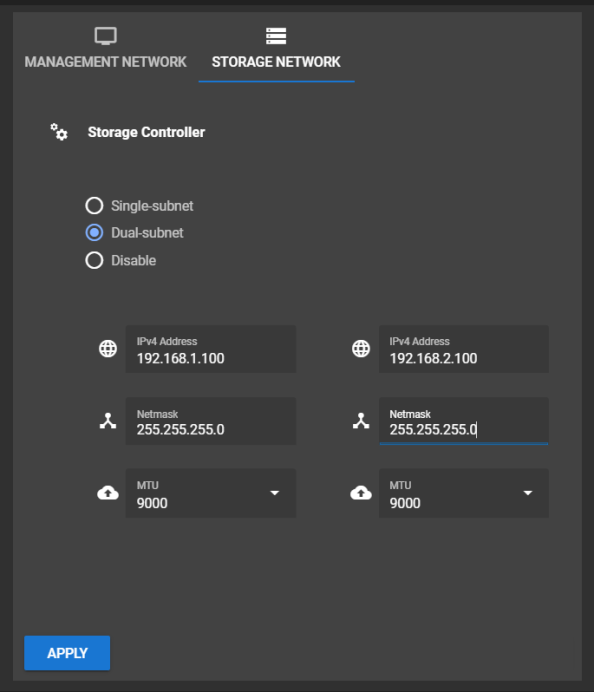
Provides access to the Management and Storage Network settings, where you can make changes, as needed.
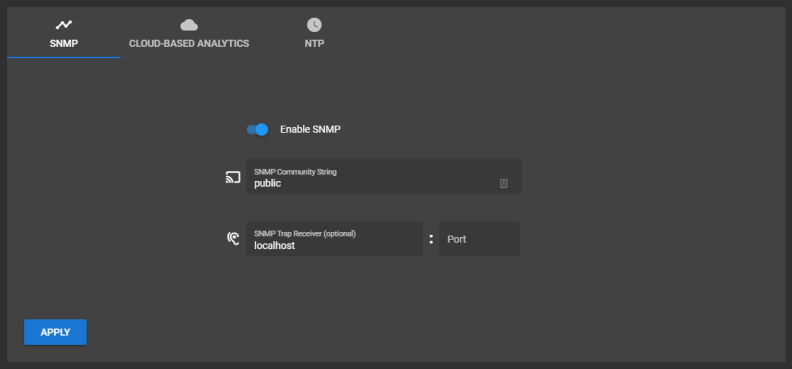
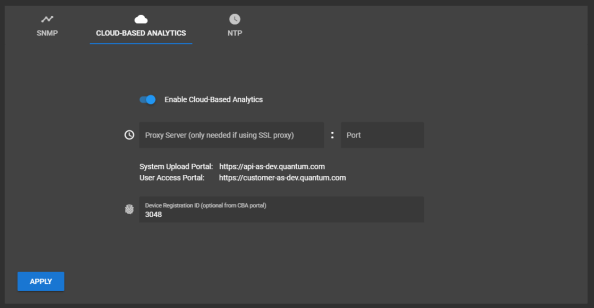
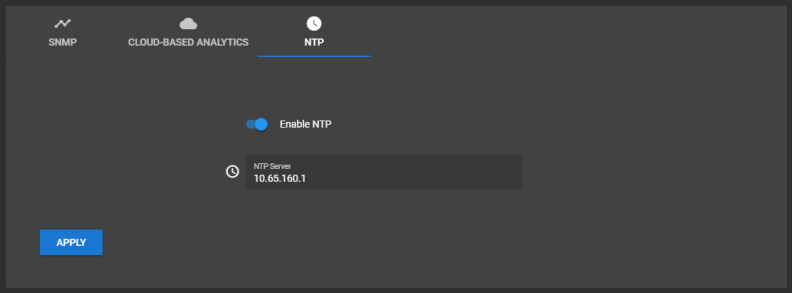
Provides access SNMP, Cloud-Based Analytics (CBA), and NTP configuration settings.
You can enable simple network management protocol (SNMP) here. See Enable/Disable SNMP.
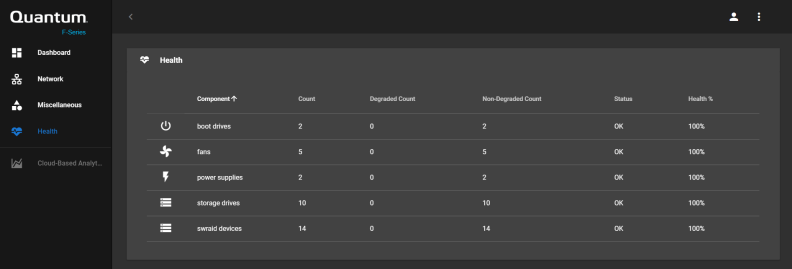
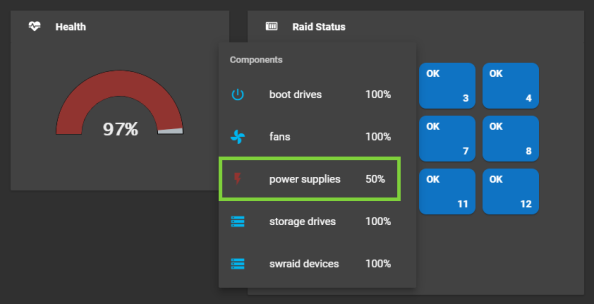
Provides a table view of health portions of the hardware (examples: fans, power supplies, storage drives, swraid devices). This includes additional detail that is not provided on the health status monitor, or seen by hovering over the health dial on the dashboard.
Move your mouse over a row to highlight that row.
Click this link to open the CBA portal log in page. By default, CBA is not functional until you configure it. See Enable/Disable Cloud-Based Analytics (CBA).
Note: By default, the CBA link in the left menu of the F-Series Manager launches the generic CBA portal page: https://insight.quantum.com. However, if you have more than one F1000, or other Quantum CBA-supported hardware, you can configure this button to launch the CBA dashboard for this specific F1000 in the CBA portal.
- Some left navigation menu options open as tabs in the main content area. Click the menu item to open it.
- To change values or configure a set of fields, enter values in the required fields.
- Click Apply to change options.
- Move your cursor over items in graphs to view additional detail about the area.
Click an icon to view options:

| Item | Description |
|---|---|
|
1 |
Expand/Collapse left navigation |
|
2 |
User account: change password and log out of the F-Series UI |
|
3 |
System options:
|
Move your cursor over graphical items (charts, diagrams, dials) to view additional detail about that data point on the graph. Most of these will be found on the Dashboard.
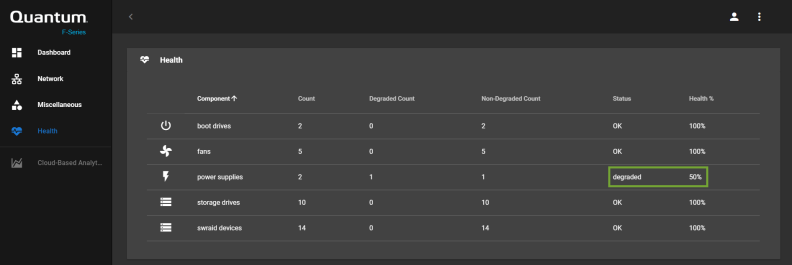
Mouse cursor moved over the health graph. Here's an example with degraded system health (degraded health of power supplies indicated in green):
Here's an example with good system health (health of "Components" indicated in blue):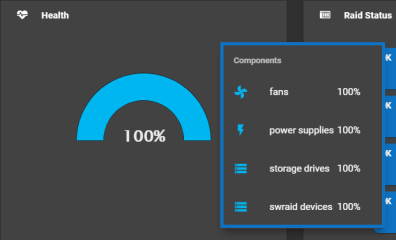
Mouse your cursor moved over the Average Service Time graph ("Components" health indicated in blue box). You can also print this information, or save it as a graphic or text file.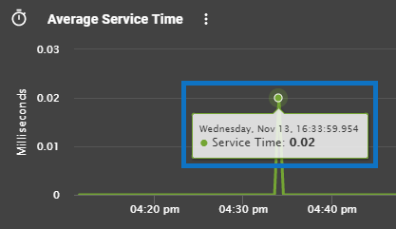
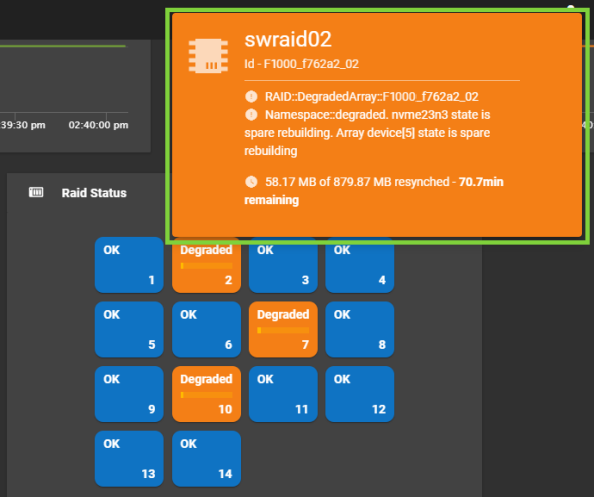
Mouse your cursor moved over the Degraded RAID graph:
On the Dashboard, click the More Options hamburger menu icon (shown in the blue square below) for the section for additional printing options, or to save the information as a graphic or text file.

The F1000 uses an embedded web server called the BMC Web UI to handle out-of-band (OOB) management. This user interface is designed to easily control power, access reports and logs, and create and update new users.
|
Browser |
Linux |
Windows |
Mac |
|
Firefox (version 2.0+) |
Yes (default) |
Yes |
Yes |
|
Internet Explorer (version 7+) |
No |
Yes (default) |
N/A |
|
Chrome (version 2.0+) |
No |
Yes |
Yes |
|
Safari (12.1) |
N/A |
N/A |
Yes |
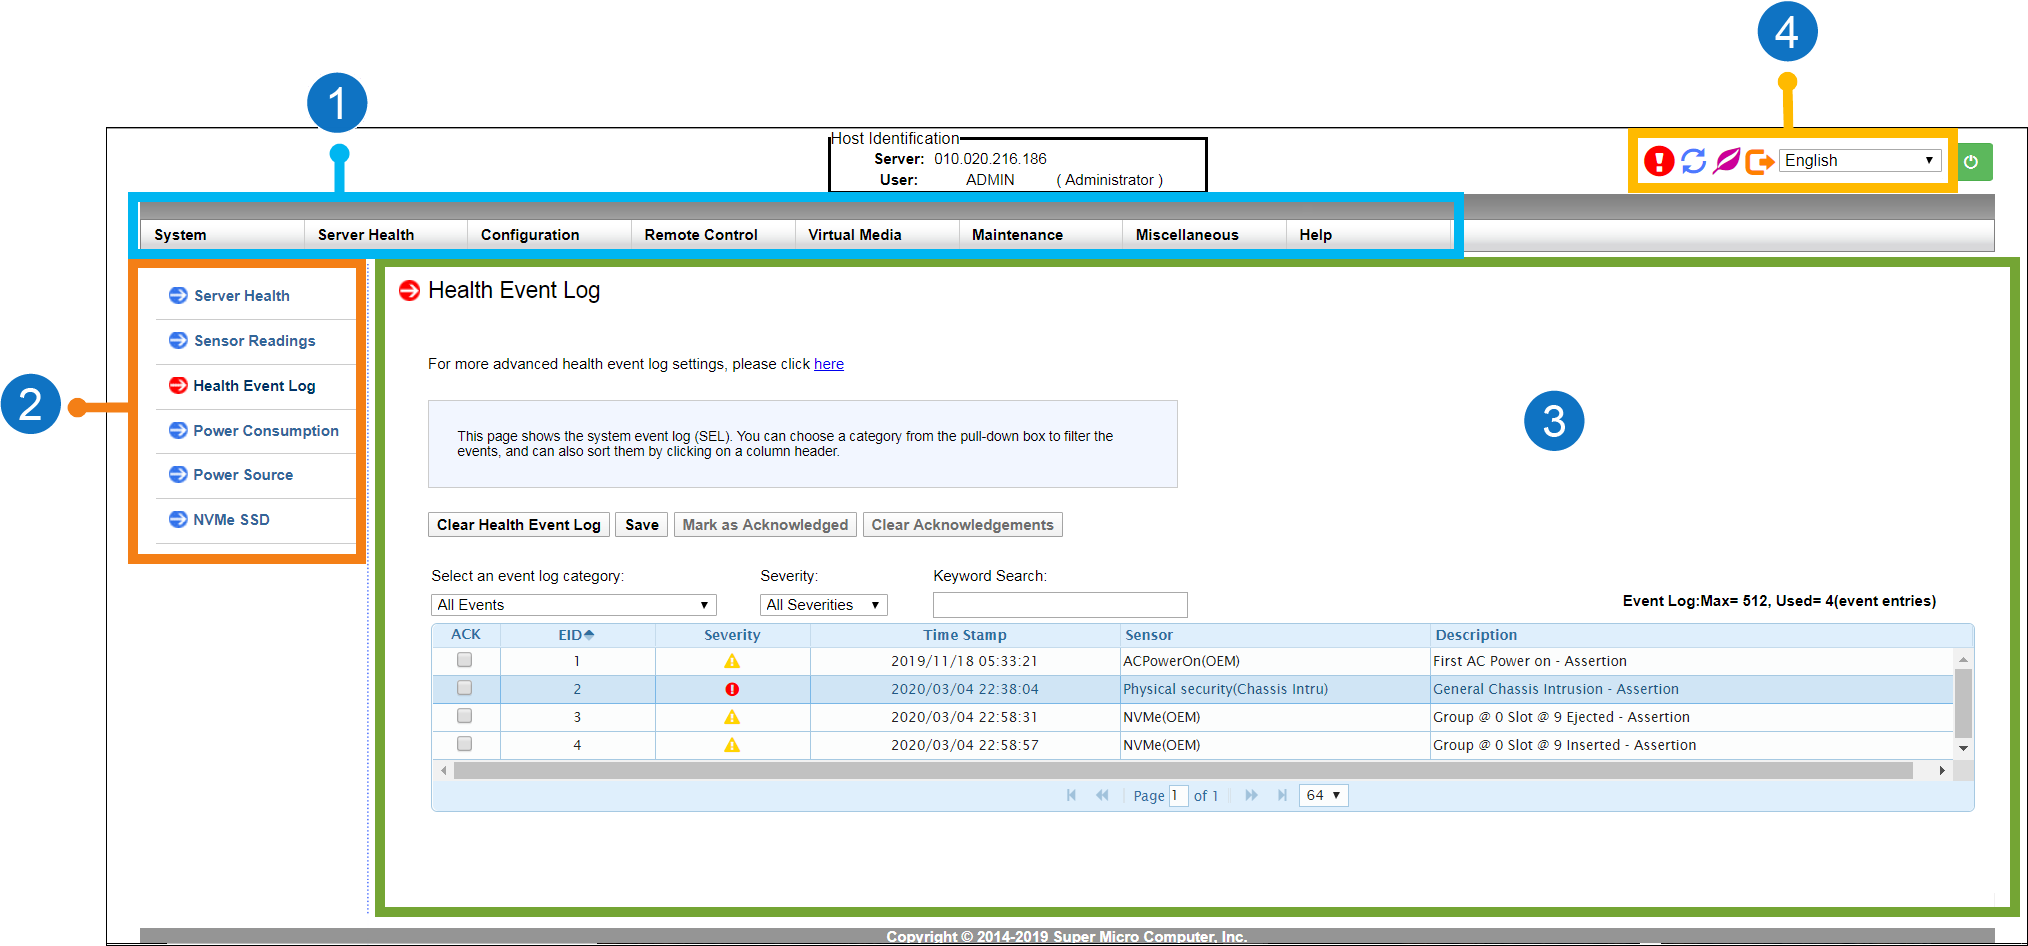
The BMC Web UI contains the main sections shown below:
|
Item |
Description |
|||||||||||||
|
1 |
Main Menu: Click an item to view the submenu for that function, status, or component. |
|||||||||||||
|
2 |
Submenus: Click an item to view details about that function, status, or component in the Main Content Area. |
|||||||||||||
|
3 |
Main Content Area: Displays details about the selected function, status, or component. You can also configure the server in this area. |
|||||||||||||
|
4 |
|


Use an Ethernet cable to connect a notebook computer to the IPMI/BMC port on the F1000.

Complete one of the following procedures, depending on whether you are using a Mac or Windows computer.
When you configure the IPv4 network settings for the Ethernet connection on the computer, you will access the system directly, while connected to the IPMI/BMC UI Port.
- IP Address - 192.168.17.10
- Subnet Mask - 255.255.255.0
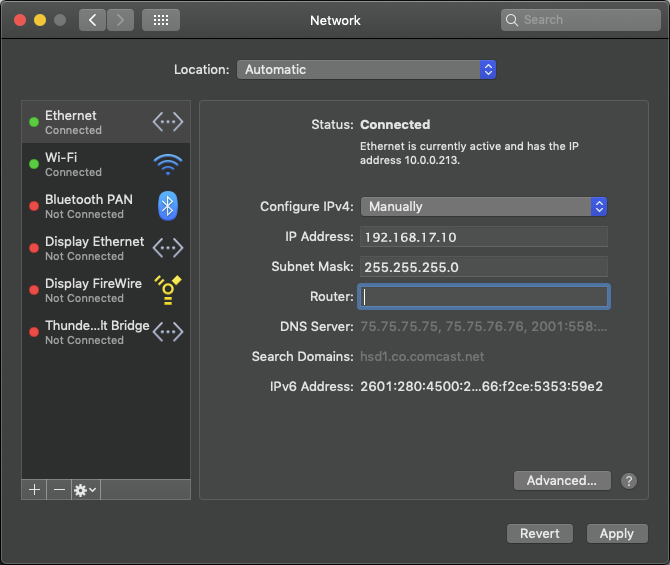
Note: These steps may differ, depending upon your version of macOS.
- Click an open area of the Mac desktop, and select Apple menu > System Preferences > Network, or click System Preferences in the Dock.
- Click Network in System Preferences.
- Select the Ethernet connection in use.
- In the Configure IPv4 list, select Manually.
Quantum recommends writing down the settings in this dialog box before you change them. You can refer to this information later when you finish using this network connection, and you return the settings to their original values.
- Enter the IP address and subnet mask values (leave router blank):
- IP Address - 192.168.17.10
- Subnet Mask - 255.255.255.0
- Click Apply.
- Close the Network dialog.


Example (Mojave):
It may take a couple minutes to enable the network connection.
Note: The following steps may differ, depending on your version of Windows.
- Access the Network Connections dialog using one of the following methods:
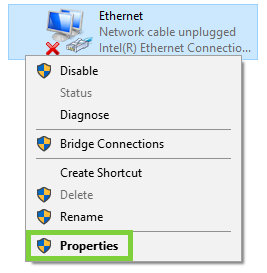
- For Windows 10, right-click Start, click Network Connections, and click Change Adapter Options in the right pane of the dialog.
- For older Windows versions, click the Start menu, then search for and open the View Network Connections dialog.
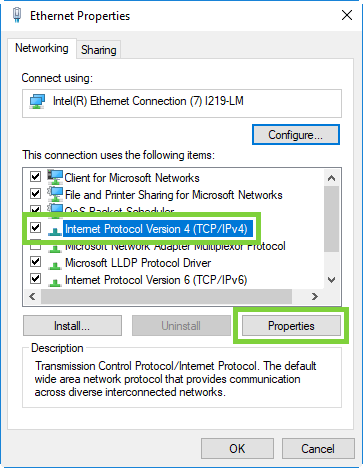
- Right-click the network connection that corresponds to the Ethernet port on the computer in use—for example, Ethernet or Local Area Connection—and select Properties.
- From the list of connections, select Internet Protocol Version 4 (TCP/IPv4), then click Properties to display the Internet Protocol Version 4 (TCP/IPv4) Properties dialog box.
Note: Quantum recommends writing down the settings in this dialog box before you change them. You can refer to this information later when you finish using this network connection, and you set the settings back to their original values.
- Click Use the following IP address, and enter the appropriate IP address and Subnet mask values (leave gateway blank), then click OK.
- IP Address - 192.168.17.10
- Subnet Mask - 255.255.255.0
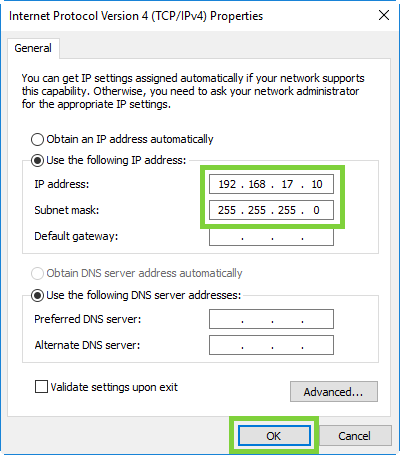
- Click Close.
It may take a couple minutes to enable the network connection.
-
On the notebook computer, open a supported Web browser, type https://192.168.17.21 in the address box, and press Enter.
Note: You must use “https://” the first time you access the BMC Web UI through the IPMI/BMC port.
The Login screen displays.
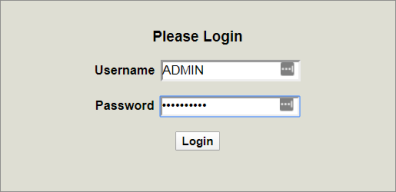
-
Log into the BMC Web UI. The default credentials are:
- Username: ADMIN
- Password: The series of alphanumeric characters included after "PWD" on the sticker on the top, left corner of the unit.
Sticker location:

Once logged in, the System page displays.

The F1000 includes an interface. Most of the common features of this interface are included in the F-Series UI. You can complete some tasks in this interface, including:
- Creating support bundles (see Create and Download a F1000 Support Bundle)
- Setting MTU, static IP addresses, netmask, and broadcast General Network Settings for Converged/VLAN storage networks (see Step B: Enable DCBX)
- Changing time and date settings for systems without an NTP time server (see Update the F1000 Date and Time Settings in the QCSP TUI for Systems that Cannot Use an NTP Time Server)
