Manage Quotas
Note: The information below assumes you have the Quotas feature enabled on your file system(s). See Quotas in Advanced Parameters > Features Tab.
The quota system provides a means for limiting the amount of disk storage consumed on a per user or per group basis across an entire file system or within a designated directory hierarchy. Quota limits apply to the space consumed by disk-block allocations for a user or group, which is not equal to the sum of their file sizes. Disk-block allocations can be less than the file size if the file is sparse, or more if the file system has allocated extra sequential blocks for the efficiency of anticipated future writes.
WARNING: If you enable quotas on an existing file system, the file system becomes unavailable while the changes are applied.
The Manage Quotas page enables you to view, edit, delete or configure new quota values as it pertains to StorNext file system. See Figure 1 and Table 1.
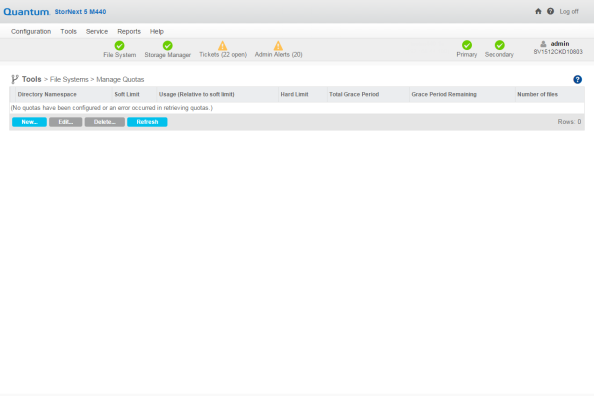
The following table provides a brief description of the quota properties, and values you can view on the Manage Quotas screen.
To edit the current quota values for a specified file system:
- Under the Directory Namespace column, select the file system whose quota values you want to edit.
- Click Edit... (see Figure 2).

- Configure the following quota value properties:
- In the Hard Limit field, input a numeric value (decimal values are allowed), and then select the unit of measure from the drop-down. Refer to Quota Limits for additional information on limits.
- In the Soft Limit field, input a numeric value (decimal values are allowed), and then select the unit of measure from the drop-down. Refer to Quota Limits for additional information on limits.
- In the Time Limit field, input a numeric value (decimal values are allowed), and then select the unit of measure from the drop-down.
- Click Update to confirm and save your selection, or click Cancel to abort and return to the Tools > File Systems > Manage Quotas screen.
To configure new quota values for a specified file system:
- Click New... (see Figure 3).
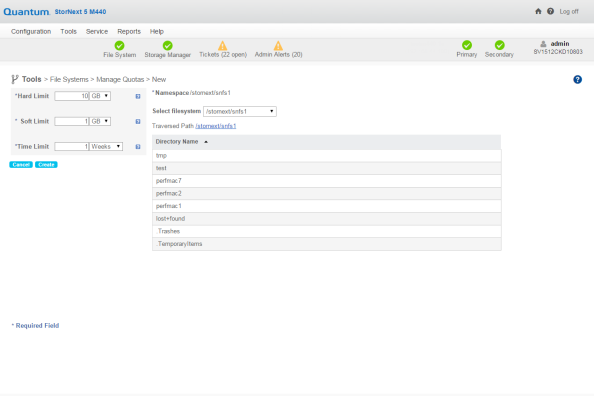
- Configure the following quota value properties:
- In the Hard Limit field, input a numeric value (decimal values are allowed), and then select the unit of measure from the drop-down. Refer to Quota Limits for additional information on limits.
- In the Soft Limit field, input a numeric value (decimal values are allowed), and then select the unit of measure from the drop-down. Refer to Quota Limits for additional information on limits.
- In the Time Limit field, input a numeric value (decimal values are allowed), and then select the unit of measure from the drop-down.
- For the Namespace, select the file system from the drop-down, and then select a directory underneath the Directory Name heading.
- Click Create to create a new directory namespace with the specified quota values, or click Cancel to abort and return to the Tools > File Systems > Manage Quotas screen.
To delete a configured quota values:
- Select the Directory Namespace whose quota values you want to delete.
- Click Delete....
- When asked to confirm the deletion of the configured quota value, click Yes to proceed, or No to abort.
- When a message notifies you that the quota was successfully deleted, click OK to continue.
To refresh the configured quota values:
- Click Refresh.
