i6 Devices
Overview
Devices are the physical components of the library that can be accessed, removed or have their status changed.
The available devices are as follows:
| Robotics |
Includes the robot and allows you to position the robot for maintenance |
| Import/Export |
|
| Storage |
Includes all the magazines in the library available to be ejected from the WebGUI |
Layout
Lists all available library devices.
Lists all configured parameters for any highlighted partition.
Provides options for device interaction.
| Configuration | |
|---|---|
| Settings |
Available for the Robot. Allows you to configure your Robot |
| Actions | |
|---|---|
| Vary-On |
Allows you to vary-on the robot to prepare it for positioning |
| Position |
Allows you to position the robot at the top or bottom of the library for maintenance procedures |
| Eject |
Allows you eject any magazine in the library from the WebGUI |
| Vary-Off |
Allows you to vary-off the robot for maintenance procedures |
| Restart |
Allows you to restart a blade to activate any changes |
| Identify On | |
| Identify Off | |
| Device Snapshot |
Allows you to capture information about the selected device |
| Sequester | Allows you to eject a magazine configured with airgap polices against a magazine hard stop. |
| Insert | Allows you to send a request to insert a sequestered airgap magazine back into the library. |
| Inventory | Allows you to inventory specific magazines in the library. |
Tasks
Configuration
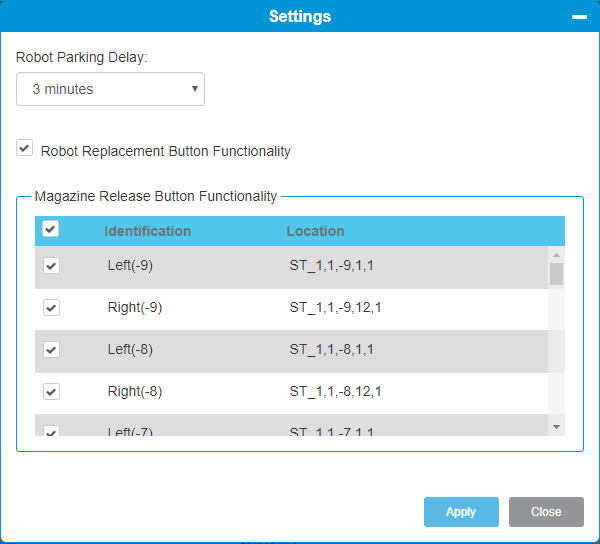
The Settings feature allows you to set the robot parking time delay and enable/disable the Magazine Request Release buttons.
- From the Navigation panel, select Devices.
-
In the Operations panel, click Settings.

Item Description Action Robot Parking Delay Allows you to set a specific idle time interval between a robot completing a motion request and parking at the bottom of the library rack.
Note: The default delay is 3 minutes.
Select the time delay from the drop down menu. Robot Replacement Button Functionality Allows you to enable or disable the Robotics Enable button on the back of the Control Module (CM).
Select the check box to enable the button. Deselect the check box to disable the button. Magazine Release Button Functionality Allows you to enable or disable the Magazine Release Request buttons on the front of each module in the library.
Select the check box to enable the release buttons. Deselect the check box to disable the buttons. -
Click Apply to save your settings.
-
Click Close to exit the window.
Actions
There are two robot states:
- Vary Off - powers off a robot.
- Vary On - powers on a robot.
You vary a device off to prepare for removal and maintenance.
Note: If the robot is varied off, it will be automatically varied back on after a restart of the library.
- From the Navigation panel, select Devices.
- In the North Panel, select the check box next to the robot or tower.
-
In the Operations panel, click Vary On or Vary Off.

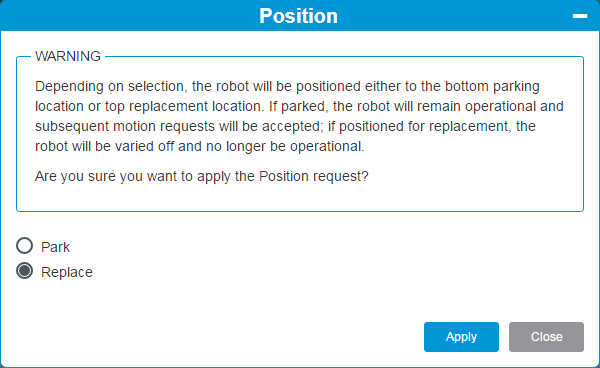
The position feature allows you to place the robot at it's designated top or bottom position. You can use this feature to prepare for robot replacement or maintenance if the robot motors are still functioning.
Note: The library will remain in a ready state and any operation requests that require the library will still be accepted and reposition the robot.
- From the Navigation panel, select Devices.
- In the North Panel, select the + next to the Robotics then check box next to the robot.
-
In the Operations panel, click Position.

Item Description Action Park Moves the robot to the bottom-most module. Select this radio button if you want to move the robot to it's designated bottom position. Click Apply to begin the position operation.
Note: After the completion of a motion command, the robot will not park until 3 minutes of idle time are observed.
Replace Moves the robot to the second module from the top. Select this radio button if you want to move the robot to it's designated top position. Click Apply to begin the position operation. -
Click Apply to save your settings.
-
Click Close to exit the window.
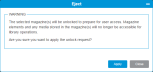
This feature allows you to remotely eject any magazine from your library. When selecting a magazine and clicking the Eject button, any media in that magazine become unavailable for any library operation. Also, you will need someone at the library to put the magazine back into the library.
- From Navigation panel, select Devices.
- In the North Panel, select the check box next to the magazine you want to eject.
-
In the Operations panel, click Eject.

Magazine sequestration supports the Ransom Block airgap feature in the i6 library (see Airgap Policies). A airgap magazine assigned to a partition is sequestered when it is ejected from the library against a magazine eject stop. The media in the sequestered magazine cannot be physically accessed by the library robot for any GET/PUT operations.
Unlike a traditional library magazine eject, media in a sequestered magazine can still be identified and inventoried by the i6 library.
To sequester an airgap magazine, do the following:
- From the Navigation panel, select Devices
- Select your magazine to sequester in the North panel. A magazine with an airgap policy applied will have a Device Type of Magazine (Airgap).
-
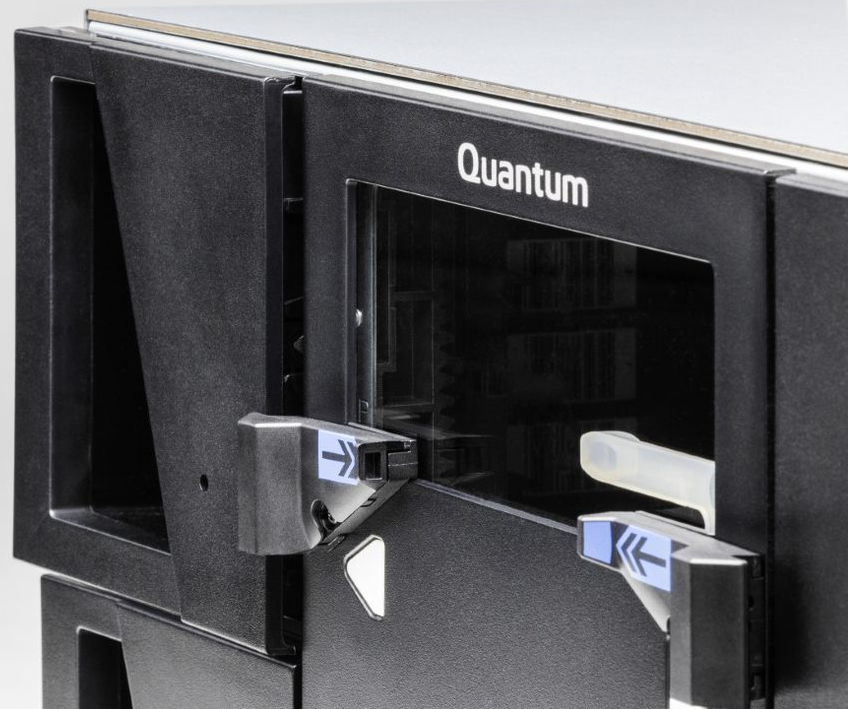
From the Operation panel, select Sequester. The library will begin the sequester procedure. Once the sequester is complete, the magazine will be in the following state:
-
Magazine will be ejected out of the library against the magazine eject stop (see image below).

-
Magazine eject buttons will flash orange in one second intervals.
-
Magazine will have a status of Sequestered in the Library > Devices north panel.

-
There are several scenarios where the magazine will need to be inserted into a library.
-
The magazine was ejected from the library using the magazine eject button on the front of the library.
-
The magazine was ejected using the eject function in the WebGUI (see Eject a Magazine).
-
A magazine has a Sequestor on Insert airgap policy (see Airgap Policies) applied to it and is sequestered. When this policy is applied, the magazine will automatically re-sequester if it is physically inserted back into the library and an insert request was not made by the library. To remove this policy and allow the magazine to be reinserted into the library, an insert a magazine request must first be sent to the appropriate magazine.
To successfully insert a sequestered airgap magazine with a Sequestor on Insert policy applied, do the following:
- From the Navigation panel, select Devices
- Select your magazine to insert in the North panel.
-
From the Operation panel, select Insert. The magazine will now be in the following state:
-
Magazine will still be ejected out of the library. For magazines that were sequestered, the magazine will be against the magazine eject stop.
-
Magazine eject button will now flash orange and green in one second intervals.
-
Magazine will have a status of Pending Insert in the Library > Devices north panel.

-
-
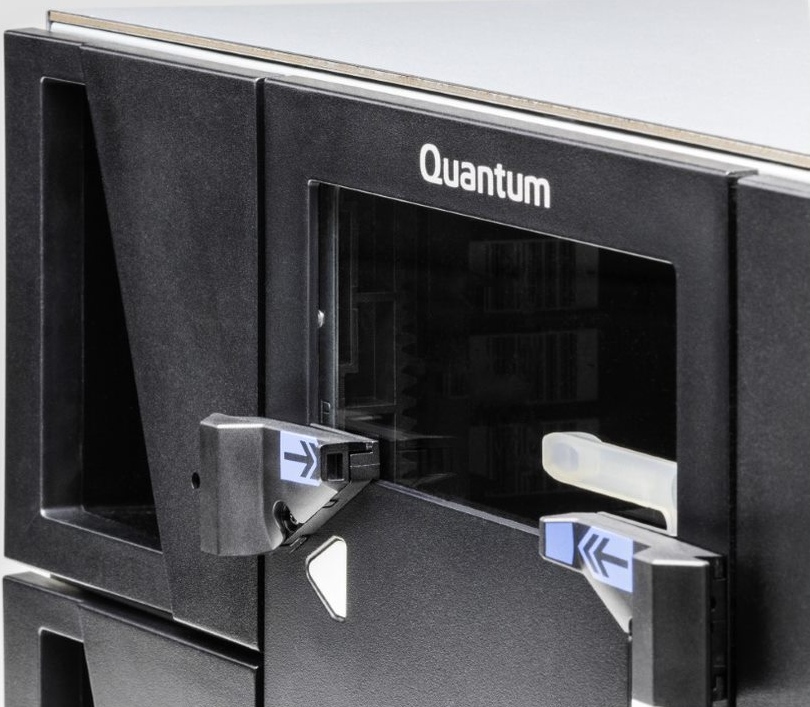
To complete the insert, the magazine must be physically pushed back into the library. The magazine eject button will begin to flash green in one second intervals. Once the insertion is complete, the magazine will be in the following state:
-
Magazine will be reinserted into the library.
For magazines that were sequestered, the magazine will no longer be against the magazine eject stop and will be reinserted into the library.(see image below)

-
Magazine eject button will have no flashing state.
-
Magazine will have a status of Good in the Library > Devices north panel.

-
There are instances when a specific magazine needs to be identified in the physical library. In these cases, using the Identify feature causes the magazine eject button to blink rapid orange so that the magazine can be found quickly.
- From the Navigation panel, select Devices.
- In the North Panel, select the check box next to one or more magazines you want to identify.
- In the Operations panel, click Identify On. The magazine eject button for the selected magazines will flash rapid orange. In addition, the magazine location in the North panel will begin to flash green.
- In the Operations panel, click Identify On or Identify Off.The magazine eject button for the selected magazines will no longer flash. In addition, the magazine location in the North panel will no longer flash green.
To inventory media in specific magazines, select one or more magazines in the North Panel.
Additional Information
-
Media contained in a sequestered airgap magazine can still be inventoried by the library (see Airgap Policies).
-
Media that has logical tape blocking applied to it can still be inventoried by the library (see Block Media ).
- From the Navigation panel, select Devices.
- In the North Panel, select the check box next to one or more magazines you want to inventory.
- In the Operations panel, click Inventory.
