minute read
Library Firmware 77xQ and Above Upgrade Procedure
|
|
How to Create a PDF |
Overview
This guide describes the upgrade process from library firmware 77xQ and above to the 841Q firmware release. Refer to the latest Release Notes for a list of enhancements and bug fixes in this release.
Important Information - 840Q Upgrade Requirements
- This firmware upgrade is only for Gen2 systems with MCB2 and RCU2 PCBAs. Any systems with older hardware must be upgraded prior to installing 841Q. The release cannot be used for Gen1 robotics systems.
- This upgrade does not support the 6404 FCB (Fibre Channel Blade) and does not support SDLT drives.
- All libraries upgraded to the release must be i6000 systems.
- Upgrades with 77x firmware or greater use the WebGUI.
- If the library has a Gen1 robot, EXTENDED DOWNTIME WILL BE NEEDED.
- If your system does not meet any of the upgrade requirements, please contact Quantum Service and Support for assistance.
| Firmware | Version |
|---|---|
| Library Firmware Version | 841Q.GS00300 |
| LMC Server Version |
840G.GH05200 |
| LMC Client Version |
840G.GH05200 |
| MCB2B Version | 841Q.GS00300 |
| CMB1 Version | 730G.GC00200 |
| CMB2 Version | 841G.GD00300 |
| RCU2 Version | 841G.GP001 |
| RCU2 Boot Version | 800G.GP006 |
| FCB Version 6404 | V04700315 |
| FCB Version 7404 | V05120150 |
| Robot Version | 840G.GP009 |
| EEB Version | 170G.GC00400 |
| EMB Version | 840G.GB00200 |
| HDC Version | 840G.GP011 |
| UDS Version | 840Q.GU012 |
| WebGUI Version | 461G.GW00100 |
| PIP Version | 2.2 |
|
Note: If the unit does not have an EEB blade, the EEB version will display “UNKNOWN”. |
|
The latest firmware for the following drives is included in the library firmware bundle:
| Drive | Firmware Bundled in 840 |
|---|---|
| IBM LTO-5 (FC) 8 Gb | H970 |
|
IBM LTO-6 (FC) 8 Gb |
KAJ8 |
|
IBM LTO-7 (FC) 8 Gb |
S2T4 |
|
IBM LTO-8 (FC) 8 Gb |
S2T4 |
|
IBM LTO-9 (FC) 8 Gb |
S2S0 |
|
IBM LTO-9 (SAS) 12 Gb |
S2S0 |
|
IBM LTO-10 (FC) 32 Gb |
SBN0 |
|
IBM LTO-10 (SAS) 12 Gb |
SBN0 |
| HP LTO-5 (FC) 8 Gb | I6RZ |
|
HP LTO-6 (FC) 8 Gb |
J5WZ |
The library may automatically apply new firmware level to the tape drives, depending on the Auto Leveling policy. For drive firmware compatibility, please refer to the latest Release Notes.
Starting with the 770Q release, the Service license features include library firmware updates, tape drive firmware updates, library snapshot retrievals, automatic tech support e-mail notifications, diagnostic testing, and service log/chart support. The service license must be applied upon installation of a new library, or upon upgrades to 770Q or later firmware.
License key generation is available at the Quantum License Key Management web site:
Updating Gen2 Library Firmware From 77xQ and Above to 841Q
Important Information - Before You Begin
- Read the latest Release Notes.
- Retrieve the 841Q firmware image on Quantum.com.
- If the library is not connected to the Internet, you can get the latest library firmware from the Scalar i6000 page. Click the Firmware tab to download the desired firmware package to your computer.
-
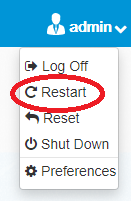
Reboot the library. This reboot process ensures that any memory leaks are not at a critical level where the upgrade will fail.
-
Save the library configuration.
 Save the Library Configuration
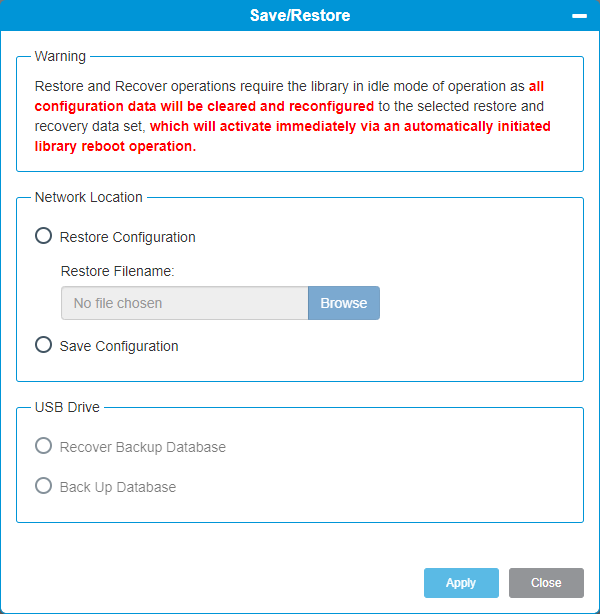
Your library has many configurable items, such as tape drive IDs, partitions, user accounts, Import/Export (I/E) slots, and cleaning slots. The Save/Restore window allows you to save your library's configuration and then restore the library’s firmware and configurable items to a previous state in the event of a hardware failure or firmware upgrade.

Item Description Action Restore Configuration Restores library to the selected configuration. After the restore, the library will automatically reboot.
Select the radio button. Restore Filename Allows you to select the name of the library configuration file you want to restore. Click the Browse button and navigate to the configuration file you want to use. Click Apply to begin restoring the library configuration. Save Configuration Saves the current library configuration. Select the radio button. Click Apply. The library configuration file is downloaded. You can then use the file locally or email it. USB Recover Backup Database Imports a backup library database from an attached USB drive. The database contains static configuration type data included in the save/restore images and dynamic data (EDLM, tape inventory, RAS, media usage tables). Select the radio button.
Click Apply. The library database on the USB drive is imported to the library.USB Backup Database Save a backup copy of the library database to an attached USB drive.The database contains static configuration type data included in the save/restore images and dynamic data (EDLM, tape inventory, RAS, media usage tables). Select the radio button. Click Apply. The library database is saved to the USB drive. Click Close to exit the window.
- Bring up the WebGUI by browsing to the library IP address (https: //<library ip address>)
- Logon using an Admin level user.
-
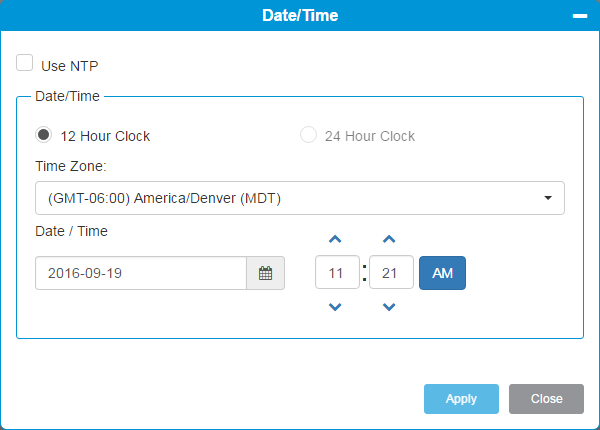
Ensure the time on the library is set to the proper time:
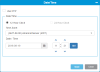
Setup Date and Time
This window allows you to configure date and time settings for your library, either by using NTP or defining them yourself.
- From the Navigation panel, select System.
-
In the Operations panel, click Date/Time.
Item Description Action Use NTP NTP – Network Time Protocol
NTP allows you to synchronize the library clock over a network to NTP. When you select this check box, a list of server fields appears, which allows you to enter the IP or URI address of up to five NTP servers.
Select this check box. For details on setting up NTP servers, see Setup Date and Time. To disable NTP, deselect the check box. 12/24 Hour Clock Displays the time in standard (12 hr) or military/European (24 hr) format. Select the desired radio button. Time Zone Allows you to select the time zone where the library resides. Select a value from the drop-down menu. Date Allows you to manually select the current date. Available if you don't use NTP. Click the Calendar icon  and use the arrows to navigate to the correct month. Then select the desired day.
Hour Allows you to manually select the current hour. Use the arrow buttons to specify the hour. Minute Allows you to manually select the current minute. Use the arrow buttons to specify the desired minute. -
Click Apply to save your settings.
-
Click Close to exit the window.
-
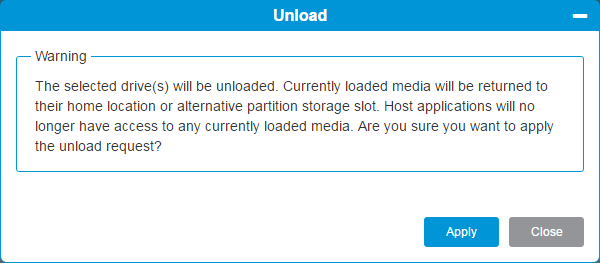
Ensure that all drives are unloaded. Use the host application to unload any cartridges from drives. If you cannot do so from the application, use the WebGUI to unload all drives.
Drive Unload
The Unload Drive operation allows you to unload a cartridge from a tape drive to a storage slot without being physically at the library. The storage slot and tape drive must be assigned to the same partition.
-
From the Navigation panel, select Drives.
- In the North Panel, select the drive you want to eject the tape from. In the row for the drive, the media column contains the barcode of the tape currently in the drive.
-
From the Operations panel, click Unload.

Note: If you experience a stuck tape while trying to unload, vary the drive off and on (see Library Firmware 77xQ and Above Upgrade Procedure). When it is back to ready, select the drive and click Unload.
-
-
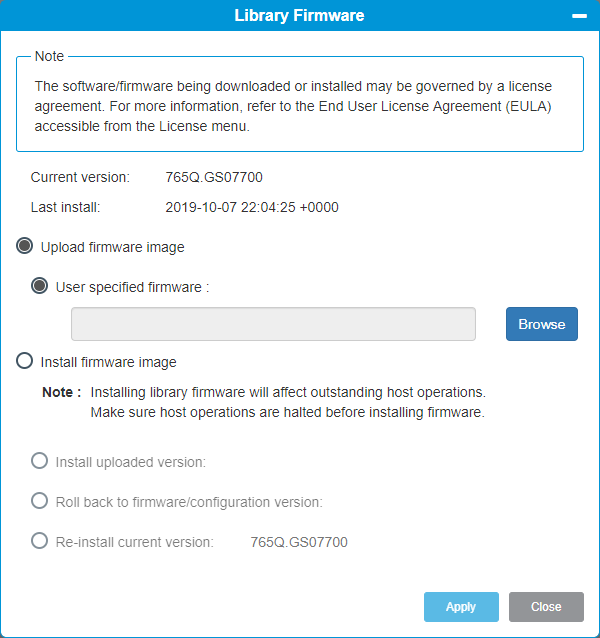
Update the Library Firmware.
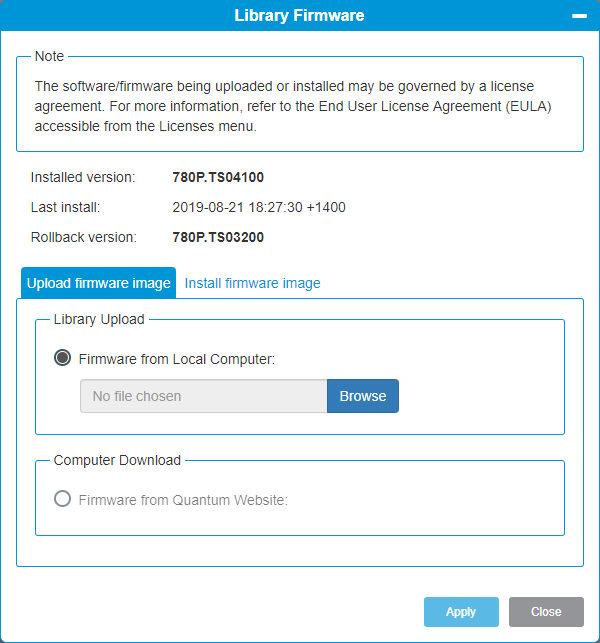
A library firmware upgrade involves two different actions: uploading the firmware and installing the firmware. On the window, you can view the current version of installed firmware and install a manually uploaded version, or install the latest released firmware version, which is available through the Quantum website. This allows you to upload the library firmware and install when convenient.
Update Library Firmware from i13.1
- From the Navigation panel, select System.
-
In the Operations panel, click Library Firmware.

-
To upload the latest firmware, select Upload firmware image and click Browse.
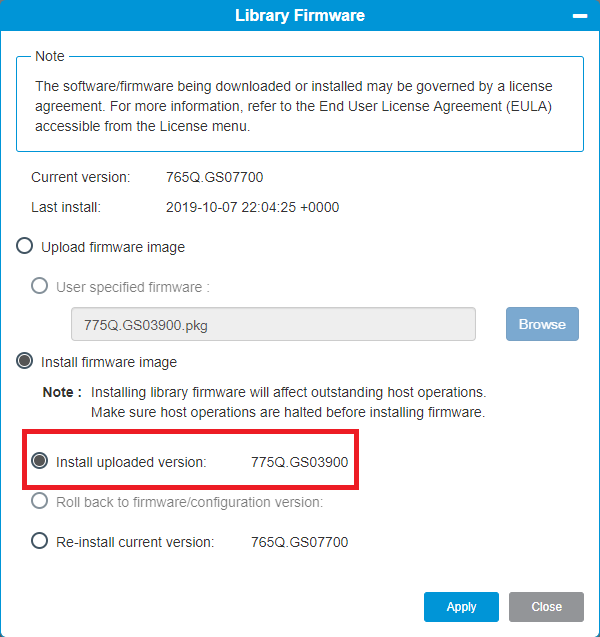
- Navigate to the appropriate folder on your laptop and select the firmware. The firmware will appear in the field under User specified firmware.
-
Click Apply. The firmware will upload to the library. Once the firmware has completed its upload, it will appear in the Install uploaded version radio button.

- Select Install firmware image.
- Select Install uploaded version.
- Click Apply to begin the library firmware upgrade process.
Update Library Firmware from i13.2 and Above
- From the Navigation panel, select System.
-
In the Operations panel, click Library Firmware.

-
To upload the latest firmware, select the Upload firmware image tab.
- Select Firmware from Local Computer and click Browse.
- Navigate to the appropriate folder on your laptop and select the firmware. The firmware will appear in the field under Firmware from Local Computer
-
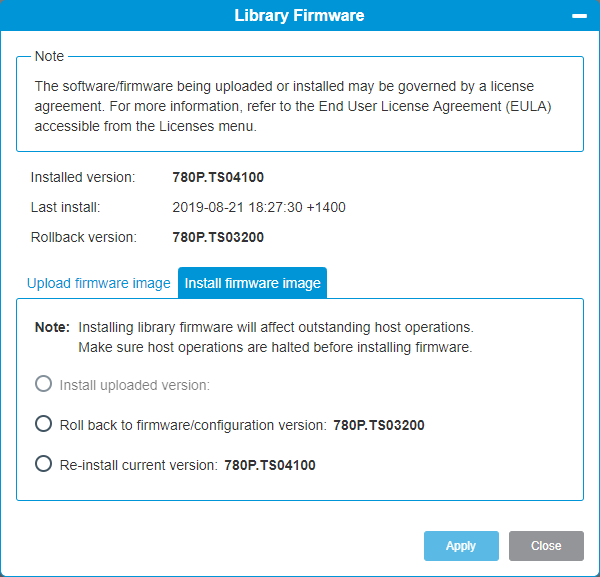
Click Apply. The firmware will upload to the library. Once the firmware has completed its upload, select the Install firmware image tab.

- Select Install uploaded version and click Apply to begin the upgrade process.
-
During the upgrade process, the library will reboot. The browser window will automatically re-connect after the firmware update completes.
-
When the browser refreshes, and the log in screen returns, log back on to the WebGUI. Under System > Licenses, review the current status of the Service License.
Starting with the i13.2 release, the Service License features include library firmware updates, tape drive firmware updates, library snapshot retrievals, automatic tech support e-mail notifications, diagnostic testing, and service log/chart support. The service license must be applied upon installation of a new library, or upon upgrades to i13.2 or later firmware.
License key generation is available at the Quantum License Key Management web site:
https://www.quantum.com/en/service-support/licensekeys/
For additional assistance regarding your Service License, contact Quantum Service and Support .
-
Save the library configuration.
The Save/Restore window allows you to save your library's configuration and then restore the library’s firmware and configurable items to a previous state in the event of a hardware failure or firmware upgrade.
Item Description Action Restore Configuration Restores library to the selected configuration. After the restore, the library will automatically reboot.
Select the radio button. Restore Filename Allows you to select the name of the library configuration file you want to restore. Click the Browse button and navigate to the configuration file you want to use. Click Apply to begin restoring the library configuration. Save Configuration Saves the current library configuration. Select the radio button. Click Apply. The library configuration file is downloaded. You can then use the file locally or email it. Click Close to exit the window.