minute read
Scalar i6000 Diagnostics
Overview
Diagnostics lists the available tests for your library. These tests will allow you determine if your library is working as intended and help you identify what isn't working correctly.
| Diagnostic Test | Description |
|---|---|
| Robot Accessor Test |
Performs accessor installation, alignment and calibration tests, as well as horizontal and vertical positioning tests to verify proper robot accessor installation and positioning. |
| Robot Picker Test |
Performs picker pivot, reach and retract tests, as well as Get/Put and Scan tests to verify proper picker functionality and operation. |
| Robot Assembly Test |
Performs a robot self test and at least one Get/Put operation as well as a scan operation to verify proper robot installation, robotic positioning, gripper pick and place capabilities and scan functionality. |
| I/E Station Assembly Test |
Verifies I/E station functionality with respect to I/E station operation as well as robotic magazine access. The I/E Station Assembly Test validates lock and unlock operations, performs calibration tests and determines robotic tape cartridge scan and Get/Put capabilities. |
| Tower Assembly Test |
Performs tower installation, positioning and accessibility tests to validate tower installation and operability. The Tower Assembly Test verifies tower homing accuracy, performs positioning repeatability tests, tower scanner assembly tests and verifies robotic Get/Put accessibility to all configured storage magazine slots. Note: If your library does not contain a tower, this test will not appear as a diagnostic test option. |
| Tower Scanner Test |
Verifies tower scanner assembly functionality, verifying vertical scanner motion operability and scanning operations at tower magazine identification labels. Note: If your library does not contain a tower, this test will not appear as a diagnostic test option. |
| Robot Scanner Test |
Performs teach calibration sensor tests and scan operations at all magazine and drive fiducial tabs to determine teach sensor operability as well as scanner and fiducial scan repeatability and quality. |
| Library Get/Put Test |
Verifies magazine access functionality with respect to magazine assembly and installation as well as robotic slot access within the magazines. This test validates magazine slot positions, verifies full and empty slot detection and performs Get/Put operations at the top and bottom slots of every linear storage magazine and top and bottom slot of every tower storage column for tape cartridge accessibility evaluation. |
| Drive Assembly Test |
Verifies drive sled functionality with respect to drive installation as well as robotic drive access. The Drive Assembly Test validates drive load and unload operations and determines robotic tape cartridge scan capabilities for mounted and unmounted tape cartridges. The Drive Assembly Test does not perform read/write or drive connectivity tests. |
| Installation Verification Test |
Performs a complete library installation test to verify robotic operation within the current library configuration. IVT determines proper installation and operation by performing robotic self tests as well as scanning and Get/Put tape cartridge tests at storage and I/E slot and drive sled locations. IVT uses existing tape cartridges for in-place Get/Put testing, while moving a scratch tape to empty locations to verify proper slot and/or drive sled accessibility. |
| Library Alignment Test |
Performs robot accessor positioning tests, including frame joint alignment quality, and calibrates and checks magazine, drive and I/E station calibration offsets to determine overall library alignment quality. |
| Barcode Label Test |
Performs accessor installation, alignment and calibration tests, as well as horizontal and vertical positioning tests to verify proper robot accessor installation and positioning. |
Layout
List all available test. Highlighting the test displays a description of the test in the Information Panel. To perform the test, select it, then click the Test button.
| Column | Description |
|---|---|
| Name | Diagnostic test name. |
| Last Invocation | Indicates last time diagnostic test was run. yyyy-mm-dd hh:mm:ss format. |
| Status | Indicates the current status of the test: In Progress, Pending, Stopped, Terminated, Failed, or Complete. |
Displays a description of the highlighted test.
Provides options for device interaction.
| Link | |
|---|---|
| Test |
Performs the test selected in the North Panel |
Tasks
Important Information
-
You must use a data tape as a scratch tape. If you use a cleaning tape as a scratch tape, the Library Get/Put Test will not occur and no results returned in the diagnostic test.
-
When a diagnostic test is canceled, the dialog box will not immediately close. It may take several minutes for the test to successfully cancel and close the dialog box.
Actions
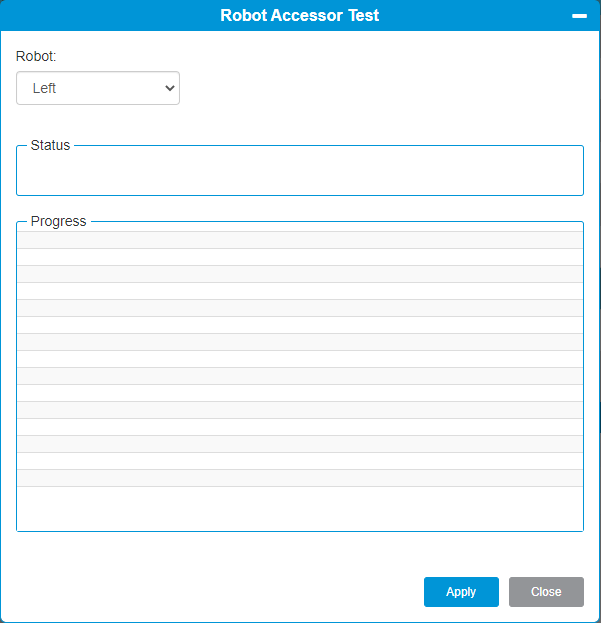
The Robot Accessor Test performs accessor installation, alignment and calibration tests, as well as horizontal and vertical positioning tests to verify proper robot accessor installation and positioning.
- From the Navigation panel, select Diagnostics.
- Select Robot Accessor Test from the North Panel.
-
From the Operations panel, select Test.

Item Description Action Robot Robot to be tested. Select a robot from the drop-down box. Progress Area Provides test status. Information only. -
Click Apply to save your settings and begin the test.
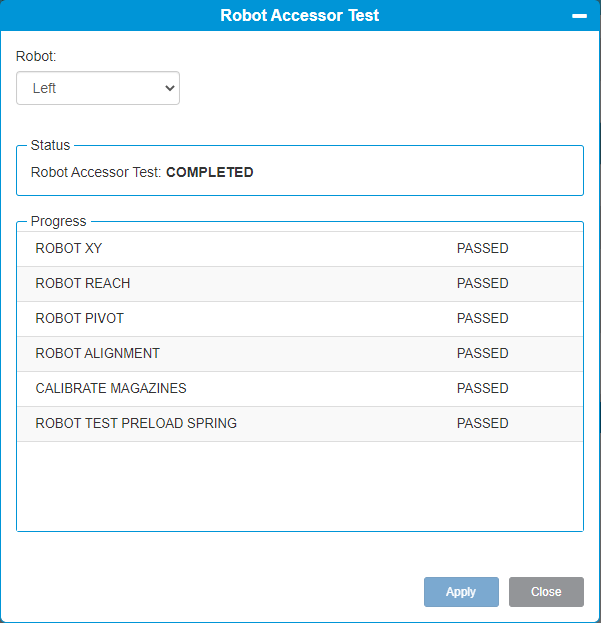
When running, the test status will display In Progress. When complete, the status will change to Completed and the test results will appear in the Progress Area.

Test Results
The following robot parameters are tested in this diagnostic test:
-
Robot XY Motion
-
Robot Reach
-
Robot Pivot
-
Robot Alignment
-
Robot Magazine Calibration
-
Robot Preload Spring
-
-
Click Close to exit the window.
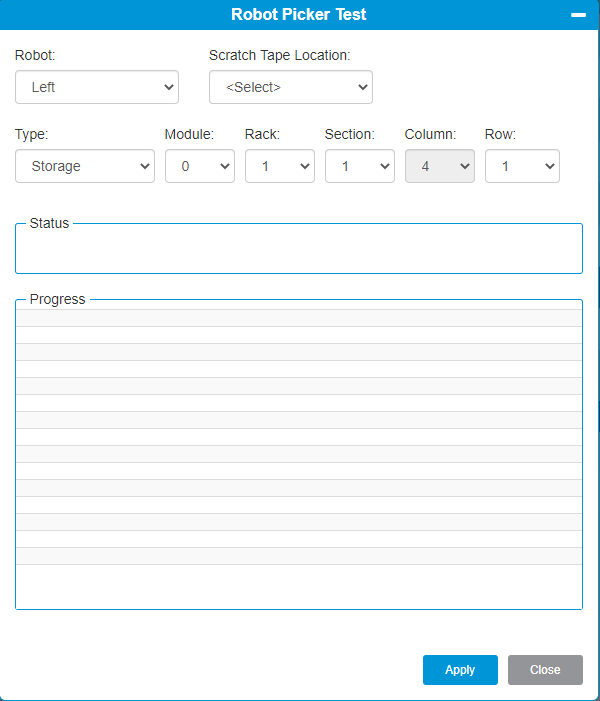
The Robot Picker Test performs picker pivot, reach and retract tests, as well as Get/Put and Scan tests to verify proper picker functionality and operation.
- From the Navigation panel, select Diagnostics.
- Select Robot Picker Test from the North Panel.
-
From the Operations panel, select Test.

Item Description Action Robot Robot to be tested. Select a robot from the drop-down box. Scratch Tape Location Allows you to select a scratch tape. Scratch tapes must be in an I/E slot. Select a scratch tape from the drop-down box. Type Test storage, I/E, or drive sled locations. Select a location type from the drop-down box. Module Module location to be tested. Select a module from the drop-down box. Rack Rack location to be tested. Select a rack from the drop-down box. Section Section location to be tested. Select a section from the drop-down box. Column Column location to be tested. Select a column from the drop-down box. Row Row location to be tested. Select a row from the drop-down box. Progress Area Provides test status. Information only. -
Click Apply to save your settings.
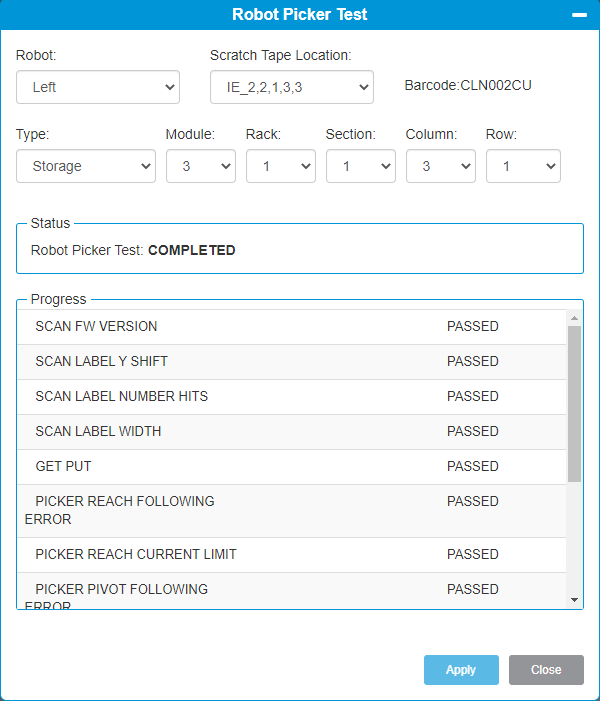
When running, the test status will display In Progress. When complete, the status will change to Completed and the test results will appear in the Progress Area.

Test Results
The following robot parameters are tested in this diagnostic test:
-
Robot Scanner - Firmware Version
-
Robot Scanner - Label Y Shift
-
Robot Scanner - Label Number Hits
-
Robot Scanner - Label Width
-
Robot Get/Put Operation
-
Robot Picker - Reach Following Error
-
Robot Picker - Reach Current Limit
-
Robot Picker - Pivot Following Error
-
Robot Picker - Pivot Current Limit
-
Robot Picker and Sled Compatibility
-
-
Click Close to exit the window.
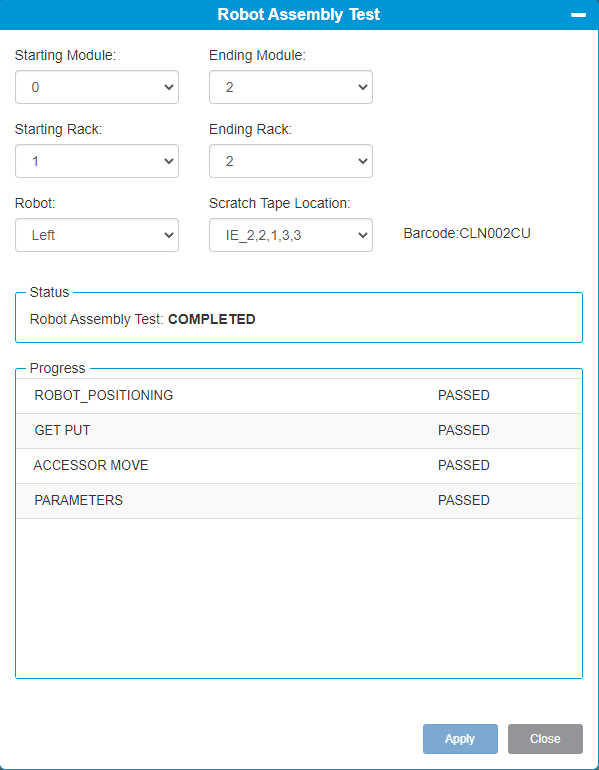
The Robot Assembly Test performs a robot self test and at least one Get/Put operation as well as a scan operation to verify proper robot installation, robotic positioning, gripper pick and place capabilities and scan functionality.
You can run a full test on all modules, or a partial test on specific modules in the library.
- From the Navigation panel, select Diagnostics.
- Select Robot Assembly Test from the North Panel.
-
From the Operations panel, select Test.

Item Description Action Starting Module Allows you to select the first module to be tested. Select a module from the drop-down box. Ending Module Allows you to select the final module to be tested.
Select a module from the drop-down box. Starting Rack Allows you to select the first rack to be tested. Select a rack from the drop-down box. Ending Rack Allows you to select the final rack to be tested. Select a rack from the drop-down box. Robot Robot to be tested. Select a robot from the drop-down box. Scratch Tape Location Allows you to select a scratch tape. Scratch tapes must be in an I/E slot. Select a scratch tape from the drop-down box. Progress Area Provides test status. Information only. -
Click Apply to save your settings.
When running, the test status will display In Progress. When complete, the status will change to Completed and the test results will appear in the Progress Area.

Test Results
The following robot parameters are tested in this diagnostic test:
-
Robot Positioning
-
Robot Get/Put Operation
-
Robot Accessor Move
-
-
Click Close to exit the window.

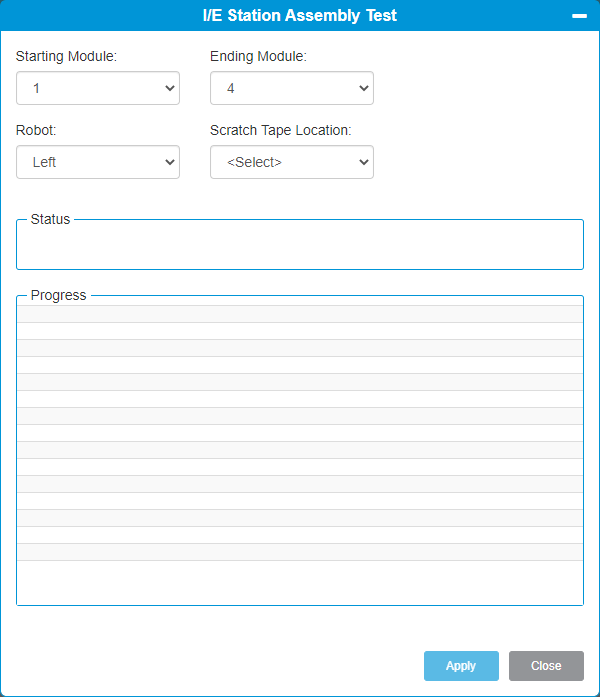
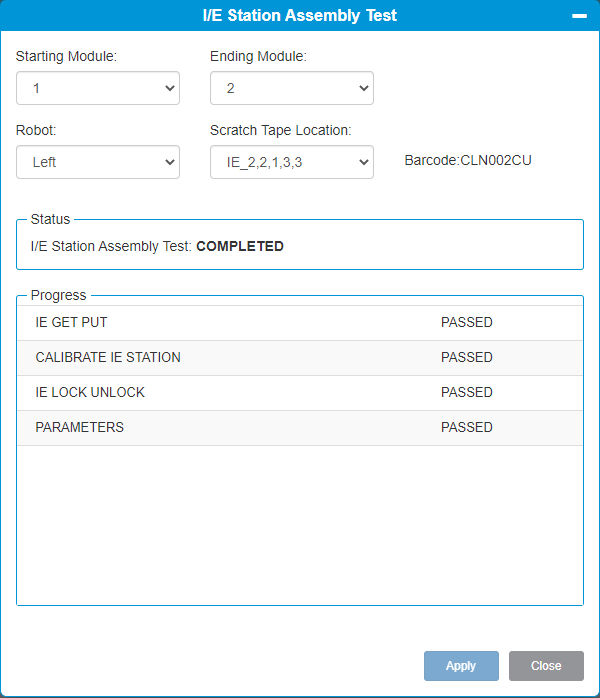
The I/E Station Assembly Test verifies I/E station functionality with respect to I/E station operation as well as robotic magazine access. The I/E Station Assembly Test validates lock and unlock operations, performs calibration tests and determines robotic tape cartridge scan and Get/Put capabilities.
You can run a full test on all modules that have I/E stations, or a partial test on specific modules.
- From the Navigation panel, select Diagnostics.
- Select I/E Station Assembly Test from the North Panel.
-
From the Operations panel, select Test.

Item Description Action Starting Module Allows you to select the first module to be tested. Select a module from the drop-down box. Ending Module Allows you to select the final module to be tested.
Select a module from the drop-down box. Robot Robot to be tested. Select a robot from the drop-down box. Scratch Tape Location Allows you to select a scratch tape. Scratch tapes must be in an I/E slot. Select a scratch tape from the drop-down box. Progress Area Provides test status. Information only. -
Click Apply to save your settings.
When running, the test status will display In Progress. When complete, the status will change to Completed and the test results will appear in the Progress Area

Test Results
The following I/E station parameters are tested in this diagnostic test:
-
I/E Station Get/Put Operations
-
I/E Station Calibration
-
I/E Station Lock/Unlock
-
I/E Station Parameters
-
-
Click Close to exit the window.
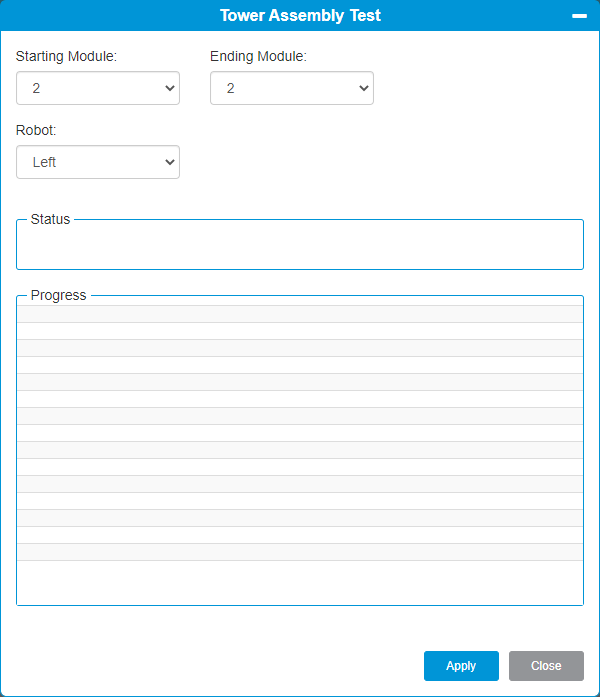
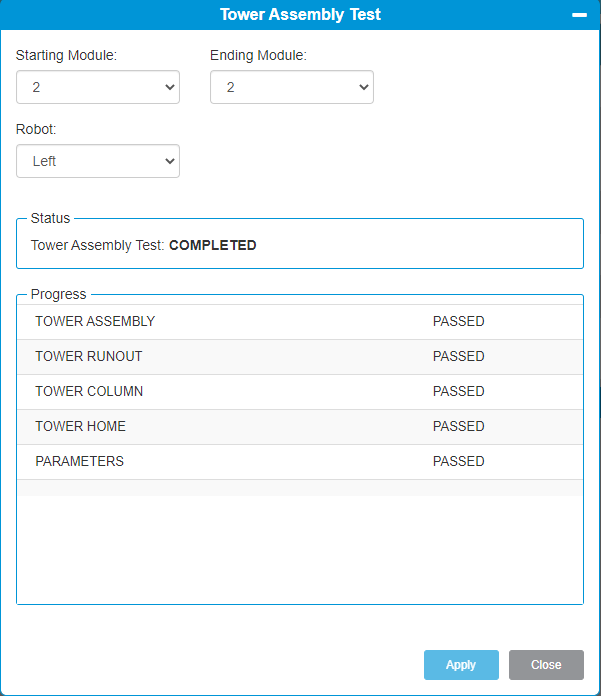
The Tower Assembly Test performs tower installation, positioning and accessibility tests to validate tower installation and operability. The Tower Assembly Test verifies tower homing accuracy, performs positioning repeatability tests, tower scanner assembly tests and verifies robotic Get/Put accessibility to all configured storage magazine slots.
You can run a full test on all towers, or a partial test on specific tower in the library.
Note: If your library does not contain a tower, this test will not appear as a diagnostic test option.
- From the Navigation panel, select Diagnostics.
- Select Tower Assembly Test from the North Panel.
-
From the Operations panel, select Test.

Item Description Action Starting Module Allows you to select the first module to be tested. Select a module from the drop-down box. Ending Module Allows you to select the final module to be tested.
Select a module from the drop-down box. Robot Robot to be tested. Select a robot from the drop-down box. Progress Area Provides test status. Information only. -
Click Apply to save your settings.
When running, the test status will display In Progress. When complete, the status will change to Completed and the test results will appear in the Progress Area.

Test Results
The following tower parameters are tested in this diagnostic test:
-
Tower Assembly
-
Tower Runout
-
Tower Columns
-
Tower Home
-
-
Click Close to exit the window.
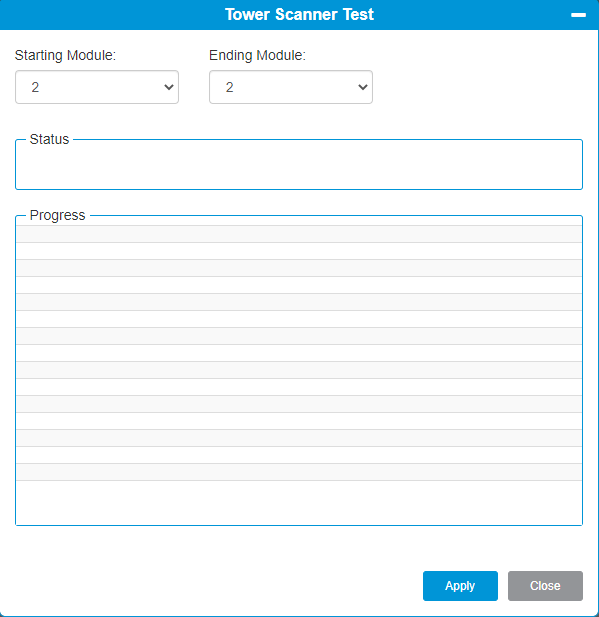
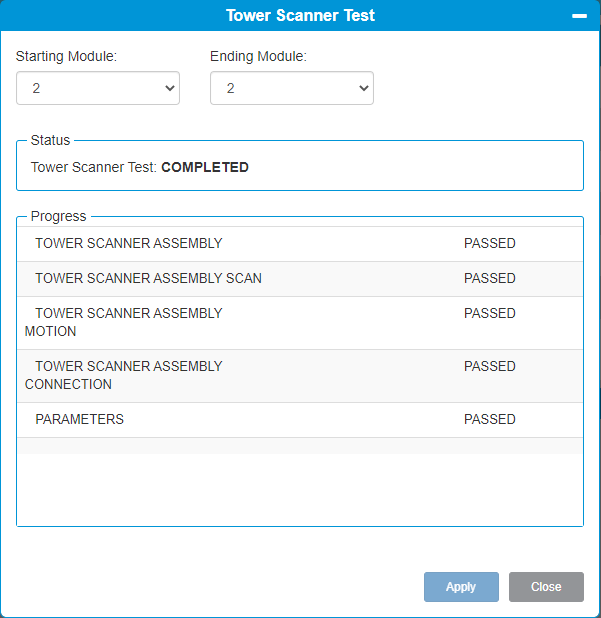
The Tower Scanner Test verifies tower scanner assembly functionality, verifying vertical scanner motion operability and scanning operations at tower magazine identification labels.
You can run a full test on all towers, or a partial test on specific tower in the library.
Note: If your library does not contain a tower, this test will not appear as a diagnostic test option.
- From the Navigation panel, select Diagnostics.
- Select Tower Scanner Test from the North Panel.
-
From the Operations panel, select Test.

Item Description Action Starting Module Allows you to select the first module to be tested. Select a module from the drop-down box. Ending Module Allows you to select the final module to be tested.
Select a module from the drop-down box. Robot Robot to be tested. Select a robot from the drop-down box. Progress Area Provides test status. Information only. -
Click Apply to save your settings.
When running, the test status will display In Progress. When complete, the status will change to Completed and the test results will appear in the Progress Area

Test Results
The following tower scanner parameters are tested in this diagnostic test:
-
Tower Scanner Assembly
-
Tower Scanner Assembly Scan
-
Tower Scanner Assembly Motion
-
Tower Scanner Assembly Connection
-
-
Click Close to exit the window.
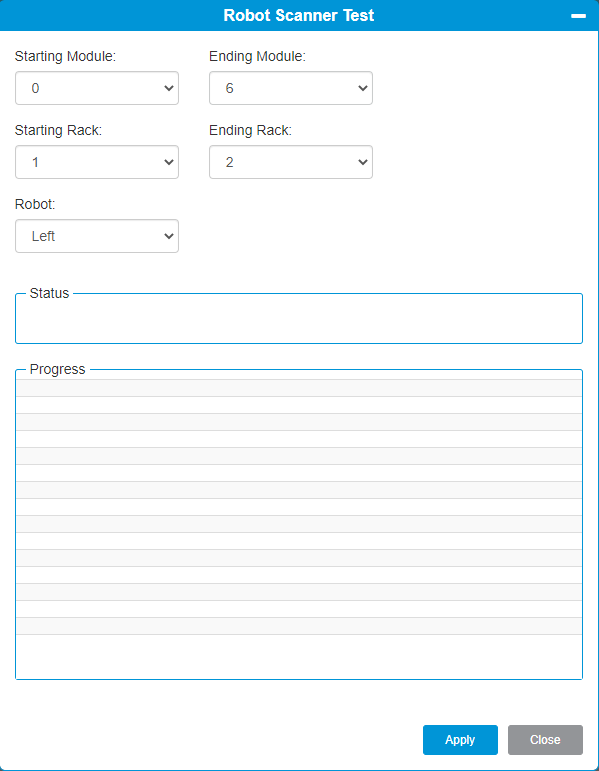
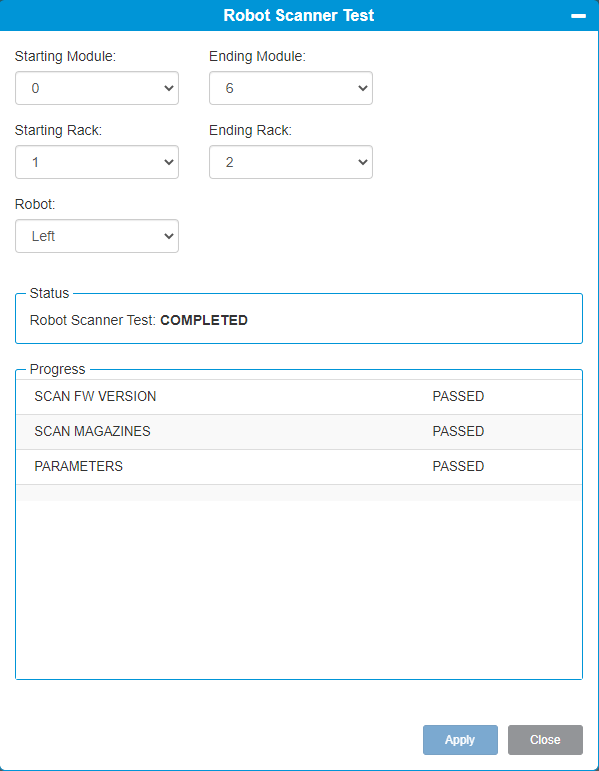
The Robot Scanner Test performs teach calibration sensor tests and scan operations at all magazine and drive fiducial tabs to determine teach sensor operability as well as scanner and fiducial scan repeatability and quality.
You can run a full test on all modules, or a partial test on specific modules in the library.
- From the Navigation panel, select Diagnostics.
- Select Robot Scanner Test from the North Panel.
-
From the Operations panel, select Test.

Item Description Action Starting Module Allows you to select the first module to be tested. Select a module from the drop-down box. Ending Module Allows you to select the final module to be tested.
Select a module from the drop-down box. Starting Rack Allows you to select the first rack to be tested. Select a rack from the drop-down box. Ending Rack Allows you to select the final rack to be tested. Select a rack from the drop-down box. Robot Robot to be tested. Select a robot from the drop-down box. Progress Area Provides test status. Information only. -
Click Apply to save your settings.
When running, the test status will display In Progress. When complete, the status will change to Completed and the test results will appear in the Progress Area

Test Results
The following robot scanner parameters are tested in this diagnostic test:
-
Scanner Firmware
-
Scanner Magazines
-
-
Click Close to exit the window.
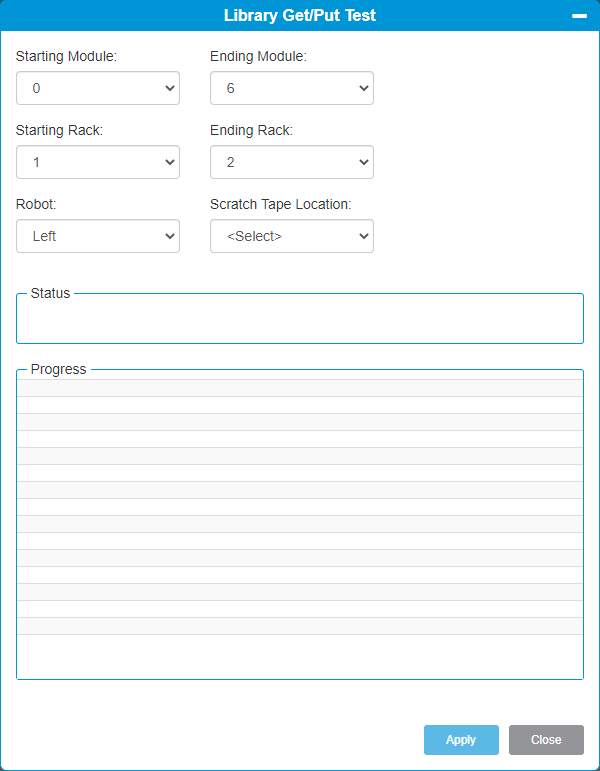
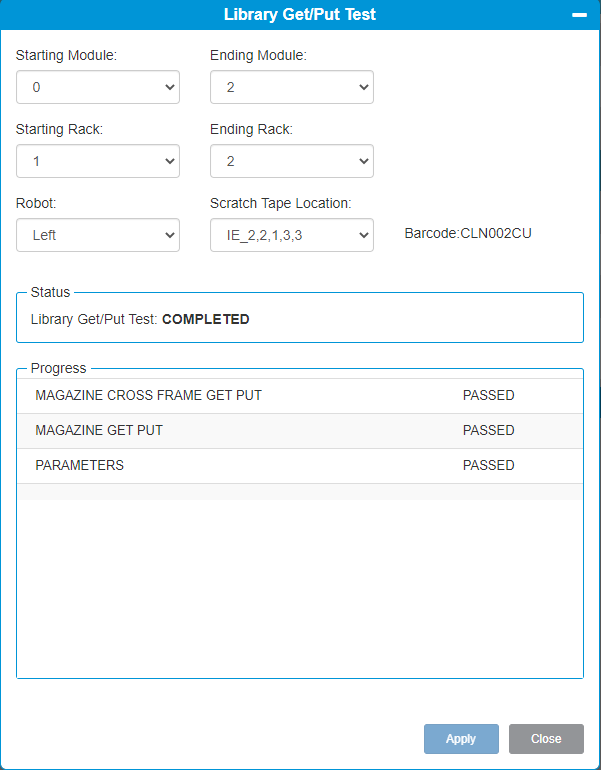
The Library Get/Put test verifies magazine access functionality with respect to magazine assembly and installation as well as robotic slot access within the magazines. This test validates magazine slot positions, verifies full and empty slot detection and performs Get/Put operations at the top and bottom slots of every linear storage magazine and top and bottom slot of every tower storage column for tape cartridge accessibility evaluation.
You can run a full test on all modules, or a partial test on specific modules in the library.
- From the Navigation panel, select Diagnostics.
- Select Library Get/Put Test from the North Panel.
-
From the Operations panel, select Test.

Item Description Action Starting Module Allows you to select the first module to be tested. Select a module from the drop-down box. Ending Module Allows you to select the final module to be tested.
Select a module from the drop-down box. Starting Rack Allows you to select the first rack to be tested. Select a rack from the drop-down box. Ending Rack Allows you to select the final rack to be tested. Select a rack from the drop-down box. Robot Robot to be tested. Select a robot from the drop-down box. Scratch Tape Location Allows you to select a scratch tape. Scratch tapes must be in an I/E slot. Select a scratch tape from the drop-down box. Progress Area Provides test status. Information only. -
Click Apply to save your settings
When running, the test status will display In Progress. When complete, the status will change to Completed and the test results will appear in the Progress Area

Test Results
The following Get/Put parameters are tested in this diagnostic test:
-
Magazine Cross Frame Get/Put
-
Magazine Get/Put
-
-
Click Close to exit the window.
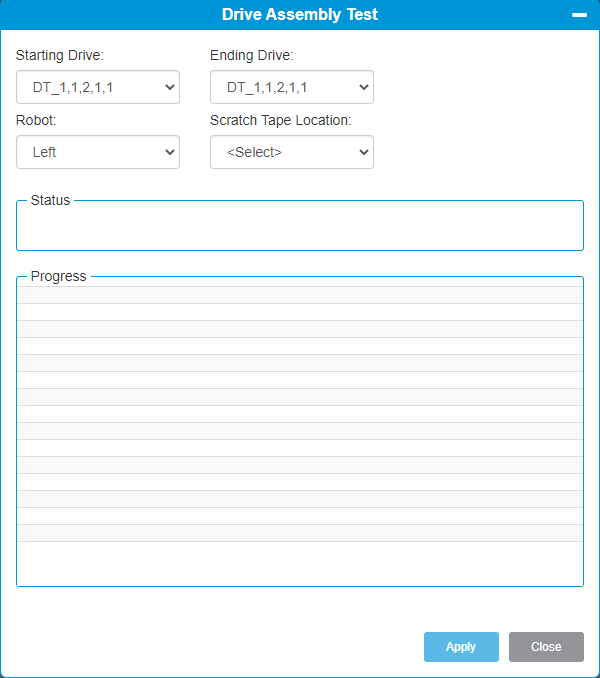
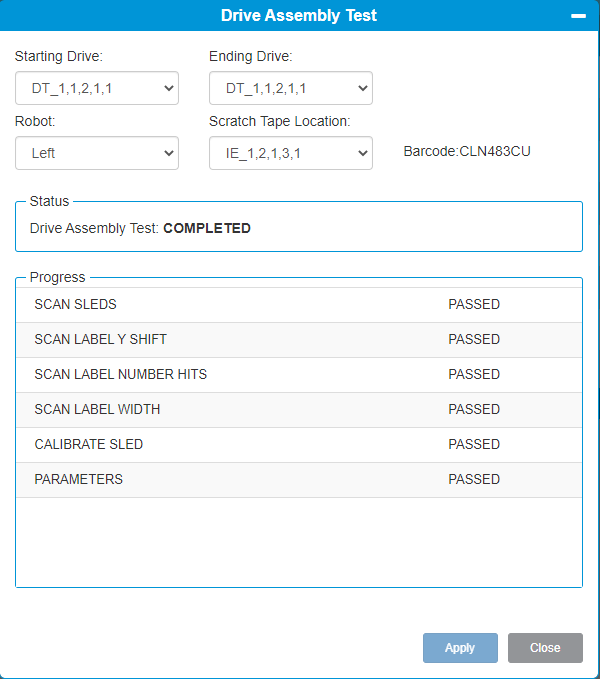
The Drive Assembly Test verifies drive sled functionality with respect to drive installation as well as robotic drive access. The Drive Assembly Test validates drive load and unload operations and determines robotic tape cartridge scan capabilities for mounted and unmounted tape cartridges. The Drive Assembly Test does not perform read/write or drive connectivity tests.
- From the Navigation panel, select Diagnostics.
- Select Drive Assembly Test from the North Panel.
-
From the Operations panel, select Test.

Item Description Action Starting Drive Allows you to select the first drive to be tested. Select a drive from the drop-down box. Ending Drive Allows you to select the final drive to be tested.
Select a drive from the drop-down box. Robot Robot to be tested. Select a robot from the drop-down box. Scratch Tape Location Allows you to select a scratch tape. Scratch tapes must be in an I/E slot. Select a scratch tape from the drop-down box. Progress Area Provides test status. Information only. -
Click Apply to save your settings.
When running, the test status will display In Progress. When complete, the status will change to Completed and the test results will appear in the Progress Area

Test Results
The following drive sled parameters are tested in this diagnostic test:
-
Scan Sleds
-
Scan Label Y Shift
-
San Label Number of Hits
-
Scan Label Width
-
Sled Calibration
-
-
Click Close to exit the window.
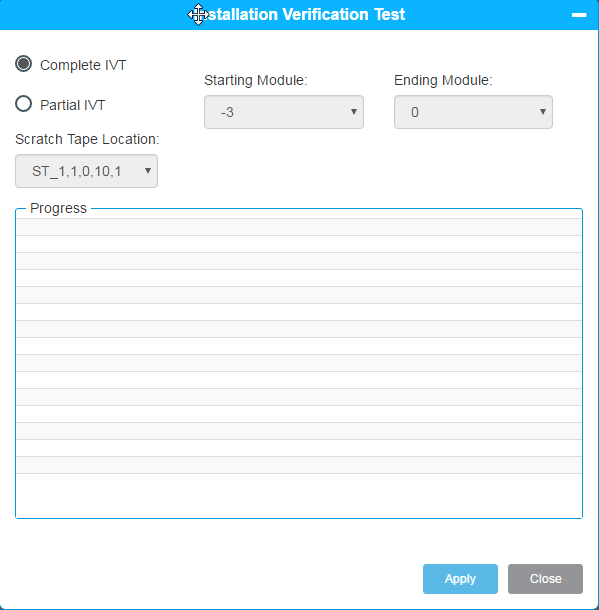
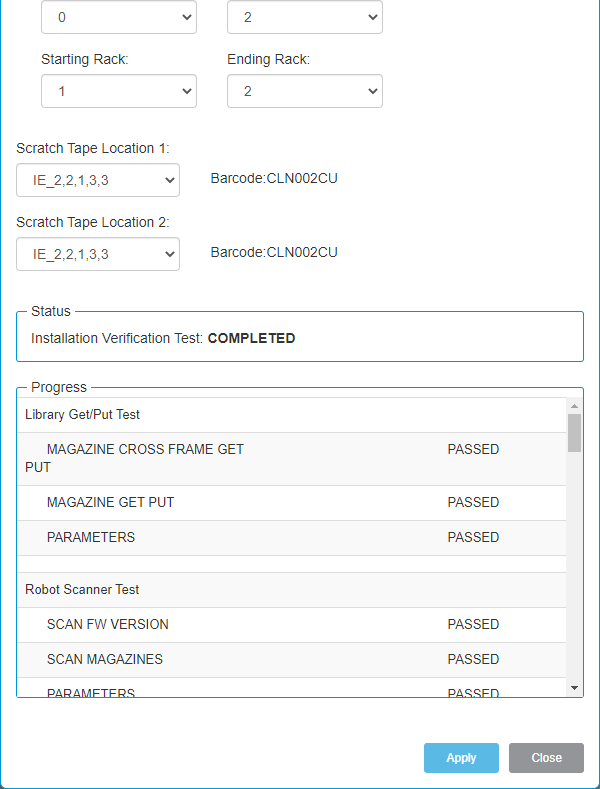
The Installation Verification Test (IVT) performs a complete library installation test to verify robotic operation within the current library configuration. IVT determines proper installation and operation by performing robotic self tests as well as scanning and Get/Put tape cartridge tests at storage and I/E slot and drive sled locations. IVT uses existing tape cartridges for in-place Get/Put testing, while moving a scratch tape to empty locations to verify proper slot and/or drive sled accessibility.
You can run a full IVT on all modules, or a partial IVT on specific modules in the library.
IVT Prerequisites
Review the following before running an IVT test:
- The library should have no unresolved RAS tickets.
- The library WebGUI accurately reflects the actual number of modules and drives in the system.
- The library is in a READY state all magazines are properly inserted.
- A scratch tape must be provided and placed into the first slot of the configured I/E area (Control Module's top right magazine, first column, bottom slot). If an I/E area is not configured, this slot position will be used by the library to locate the scratch tape, even if this slot is assigned as a storage slot to a partition.
-
Do Not use any cleaning tape as an IVT scratch tape. The IVT may fail due to timeout conditions.
- Do Not use an uncalibrated LTO-9 tape as an IVT scratch tape. If you do, the test will immediately fail and the drive will continue to calibrate the tape until it is complete. You will then need to manually remove the (now calibrated) tape and re-run IVT.
- If you do not have a calibrated LTO-9 scratch tape to run IVT, vary off the LTO-9 drives (see Vary Drive On or Off). This will prevent the test from failing due to LTO-9 calibration operations.
In addition to the prerequisites above, Quantum recommends that the scratch tape is read-capable by all drive generations in the library. If the tape cartridge media generation is not supported by a drive generation in the library, drive tests are skipped. The skipped drive tests will then need to be repeated with a scratch tape of compatible read format.
- From the Navigation panel, select Diagnostics.
- Select Installation Verification Test from the North Panel.
-
From the Operations panel, select Test.

Item Description Action Complete IVT Performs a test on all magazines, slots and drives in your library. Select this radio button. Partial IVT Performs a test on a range of selected modules. Select this radio button. Starting Module If a partial IVT is selected, allows you to select the first module to be tested. Select a module from the drop-down box. Ending Module If a partial partial IVT is selected, allows you to select the final module to be tested.
Select a module from the drop-down box. Starting Rack If a partial IVT is selected, allows you to select the first rack to be tested. Select a rack from the drop-down box. Ending Rack If a partial IVT is selected, allows you to select the final rack to be tested. Select a rack from the drop-down box. Scratch Tape Location 1/2 Allows you to select a scratch tape. Scratch tapes must be in an I/E slot. Select a scratch tape from the drop-down box. Progress Area Provides test status. Information only. -
Click Apply to save your settings.
When running, the test status will display In Progress. When complete, the status will change to Completed and the test results will appear in the Progress Area

Test Results
The following library diagnostic tests are performed during IVT:
-
Library Get/Put Test
-
Robot Scanner Test
-
Tower Scanner Test (If applicable to library configuration)
-
Tower Assembly Test (If applicable to library configuration)
-
I/E Station Assembly Test
-
Robot Assembly Test
-
Robot Picker Test
-
Library Alignment Test
-
-
Click Close to exit the window.
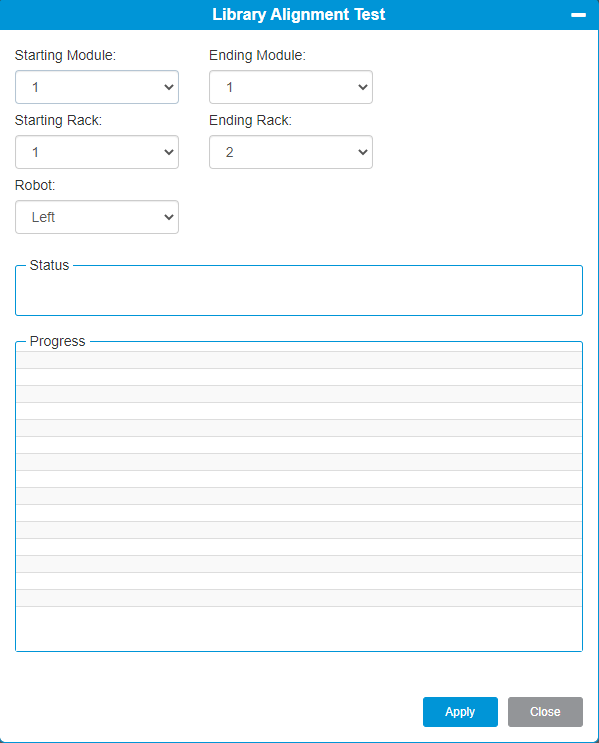
The Library Alignment Test performs robot accessor positioning tests, including frame joint alignment quality, and calibrates and checks magazine, drive and I/E station calibration offsets to determine overall library alignment quality.
You can run a full test on all modules, or a partial test on specific modules in the library.
- From the Navigation panel, select Diagnostics.
- Select Library Alignment Test from the North Panel.
-
From the Operations panel, select Test.

Item Description Action Starting Module Allows you to select the first module to be tested. Select a module from the drop-down box. Ending Module Allows you to select the final module to be tested.
Select a module from the drop-down box. Starting Rack Allows you to select the first rack to be tested. Select a rack from the drop-down box. Ending Rack Allows you to select the final rack to be tested. Select a rack from the drop-down box. Robot Robot to be tested. Select a robot from the drop-down box. Progress Area Provides test status. Information only. -
Click Apply to save your settings.
When running, the test status will display In Progress. When complete, the status will change to Completed and the test results will appear in the Progress Area

Test Results
The following library alignment parameters are tested in this diagnostic test:
-
Library Boundaries
-
Library Alignment Level
-
Library Magazine Offset
-
Library Calibrate Offset
-
Library I/E Station Calibration
-
Library Sled Calibration
-
Library Sensor Calibration
-
Robot XY Motion
-
Robot Reach
-
Robot Pivot
-
-
Click Close to exit the window.

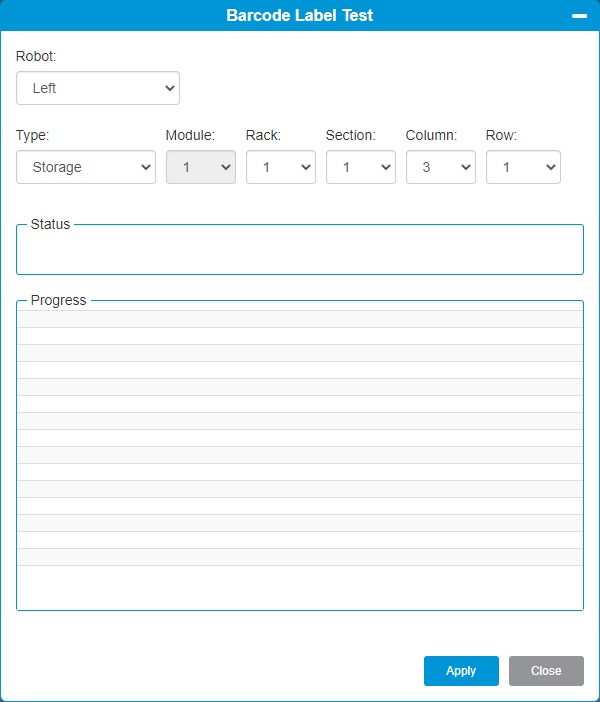
The Barcode Label Test performs a tape cartridge barcode label scan operation for specified tape cartridge locations , scanning the tapes top-down and bottom-up to determine scan hits and barcode label scan quality.
- From the Navigation panel, select Diagnostics.
- Select Barcode Label Test from the North Panel.
-
From the Operations panel, select Test.

Item Description Action Robot Robot to be tested. Select a robot from the drop-down box. Type Test storage, I/E, or drive sled locations. Select a location type from the drop-down box. Module Module location to be tested. Select a module from the drop-down box. Rack Rack location to be tested. Select a rack from the drop-down box. Section Section location to be tested. Select a section from the drop-down box. Column Column location to be tested. Select a column from the drop-down box. Row Row location to be tested. Select a row from the drop-down box. Progress Area Provides test status. Information only. -
Click Apply to save your settings.
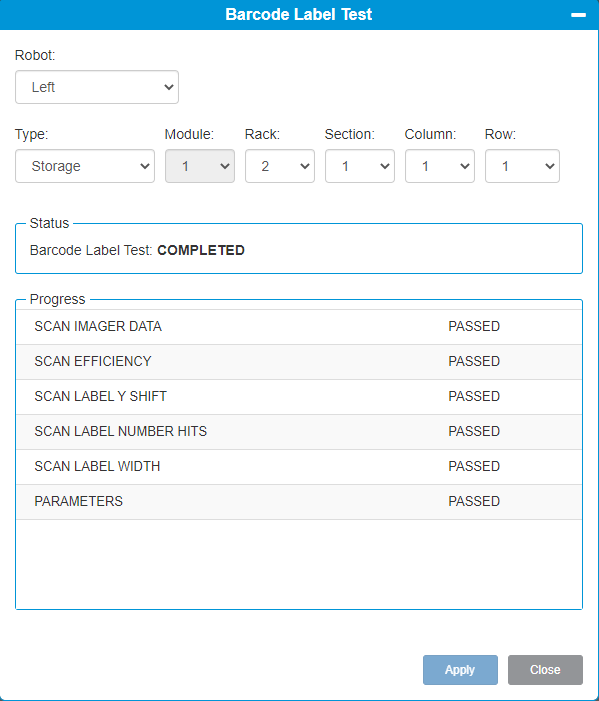
When running, the test status will display In Progress. When complete, the status will change to Completed and the test results will appear in the Progress Area

Test Results
The following media barcode parameters are tested in this diagnostic test:
-
Scan Imager Data
-
Scan Efficiency
-
Scan Label Y Shift
-
Scan Label Number of Hits
-
Scan Label Width
-
-
Click Close to exit the window.