HDEM Power Supply Replacement
Use this procedure to replace a power supply in a high-density expansion module (HDEM). Do NOT use this procedure to replace a power supply in a control module (CM), or a drive ready expansion module (DREM).
If a power supply fails, the library will issue a ticket. Write this number down.
WARNING:
-
Before performing any of the steps listed in this document, contact Quantum Service for help diagnosing the problem.
-
Use this procedure only if HDEM has redundant power (two power supplies).
-
Contact with electrical parts can cause electrical shock, resulting in possible severe or fatal burns and internal injury. A person who comes into contact with a live part often cannot break loose from the part. A second person must stand near the main circuit breaker, ready to immediately switch it off if a hazardous situation occurs.
-
Never assume that a circuit is without power. Always check the circuit. When working on AC power components, another person must supervise your work.
-
This system has more than one power supply cable. To reduce the risk of electrical shock, disconnect all power supply cables when performing service procedures that require power to be turned off.
Remove and Replace an HDEM Power Supply
These instructions explain how to remove a failed power supply and replace it with a new one.
Required tools: None
-
Vary off the HDEM by pressing the button on the operator panel on the rear door of the HDEM. The LED on the operations panel will turn Amber when the HDEM is varied off.
-
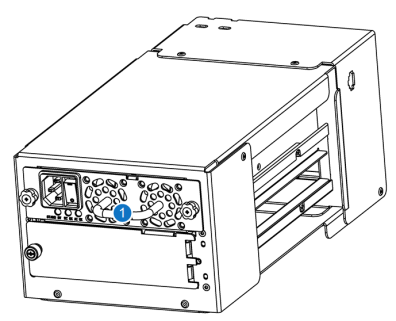
Open the rear access door and at the top of the HDEM, locate the power supply that was identified as needing replacement on your call with Quantum Service.
In the ticket generated by the library, it will identify the module number (1-16, the Control Module is always 1) and the power supply in the HDEM with either a #1 or #2. The top power supply is #1 and the bottom one is #2.
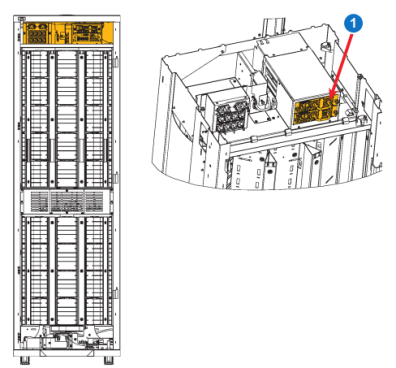
Item Name 1 Power Supplies -
On the failed power supply, set the power switch to the Off (0) position.
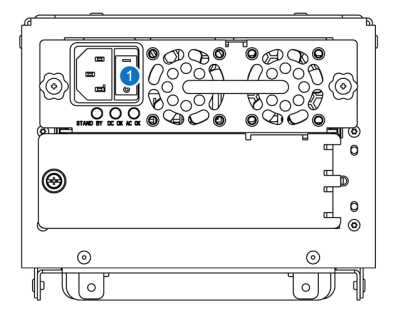
Item Name 1 Power Switch -
Disconnect the power cord from the power supply.
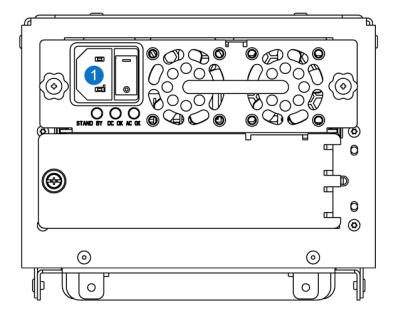
Item Name 1 Power Cord Plug -
Loosen the thumbscrews.
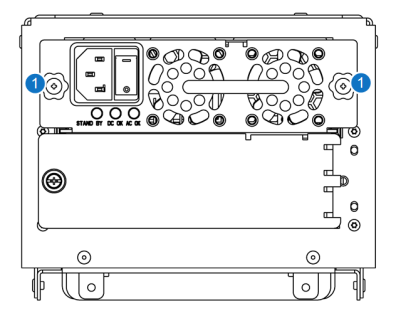
Item Name 1 Thumbscrews -
Remove the power supply by gripping the handle and pulling it toward you.
Item Name 1 Power Supply Handle -
Insert the new power supply into the vacant power supply slot.
Make sure that you insert the power supply so the on/off switch is positioned on the left side. The power supply must be level to slide in smoothly.
-
Tighten the thumbscrews to secure the power supply to the HDEM.
-
Reconnect the power cord.
-
Set the power switch to the On (I) position.
-
Observe the power supply’s LEDs. The two green LEDs should be solidly lit.
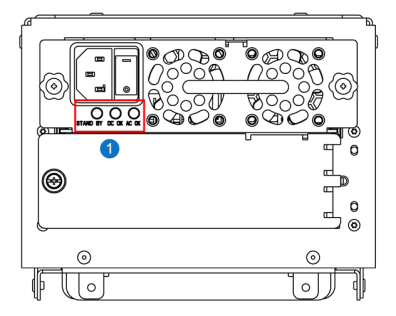
Item Name 1 LEDs Note: If the library is powered off and only the tower has power, the blue LED and the right-most green LED will be solidly lit.
-
Close the rear access door.
-
Vary on the tower by pressing the button on the operator panel. The LED on the operations panel will turn Green when the tower is varied on.
-
Close the ticket that was generated for the failed power supply.
