Manually Registering a Recovered VM
You must manually register a recovered virtual machine (VM) if you did not select to automatically add it to a server's inventory during recovery.
When the VM is registered with a server, it is added to the server's inventory and automatically discovered by the vmPRO appliance. In addition, the VM is automatically exported if you have Automatically export new VMs enabled on the VMs Console. See Navigating the vmPRO VMs Console.
 Manually register a recovered VM using the vSphere Client
- Using a vSphere Client, log in to the ESX or vCenter server where the VM resides.
- In the left pane, select the server to which to add the VM.
- Click the Summary tab to display the server's general and resource information.
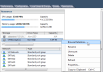
- In the Resources pane, right-click the storage location of the recovered VM and select Browse Datastore to display the Datastore Browser dialog box.
Figure 1: Resources Pane – Storage Location
- Locate and open the VM directory that was created during the recovery process.
- Rick-click the .vmx file, and select Add to Inventory to display the Add to Inventory wizard.
- In the Name field, edit the name of the VM, as needed, and click Next to display the Resource Pool page.
- In the Resource Pool pane, select the location in which to place the VM.
- Click Next to display the Ready to Complete page, and click Finish to add the VM to the server's inventory.
Manually register a recovered VM using the vSphere Web Client
- Open a vSphere Web Client.
- From vCenter Inventory Lists, select Datastores to display a list of datastores.
- Select the datastore to which to add the VM.
- Locate and open the VM directory that was created during the recovery process.
Figure 2: Datastore Files List
- Right-click the .vmx file, and select Register VM to display the Register Virtual Machine wizard.
- In the Name field, edit the name of the VM, as needed.
- In the Select inventory location list, select the folder in which to place the registered VM.
- Click Next to display the Host/Cluster page.
- In the displayed list, select the host or cluster on which to run the VM.
- Click Next to display the Resource Pool page.
- In the displayed list, select the resource pool in which to run the VM.
- Click Next to display the Ready to Complete page, and click Finish to add the VM to the server's inventory.