The Upgrade/Reinstall button allows you to upgrade to a new version of StorNext or reinstall the current version. You might want to reinstall if you accidentally removed some components and need to get them back. During an upgrade/reinstall, the old software is removed and the new software is installed. Your previous configuration settings remain intact.
Note: If you are upgrading a Windows 3.x high-availability system to StorNext, additional steps are required. Follow the instructions in the StorNext Upgrade Guide.
- Copy the file named /fs_only/snfs_full_Windows_x86_64.zip from the installation DVD and place it on the system onto which you want to install it. Be sure to select the file from the fs_only directory and not the stornext_full directory.
- Unzip the file.
-
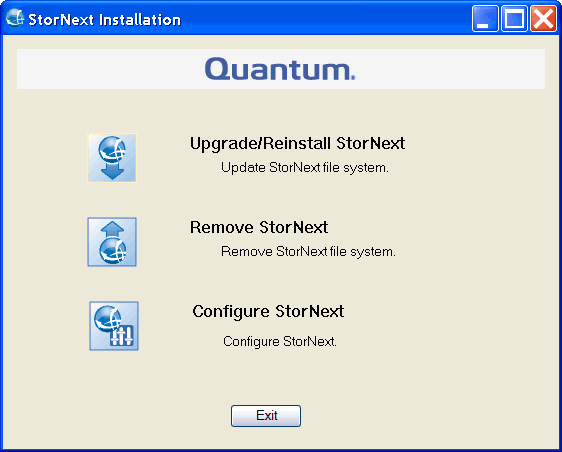
Double-click the file named SnfsSetup64.exe to launch the installer. The StorNext Installation screen appears.
-
Click Upgrade/Reinstall StorNext to begin installation. The StorNext Component Selection window appears.
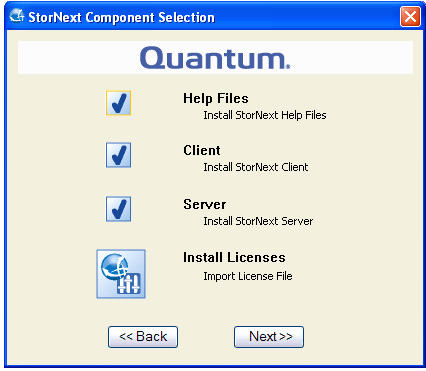
- Select the check boxes of the components you want to include in the upgrade. Clear the check boxes of the components you want to exclude. Click Next to proceed. The StorNext EULA appears.
- Read the EULA. If you accept, select “I accept the terms in the License Agreement” and then click Next to continue the install.
- It make take several minutes for the selected components to finish being added or removed.
- When a message informs you that the installation is finished, click OK.
