There are two methods to uninstall StorNext (server or client) on Windows:
Either method removes all installed StorNext components from your system, but will save the previous client configurations, debug file, and RAS files. All of the saved files are located in the following directory:
Note: Systems prior to StorNext 3.0 used the default directory C:\SNFS\config\.
Perform the following procedure to remove StorNext using the StorNext software.
-
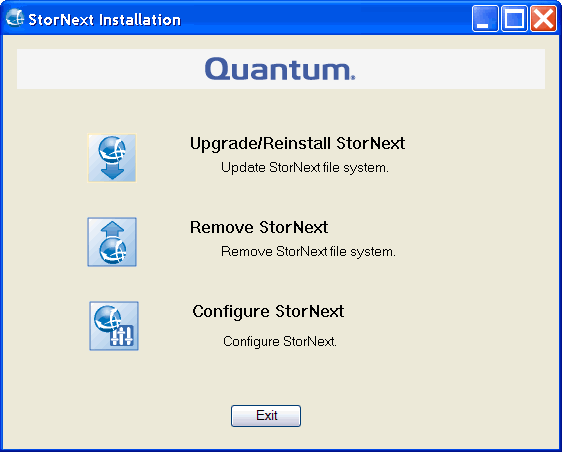
Start the StorNext installation tool if it is not already running by double-clicking the file named SnfsSetup32.exe (32-bit systems) or SnfsSetup64.exe (64-bit systems). The StorNext Installation window appears.

- Click Remove StorNext.
-
Click OK to confirm you want to remove StorNext and all of its components. A dialog box informs you that the current client configuration has been saved and lists the location. You can use this to restore the client configuration later if you wish.
- Note the name and location of the saved configuration file, and then click OK.
- If prompted, click Yes to continue, and then click OK to finish the removal.
- When the removal is complete, you will be notified that you must reboot for the change to take effect. Click Yes to reboot the system immediately, or No to reboot later.
To uninstall StorNext (server or client) on a Windows system, use the Add or Remove Programs feature located on the Windows Control Panel.
Note: On Windows Vista, Windows Server 2008 and later, the Control Panel feature is called Programs and Features.
- Open the Windows Control Panel.
- Double-click Add or Remove Programs (or Programs and Features on Windows Vista or Windows Server 2008 and later). The Add or Remove Programs (or Programs and Features) window appears.
- In the list of currently installed programs, click StorNext File System, and then click Remove.
- Click Yes to confirm the removal.
- After the uninstall process is complete, reboot the system.
