This section describes how to install StorNext on Windows clients or non-HA servers. During an upgrade, the old software is removed and the new software is installed. Your previous configuration settings remain intact.
Note: Depending on your security settings, you must be Administrator or have Administrator privileges/rights to install StorNext software.
For StorNext clients you do not require licenses. For StorNext MDCs you will need Maintenance, Server and (optionally) Distributed LAN client licenses.
Note: See the StorNext Compatibility Guide for supported upgrade versions for a given StorNext release.
Follow the procedure below to install StorNext on Windows clients or non-HA servers.
- If any StorNext file systems are currently shared, temporarily disable sharing.
-
Copy the snfs_client_Windows_x86_64.zip file (for 64-bit systems only) from the StorNext installation DVD and place it on the system onto which you want to install it. Be sure to select the file from the fs_only directory and not the stornext_full directory.
- Unzip the file.
-
Open the unzipped folder and double-click the client software installer file. This file is named SnfsSetup.exe. The StorNext Installation screen appears.
Note: If you are not logged in with Administrator privileges, right-click the file and choose Run as Administrator.

-
Click Upgrade/Reinstall StorNext. The StorNext Component Selection window appears.
Note: If you are upgrading the client, you will not have the Server or Install Licenses options.
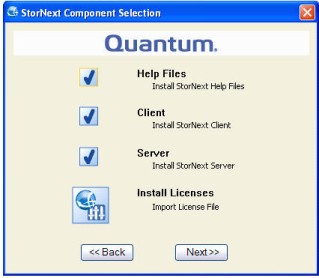
- Select the check boxes of the components you want to include in the upgrade. Clear the check boxes of the components you want to exclude. Click Next to proceed. The StorNext End User License Agreement (EULA) appears.
- Read the EULA. If you accept, select “I accept the terms in the License Agreement” and then click Next to continue the install. It make take several minutes for the selected components to finish being added or removed.
- When a message informs you that the installation is finished, click OK.
- In some cases you may be required to reboot your system. In these situations StorNext attempts to complete the installation automatically when the system starts back up. However, some platforms, virus checkers, etc. prohibit the automatic restart feature. If the installation is not automatically completed (for example, there is no Start->All Programs-> StorNext menu), restart the SnfsSetup.exe program manually and follow the on-screen directions.
- After the upgrade is complete, re-enable sharing on your StorNext file systems.
