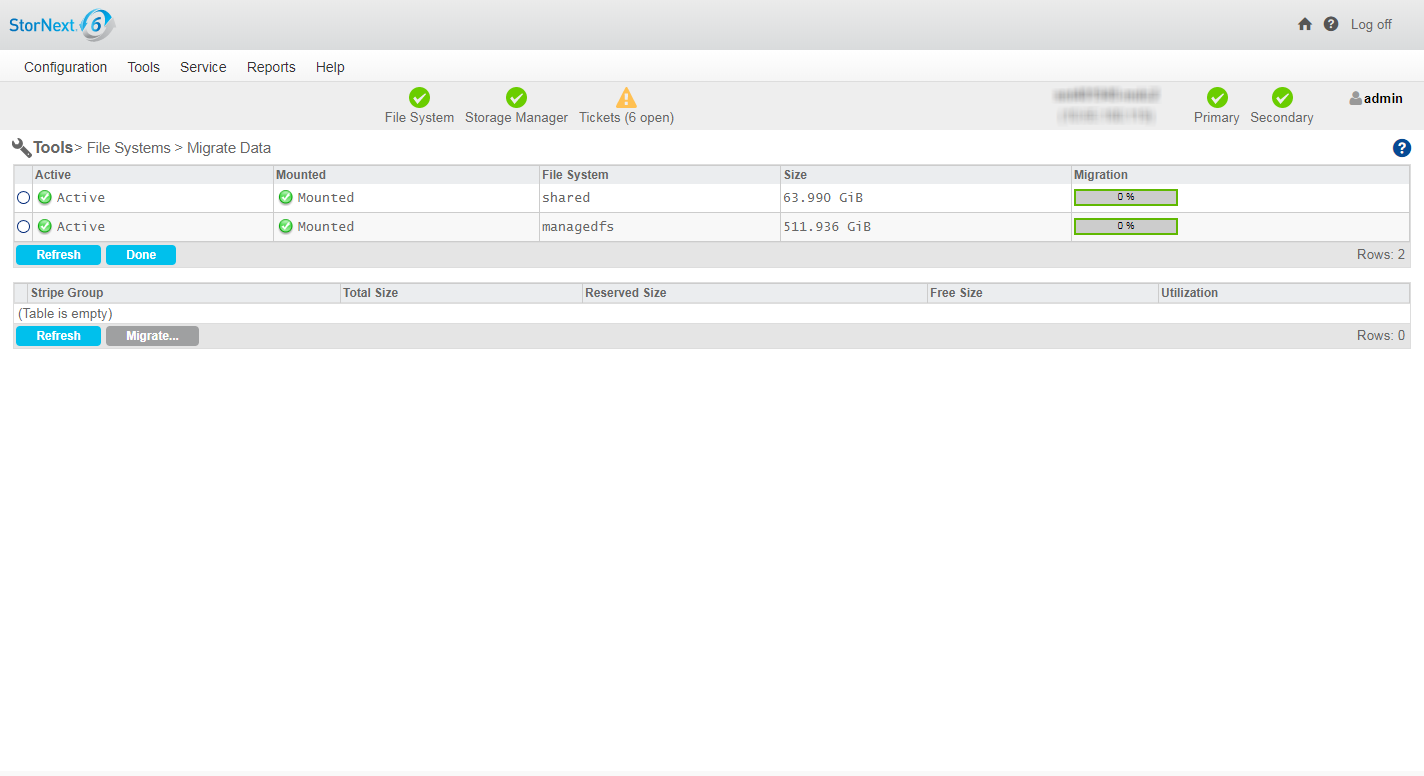
Tools > File Systems > Migrate Data
You can migrate file system data to move data files from a file system’s source stripe group to another stripe group on the same file system. This process allows the source stripe group to become available so that it can be removed from the file system.
Note: To manage and perform a task on a stripe group (including migrating a stripe group for a managed file system), see Tools > File Systems > Stripe Group Actions.
To access the Migrate Data page on the GUI, on the Tools menu, click File Systems, and then click Migrate Data.
You can migrate a User Data stripe group or a Metadata/Journal Data stripe group.
-
To migrate a Metadata/Journal Data stripe group, see Migrate Metadata and Journal Data.
Note: When you migrate a metadata stripe group to a new disk, the overall metadata size remains the same despite the size of the target disks. In order to add more metadata capacity, add a new metadata stripe group (see Add a Stripe Group Without Migrating).
-
To migrate a User Data stripe group, see Migrate User Data.
Note: When you migrate a User Data stripe group, the files are moved randomly to a new stripe group while respecting their affinity rules (if any). When migrating, make sure the source stripe group is completely empty when the process completes, because source files that are updated while the file system is running may be left behind, requiring a second iteration of the migration.
The time it takes to complete the migration process depends on the amount of data being moved between source file system and destination stripe groups. When moving a data stripe group, the file system continues to run during the move. StorNext does not block any new read/write requests, or block updates to existing files on the source file system. All operations (including metadata operations) are handled normally, but no new writes are allowed to the source stripe group, which will be marked read-only.
Note: On large disks, the migration process may take some time since all of the blocks on the disks are copied, regardless of the amount of data on the disks.
Do the following to migrate Metadata and Journal Data using the GUI.
- On the Tools menu, click File Systems, and then click Migrate Data. The Tools > File Systems > Migrate Data page appears.
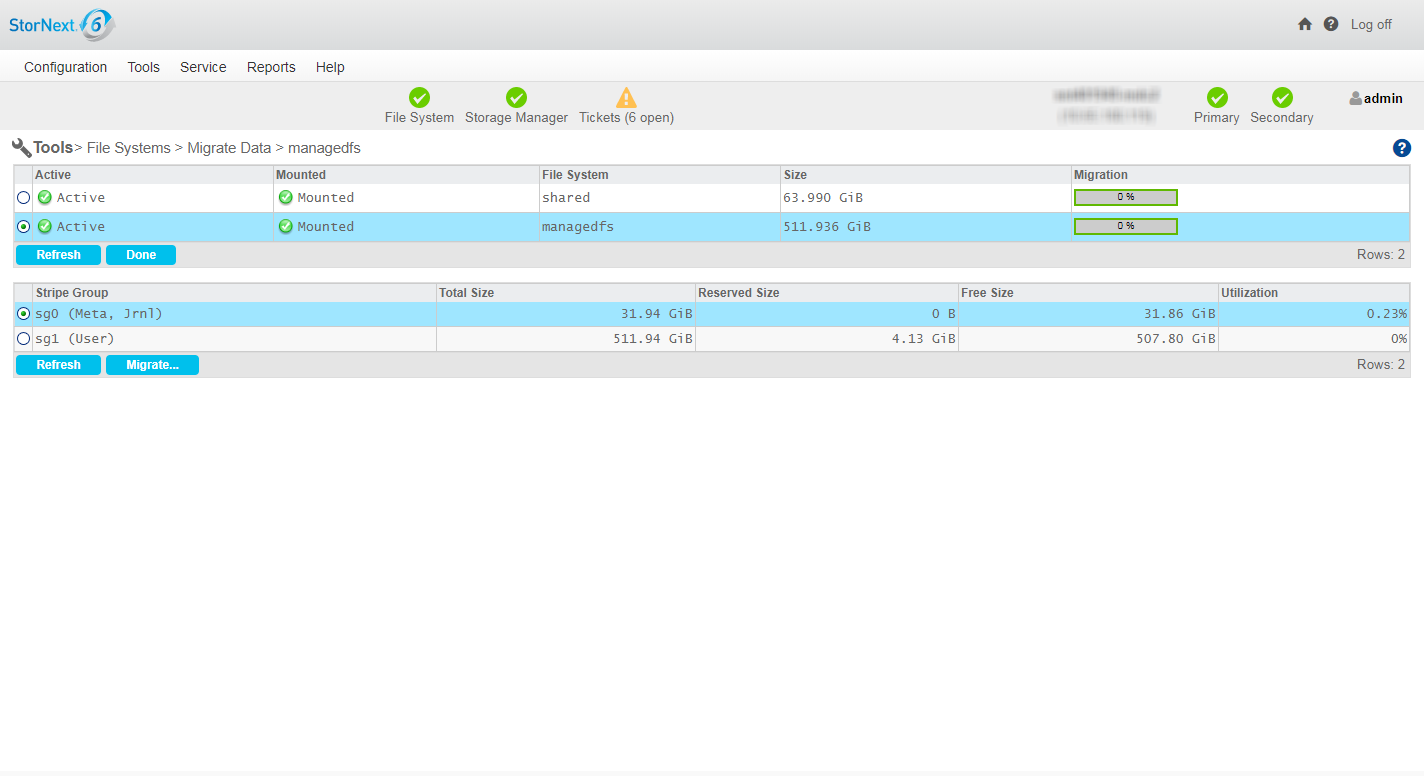
- Click a File System.
-
Click a Metadata/Journal stripe group in the File System to migrate.
-
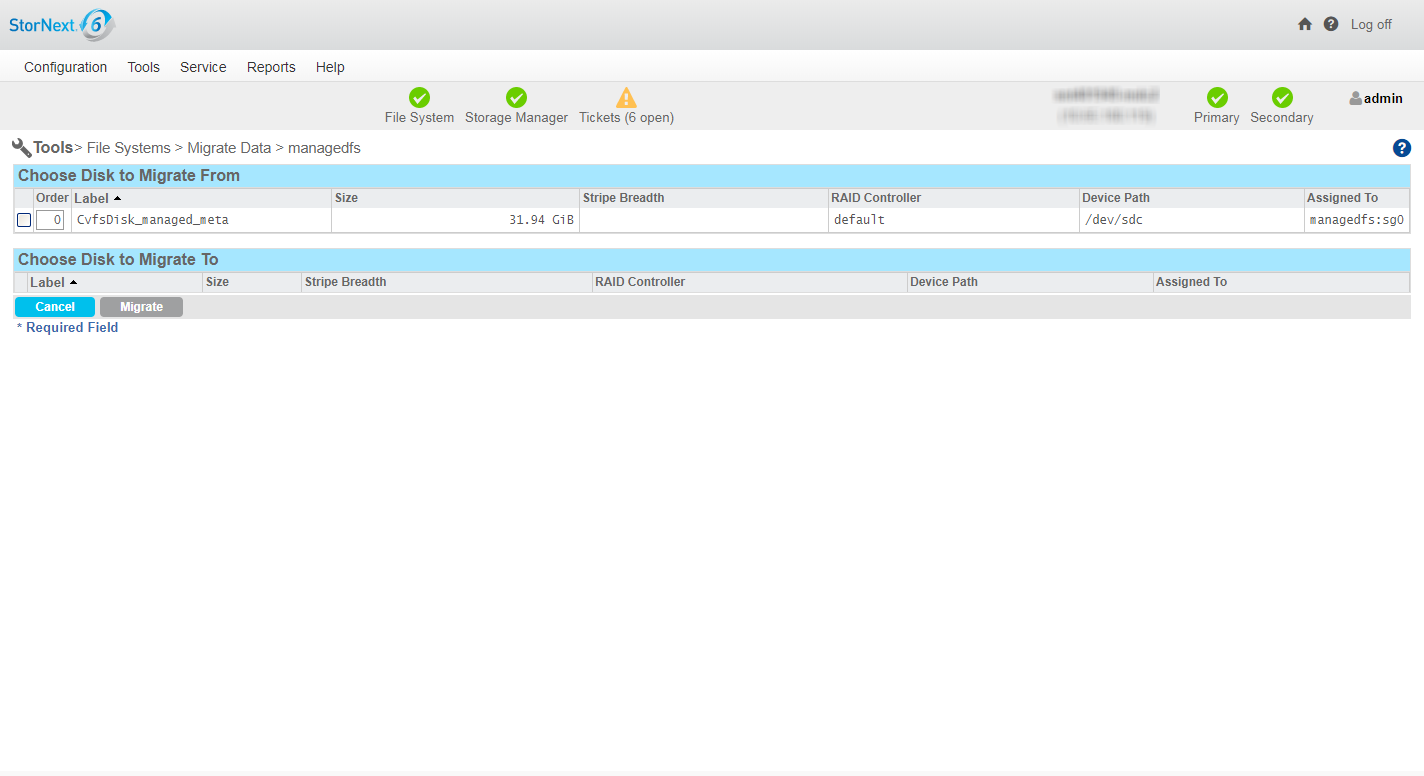
Click Migrate.... A new page appears.
- Click a disk from the Choose Disk to Migrate From table.
- Click a disk from the Choose Disk to Migrate To table.
- Click Migrate. The following occurs:
- The file system stops and is unmounted.
The GUI executes the command
sndiskmove.Caution: You can only use the
sndiskmovecommand if both the source and destination LUNs have EFI labels. VTOC labels are not supported in StorNext 6. Use the special CLI command /usr/cvfs/bin/cvlabel_compat_5 to convert VTOC labels to EFI labels before attempting to usesndiskmove. The cvlabel_compat_5 command is a StorNext 5 version of cvlabel that supports the conversion of VTOC to EFI labels.Caution: The command,
sndiskmove, only works on disks or LUNs of the same size. For instance, if the destination LUN is smaller than the source LUN, then the command fails. However, if the destination LUN is larger than the source, then the additional capacity is ignored.- The source disk/LUN is relabeled to
$LABEL.old. - The destination disk/LUN is relabeled to
$LABEL.
- Click Refresh to manually update the status.
- When this migration task is completed, start and mount the file system using the GUI.
Do the following to migrate User Data using the GUI.
User Data migration runs faster as only areas containing files are processed. Since the file system is still running, it may take several iterations to complete if any clients have open files while the snfsdefrag command is executing.
Note: Beginning with StorNext 6, use the sgoffload command instead of the GUI, which uses the snfsdefrag command. The sgoffload command moves extents belonging to files that are currently in use (open). The sgoffload command also informs the client to suspend I/O for a time, moves the data, then informs the client to refresh the location of the data and resume I/O. For more information about the sgoffload command, see the StorNext Man Pages Reference Guide.
The migration process moves the data from the source stripe group to an available user data disk.
Note: If files are not moved due to open file handles, repeat Step 1 through Step 4.
- On the Tools menu, click File Systems, and then click Migrate Data. The Tools > File Systems > Migrate Data page appears.
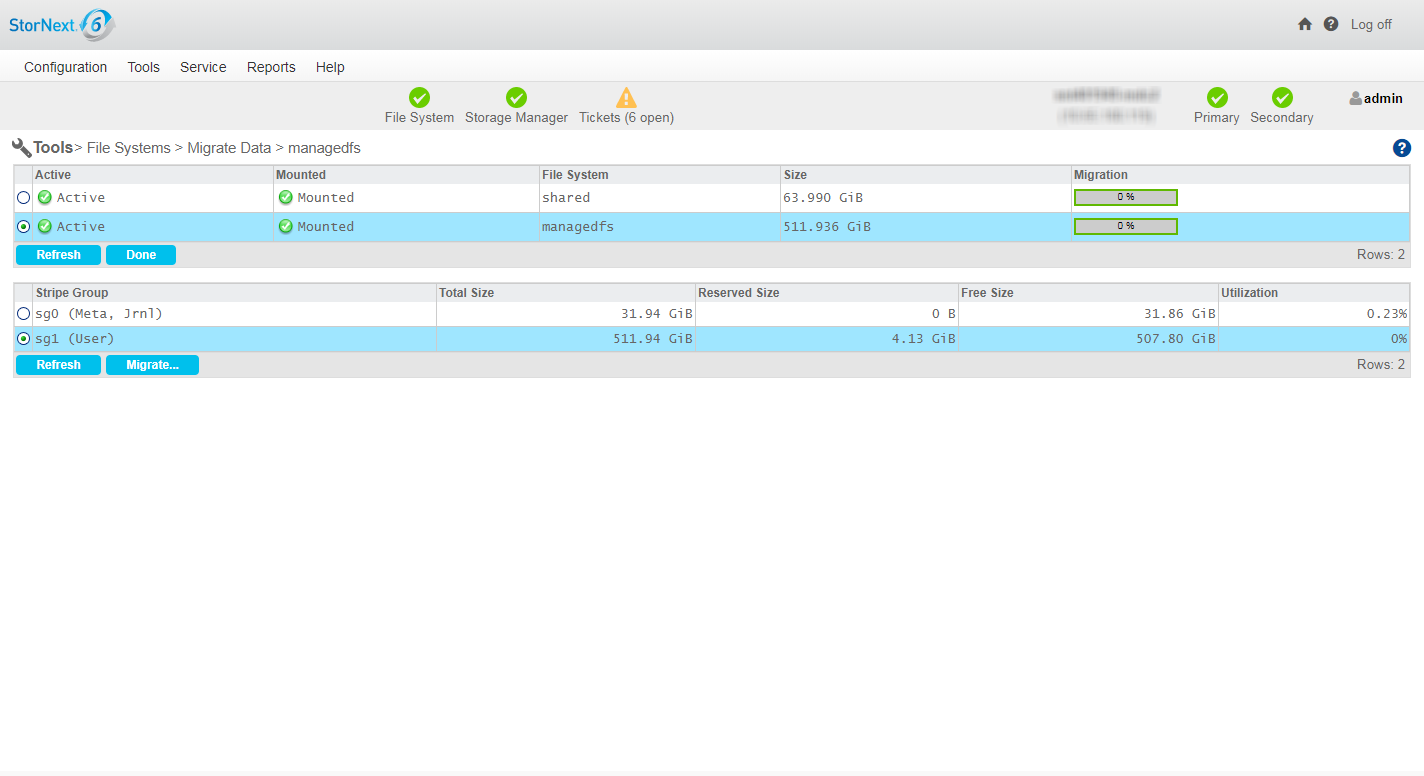
- Click a File System.
-
Click a User Data stripe group in the File System to migrate.
- Click Migrate.... The following occurs:
- The source stripe groups are set to read-only.
- The GUI executes the command
snfsdefrag. Progress is reported as percent complete.
Note: Beginning with StorNext 6, use the
sgoffloadcommand instead of the GUI, which uses thesnfsdefragcommand. Thesgoffloadcommand moves extents belonging to files that are currently in use (open). Thesgoffloadcommand also informs the client to suspend I/O for a time, moves the data, then informs the client to refresh the location of the data and resume I/O. For more information about thesgoffloadcommand, see the StorNext Man Pages Reference Guide.Caution: This particular function does not provide a confirmation message, so be absolutely sure you want to migrate data from the selected stripe groups before you click Migrate.
- Click Refresh to manually update the status.
- If necessary, repeat Step 1 through Step 4 until all the files are migrated off of the source stripe group.
- (Optional) If you want to re-use the empty source stripe group, edit the file system and mark the source stripe group as read-write.
Caution: You cannot use the GUI to migrate a stripe group that contains both Metadata/Journal Data and User Data. Contact Quantum Professional Services to discuss a workaround.
Note: Quantum recommends you keep User Data and Metadata on separate stripe groups for performance reasons and to allow for stripe group migration using the GUI.


