 minute read
You can use an Azure Data Box device to quickly migrate a large amount of data into Azure Storage for management as a Storage Manager tier. You can order an Azure Data Box device through Microsoft Azure and have it delivered to your site, where it is attached to your local network to facilitate rapid data transfer onto the device. After you have completed the data transfer, you can deliver the device to an Azure data center and have the data uploaded to your Azure Storage account.
See Azure Data Box Documentation - Offline Transfer (https://docs.microsoft.com/en-us/azure/databox/) for additional information.
Azure Data Box and StorNext Storage Manager
StorNext Storage Manager maintains metadata for files stored to archive media. This metadata allows the contents of a truncated file to be retrieved from archive media and stored on disk. In order for Storage Manager to manage files which have been migrated to an Azure Data Box, database tables and file attributes must be populated as part of the migration or completed after the migration.
There are two methods you can use to export data to Azure, using the Azure Data Box, for subsequent management through Storage Manager:
Microsoft supports three network interfaces to transfer data to the Azure Data Box:
- SMB (see Tutorial: Copy data to Azure Data Box via SMB)
- NFS (see Tutorial: Copy data to Azure Data Box via NFS)
- REST (see Tutorial: Copy data to Azure Data Box Blob storage via REST APIs)
Once the data has been uploaded to an Azure bucket, you must use the StorNext fsobjimport command to create the metadata for each file, which allows access to the file contents. See Import Object Storage Media for information on how to import the contents of an object storage bucket.
Configure the Azure Data Box as an archive tier and then either configure a policy to automatically migrate data to the Data Box or manually store data using the command fsstore. The stored data is then uploaded to Azure Storage and exists as an archive copy. See Migrate Data into Azure Storage Using the Azure Data Box.
Migrate Data into Azure Storage Using the Azure Data Box
Do the following to import data into the Storage Manager using the Azure Data Box:
- Step 1: Order an Azure Data Box
- Step 2: Set up the Azure Data Box
- Step 3: Configure for RESTful API Access
- Step 4: Create the Container
- Step 5: Transfer the Data to the Azure Data Box
- Step 6: Return the Azure Data Box
- Step 7: Monitor the Azure Upload Status
- Step 8: Reconfigure the Configuration to Azure Storage
Verify your Azure subscription supports the Data Box service and that you have owner or contributor access to a Data Box. Check the Azure documentation for hardware prerequisites and more detailed information on ordering a Data Box. Also, make sure your data conforms to the limits of the device. Multiple data box orders may be required if your data size exceeds the maximum capacity of a single data box.
-
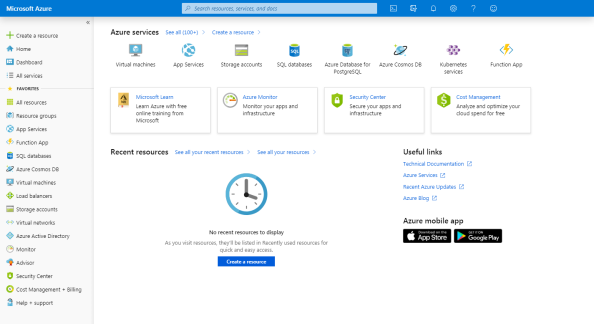
Log in to Microsoft Azure at https://portal.azure.com.
-
On the left navigation pane, click + Create a resource.
-
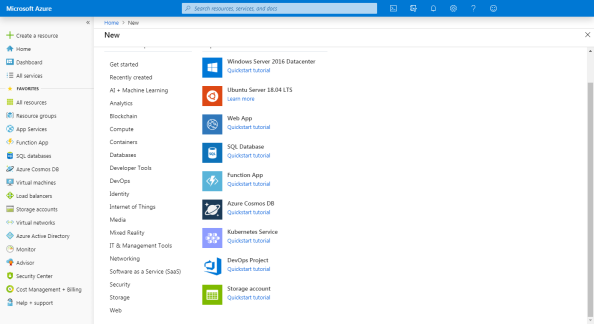
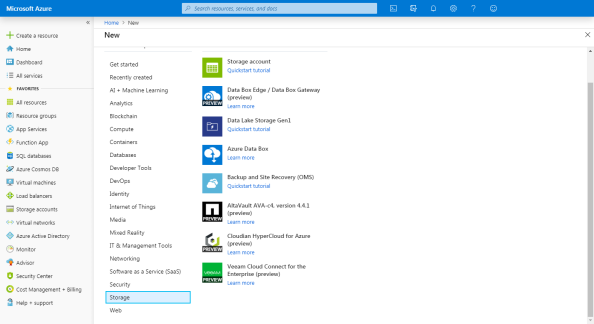
Click Storage. The Azure Data Box option appears on the right (you can also use the search bar to search for Azure Data Box).
-
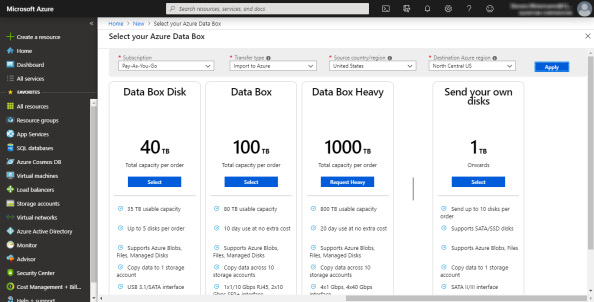
Click Azure Data Box. The Select your Azure Data Box page appears where you can select where your data resides and the destination Azure region for data transfer.
-
Select the Subscription to specify an existing storage account or you can create a new one.
- Select the Transfer Type to specify the import option to send the data to Azure.
- Select the Source country/region to specify where the data resides.
- Select the Destination Azure region to specify the Azure region to which you will import the data.
-
- Click Apply.
-
Select or create the resource group and storage accounts to complete the order.
- Complete the Job details form.
- Complete the Shipping form and Notification details.
- Review the Summary information and then click Order.
-
Review the prerequisites for using an Azure Data Box:
- Retain the shipping label of the box as you will use it for the return shipment.
- If the device is delivered in a box, retain the box for the return shipment.
- Check that you received a grounded power cord.
- Verify the host requirements:
- The host must run a supported operating system. See Azure Data Box system requirements (https://docs.microsoft.com/en-us/azure/databox/data-box-system-requirements).
- The host must be connected to a high-speed network. At least one 10-GbE connection is recommended.
- You must use a flat surface for the device. If you place the device on a standard rack shelf, then you must use a 7U slot.
- You must use the following cables to connect the Data Box to your host computer:
- One or more 10-GbE SFP+ Twinax copper or SFP+ fiber optic cables. The cables must be compatible with a Mellanox ConnectX ®-3 Pro EN Dual-Port 10GBASE-T Adapters w/ PCI Express 3.0 network interface.
- One RJ-45 CAT 6 network cable for use with the MGMT network interface.
- One RJ-45 CAT 6A or one RJ-45 CAT 6 network cable for use with the DATA 3 network interface, configured as 10 Gbps or 1 Gbps, respectively.
Note: See Tutorial: Cable and connect to your Azure Data Box (https://docs.microsoft.com/en-us/azure/databox/data-box-deploy-set-up) for additional information on the prerequisites for using an Azure Data Box.
- See Cable your device and Connect to your device of the Azure Data Box tutorial (https://docs.microsoft.com/en-us/azure/databox/data-box-deploy-set-up) for instructions on how to cable and connect to your Data Box.
- Retrieve the credentials needed to sign into the web UI of the Data Box.
- Sign into the Azure portal at https://portal.azure.com.
- Navigate to General > Device details to display the device password. Copy this information to use to sign into the Data Box web UI.
- Assign a static IP address of 192.168.100.5 and subnet 255.255.255.0 to the Ethernet adapter on the computer you are using to connect to the Data Box.
- Connect to the MGMT port of the data box for access to the web UI at https://192.168.100.10. Provide the saved password obtained from the Azure portal and sign into the UI.
- Configure the data interface.
- If DHCP is enabled, then no further action is needed.
- If DHCP is disabled, then select Set network interfaces to configure static IP addresses.
The Storage Manager uses a REST interface to transfer data to the Azure Data Box. When you use a REST connection, do the following steps, which are explained in more detail in the Azure Data Box documentation.
-
Access the REST interface settings.
Storage Manager accesses the Azure Data Box through a REST interface. Do the following using the Azure Data Box user interface to retrieve the information required to establish the REST connection.
-
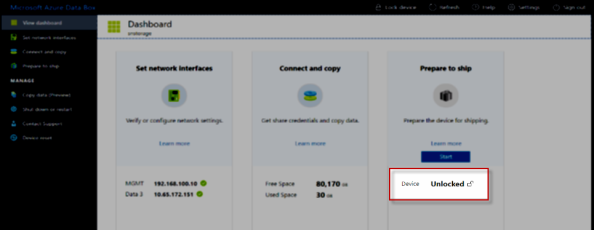
Log in to the Azure Data Box and verify that the box is unlocked.
-
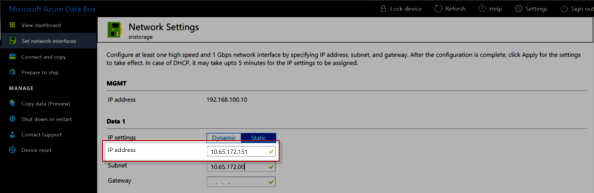
On the left menu, click Set network interfaces to display the Network Settings page. On the Network Settings page, make a note of the IP address of the Data Box.
-
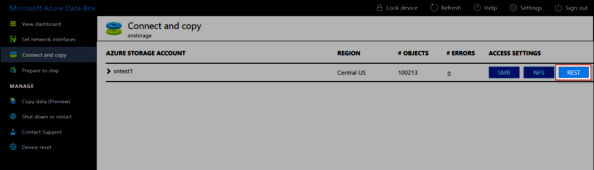
On the left menu, click Connect and copy to display the Connect and copy page and then click REST.
-
The Access Storage account and upload data dialog appears and displays information about the Storage Account Name and the Key.

Note: Record all the values, in addition to the Blob Service Endpoint. You must specify the values using the CLI fsobjcfg command when you configure the Azure Data Box as a Storage Manager destination.
-
- If you connect using HTTPS, then you must download a certificate from the Azure portal. See Download certificate and Import certificate for additional details.
- Log in to the Azure portal and go to your Data Box order.
- Select General > Device details.
- Under Device credentials, select API access and then click Download to download a certificate file.
- Install the certificate file on your MDC’s default certificate repository. See HTTPS Default CA ROOT Certificate File or Path.
- If you connect using a static IP address, then you must update the MDC's /etc/hosts file to include the IP address and Blob Service Endpoint of the data box. You can also obtain the information from the Azure Data Box UI.
- Log in to the Data Box UI.
- On the left menu, click Set network interfaces to display the configured static IP address.
- To display the blob service endpoint, on the left menu click Connect and copy and then click Rest. The Access Storage account and upload data dialog displays the Blob Service Endpoint.
Add the static IP address and blob service endpoint to your /etc/hosts file:
device-ip-address blob-service-endpointFor example, the image below illustrates an /etc/hosts file that contains an entry for the Azure Data Box:

-
Verify Access to the Azure Data Box
Use the Microsoft Azure Storage Explorer application to verify access to the Azure Data Box. Use the account you create for the verification to create a container for the uploaded files.
-
Go to https://azure.microsoft.com/en-us/features/storage-explorer/.
- Download and install Microsoft Azure Storage Explorer.
- Open the Microsoft Azure Storage Explorer application.
-
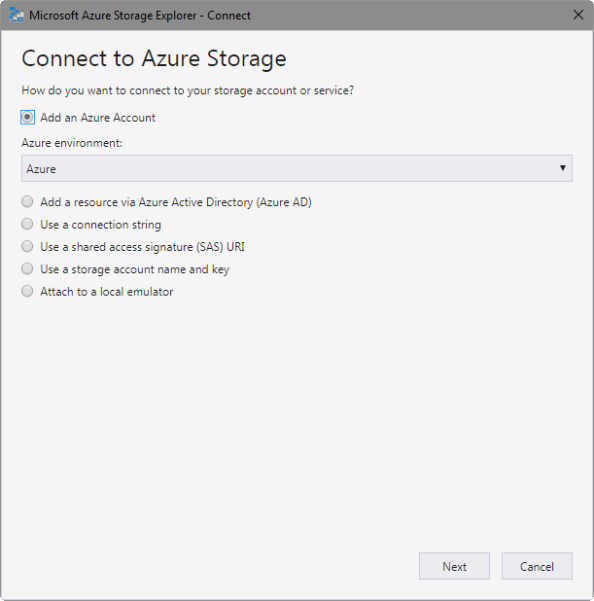
On the left menu, click Add Account.
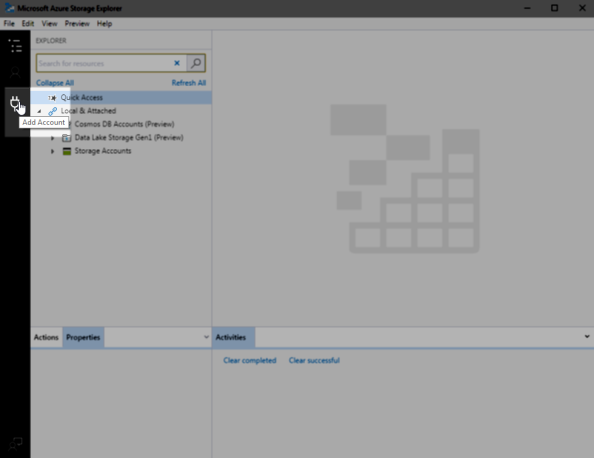
The Connect to Azure Storage dialog appears.
-
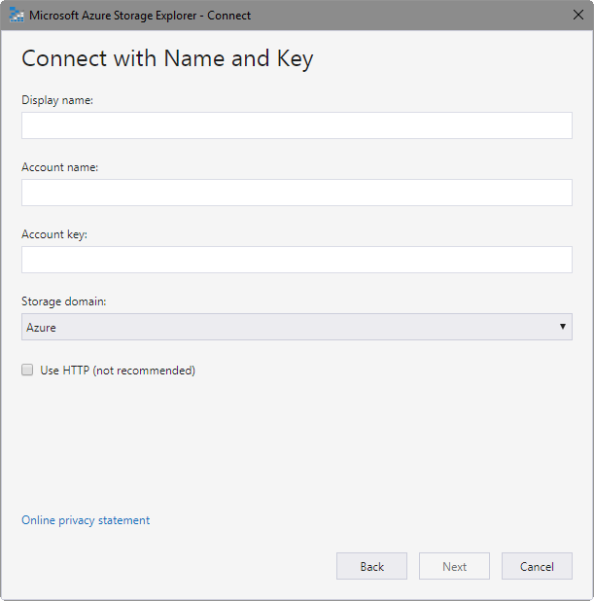
Click Use a storage account name and key to display the Connect with Name and Key dialog.
-
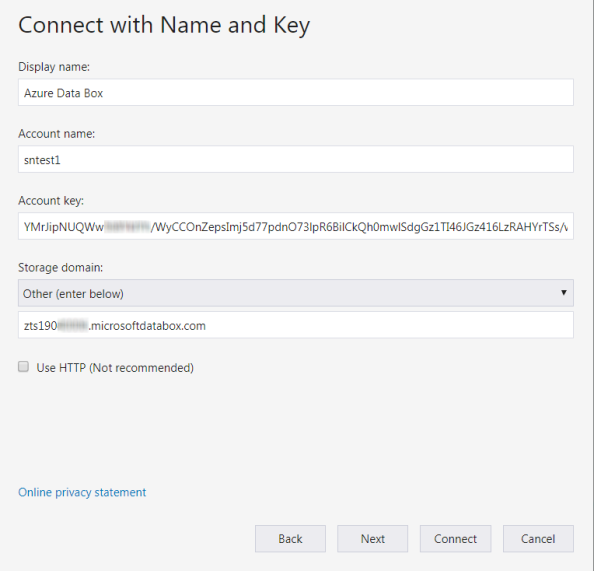
Enter the account information recorded from the Azure Data Box Access Storage account and upload data dialog.
Note: If you connect using HTTPS, then you must download and install a certificate from the Azure portal.
- In the Account name field, type the Storage Account Name displayed by the Access Storage account and upload data page of the Azure Data Box GUI.
- In the Account key field, type the Account key value from the same page.
-
In the Storage domain field, click Other and then type the Blob Service Endpoint value from the Data Box page.
Note: You must exclude the https://resource-group.blob portion of the link displayed in the Blob Service Endpoint.
- Click Next.
-
Click Connect to verify the connection.
-
Use the Azure Storage Explorer to create a container in the Azure Data Box. Your data files are uploaded into this container. The container name is also used when you upload the contents of the Data Box to Azure Storage.
- Open the Azure Storage Explorer.
- Select the Azure Box Storage Account.
-
Right-click Blob Containers and select Create Blob Container.

- Enter the name of the container in the text box that appears below the Blob Containers folder.
- Press Enter to create the container or press Esc to cancel the operation and return to the previous page.
In order to use Storage Manager to transfer data to the Azure Data Box, you must do the following:
- Configure the Azure Data Box as an object storage destination.
- Configure an appropriate Storage Manager policy.
When you complete the configurations, the policy processing automatically transfers your data.
Alternatively, you can use the fsstore command to expedite the data transfer.
Note: You must verify that the size of each file does not exceed the Azure limit of 4.75 TB.
-
Do the following to configure a path to the Azure Data Box.
- Use the fsobjcfg command to configure an object storage appliance, controller and I/O path. These configurations define a path to the Azure Data Box.
- You must specify the Blob Service Endpoint for the host address (-i) of the appliance configuration and the connection endpoint of the I/O path (-i) configuration.
- Specify AZURE for the provider and media type.
fsobjcfg -a -i blob-service-endpoint -e http|https -v AZURE azure
fsobjcfg -a -n azure-ctl azure
fsobjcfg -a -o azure-io -i blob-service-endpoint -e https|http -t AZURE -n azure-ctl
- Use the fsobjcfg command to configure an object storage appliance, controller and I/O path. These configurations define a path to the Azure Data Box.
-
Do the following to configure the Azure Data Box Namespace.
- Use the fsobjcfg command to configure the Azure Data Box container.
- Use the -b option to specify the name of the container created in Step 4: Create the Container.
- Use the -U option to specify the specify the Storage Account Name.
Use the -P option to specify Key value.
Note: Both of the values are displayed on the Access Storage account and upload data page.
Use the -f option to specify a name (up to 16 characters) that uniquely identifies the container within Storage Manager.
- Use the -t option to specify AZURE for the media type.
fsobjcfg -a -b container-name -f media-id -t AZURE -U storage-account-name -P key azureThe following example illustrates how to configure access to the Azure Data Box as illustrated in Step 3: Configure for RESTful API Access:
fsobjcfg -a -i blob.ZTS190*****.microsoftdatabox.com -e https -v AZURE azure-box
fsobjcfg -a -n azure-box-ctl azure-box
fsobjcfg -a -o azure-box-io -i blob.ZTS190*****.microsoftdatabox.com -e https -t AZURE -n azure-box-ctl
fsobjcfg –a -b azb-bucket -f AZB000 -t AZURE -U sntest1 -P YMrJipNUQWw********/WyCCOnZepsImj5d77pdnO73lpR6BilCkQh0mwlSdgGz1TI46JGz416LzRAHYrTSs/w== azure-box
- Use the fsobjcfg command to configure the Azure Data Box container.
-
Do the following to configure a Storage Manager policy.
- You must configure a Storage Manager policy to allow copies of the data files to be made to the Azure Data Box.
- When you configure the policy, you must specify a media type of AZURE to steer the copies to the Data Box.
- You must configure the directories where the data resides as relation points for the policy.
If you want to associate the media with only a single policy, then specify the policy class name with the media configuration.
fsobjcfg -m -C policy_name -f azure_media_id - You must configure a Storage Manager policy to allow copies of the data files to be made to the Azure Data Box.
-
Do the following to transfer data.
-
The policy processing automatically stores the managed files to the Azure Data Box. To manually store the files, run the fsstore command on each relation point.
fsstore -R relation-point -
Run the showc command on the mount point of each relation point to verify that the copies are complete. Wait for the command to display 0 entries for your policy class.
# showc -p /stornext/snfs1
Filesystem: /stornext/snfs1
found 0 entries for class azure-data-box.
-
-
Do the following to change the Media State.
-
When all of the data stores are complete, you must change the media state to unavailable prevent further use of the media:
fschmedstate -s unavail media-id
-
After the store operations are complete, you must validate the data and must download a manifest before you return the box to Microsoft.
- Validate the data.
On the left menu of the Azure Data Box UI, click Prepare to ship and then click Start preparation.

Note: Any files that do not adhere to the Azure naming conventions are flagged. A checksum computation for the files is completed and a file list generated. This might take several days depending on the size of your files. If needed, you can pause the device preparation (click Stop preparation).
When you complete the device preparation, the box status is updated to Ready to Ship and the device becomes locked.
Note: If you need to copy additional data, then you can unlock the device and transfer the additional data. You must prepare the device for shipment again.
Note: Do not skip this step, or the process might result in upload failures when processing non-conforming data.
-
Download the manifest containing the file list.
Note: You can use the list to verify the files after the migration completes.
- Power off the device, remove the cables, and secure the power cord in the back of the Data Box.
-
Verify that the shipping label is displayed on the E-Link display.
Note: If the shipping label is not displayed correctly, contact Microsoft Support.
-
Schedule a pickup with UPS or drop off your Data Box. The order status of your box is updated to Picked up once it is scanned by your carrier.
Note: Notify UPS of your shipment tracking number to prevent additional charges from being added during pickup.
You can track the status of your Data Box upload order in the Azure portal.
- When the Box is received, the order status is updated to Received.
-
When the box is physically verified, it is connected to Azure Storage and the data is uploaded.
Note: You can monitor the progress of the data upload in the Azure portal.
-
Once the upload is completed, the order status is updated to Completed.

Do the following to redirect the Storage Manager Azure Data Box configuration from the Data Box to Azure Storage.
-
You must change the object storage endpoint of the appliance and controller. Run the following to modify both the host address for the appliance and the connection endpoint of the I/O path. Set the object storage endpoint to blob.core.windows.net.
fsobjcfg -m -i blob.core.windows.net azure
fsobjcfg -m -i blob.core.windows.net -o azure-io -n azure-ctl
-
Update the Azure Storage Access key configured for the media.
fsobjcfg -m -f media-id -P Azure_Storage_Access_key -
Run the following to modify the media state to make it available.
fschmedstate -s avail media-id -
Run the following to verify access to an imported file. Use the fsretrieve command to retrieve the data.
Important Consideration About The Recursive Retrieve Command
There are two phases when you invoke a recursive retrieve command:
- Phase 1: Mapping of the directory and the files to determine which files are retrieved.
- Phase 2: The actual retrieves from tape, sdisk, and object storage.
During Phase 1 you can only execute one recursive retrieve command at a time. If you execute multiple recursive retrieve commands concurrently, the processes fail and you are notified that an existing recursive retrieve command is in progress.
For example, if a recursive retrieve is currently running Phase 1 and an additional recursive retrieve is invoked, the second request fails
However, if that same recursive retrieve is currently running Phase 2, and an additional recursive retrieve is invoked, the second request is processed without any errors.
fsretrieve file
