Optional HA and Multilink Configuration
When the High Availability (HA) feature is used with replication, a virtual IP (vIP) address must be configured to allow a replication source to use a single IP address to access whichever server is currently performing the Primary function in the target HA cluster.
The vIP is automatically moved to the correct server as part of the failover process for the HaShared file system. See Virtual IP (vIP) for an expanded definition.
It is easiest to set up the vIP during the initial HA conversion. The vIP configuration items appear automatically at this time if a license exists for replication. It is not necessary to have a replication policy configured.
The IP address used for the vIP must be statically allocated and routable to the physical network interface of both servers in the HA cluster. Please request this IP address and netmask information from your network administrator before starting the HA conversion.
Note: This step describes only the tasks necessary for configuring replication on an HA system. For general instructions about configuring HA, see Converting to HA.
- Choose High Availability > Convert from the Tools menu. The HA (Convert) page appears.
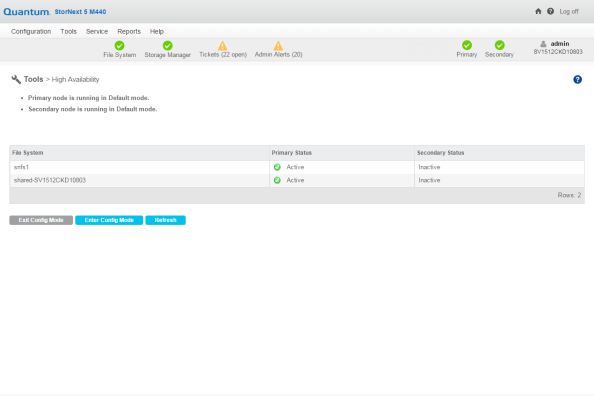
Figure 1: Tools > HA Convert Page
- At the Shared File System field, select from the dropdown list the file system that will be dedicated to StorNext HA internal functions.
- At the MDC Address field, select from the dropdown list the primary system’s IP address for use in communicating between HA MDCs.
- Since this HA system runs a blockpool, you must configure a Virtual IP Address (vIP). Under the heading Virtual Network IP Address Configuration, check Enable and then enter the vIP (virtual IP) Address and vIP Netmask provided by your network administrator.
- Click Convert to convert the primary node to HA.
- When the confirmation message appears, click Yes to proceed or No to exit without converting.
- When a message informs you that the operation was completed successfully, click OK. The configuration items for the Secondary System will be added to the page.
- At the System Name field, enter the IP address of the Secondary System to use for communications between HA MDCs, and then click Scan Host.
- Select the IP address of the physical interface to associate with the vIP, and then click Convert.
- When the confirmation message appears, click Yes to proceed or No to exit without converting.
- When a message informs you that the conversion was completed successfully, click OK to continue.
Setting the IP Address of the Blockpool Server in HA Clusters
The default location of the blockpool server process is localhost. This is not sufficient for HA Clusters where the blockpool server moves with the Primary status to the redundant server in a failover of the HA Shared file system.
- Return to the StorNext Configuration Wizard’s Storage Policies task.
- Locate the Deduplication/Replication file system, select its global policy, and then click Edit. This step must be repeated for each Deduplication/Replication enabled file system.
- Click the Deduplication tab.
- At the Address for Replication and Deduplication field, click the Inherit button.
- Replace the
localhostvalue with the vIP address in the Override box (Override appears after you click Inherit). If multiple vIPs are configured, select one vIP address for the blockpool server. - Click Apply.
- When the confirmation message appears, click Yes to proceed or No to exit. In this case you can safely ignore the warning about associated directories.
- When a message informs you that the operation was completed successfully, click OK to continue.
- Repeat steps 2 thru 8 for each file system.
Note: The IP address of the Blockpool Server in HA Clusters can also be configured from the tab Outbound Replication and Inbound Replication for the "global" policy. There is no difference in configuring from different tabs and the setting of the IP address for the Blockpool from one tab is automatically reflected in the corresponding field of the other two tabs.
Configuring Multilink
Virtual IPs are also used in an HA environment if the multilink feature is configured. A virtual IP address is required for each NIC card you use for replication.
- Choose Replication/Deduplication > Replication Bandwidth from the Tools menu. The Tools > Replication > Bandwidth page appears.
Figure 2: Tools > Replication > Bandwidth Page

- The Replication Bandwidth screen displays a list of NIC cards available for replication. Select Enable for each NIC card you want to include in the replication process.
- Enter the following fields:
- VIP: Enter the virtual IP address for the NIC. (Ask your network administrator for this address as well as the virtual netmask.)
- VIP Netmask: Enter the virtual netmask for the NIC
- Receive Rate: Enter the maximum data reception rate (expressed in bits per second) for the replication target. When replication data is received on the target, it will not exceed this speed. For more information, see Bandwidth Throttling.
- Transmit Rate: Enter the maximum data transmission rate (expressed in bits per second) for the replication source. When replication data is transmitted to the target it will not exceed this speed. For more information, see Bandwidth Throttling.
- Channels: Enter the number of channels you want enabled on the NIC.
- Click Apply to save your changes.
