Label a Device
Follow this procedure to label any new or unused devices, or relabel a device that has been unlabeled.
Caution: Labeling a disk device may result in a complete loss of data on that disk device.
- On the Tools menu, click File Systems, and then click Label Disks. The Tools > Label Disks page appears.
Figure 1: Label Disks Page
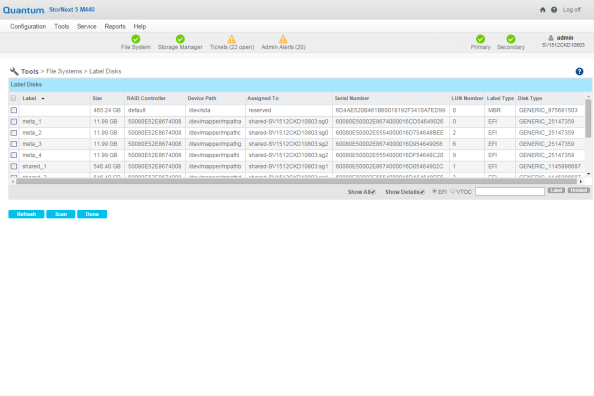
- (Optional) Click Scan to initiate a scan of the disk devices in your SAN.
Caution: Before you initiate a scan, be aware that in complex SAN environments frequent disk scanning can lead to SAN instability including timeout errors. Before the scan begins you will receive a reminder and be given the opportunity to confirm whether you want to proceed with the scan.
- Select the disk devices to which you want to apply labels. Optionally, click All to select all available disks. If a disk device already has a label, continuing with this procedure overwrites the existing label.
Caution: Overwriting or renaming a disk device label may result in a complete loss of data on that disk device.
- Specify the label type by choosing EFI or VTOC.
- Enter a label name in the text field to the right of the EFI and VTOC buttons.
- Click Label.
- When the confirmation message appears, verify that the disk you are labeling is empty, and then click OK to proceed. To cancel the operation, click Cancel.
Note: If you later unlabel a device and then decide to make the unlabeled device usable by the StorNext File System, you must first relabel the device. The relabeling process is identical to labeling initially.
