Application-Specific Shares Wizard
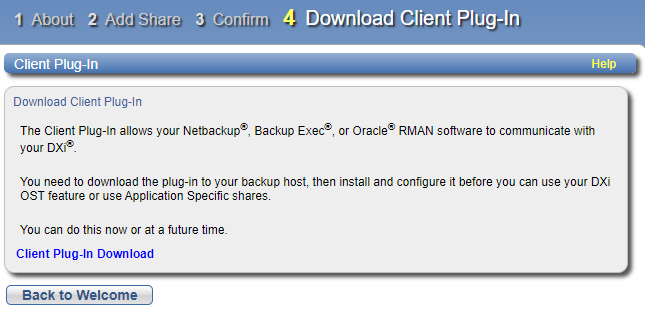
The Application Specific wizard provides guided assistance for configuring the DXi to use application-specific shares to be used by RMAN or AccentFS. A link for downloading and installing a Client Plug-in on your backup host is provided in the Confirm step.
The NAS wizard provides guided assistance for configuring the DXi as a NAS (Network Attached Storage) appliance. The wizard guides you through the process of adding one or more NAS shares to receive backup data and configuring these shares with the CIFS/SMB or NFS protocols.
To begin the Application Specific Shares wizard, on the Wizards menu, click Application Specific.
- Read the information about the wizard.
- Click Next to continue.
Note: At any time while using the wizard, you can click Previous to return to the previous step.
-
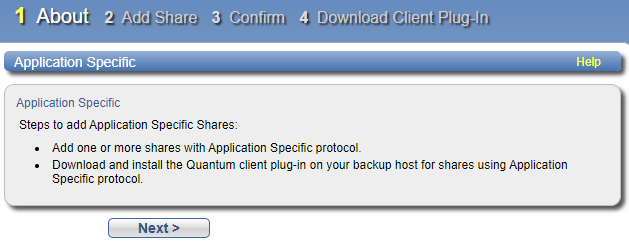
Under Add Share, enter information about the Application Specific share:
Name
Enter the name of the Application Specific share.
Additional Information
Application Specific share names are not case-sensitive. For example, if you create a share named AppSpec1, you cannot create another share named appspec1 because the system considers the names to be the same.
Description
(Optional) Enter a brief description of the share.
Protocol
Application Specific is selected by default and cannot be changed.
Enable deduplication
Deduplication of Application Specific shares is enabled by default and cannot be changed.
- Click Add.
- (Optional) To add additional shares, repeat Steps 1–2.
- Click Next to continue.
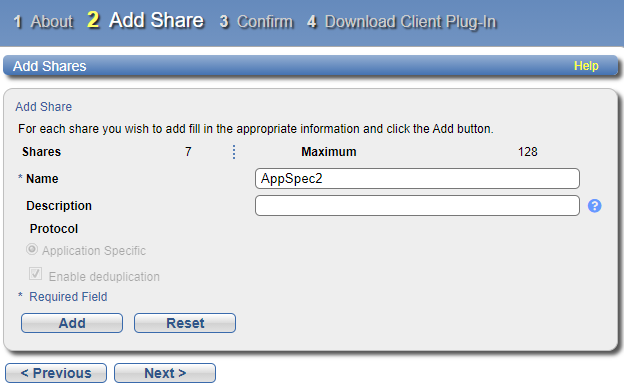
- Review the settings you selected to make sure they are correct. If necessary, click Previous to return to a previous step to make changes.
- To make changes to an Application Specific share you added, first select the share and click Delete to delete the share. Then click Previous to return to the previous step and add a new share.
- After you have confirmed all settings, click Finish. The wizard configures the DXi with the settings you selected.
- When you click Finish, the Application Specific Wizard Results screen confirms that your settings are saved. Click on Yes to continue in the wizard to the Download Client Plug-in step or No to finish the Wizard.
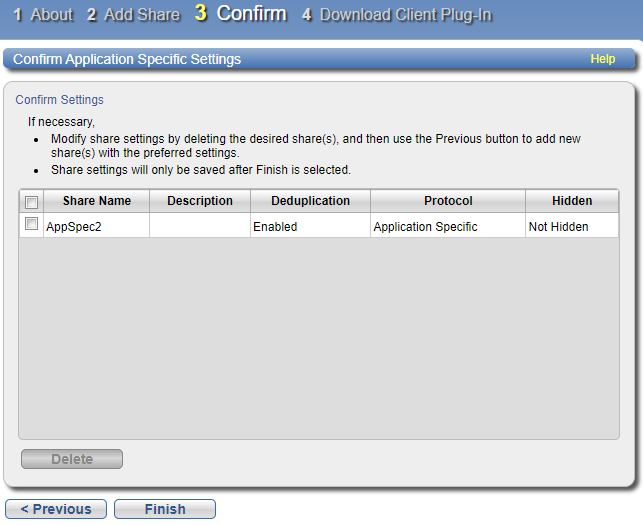
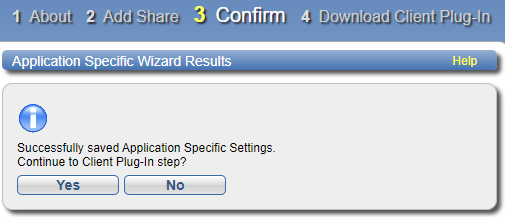
To download the Application-specific plug-in, click Client Plug-in Download. On the download page, download the correct plug-in for your backup application and operating system.
For Application Specific (RMAN) shares, you must download, install and configure the client plug-in on the Oracle server.
To download the Application Specific (RMAN) Plug-in:
- Click Client Plug-in Download.
- On the download page, click Select a New Product.
-
In the dialog box, select Browse for Product and make the following selections:
- Product line: Storage
- Click More Details under the Downloads section of the Product Support page.
- Select the Driver tab to access the Application Specific Plug-in.
Also on the download page, click Installation Instructions to download the plug-in installation instructions. Follow the instructions to install the plug-in on your Oracle server.
