 minute read
DXi T10 Capacity Upgrade
Overview
WARNING: Read these instructions completely before installing any hardware components in the DXi T10. Failure to correctly follow the instructions may cause the capacity upgrade to fail.
This document provides instructions for upgrading the storage capacity of a Quantum DXi T10 disk backup system.
Adding a Storage Capacity License
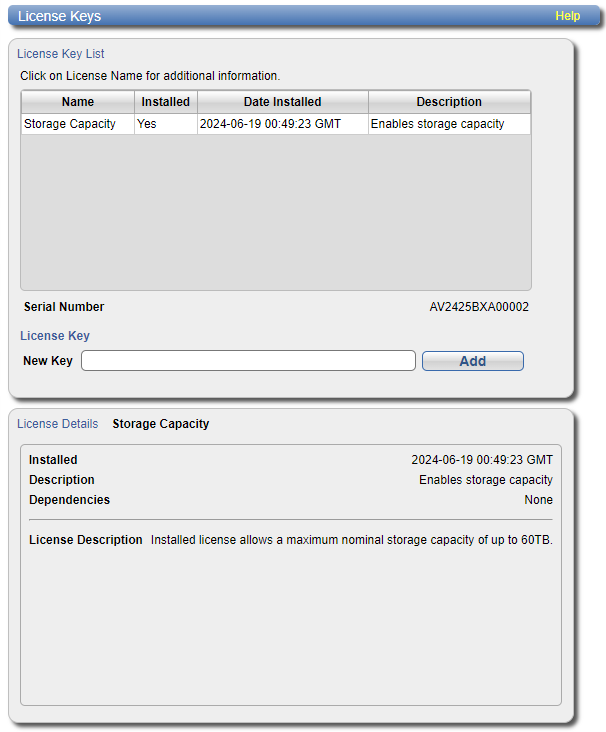
Usable storage capacity can be upgraded at any time after purchase by adding a storage capacity upgrade license to enable installed hardware capacity, up to a total of 60 TB for DXi T10-60, 120 TB for DXi T10-120, 240 TB for DXi T10-240, and 480 TB for DXi T10-480.
Storage capacity licenses are available in 15 TB and 30 TB increments.
| System | Minimum Capacity | Maximum Capacity | Capacity Upgrade Licenses Available |
|---|---|---|---|
| DXi T10-60 | 15 TB | 60 TB | 15 TB or 30 TB |
| DXi T10-120 | 30 TB | 120 TB | 15 TB or 30 TB |
| DXi T10-240 | 60 TB | 240 TB | 15 TB or 30 TB |
| DXi T10-480 | 120 TB | 480 TB | 15 TB or 30 TB |
Prepare for the Capacity Upgrade
Before you begin the DXi T10 storage capacity upgrade, make the following preparations:
Before starting a capacity upgrade, Quantum recommends that the DXi library is running the latest version of DXi Software. For more information on software upgrades, see the Software Upgrades section of the DXi T10 User’s Guide.
Make sure the following conditions are met before you continue with the capacity upgrade:
- All backup jobs are completed and there is no pending I/O.
- All replication jobs are completed, and replication is paused (Replication > Actions page).
- All space reclamation tasks are completed without errors (Utilities > Space Reclamation page).
- All healthchecks are completed without errors (Utilities > Space Reclamation page).
- All components in the system display Normal status (Status > Hardware page).
- All outstanding administration alerts are deleted (Alerts > Admin Alerts page).
- All service tickets are closed (Alerts > Service Tickets page).
For more information, see the DXi T10 User’s Guide or click Help > Help Contents in the remote management console to display the DXi online help.
Install the Storage Capacity License
You must add a license key to enable the new usable capacity of the system. The 15 or 30 TB licenses each need to be installed separately.
-
Locate your Storage Capacity License Certificate.
-
Open two Web browser windows on a computer with Internet access.
Note: During this procedure, you can copy and paste required numbers between these two windows.
-
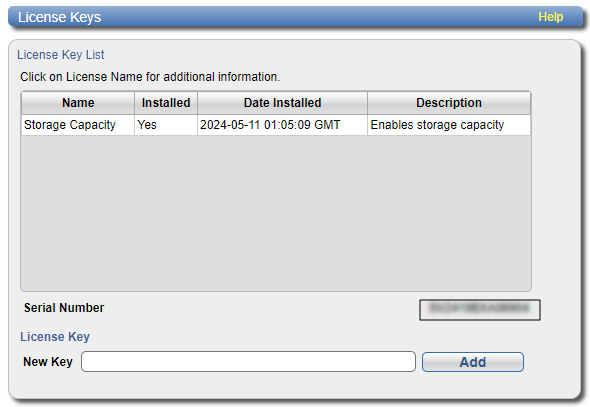
In one browser, navigate to the Utilities > License Keys page in the DXi remote management console. Note that the system serial number displays directly above the New Key box.
For information about accessing the remote management console, refer to the DXi T10 User's Guide.
-
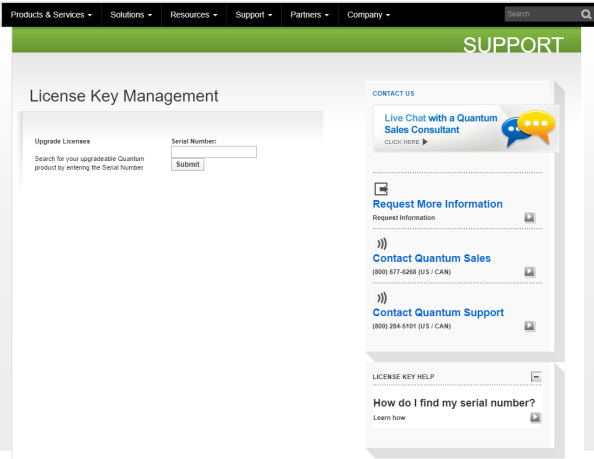
In the other browser, enter the address for the License Key Management Web site:
http://www.quantum.com/licensekeys
https://www.quantum.com/oem/fujitsu/licensekeys
-
-
On the License Key Management Web site, perform the following steps:
- Enter the system serial number in the Serial Number box and click Submit.
-
Enter the authorization code (printed on the License Certificate) and click Get License Key.
The Licensed Feature page returns a storage capacity key.
-
Switch to the Utilities > License Keys page in the DXi remote management console.
-
Enter the license key in the New Key box and click Add.
The file system is automatically expanded. (This can take up to 10 minutes.)
-
Click the Storage Capacity license link on the License Keys page. The maximum allowed storage capacity appears under License Details.
Verify that the licensed capacity equals the expected total storage capacity of the system.
Note: After installation, the DXi T10 performs background initialization of all new storage arrays. The time to complete the initialization depends on the level of I/O to/from the unit. You can use the DXi T10 normally during this time. To monitor the progress of background initialization, navigate to Status > Hardware > Details > Storage Arrays in the remote management console. Click a storage array, and then click Volumes to view initialization status.
Troubleshooting
If you encounter problems while installing or configuring the DXi T10, see the table below for troubleshooting steps.
DXi T10 Installation Troubleshooting
| Problem | Corrective Action |
|---|---|
| The following message displays when you log on to the remote management console: There are service tickets that require attention. | Click OK to display the Service Tickets page, or navigate to the Alerts > Service Tickets page. Click a ticket number to view details about the service ticket. Perform any suggested steps listed in the ticket details. |
| The Home page does not display the expected total Disk Capacity. | Make sure the storage capacity license is installed. |
| The storage capacity license is correctly installed, but the Home page still does not display the expected total Disk Capacity. |
|
