Enabling Secure Snapshots for Individual Shares
After globally enabling DXi Secure Snapshots of NAS shares, VTL partitions, or OST LSUs for your DXi T10 System, the next step is to select and enable individual shares you want to secure using snapshots. After completing the instructions in this topic, you can use the instructions in the next topic, Scheduling Secure Snapshot Events, to determine and schedule when and how often the snapshots are taken.
Note: Unchecking the Enable Secure Snapshots box as noted in this topic will disable further creation of individual snapshots for the selected share, partition, or LSU.
Enable or Disable Snapshots for Individual Shares, Partitions, and LSUs
Complete these steps to enable snapshots for individual NAS shares:
- Select Configuration > NAS > Summary.
- In the NAS Shares List, scroll to and check the far-left box in the row to select the individual NAS share where you want snapshots to be enabled, then click Edit.
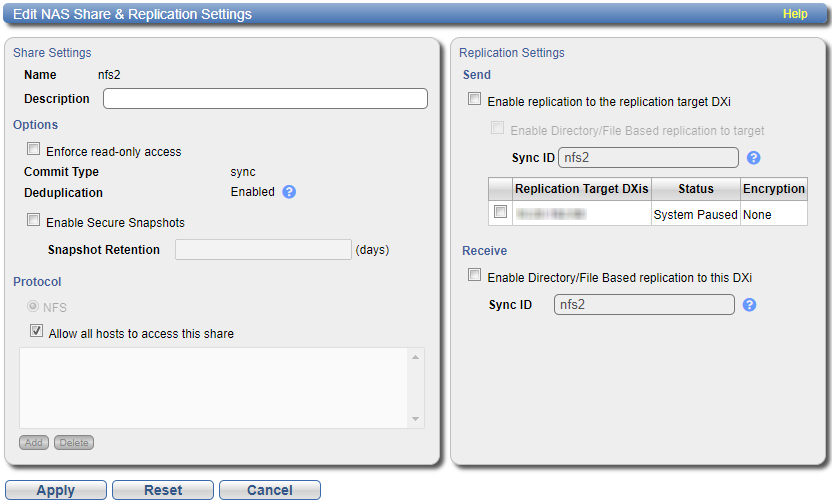
- In the Edit NAS Share & Replication Settings dialog, In the Options section, check Enable Secure Snapshots.
- In the Snapshot Retention box, type the number of days to retain the snapshots and click Apply to enable snapshots for the selected share.
- Continue with Scheduling Secure Snapshot Events.


Note: At the end of the retention period, the snapshot is automatically deleted.
To disable snapshots for the selected share, uncheck the Enable Secure Snapshots box, then click Apply to save the change.
Complete these steps to enable snapshots for individual application-specific shares:
- Select Configuration > Application Specific.
- In the Application Specific Shares List, check the far-left box in the row to select the individual share for which you want the Secure Snapshots feature to be enabled, then click Edit.
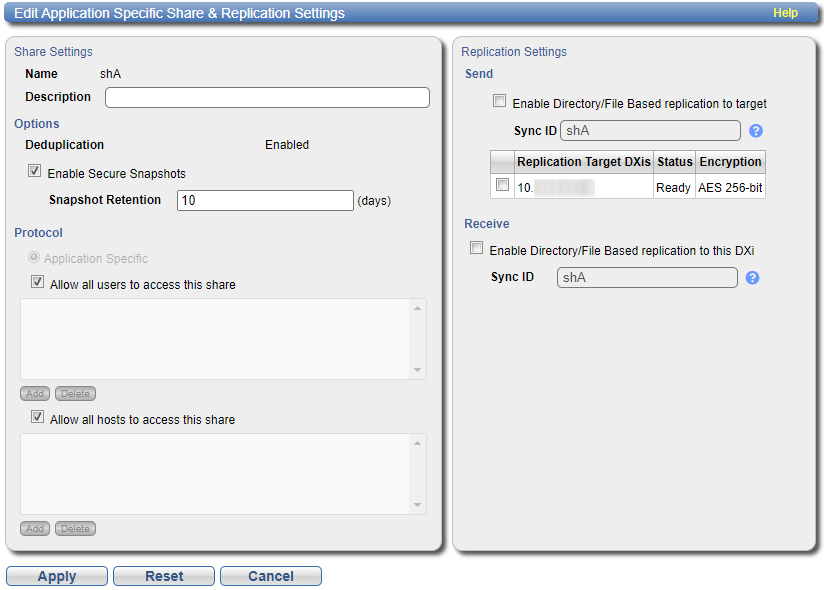
- In the Edit Application Specific Share & Replication Settings dialog, In the Options section, check Enable Secure Snapshots.
- In the Snapshot Retention box, type the number of days to retain the snapshot and click Apply to enable snapshots for the selected share.
- Continue with Scheduling Secure Snapshot Events.


Note: At the end of the retention period, the snapshot is automatically deleted.
To disable snapshots for the selected share, uncheck the Enable Secure Snapshots box, then click Apply to save the change.
Complete these steps to enable snapshots for individual VTL partitions:
- Select Configuration > VTL > Partitions.
- In the Partition List, scroll to and check the far-left box in the row to select the individual partition where you want snapshots to be enabled, then click Edit.
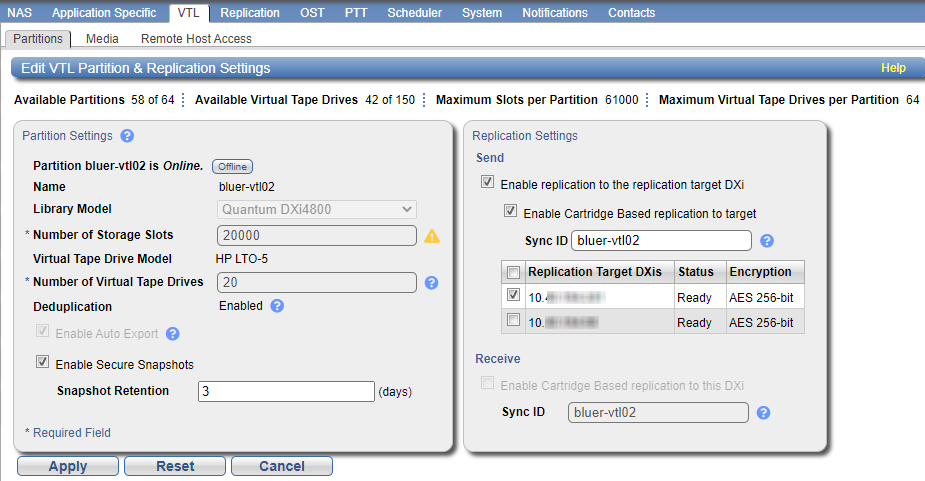
- In the Edit VTL Partition & Replication Settings dialog, In the Deduplication section, check Enable Secure Snapshots.
- In the Snapshot Retention box, type the number of days to retain the snapshot and click Apply to enable snapshots for the selected partition.
- Continue with Scheduling Secure Snapshot Events.


Note: At the end of the retention period, the snapshot is automatically deleted.
To disable snapshots for the selected partition, uncheck the Enable Secure Snapshots box, then click Apply to save the change.
Complete these steps to enable snapshots for individual OST Logical Storage Units (LSUs):
- Select Configuration > OST > LSU.
- In the Logical Storage Unit List, scroll to and check the far-left box in the row to select the individual LSU where you want the Secure Snapshots feature to be enabled, then click Edit.
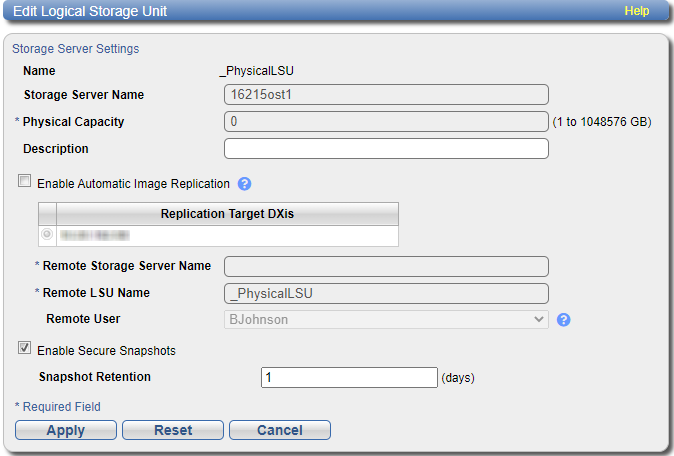
- In the Edit Logical Storage Unit dialog, check Enable Secure Snapshots.
- In the Snapshot Retention box, type the number of days to retain the snapshot and click Apply to enable snapshots for the selected LSU.
- Continue with Scheduling Secure Snapshot Events.


Note: At the end of the retention period, the snapshot is automatically deleted.
To disable snapshots for the selected share, uncheck the Enable Secure Snapshots box, then click Apply to save the change.
