 minute read
SNMP
The SNMP page allows you to configure the DXi4800 to send status messages using SNMP (Simple Network Management Protocol). The DXi4800 supports SNMP v1 and v2c.
SNMP works by sending messages, called protocol data units (PDUs), to different parts of a network, or communities. SNMP compliant devices, called agents, store data about themselves in Management Information Bases (MIBs) and return this data to the SNMP requesters.
You can configure the DXi4800 to act as an agent and send traps to a specified destination. You can also add SNMP community information.
To access a copy of the SNMP MIB file, see SNMP MIB File.
To access the SNMP page, on the Notifications page, click the SNMP tab.
The SNMP page contains the following tabs:
The Destinations page allows you to manage the destinations the DXi4800 sends SNMP traps to. You can add, edit, and delete SNMP destinations, and you can specify the types of traps to send.
To access the Destinations page, on the SNMP page, click the Destinations tab.
Tasks
Use the Destinations page to perform the following tasks:
- View information about SNMP destinations. See Trap Destination List.
- Add an SNMP destination. See Adding a Destination.
- Edit an SNMP destination. See Editing a Destination.
- Delete an SNMP destination. See Deleting a Destination.
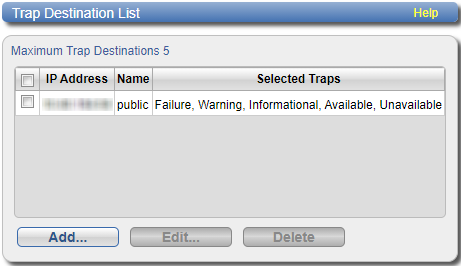
The Trap Destination List displays the following information about SNMP destinations:
| IP Address | The IP address of the destination. |
| Name | The name of the destination. |
| Selected Traps | The traps the DXi4800 sends to the destination (Failure, Warning, Informational, Available, or Unavailable). |
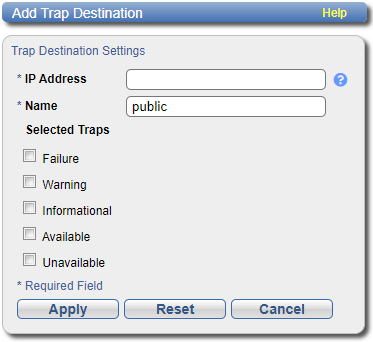
Add an SNMP destination to send traps from the DXi4800 to the destination.
Note: You can add up to 5 destinations.
To add a destination:
-
Click Add.
-
Enter information about the destination:
IP Address Enter the IP address of the system that will receive the traps generated by the DXi4800.
Additional Information
- When entering IP addresses, never use an address that is in a reserved IP address range. To see a list of reserved IP address ranges, click the quick tip icon [?] located near the IP address field.
- To use hostname format, you must specify at least one DNS IP address on the Network page. See Network.
-
Using uppercase letters in the hostname is acceptable but will not be preserved after entry. For that reason, Quantum recommends using lowercase letters in the Hostname or IP Address box.
Name Enter the name of the destination. -
Select one or more traps to send to the destination:
Failure Sends failure traps. Warning Sends warning traps. Informational Sends informational traps. Available Sends a trap when the system transitions from an unavailable to an available state. Unavailable Sends a trap when the system transitions from an available to an unavailable state. - Click Apply.
The Add Trap Destination page displays.
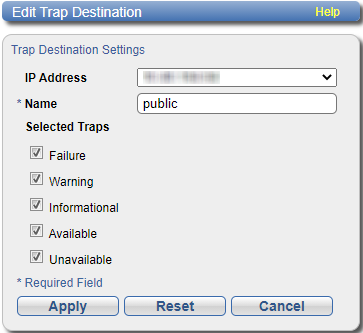
Edit an SNMP destination to change the name of the destination or the types of traps the DXi4800 sends to the destination.
To edit a destination:
-
Click Edit.
The Edit Trap Destination page displays.
-
Enter information about the destination:
Note: If you are editing a destination, you cannot change the IP Address.
IP Address (Optional) Select a different destination to edit. Name Enter the name of the destination. -
Select one or more traps to send to the destination:
Failure Sends failure traps. Warning Sends warning traps. Informational Sends informational traps. Available Sends a trap when the system transitions from an unavailable to an available state. Unavailable Sends a trap when the system transitions from an available to an unavailable state. - Click Apply.
Delete an SNMP destination if you no longer want the DXi4800 to send traps to the destination.
To delete a destination, select the destination and click Delete.
Note: You can select multiple destinations to delete at once.
The Community page allows you to manage SNMP community information for the DXi4800. You can add, edit, and delete communities, and you can specify the community access type.
To access the SNMP Community List page, on the SNMP page, click the Community tab.
Tasks
Use the Community page to perform the following tasks:
- View information about SNMP communities. See SNMP Community List.
- Add an SNMP community. See Adding a Community.
- Edit an SNMP community. See Editing a Community.
- Delete an SNMP community. See Deleting a Community.
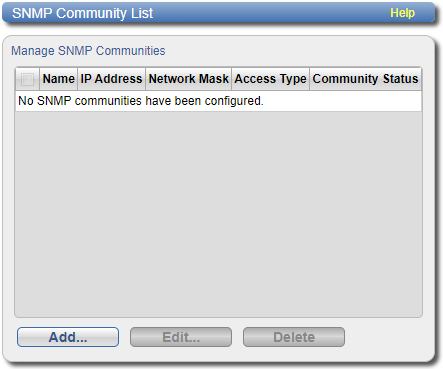
The SNMP Community List displays the following information about SNMP communities:
| Name | The name of the community. |
| IP Address | The IP address of the community. |
| Network Mask | The network mask of the community. |
| Access Type | The access type of the community (Get or Get/Set). |
| Community Status | The status of the community (Enabled or Disabled). |
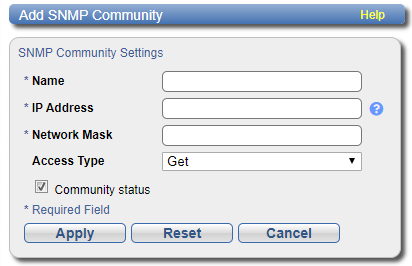
Add an SNMP community to include the DXi4800 in a group of devices that are monitored by a common management station.
Note: If no communities are defined, the SNMP agent is not accessible.
To add a community:
-
Click Add.
The Add SNMP Community page displays.
-
In the Name box, enter a unique Name for the community (up to 20 characters).
Valid characters are letters, numbers, hyphens, and underscores.
-
Enter a valid IP Address and Network Mask pair.
A pair is valid if performing a logical bitwise AND operation on the IP address and the network mask results in the IP address. See the table below for examples:
IP Address / Network Mask
Result
10.40.166.87
255.255.255.255
Allows access only from 10.40.166.87
10.40.166.87
10.40.166.87
Allows access only from 10.40.166.87
10.40.166.87
10.40.166.0
Invalid because the logical bitwise operation (address AND mask) is not equal to the address
10.40.166.87
255.255.0.0
Invalid because the logical bitwise operation (address AND mask) is not equal to the address
10.40.0.0
255.255.0.0
Allows access from any client with address 10.40.xx.xx
Additional Information
- If you define a single community and set both the IP address and network mask to 0.0.0.0 (or leave both blank), then IP address-based access control is disabled. In this case, the SNMP agent is accessible from any IP address.
- When entering IP addresses, never use an address that is in a reserved IP address range. To see a list of reserved IP address ranges, click the quick tip icon [?] located near the IP address field.
-
In the Access Type drop-down box, select the access type for the community:
Get Allows SNMP get operations. Get/Set Allows both SNMP get and put operations. -
Select the Community status check box to enable the community.
Or clear the Community status check box to disable the community.
- Click Apply.
Edit an SNMP community to change the IP address or access type for the community. You can also enable or disable the community.
To edit a community:
-
Select the check box in the row for the community to edit and click Edit.
The Edit SNMP Community page displays.
- (Optional) In the Name box, select a different community to edit.
-
Enter a valid IP Address and Network Mask pair.
A pair is valid if performing a logical bitwise AND operation on the IP address and the network mask results in the IP address. See the table below for examples:
IP Address / Network Mask
Result
10.40.166.87
255.255.255.255
Allows access only from 10.40.166.87
10.40.166.87
10.40.166.87
Allows access only from 10.40.166.87
10.40.166.87
10.40.166.0
Invalid because the logical bitwise operation (address AND mask) is not equal to the address
10.40.166.87
255.255.0.0
Invalid because the logical bitwise operation (address AND mask) is not equal to the address
10.40.0.0
255.255.0.0
Allows access from any client with address 10.40.xx.xx
Additional Information
- If you define a single community and set both the IP address and network mask to 0.0.0.0 (or leave both blank), then IP address-based access control is disabled. In this case, the SNMP agent is accessible from any IP address.
- When entering IP addresses, never use an address that is in a reserved IP address range. To see a list of reserved IP address ranges, click the quick tip icon [?] located near the IP address field.
-
In the Access Type drop-down box, select the access type for the community:
Get Allows SNMP get operations. Get/Set Allows both SNMP get and put operations. -
Select the Community status check box to enable the community.
Or clear the Community status check box to disable the community.
- Click Apply.
Delete an SNMP community if you no longer want the DXi4800 to belong to a group of devices that are monitored by a common management station.
To delete a community, select the community and click Delete.
Note: You can select multiple communities to delete at once
The Send Test Trap page allows you to send a test SNMP trap to verify that SNMP is correctly configured on the DXi4800.
To access the Send Test Trap page, on the SNMP page, click the Test tab.
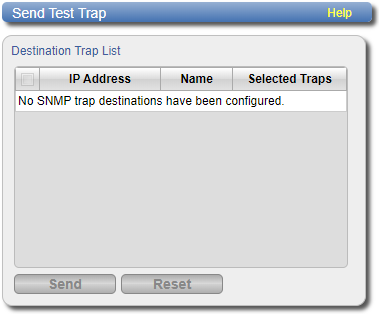
To send a test SNMP trap, select a destination in the list and click Send. If the destination does not receive the SNMP trap, make sure that the destination IP address and community information are correct. See Editing a Destination and Community.
