File System Operations
Do the following to create or delete a file system.
-
Log in to the Myriad UI, if needed.
-
In the top navigation menu, click CLUSTERS. The Clusters page appears.
(click image to enlarge)
-
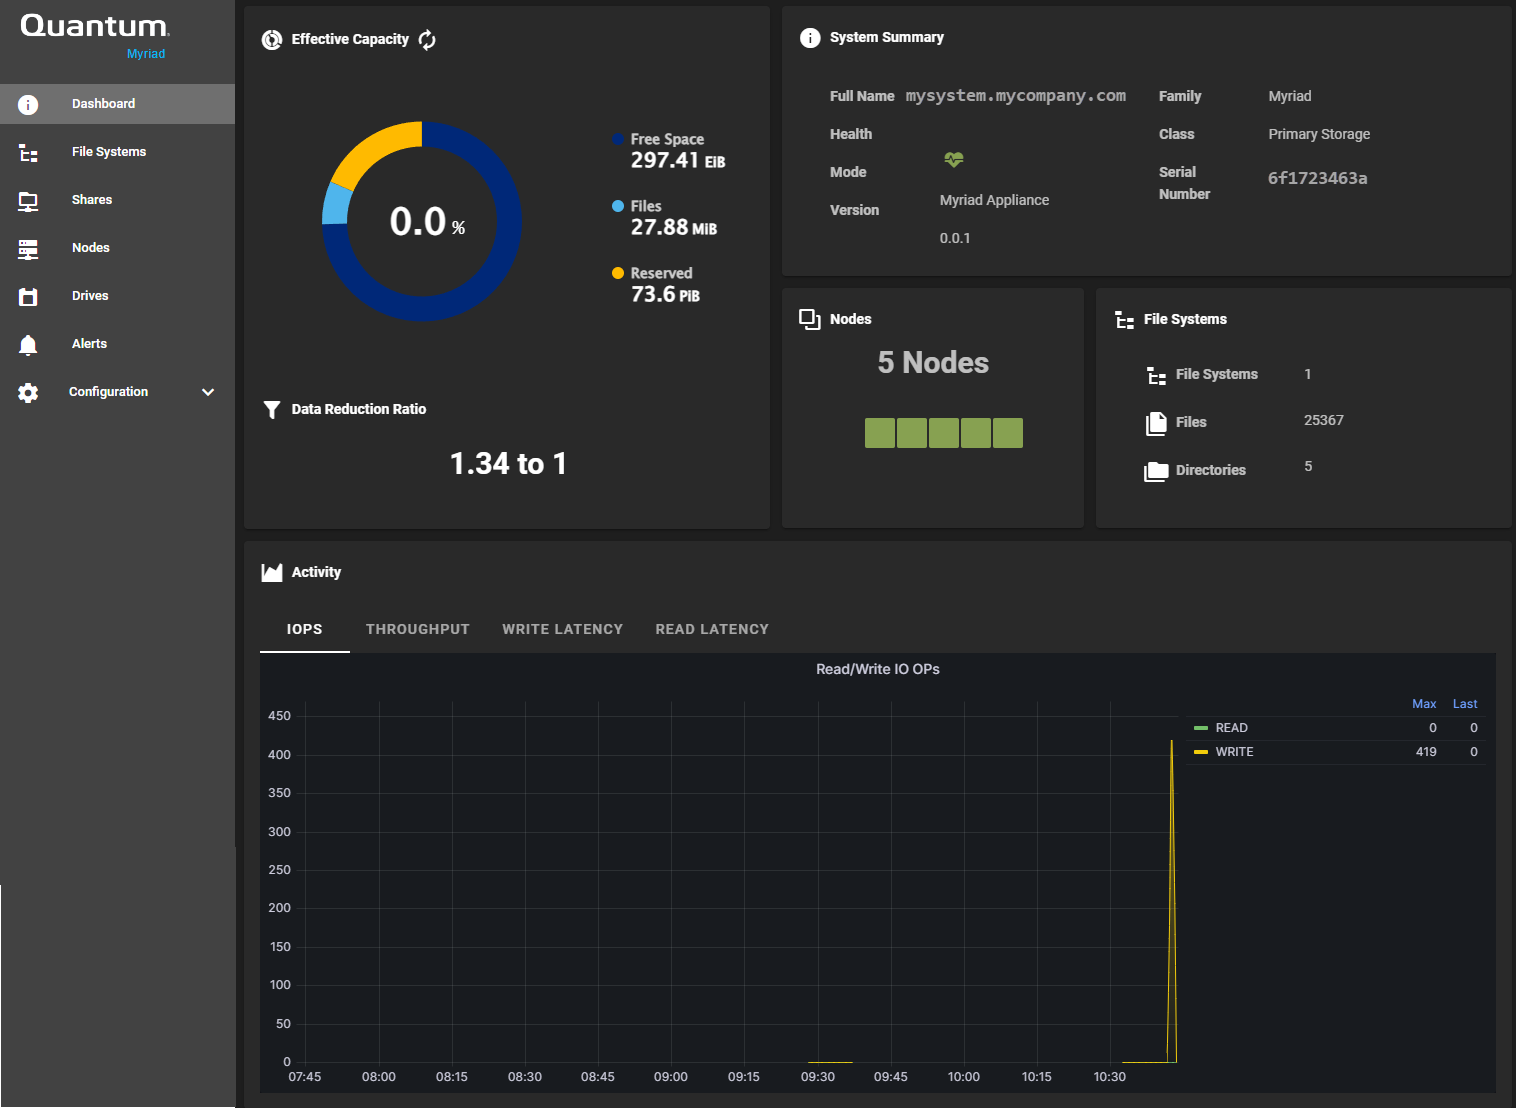
Click a cluster. The cluster dashboard appears.
(click image to enlarge)
-
In the left navigation menu, click File Systems. The File Systems page appears.
(click image to enlarge)
-
Click the plus icon (
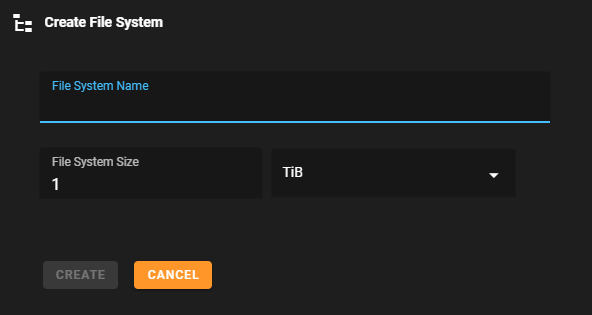
 ) in the upper right of the File Systems page to create a file system. The Create File System dialog appears.
(click image to enlarge)
-
Complete the form and then click CREATE, or click CANCEL to abort the operation and return to the previous page.
Note: The file system name must include alphanumerical characters and cannot exceed 254 characters.
If successful, the Successfully created file system! dialog appears and your file system appears on the File Systems page.
(click image to enlarge)

-
Log in to the Myriad UI, if needed.
-
In the top navigation menu, click CLUSTERS. The Clusters page appears.
(click image to enlarge)
-
Click a cluster. The cluster dashboard appears.
(click image to enlarge)
-
In the left navigation menu, click File Systems. The File Systems page appears.
(click image to enlarge)
-
Click the delete icon (
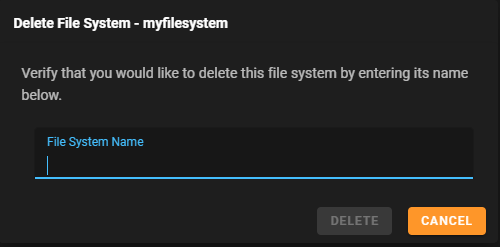
 ) to delete a file system. The Delete File System - name of file system dialog appears.
(click image to enlarge)
-
Complete the form and then click DELETE, or click CANCEL to abort the operation and return to the previous page. If successful, the Name of file system is being deleted. dialog appears and your file system is removed from the File Systems page.
(click image to enlarge)

Do the following to create or delete a share.
-
Log in to the Myriad UI, if needed.
-
In the top navigation menu, click CLUSTERS. The Clusters page appears.
(click image to enlarge)
-
Click a cluster. The cluster dashboard appears.
(click image to enlarge)
-
In the left navigation menu, click Shares. The Shares page appears.
(click image to enlarge)
-
Click the plus icon (
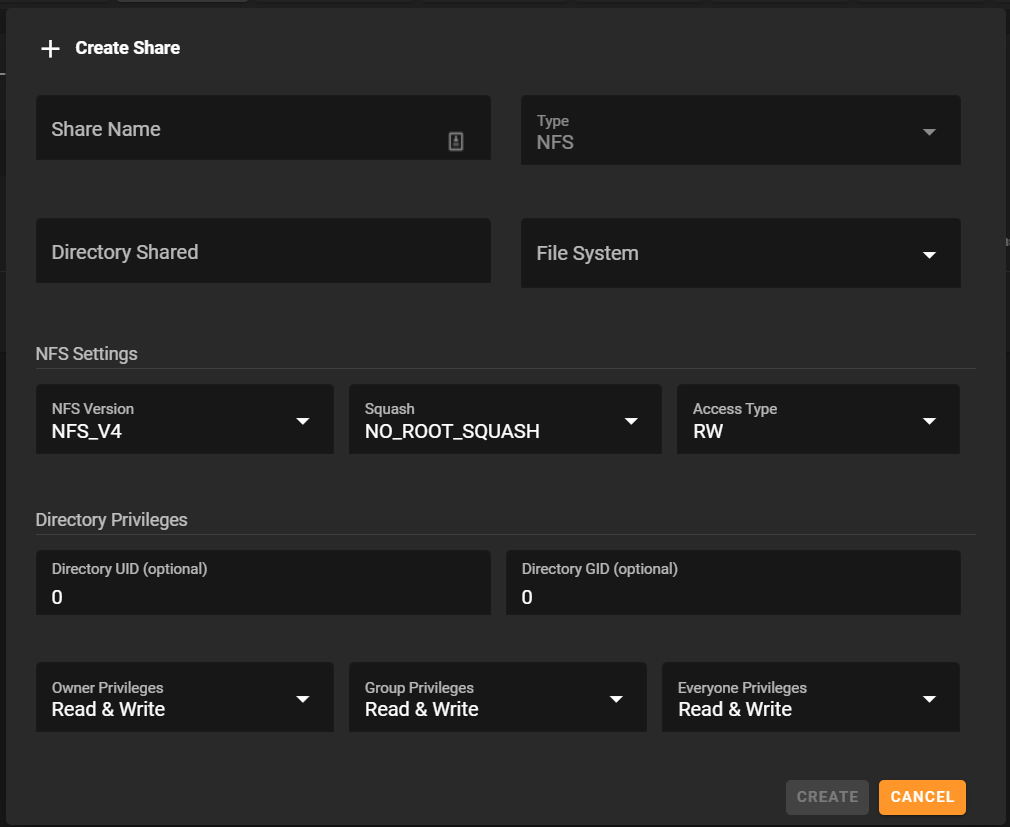
 ) to create a share. The Create Share dialog appears.
 Create an NFS Share
In the Type field, click NFS.
(click image to enlarge)
Parameter Description Share Type The type of connection to the share. Share Name The name of the share mount point (for example, /nfs1). NFS Version The version of NFS the share supports. The default is NFSV4.
-
NFSv4
-
NFSv3
File System The name of the Myriad file system to use for your share. Directory Share The directory on the file system to share. Access Type The type of access for the share.
-
RW (Read and Write)
-
RO (Read Only)
Squash The root squash option for the share.
-
root_squash
-
no_root_squash
Note: The fields below are attributes for the ROOT directory of the share.
Directory UID The UID of the share root. The default UID is zero (0). Directory GID The GID of the share root. The default GID is zero (0). Owner Privileges The share root directory permission for the owner.
-
Read and write
-
Read Only
-
No permission
Group Privileges The share root directory permission for the group.
-
Read and write
-
Read Only
-
No permission
Everyone Privileges The share root directory permission for everyone.
-
Read and write
-
Read Only
-
No permission
 Create an SMB Share
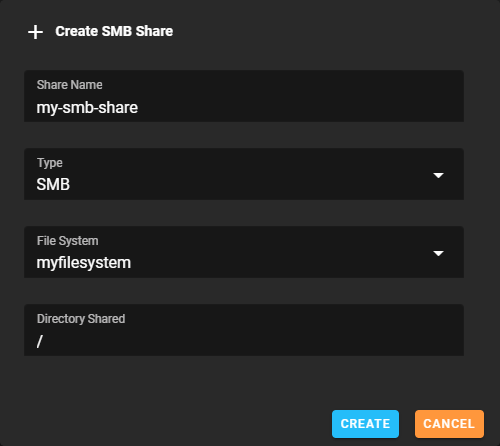
In the Type field, click SMB.
(click image to enlarge)
Parameter Description Share Name The name of the share mount point (for example, /nfs1). Share Type The type of connection to the share. File System The name of the Myriad file system to use for your share. Directory Shared The directory on the file system to share. -
-
Complete the form and then click CREATE to create the share and, if successful, the Successfully created share! dialog appears and your share appears on the Shares page. Alternatively, click CANCEL to abort the operation and return to the previous page.
(click image to enlarge)

-
Log in to the Myriad UI, if needed.
-
In the top navigation menu, click CLUSTERS. The Clusters page appears.
(click image to enlarge)
-
Click a cluster. The cluster dashboard appears.
(click image to enlarge)
-
In the left navigation menu, click Shares. The Shares page appears.
(click image to enlarge)
-
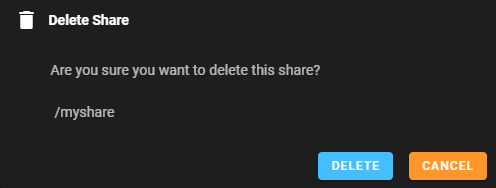
Click the delete icon (
 ) to delete a share. The Delete Share dialog appears.
(click image to enlarge)
-
Click DELETE, or click CANCEL to abort the operation and return to the previous page. If successful, the Name of shared is being deleted. dialog appears and your share is removed from the Shares page.
(click image to enlarge)

You can also edit the settings of a specified share.
-
Log in to the Myriad UI, if needed.
-
In the top navigation menu, click CLUSTERS. The Clusters page appears.
(click image to enlarge)
-
Click a cluster. The cluster dashboard appears.
(click image to enlarge)
-
In the left navigation menu, click Shares. The Shares page appears.
(click image to enlarge)
-
Depending on the type of share you want to edit, do the following:
 Edit an NFS Share
Caution: When you change the NFS Version (for example, from NFSv3 to NFSv3 and NFSv4) and there is NFSv3 I/O occuring during that time, the NFS server might crash and cause a pod to restart. Quantum strongly recommends you prevent any I/O activity on the share that you are editing.
Click Edit Share. The Edit Share dialog appears.
(click image to enlarge)
Parameter Description Share Type The type of connection to the share. Share Name The name of the share mount point (for example, /nfs1). NFS Version The version of NFS the share supports. The default is NFSV4.
-
NFSv4
-
NFSv3
File System The name of the Myriad file system to use for your share. Directory Share The directory on the file system to share. Access Type The type of access for the share.
-
RW (Read and Write)
-
RO (Read Only)
Squash The root squash option for the share.
-
root_squash
-
no_root_squash
Note: The fields below are attributes for the ROOT directory of the share.
Directory UID The UID of the share root. The default UID is zero (0). Directory GID The GID of the share root. The default GID is zero (0). Owner Privileges The share root directory permission for the owner.
-
Read and write
-
Read Only
-
No permission
Group Privileges The share root directory permission for the group.
-
Read and write
-
Read Only
-
No permission
Everyone Privileges The share root directory permission for everyone.
-
Read and write
-
Read Only
-
No permission
 Edit an SMB Share
Click Edit Share. The Edit Share dialog appears.
(click image to enlarge)
Parameter Description Share Name The name of the share mount point (for example, /nfs1). Share Type The type of connection to the share. File System The name of the Myriad file system to use for your share. Directory Shared The directory on the file system to share. -
-
Complete the form and then click Apply to save your changes. Alternatively, click CANCEL to abort the operation and return to the previous page.
Do the following to add or delete a snapshot.
-
Log in to the Myriad UI, if needed.
-
In the top navigation menu, click CLUSTERS. The Clusters page appears.
(click image to enlarge)
-
Click a cluster. The cluster dashboard appears.
(click image to enlarge)
-
In the left navigation menu, click File Systems. The File Systems page appears.
(click image to enlarge)
-
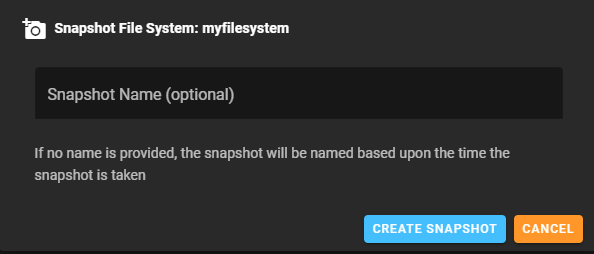
Click the snapshot icon (
 ) to add a snapshot of a file system. The Snapshot File System: <name of file system> dialog appears.
(click image to enlarge)
-
Complete the form and then click CREATE SNAPSHOT, or click CANCEL to abort the operation and return to the previous page.
Note: If you do not provide a name for your snapshot, the snapshot is labeled based on the time it is created. The snapshot name must include alphanumerical characters and cannot exceed 254 characters.
Caution: Quantum recommends you not exceed 1000 snapshots.
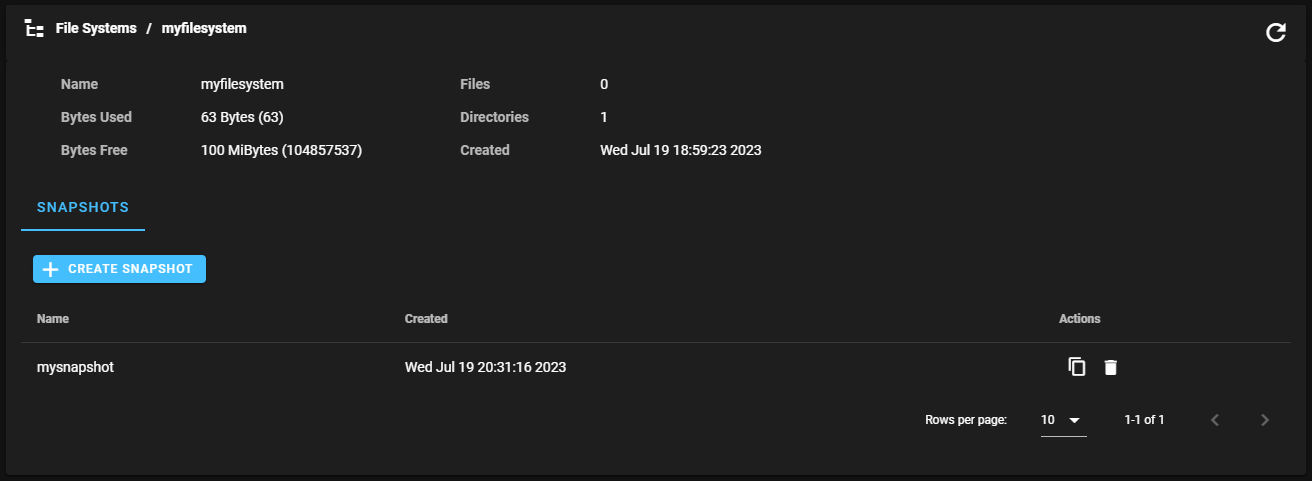
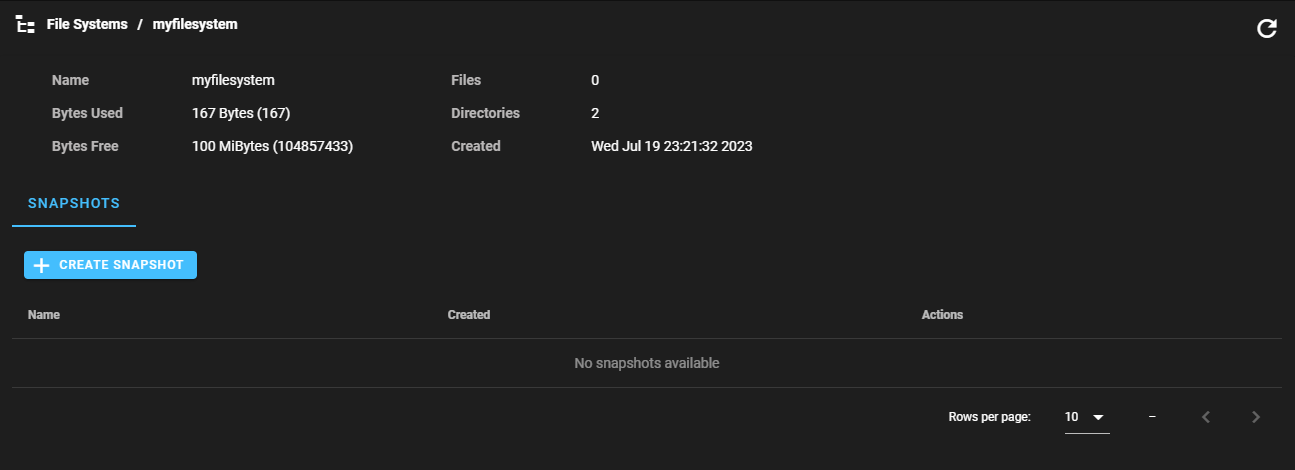
If successful, the Successfully created snapshot! dialog appears and your snapshot appears on the File Systems / <file system name> page under the SNAPSHOTS tab.
(click image to enlarge)

-
Log in to the Myriad UI, if needed.
-
In the top navigation menu, click CLUSTERS. The Clusters page appears.
(click image to enlarge)
-
Click on a cluster. The cluster dashboard appears.
(click image to enlarge)
-
In the left navigation menu, click File Systems. The File Systems page appears.
(click image to enlarge)
-
Click a file system. The File Systems / <file system name> page appears.
(click image to enlarge)
-
Click the delete icon (
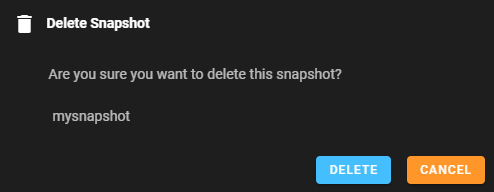
 ) to delete a snapshot. The Delete Snapshot dialog appears.
(click image to enlarge)
-
Click DELETE, or click CANCEL to abort the operation and return to the previous page. If successful, the Name of snapshot is being deleted. dialog appears and your snapshot is removed from the File Systems / <file system name> page.
(click image to enlarge)

Do the following to add or delete a clone.
-
Log in to the Myriad UI, if needed.
-
In the top navigation menu, click CLUSTERS. The Clusters page appears.
(click image to enlarge)
-
Click a cluster. The cluster dashboard appears.
(click image to enlarge)
-
In the left navigation menu, click File Systems. The File Systems page appears.
(click image to enlarge)
-
Click the clone icon (
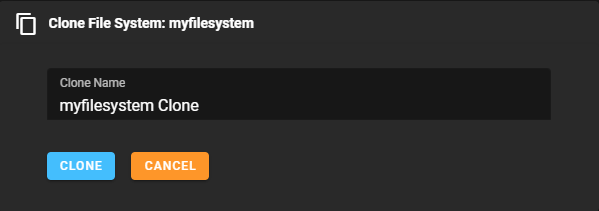
 ) to clone a file system. The Clone File System: <name of file system> dialog appears.
(click image to enlarge)
-
Complete the form and then click CLONE, or click CANCEL to abort the operation and return to the previous page.
Note: The clone name must include alphanumerical characters and cannot exceed 254 characters.
Caution: Quantum recommends you not exceed 1000 clones.
If successful, the Successfully cloned filesystem! dialog appears and your clone appears on the File Systems page.
(click image to enlarge)

-
Log in to the Myriad UI, if needed.
-
In the top navigation menu, click CLUSTERS. The Clusters page appears.
(click image to enlarge)
-
Click a cluster. The cluster dashboard appears.
(click image to enlarge)
-
In the left navigation menu, click File Systems. The File Systems page appears.
(click image to enlarge)
-
Click the delete icon (
 ) to delete a clone. The Delete File System - name of file system dialog appears.
(click image to enlarge)
-
Complete the form and then click DELETE, or click CANCEL to abort the operation and return to the previous page. If successful, the Name of file system is being deleted. dialog appears and your file system is removed from the File Systems page.
(click image to enlarge)

Do the following to view metrics, performance, and storage usage data for a file system.
-
Log in to the Myriad UI, if needed.
-
In the top navigation menu, click CLUSTERS. The Clusters page appears.
(click image to enlarge)
-
Click a cluster. The cluster dashboard appears.
(click image to enlarge)
-
In the left navigation menu, click File Systems. The File Systems page appears.
(click image to enlarge)
-
Click a file system. The File Systems > name of file system page appears.
(click image to enlarge)
-
Do any of the following:
-
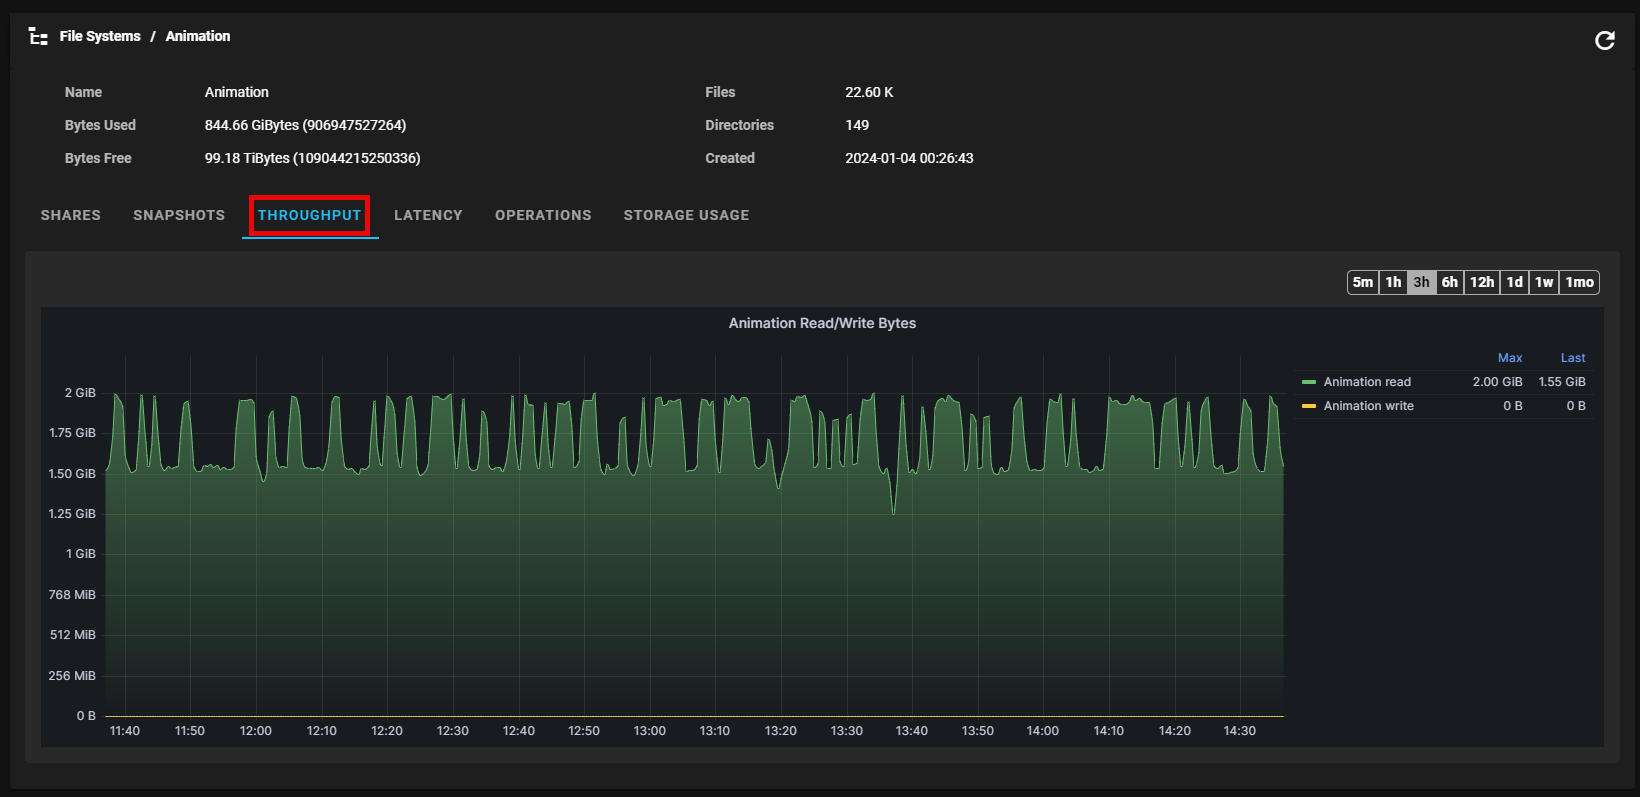
To view throughput data, click the Throughput tab.
(click image to enlarge)
-
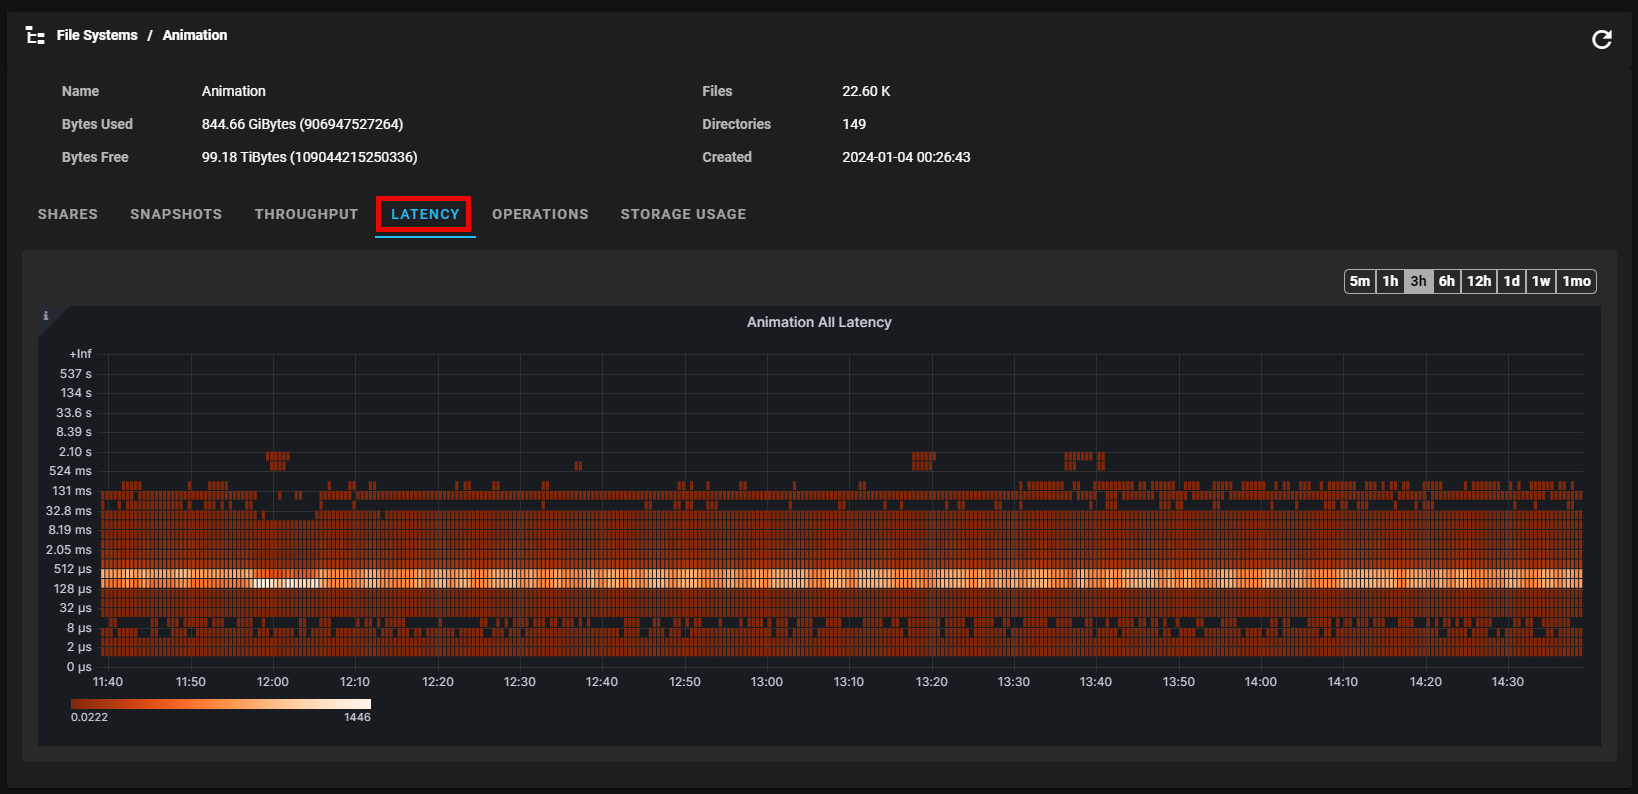
To view latency data, click the Latency tab.
(click image to enlarge)
-
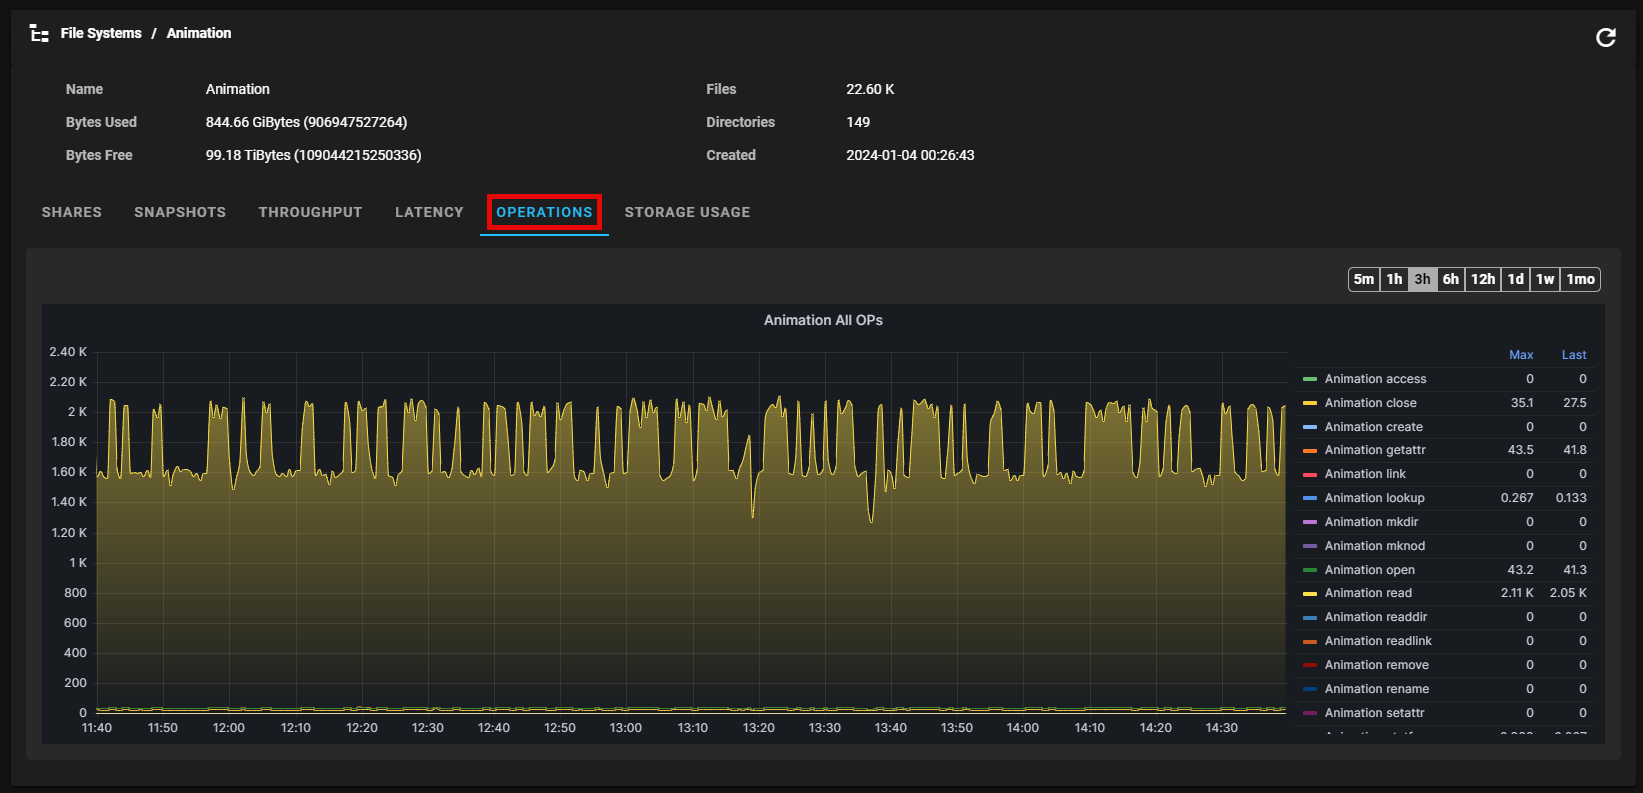
To view operations data, click the Operations tab.
(click image to enlarge)
-
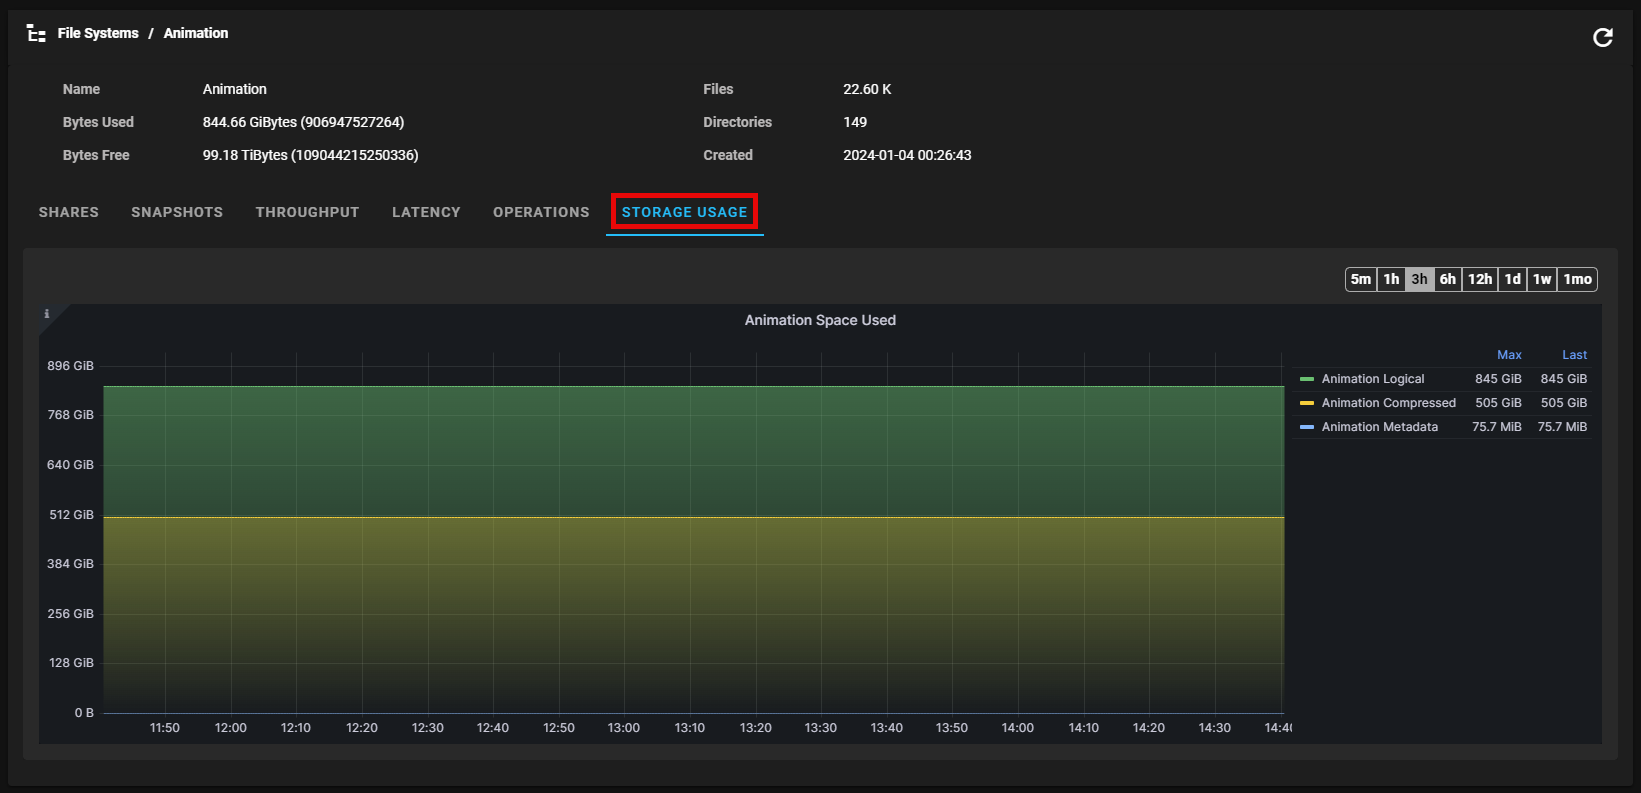
To view storage usage data, click the Storage Usage tab.
(click image to enlarge)
-

