Manage Buckets
ActiveScale View allows you to create and manage buckets. This section describes the following topics:
To use the S3 API's on ActiveScale, the user first needs to create a bucket. Depending on the usage of this bucket, you can enable versioning, object lock and a Default Retention period at creation of the bucket. Other settings can be modified after the bucket has been created (such as setting an Object Lifecycle Policy).
-
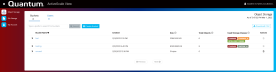
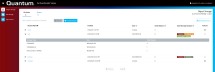
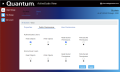
In the navigation bar, click Object Storage. The Buckets dialog box will be displayed as shown in the following example:
Figure 1: The Buckets Page

-
In the Buckets tab, click Create Bucket to display the Create Bucket dialog box.
Figure 2: Create New Bucket

-
In the Create New Bucket dialog box, type a name for the new bucket.
Note: A bucket name must be between 3 and 63 characters long and can contain lowercase letters, numbers, periods, and hyphens. Adjacent labels (groups of characters) must be separated by a single period (.) or a single hyphen (-). Each label must start and end with a lowercase letter or a number. The bucket name cannot contain underscores, end with a hyphen, have consecutive periods, or use hyphens adjacent to periods. Bucket names must not be formatted in the form of an IP address (for example, 192.168.5.4).
-
Select Versioning to keep multiple versions of an object in the same bucket.
Note: Versioning must be enabled to use the Object Lock feature
-
Selecting Allow objects in this bucket to be locked ensures that objects can be locked within this bucket by specifying a Retain-Until date when writing the object. It allows making object versions undeletable for a specified period.
Note: Enabling Object Lock requires bucket versioning to be enabled.
Note: Enabling Object Lock is permanent. This option cannot be modified anymore after creation of the bucket.
-
Optionally, select the "Default Retention Period" check box to set a Default Retention Period to all new objects that are placed put in the bucket. This default can be overridden on a per-object-version basis. Changing the default retention period does not affect existing object versions. Setting a default retention time is only possible when object lock is enabled on the bucket.
Note: The Default retention period is applied to all new objects unless a different retention mode and period was specified when the object was created.
Note: The user can set a default retention period in a certain amount of days or years. Days and Years cannot be specified at the same time.
-
Click Create.
-
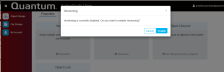
To confirm, click Confirm in the dialog that appears.
Figure 3: Successfully Created a Bucket


This section provides the steps required to list buckets.
-
In the navigation bar, click Object Storage.
-
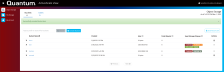
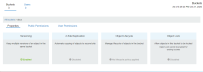
(Optional) In the search box, type the first few characters of the bucket name, and click Search.
Figure 4: The Buckets Page
Note: This interface can only search for the prefix of a bucket name.
-
(Optional) Sort the list by the Bucket Name or Created column.
-
Use the Next/Previous button to page down/up the list.
Note: To refresh the list, click Search again.
Note: The system updates the Capacity and Total Objects metrics at random time intervals. Hover over the clock icon beside these metrics to see when they were last updated
-
To download a report, click Download.
-
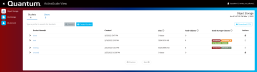
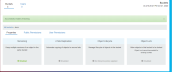
To view a bucket’s capacity and total number of objects per storage class, click the caret icon next to its name.
Figure 5: Bucket Capacity


In ActiveScale View, buckets can easily be managed with a few clicks. Please do note though that some settings can only be managed by the S3 account and therefore only be viewed by the administrator. Depending on the way you log into ActiveScale View (using the admin account of using the S3 credentials) you will therefore have more or less options. System administrators have limited management capabilities on behalf of S3 account owners, listed below:
- They can view a bucket's public or user permissions, but cannot set them.
- They can view a bucket's object lifecycle policies, but cannot change them.
-
In the navigation bar, click Object Storage.
-
In the search box, type the first few characters of the bucket name, and click Search.
-
(Optional) Sort the list by the Bucket Name or Created column.
-
Click the bucket’s name.
-
The bucket’s details appear.
-
-
Click Properties.
-
In the Versioning panel, click the radio button.
Note: Versioning is disabled by default.
The dialog box appears asking if you want to enable versioning.
Figure 6: Enable Versioning

-
In the Versioning dialog box, click Enable.
If versioning is successfully enabled on this bucket, the Enabled radio button is now green.
Figure 7: Successfully Enable Versioning
Note: Once versioning is enabled you cannot disable it, but it can be suspended.
Note: Versioning cannot be suspended on a bucket once object lock is enabled on that bucket
Figure 8: A bucket with Versioning Enabled

When a system-wide replication is enabled (see Change or Create a Replication Pipeline), buckets can be configured to replicate all objects written in this bucket to a bucket on the configured destination system. The bucket managing functionalities in ActiveScale View allow you to configure this in an easy way.
For enabling asynchronous replication system-wide refer to Enabling Asynchronous Replication.
Note: Your system administrator has already configured a replication pipeline to your destination system. This pipeline is based on the replication account credentials you specified for the source and destination systems. Use these same credentials in the steps below to start forwarding the contents of a source bucket you specify to a destination bucket you specify on your destination system.
Configure the Source Bucket.
-
Select the bucket from the list on the Buckets page.
-
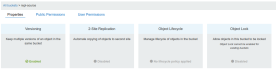
Click the Properties tab.
Figure 9: Bucket Properties
-
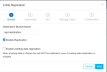
In the 2-Site Replication panel, click the radio button and a dialog box will open:
Figure 10: 2-Site Replication

Fill in the Destination Bucket Name after selecting the Enable Replication check box.
Figure 11: 2-Site Replication > Enable Replication
Select Next or use the following optional step to enable existing object replication.
-
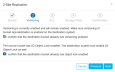
(Optional Step): Select Enable existing data replication when existing objects in the bucket require replication. Select Next.
A warning box will appear after selecting the check box:
WARNING: Once existing object replication is enabled, all existing data will be marked for replication. This cannot be undone.
Figure 12: 2-Site Replication > Enable Existing Data Replication


-
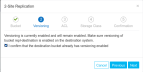
Confirm that versioning is enabled on the destination bucket by selecting the confirm check box.
Figure 13: 2-Site Replication > Enable Versioning
Note: An additional check box will be present if the source bucket has S3 Object Lock enabled. Confirm that the destination bucket is locked by selecting the confirm check box.
Figure 14: 2-Site Replication > S3 Object Lock Enabled
Select Next.
-
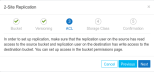
ActiveScale View reminds you to set up user permissions (ACLs). More information, refer to the advanced section,. Press Next if this is already done or Cancel if you want to set up permissions first. Note that you can still set these permissions afterwards, but this may result in events when objects are already written to the bucket before the permissions have been set correctly.
Figure 15: 2-Site Replication ACL
-
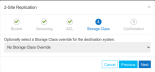
(Optional Step): The option exists to override the storage class used for the destination system.
This is optional, if the source storage class is to be preserved, keep the default No Storage Class Override and select Next.
Figure 16: 2-Site Replication Storage Class
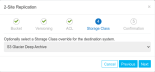
Or select a destination storage class, e.g. S3 Glacier Deep Archive:
Figure 17: 2-Site Replication Destination Storage Class
-
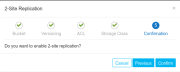
Confirm your settings and select Confirm.
Figure 18: 2-Site Replication Confirmation
If replication is successfully enabled on this bucket, the 2-Site Replication radio button is now green.
Note: Once replication is enabled, you can disable it any time. Versioning remains enabled.
Figure 19: Source Bucket - Versioning and 2-Site Replication Enabled


This section describes object lifecycle operations.
Figure 20: Bucket Details

Note: The Object Lifecyle configuration can only be changed by accessing ActiveScale View by logging it with the account credentials. It cannot be changed by logging in as administrator.
-
In the navigation bar, click Object Storage.
-
In the search box, type the first few characters of the bucket name, and click Search.
-
(Optional) Sort the list by the Bucket Name or Created column.
-
Click the bucket’s name.
The bucket’s details appear.
-
Click the Properties sub-tab.
-
In the Object Lifecycle panel, click the radio button.
The Object Lifecycle dialog box displays.
-
The following figure provides the JSON code example of an Object Lifecycle after enabling Object Lifecycle by selecting the radial button. This is an example of non-current version expiration. It will automatically permanently delete all non-current versions after 7 days.
Figure 21: Object Lifecycle OLM Policy (JSON)


Note: By default, no policy is set.
Object Lock can only be enabled when creating a bucket. Selecting a bucket in the list will display the buckets properties as shown in the following figure:
Figure 22: Bucket Properties Tab

This buckets properties show that Object Lock is Disabled. Object Lock can only be enabled when a bucket is created.
Note: Object Lock cannot be enabled for existing buckets.
When Object Lock is enabled, you will see the radial button checked under bucket properties indicated the bucket is “Permanently enabled” as illustrated in the following figure:
Figure 23: Object Lock Permanently Enabled

Object Lock cannot be disabled once a bucket has been locked but the default retention period can be edited as follows:
-
Click on Permanently Enabled to open the edit default retention period tab.
Figure 24: Edit Default Retention Period

Note: You can only set a default retention period in Years or Days, you cannot set both Years and Days.
This section describes how to view Public Permissions.
Note: User Public can only be changed by accessing ActiveScale View by logging it with the account credentials. It cannot be changed by logging in as administrator.
-
In the navigation bar, click Object Storage.
-
In the search box, type the first few characters of the bucket name, and click Search.
-
(Optional) Sort the list by the Bucket Name or Created column.
-
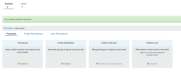
Click the bucket’s name. The bucket’s details appear.
-
Click Public Permissions.
Figure 25: A bucket’s public permissions

This section describes how to view User Permissions.
Note: User Permissions can only be changed by accessing ActiveScale View by logging it with the account credentials. It cannot be changed by logging in as administrator.
-
In the navigation bar, click Object Storage.
-
In the search box, type the first few characters of the bucket name, and click Search.
-
(Optional) Sort the list by the Bucket Name or Created column.
-
Click the bucket’s name. The bucket’s details appear.
-
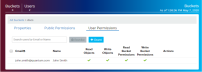
Click User Permissions.
Figure 26: A bucket’s user permissions