|
How to Create a PDF |
Use the VS-Settings Menu
Note: This topic assumes that the VS2124 has been initially configured. See for configuration details.
The VMS-Settings.sh script on the VMS product is a text-based menu interface to all configuration and monitoring of various components in the Host Operating System (OS) portion of the VMS product. The X Windows desktop (Windows VM console) includes an icon which launches the VMS-Settings.sh script in a terminal window. The VS-Settings interface can also be run from an SSH connection to the server, by logging in as the vms user and then running the /opt/quantum/scripts/VMS-Settings.sh file.
 Step 1: Launch the Host Operating System (OS) Console
Note: The baseboard management controller (BMC) manages the interface between system-management software and platform hardware.
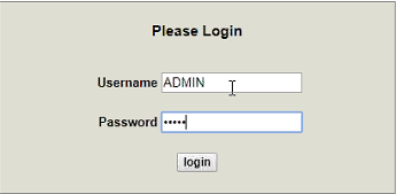
In your browser, type the BMC IP address for the server, in the address bar and press Enter.
The login dialog appears.
Note: Contact your network administrator for your server's company-specific IP address. If you didn’t change BMC IP address as part of the installation and initial configuration, refer to Access Default Login Credentials.
Supported Browsers
Quantum supports the following browsers for VS products:
- Google Chrome v77.0.3865.75
- Mozilla Firefox v69.0 (64-bit)
- Microsoft Edge v44.18362.329.0
- Internet Explorer v11.356.18362.0
- Apple Safari 12.1.2 (14607.3.9)
Additional Information: If the Login window does not display, verify that you entered the correct server IP address and that the network settings on the computer are correct. Wait 10 minutes, then try again. If the Login window still does not display, contact Quantum Customer Support. See Contacting Quantum.
For this step, use either your company-specified server login credentials, or if your company has not changed the server login credentials, use the Default BMC information provided in Access Default Login Credentials:
- Type ADMIN for the Username or if changed during installation, use your company-specified username.
- Type ADMIN for the Password or if changed during installation, use your company-specified password.
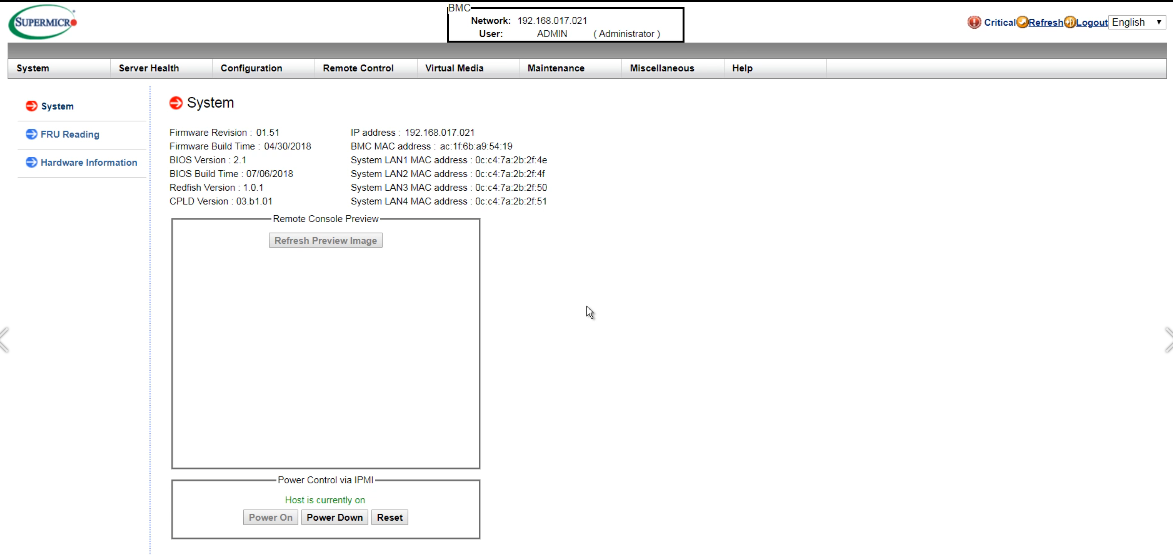
- The Server home screen appears.
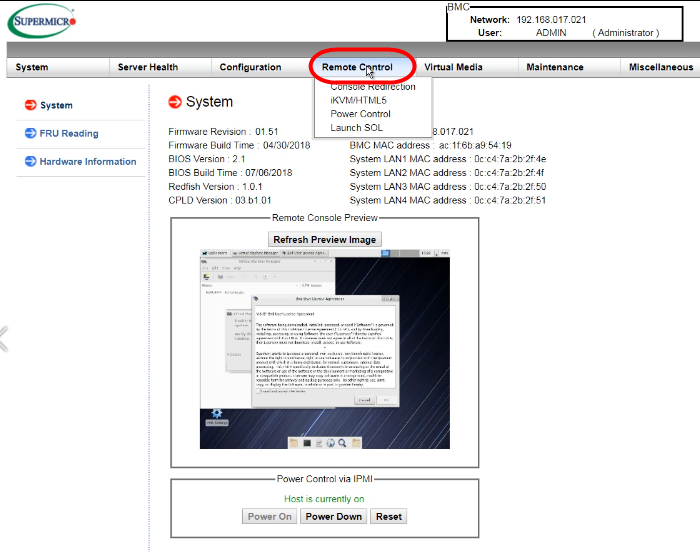
- Click on the Remote Control dropdown to change the left-side navigation to remote control options.
- Continue with the next section to use either an HTML5 or Java viewer to access the Windows VM console.
Access Windows VM using the HTML5 Viewer
Use these steps to access the BMC console using HTML-based viewer and controls.
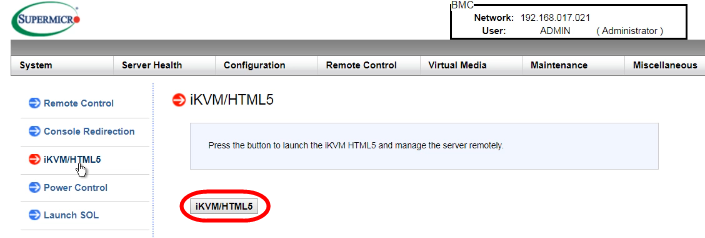
- Select iKVM/HTML5 from the Remote Control dropdown.
- Click the iKVM/HTML5 button to access the Host OS.
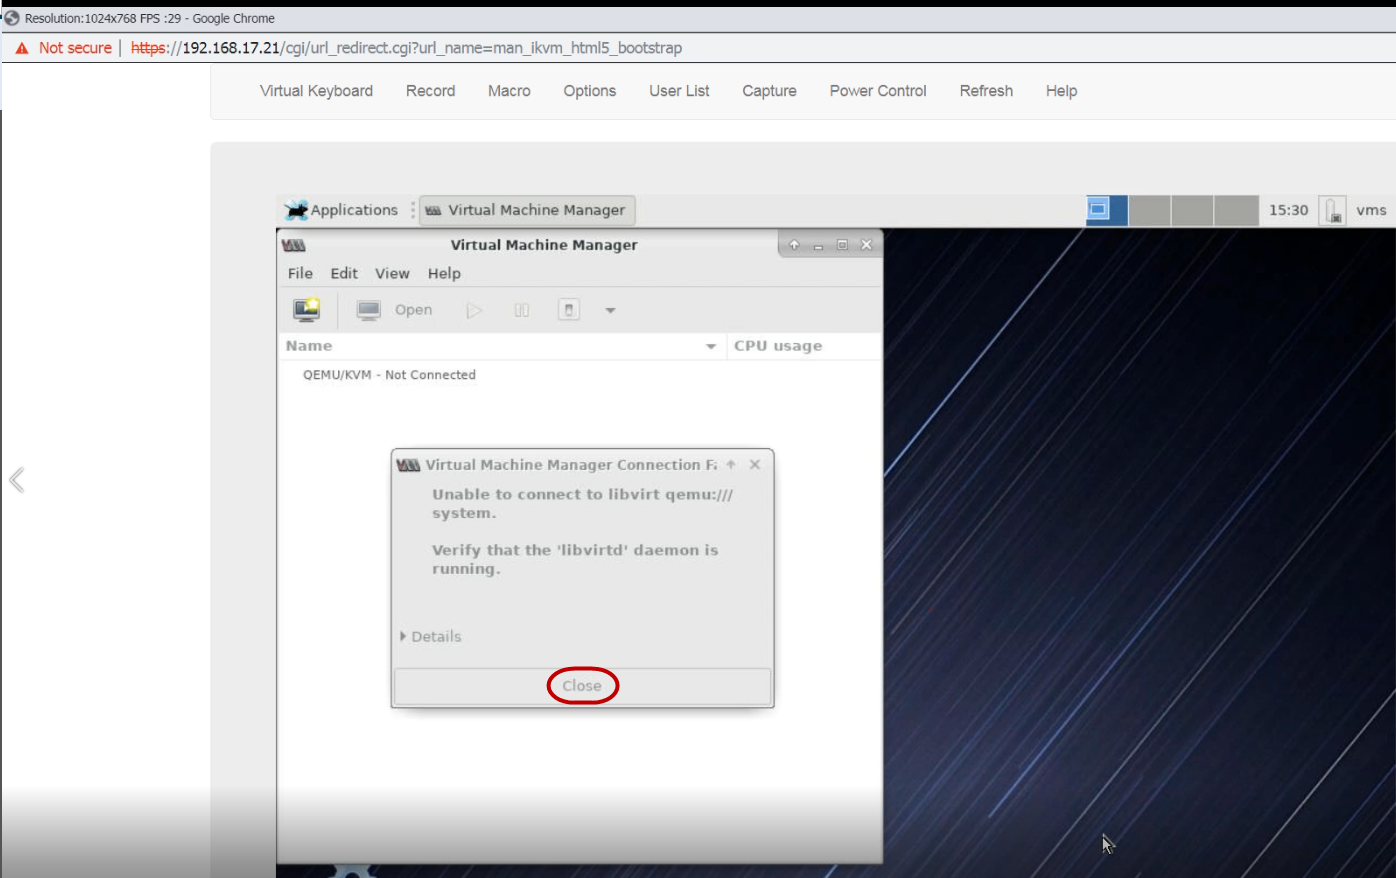
- Click Close at the bottom of the dialog.
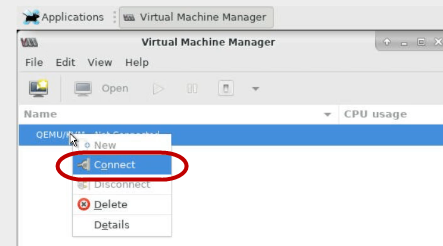
- In the Virtual Machine Manager window, right-click on <xxxx>/KVM and select Connect.
-
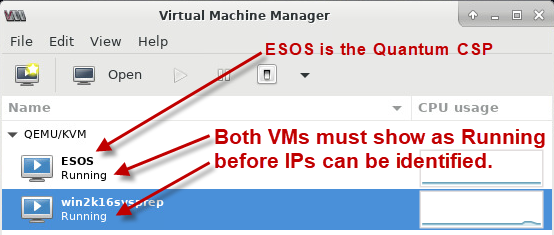
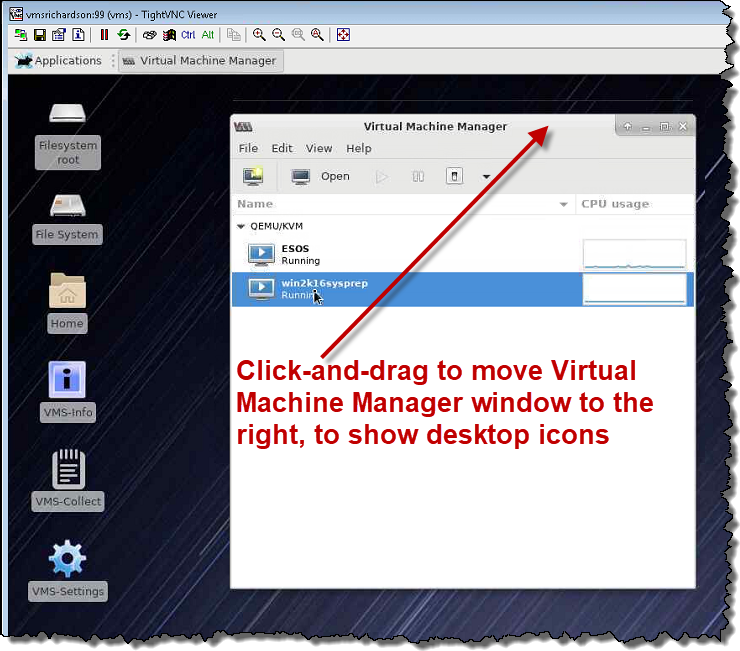
The VM is now connected and displays the Host OS Console, containing the Quantum Cloud Storage Platform (do not access or change) and win2k16sysprep VMs. Both VMs should have the status of Running below the VM name.
-
Click and drag the Virtual Machine Manager window to the right on the screen, to show the VMS-Settings icon.
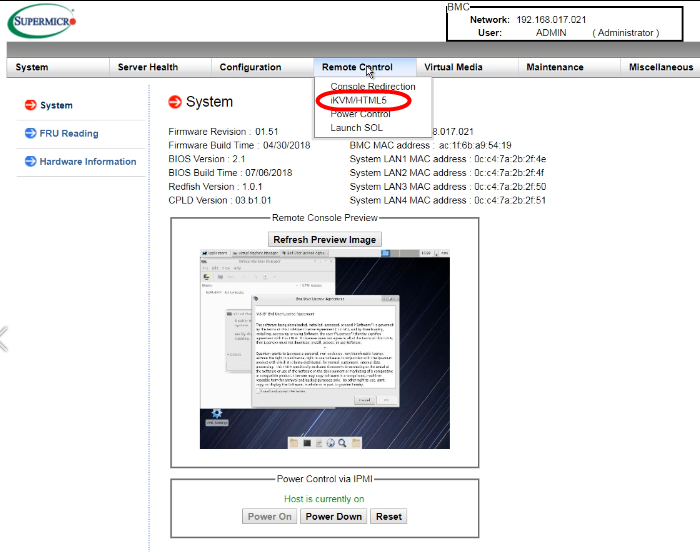
The iKVM/HTML5 screen appears.
For the HTML5 access method only, the Virtual Machine Manager screen appears with a message stating Unable to connect to <xxxx> system. Verify that the <xxxx> daemon is running.
Access Windows VM using the Java Viewer
Use these steps to access the BMC console using the java-based viewer and controls.
Note: You must have Java version 8 or later installed to use this option.
- From the left-side navigation, click on Console Redirection, then click the Launch Console button.
- Click Keep to continue downloading, then click on the downloaded launch.jnlp file to launch it.
- Click Continue, then click Run on the Java viewer Do you want to run this application? dialog.
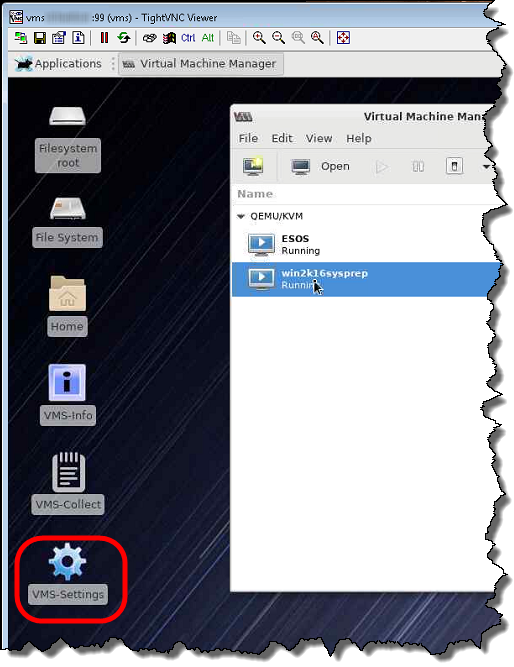
- Click and drag the Virtual Machine Manager window to the right on the screen, to show the VMS-Settings icon.
A download confirmation message appears.
An Opening File message appears, then a Security Warning confirmation.
The Host OS Console displays.
Step 2: Open the VS-Settings Menu

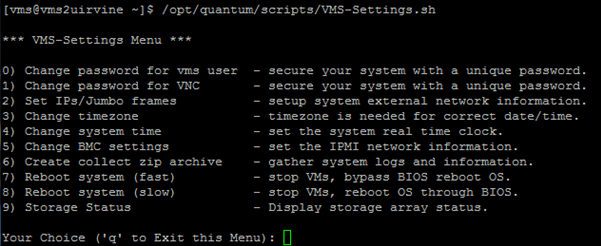
Option 0) Change password for vms user
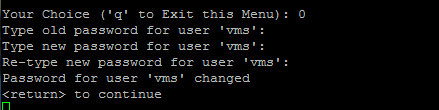
Use option 0 to change the password for the vms user account in the Host OS. The default password for the vms user account is vms and should be changed to your company's preferred string after installation. You will be prompted for the old password followed by the new password.
Option 1) Change password for VNC
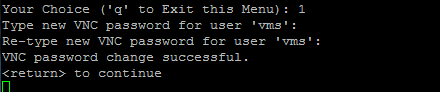
Use option 1 to change the password for the VNC connections to the system as user vms. The default VNC password for the vms user is vms, but it should be changed to your company's preferred string after installation. You will be prompted for the new password.
Option 2) Set IPs/Jumbo Frames
Use option 2 to change the settings for the management network for the server. This is the IP address information for the management port (Ethernet port 0) and is used to connect to your LAN and/or internet. By default, this port is configured as DHCP from the factory and it is recommended to change this to a static IP address at installation time. The current settings will be displayed and a prompt to change the settings.
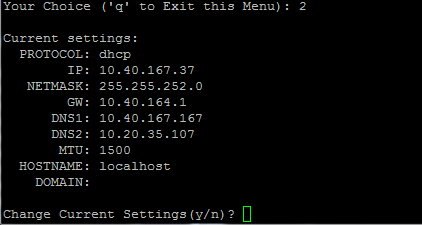
Note: You will be prompted for the information above if you select a “manual” (static IP) configuration instead of the default DHCP. Note that changes to the MTU setting may require an equivalent change on your network switch where the system is connected.
Option 3) change timezone
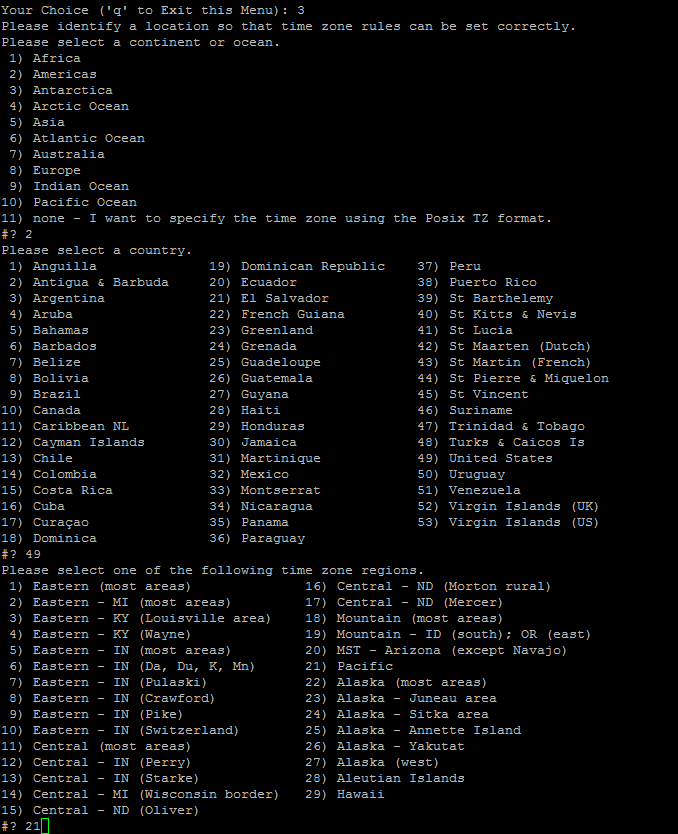
Use option 3 to set the time zone for the system. By default, the system time and time zone are based on UTC. It is recommended to change the time zone to the local time zone for the system. A text-based set of menu selections are presented for you to select the appropriate time zone. The selections will prompt you to narrow-down the selections, starting with various regions, etc. The following is an example of setting the system to Pacific Standard Time (PST).
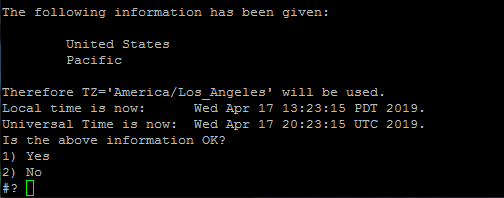
A final confirmation is displayed:
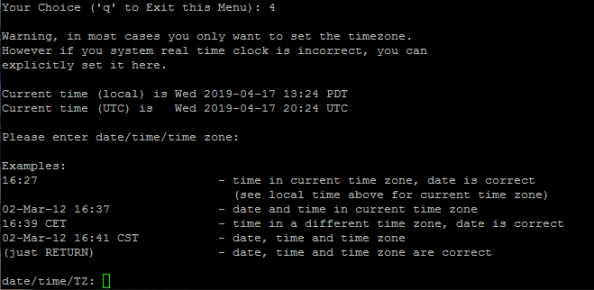
Option 4) Change system time
Use option 4 to override the local time on the system with a manual time setting. By default, NTP services are enabled using standard internet NTP servers. Quantum recommends leaving this setting in place unless you need to override it. There are various formats that can be specified for the manual time.
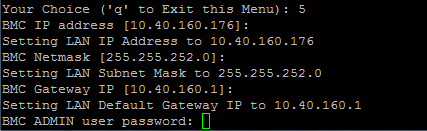
Option 5) Change BMC settings
Use option 5 to change the IP address settings for the BMC management interface on the server. Prompts will appear for the IP address, NetMask and Gateway settings as well as the ability to change the password for the default ADMIN user account on the BMC.
Option 6) Create collect zip archive
Use option 6 to create a collection of log files for service to diagnose issues when needed. The script run when selecting this option will generate a .zip file, which can be offloaded and sent to Quantum support.

Option 7) Reboot system (fast)
Use option 7 to reboot the server using a “fast” reboot feature in the Host OS, which restarts the OS without unloading the kernel or going through the HW POST portion of a normal slow reboot.
Note: Both options 7 and 8 will attempt a clean shutdown of the Windows VM and Quantum Cloud Storage Platform (Quantum CSP) if they are running.
Option 8) Reboot system (slow)
Use option 8 to do a full reboot of the Host OS.
Option 9) Storage status
Use option 9 to display the current overall status of the RAID volumes in the system. If the initial background initialization is still in progress, then that status will show as well.