| How to Create a PDF |
Install Milestone XProtect VMS Software
After you have completed the configuration of your VS2124 system, you will want to reset your laptop's network settings.
VS2124 default network IP addressses and initial installation credentials are available at Access Default Login Credentials. In addition, you can print a copy of the blank Networking IP List to help you record your IP addresses. If you are installing multiple VS2124 systems, Quantum recommends that you record all IP address and login information.
- Remove the network cable from the VS2124 IPMI Port.
- Reset your laptop’s network settings to the values used prior to connecting to the system.
- Connect your computer to your company's network switch. If you need assistance, contact your company's network administrator.
Test your system IP addresses over your selected company network to confirm all IP addresses are functional.
Caution: Failure to test your IP addresses at this point can potentially result in a failed installation of, or communication errors between your video console and your VS2124 system.
- Open an SSH client such as PuTTY to SSH into the Node, over the selected customer network.
- From the SSH session for the Node, ping the IP address you just assigned to the Management Port.
Note: The CameraNet ports are dedicated to Windows and cannot be pinged from the Host Operating System (OS). You will need another computer on your camera network to verify your CameraNet IPs.
-
If you are unable to ping the IP addresses for the Node, verify your cable connections and your company's switch settings to make sure the IPs are accessible.
- Close the SSH session.
Using the linked instructions accessible from the Milestone Manuals and guides page, here are some helpful pointers to keep your installation process moving forward:
You can access the Milestone documentation from here: https://www.milestonesys.com/support/help-yourself/manuals-and-guides/ Open the “Administrator manual” for installation instructions.
- It should take about 30 minutes to install and configure camera feeds, including one restart during the process.
- If you do not already have one, Quantum recommends purchasing the full Milestone XProtect Essential + license, which will enable you to manage four recording servers vs. one server supporting a limited number of cameras. Complete license certificate file purchase and upload instructions and links are available from the Administrator manual page.
- During the installation, at the Select Installation Type dialog, select Custom. This will allow you to choose which Milestone software components you want to install.
- At the Components to be installed dialog, uncheck the XProtect Recording Server box. You will install this server separately. This will allow you to install more than one recording server, which is needed to optimize your server configuration.
- For the remaining selections and dialogs, you can use the default selections and begin the software installation.
- After installation is complete, you will be prompted to restart your computer to continue the installation.
- After the restart, in the The installation is complete dialog, uncheck the Open XProtect Management Client [version] upon exit box before clicking Close for the dialog, because installation is not fully complete. You still need to install the XProtect Recording Server.
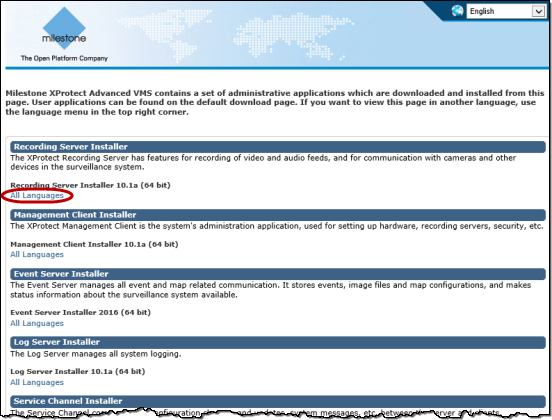
- After clicking Close, you will see some standard Windows security dialogs, then a Milestone product installer page, where you can select the Recording Server Installer [version] by clicking All Languages. Other optional components are also available.
- Double-click the Milestone XProtect VMS software installer icon to begin the download and install process from the CD image, which will appear as the D:\ drive in Windows Explorer.
-
Review the following guidelines for the recording server installation settings.
Guidelines
- To begin your recording server installation, select All Languages from the Milestone Download Manager page.
- In the Recording servers IP addresses dialog, change the Number of instances from 1 to 4, to launch 4 servers and allow the maximum available number of cameras to use the software.
- In the Specify recording server encryption dialog, uncheck the check box unless you have and will upload an authentication certificate for increased data encryption.
- If you enable/install the Milestone Recording Service to ingest and record camera feeds on the server, after installing Milestone, double-click the Optimize Milestone Recording Settings icon to initialize a script that optimizes and tunes the performance of the recording service settings for the VS2124 hardware. This script only needs to be run one time on each recording server installed.
- As a screen shows while the script is running, the four servers are taken down and restarted.
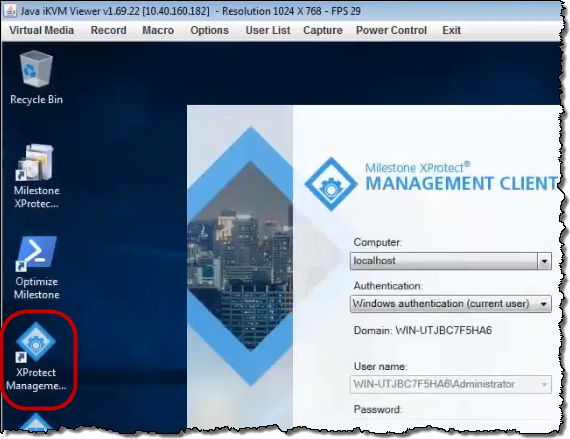
- Click on the XProtect Management Client icon to have the system discover your cameras.
![]()
You can access the Milestone documentation from here: https://www.milestonesys.com/support/help-yourself/manuals-and-guides/ Open the “Administrator manual” for installation instructions.
Note: During the Milestone software installation, a 30-day trial license may be downloaded from Milestone (Internet access required). The Milestone software installation with the trial license will allow you to configure a Management server and one recording server.
Note: The internal RAID 6 storage volumes have been automatically mapped to the G:\MediaDatabase drive and folder in the Windows VM and should be used as the destination recording target location.

Note: In the Specify recording server settings dialog, defaults are set, but you can adjust the Retention time for video recordings at the bottom to your company's needs.
![]()

Note: Authorizing more than one recording server requires purchasing the full Milestone license.

