Change RAID Configuration
Quantum ships the system configured as, RAID 5, 6-drive configuration. As a best practice, you should not modify or reconfigure the RAID 5. If you must reconfigure the system, Quantum recommends that a qualified person performs the reconfigure procedure.
Caution: If you reconfigure the RAID 5, ensure to download your data from the system (drive magazine). All data on the drive magazine will be lost during the reconfigure process.
Factory new magazines have the file system initialized. Creating a file system on the magazine is not needed. If a file system is created, it will take up to 24 hours to complete. If you remove power from the system during file system creation, the file system will become corrupted and will need to be recreated.
Here is a representative example of data versus parity in a RAID 5 and RAID 6 configuration using 10TB drives.
- RAID 5 (6 10TB drives)
- Data (5 drives): 50TB
- Parity (1 drive): 10TB
- RAID 6 (6 10TB drives)
- Data (4 drives): 40TB
- Parity (2 drives): 20TB
Recommended configurations:
- RAID 5 is the recommended configuration because it:
- Is dependable and basically only uses the equivalent of one (1) drive for parity.
- Allows data storage on five (5) drives.
- Can lose one (1) drive and still allow data access.
- RAID 6 is often used because it:
- Is very dependable and basically uses the equivalent of two (2) drives for parity.
- Allows data storage on only four (4) drives.
- Can lose two (2) drives and still allow data access.
Note: We are using a representative AC system to perform this procedure.
Complete the following procedure:
-
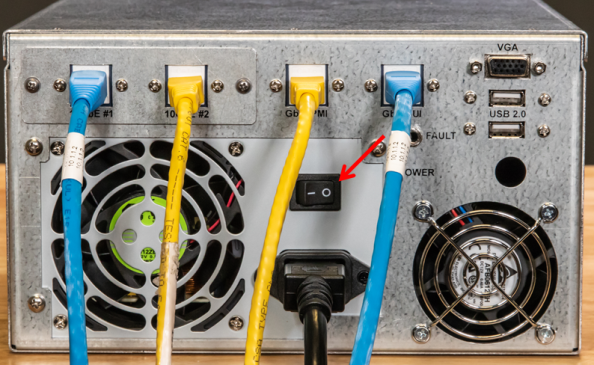
Ensure the system is powered off.
-
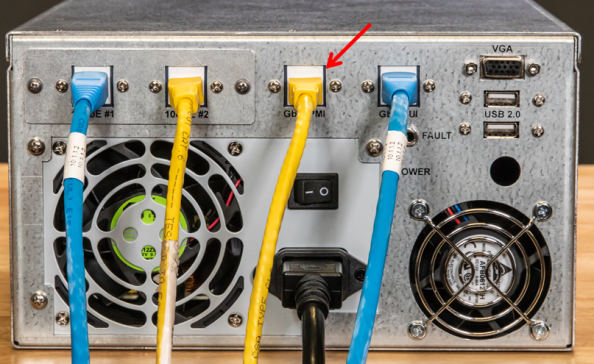
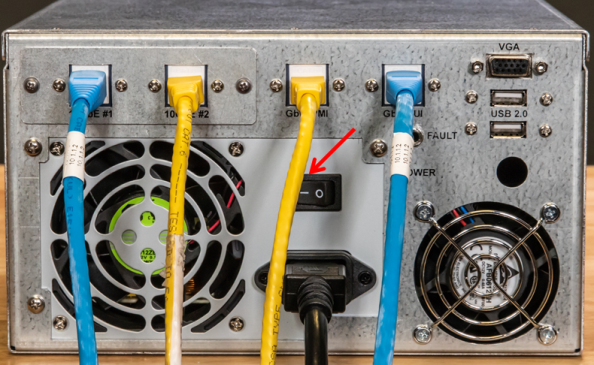
Connect an Ethernet cable from your computer to the IPMI port on the back of the system.
- Set up your computer so that you can communicate with the system.
Note: This is a representative example of setting up your computer to communicate with the system. Depending what type of software you are using, dictates the actual screen presentation.
Complete the following procedure:
-
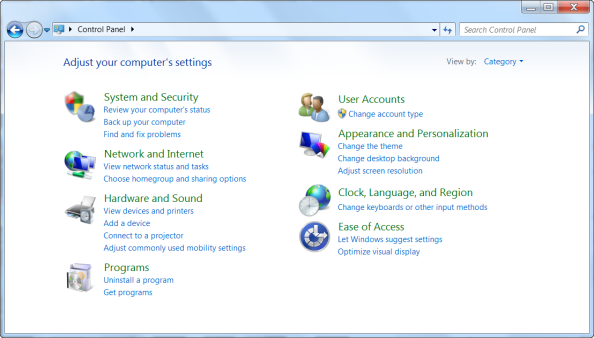
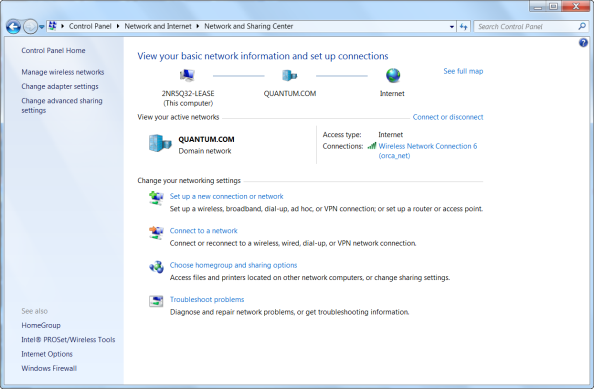
Access the “Control Panel” screen and click on “Network and Sharing Center”.
Note: This is a representative example of setting up your computer to communicate with the system. Depending what type of software you are using, dictates the actual screen presentation.
-
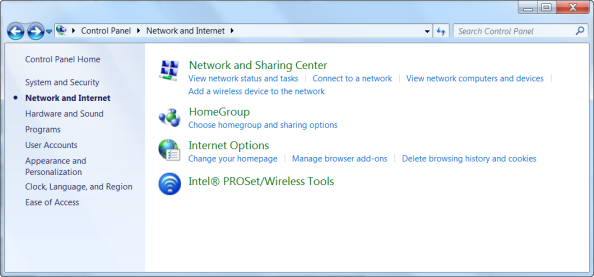
Click on “Network and Sharing Center”.
-
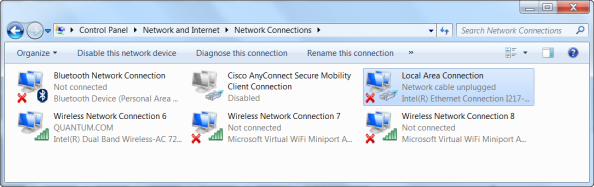
Click on “Change adapter settings” (left column) to access the “Network Connections” screen.
-
Right-click on “Local Area Connection” and click on "Properties".
-
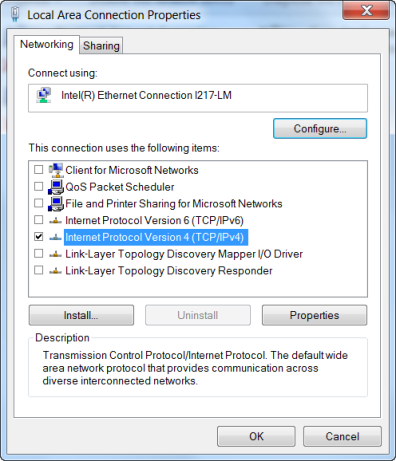
Verify that the "Local Area Connection Properties” screen appears.
-
Select only “Internet Protocol Version 4 (TCP/IPv4)".
-
Click on "Properties" (lower right of screen).
-
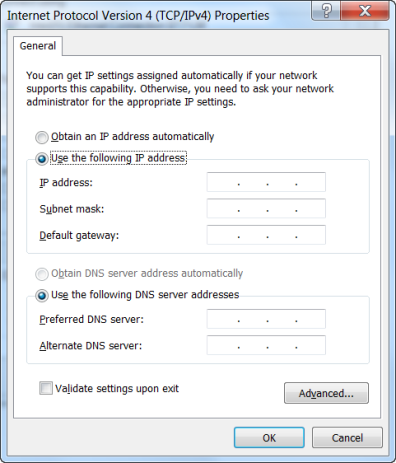
Verify that the "Internet Protocol Version 4 (TCP/IPv4)" appears.
-
Click “Use the following IP address" (shown selected in above screen).
-
Enter the following data:
- IP address: 10.17.21.200
- Subnet mask: 255.255.255.0
- Default gateway: leave blank
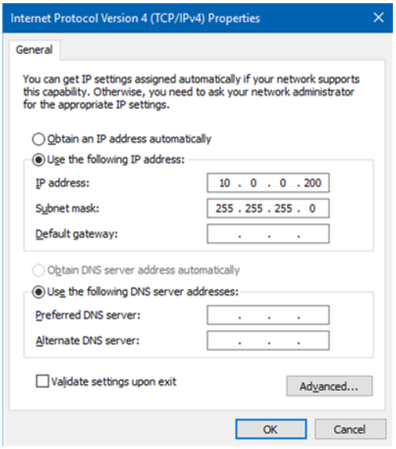
Note: IP address, subnet mask, and default gateway will differ at all companies. Notify your IT admin if you need assistance on specific addresses.
That completes this procedure.
Note: Ensure you have your computer correctly connected, configured to the IPMI port, and you monitor the system as it boots up.
Complete the following procedure:
-
Power on the system using the power switch on the back of the unit.
- Verify the IPMI Initialization screen appears.
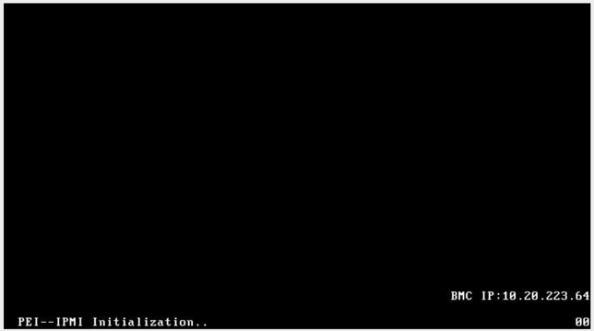
Note: You will have to press the "Delete" key on your computer during the boot up process to access the "Setup" screen.
- When the following screen appears, press the "Delete" key on your computer (first message at bottom of screen).
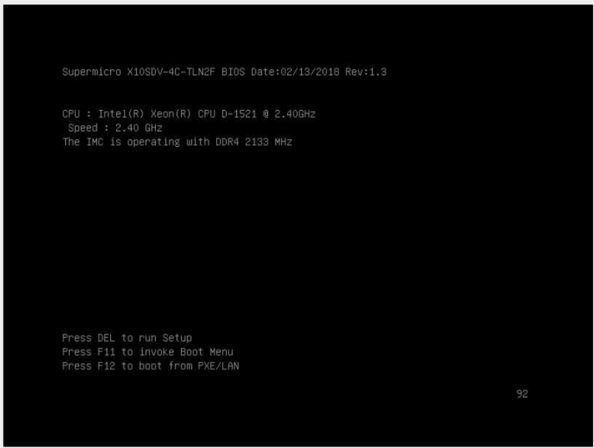
- Verify that the "Enter Password" screen appears as shown below.
Note: You must notify Quantum Service and Support to receive the password for your system. Changing RAID configurations must be accomplished by a qualified person.

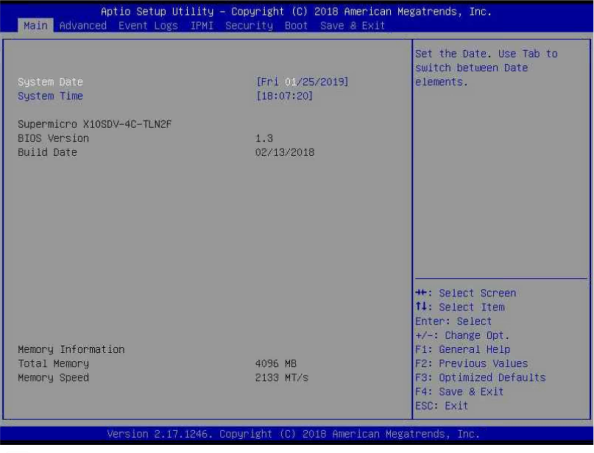
- After entering the password, verify that the "Opening GUI (UEFI)" screen appears.
- Press "right arrow" to move to "Advanced" tab.
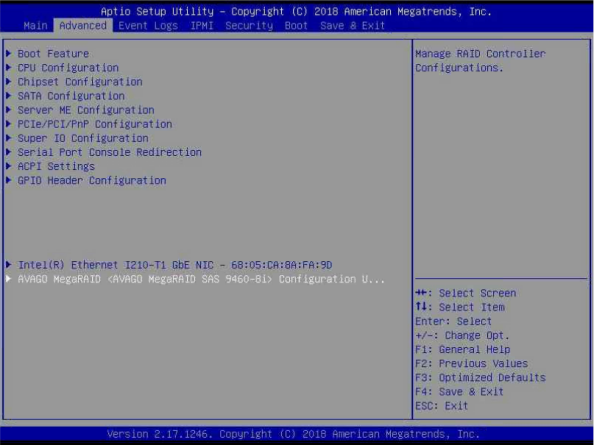
- Verify that the "Advanced" screen appears.

Complete the following procedure:
-
On the the "Advanced" screen, press the "Up" arrow to go to the AVAGO MegaRAID selection at the bottom of the screen.
- Refer to the following screen for an example of the AVAGO MegaRAID selection.
-
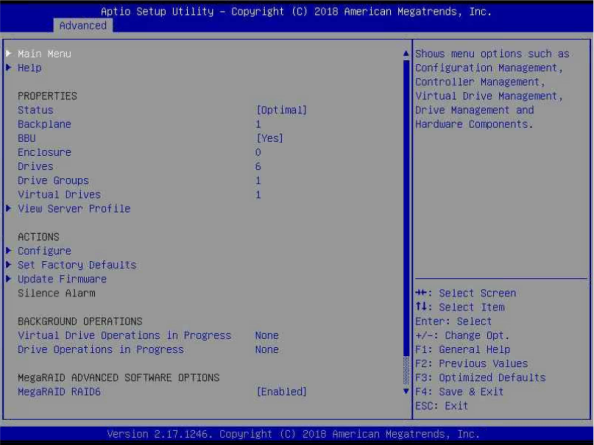
With AVAGO MegaRAID selected, press "Enter".
- Verify the following screen appears (Main Menu).
-
Press the "Down" arrow to go to "View Server Profile" selection.
- With the "View Server Profile" selected (high-lighted), press "Enter".
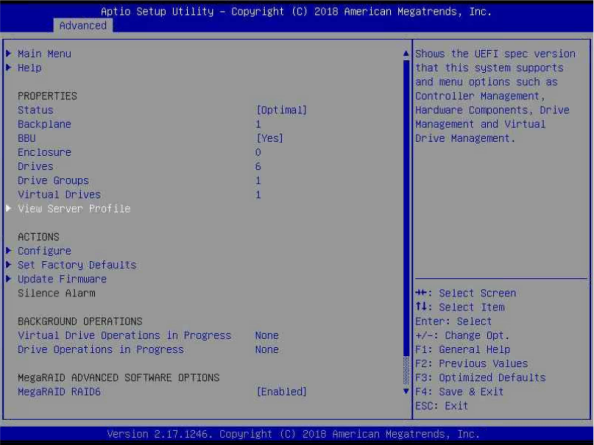
- Verify that the "Server Profile" menu appears.
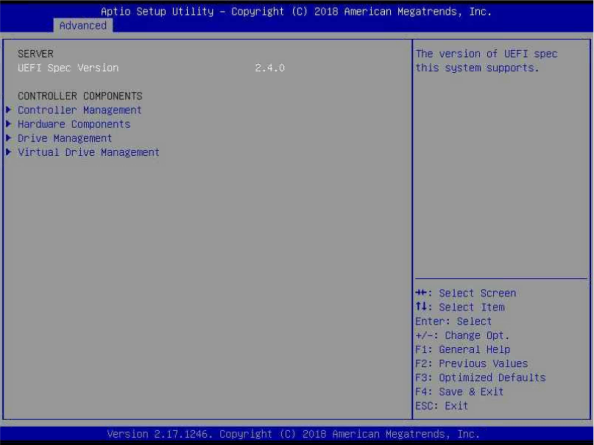
- Press the "Up" arrow to go to "Virtual Drive Management" selection. (Selection will be highlighted.)
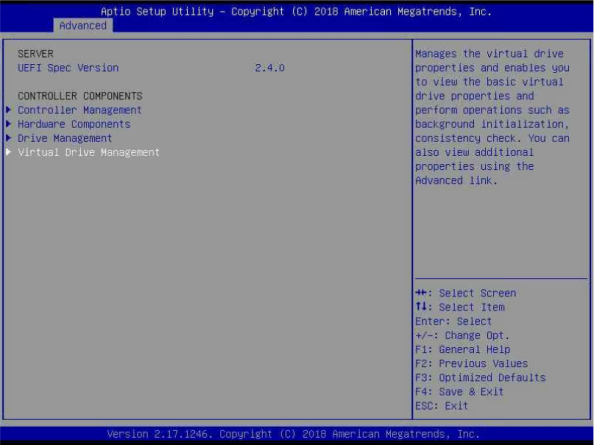
- Press "Enter" and verify that the "Virtual Drive Management" menu appears.
- Press "Enter" to view the basic properties of the "Virtual Drive".
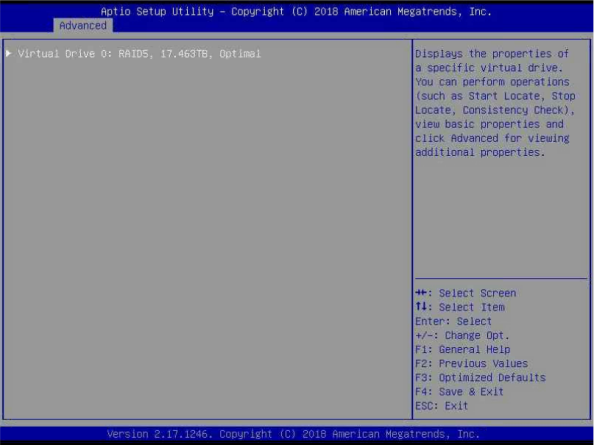
Note: This system has six (6) drives installed and all drives are used within a specific RAID group. So, there should only be one selection on this screen.
- Verify the following screen appears.
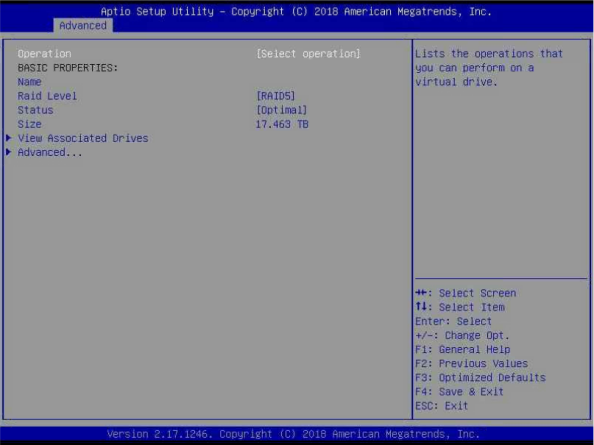
-
Press "Enter" at the above screen (Operation [Select operation] is highlighted).
- Verify that the following screen appears.
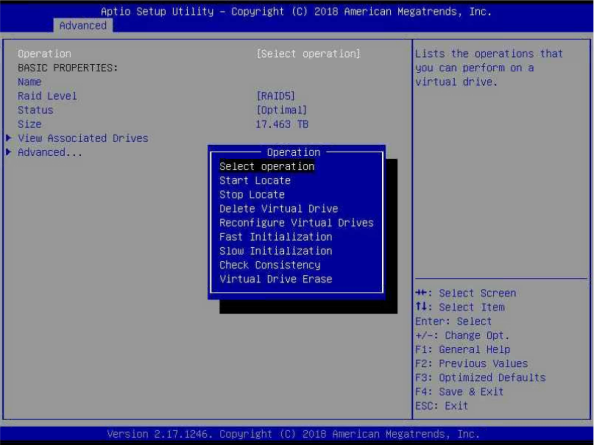
- Press the "Down" arrow to the "Delete Virtual Drive" selection (selection will highlight).

-
Press "Enter" and verify that the following screen appears.
Note: Notice that the "Operation" is now [Delete Virtual Drive].
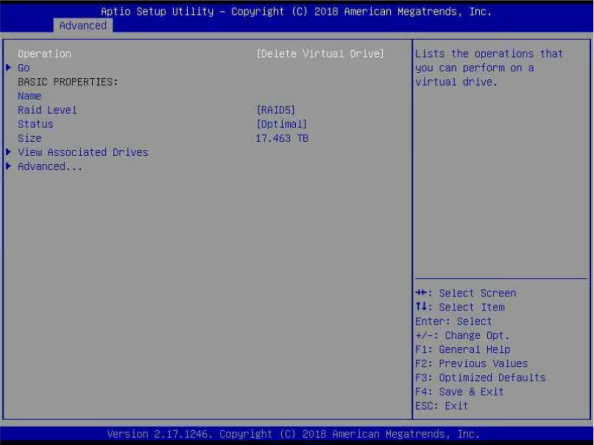
- Press the "Down" arrow and select "Go" (top left of screen/"Go" will be highlighted).
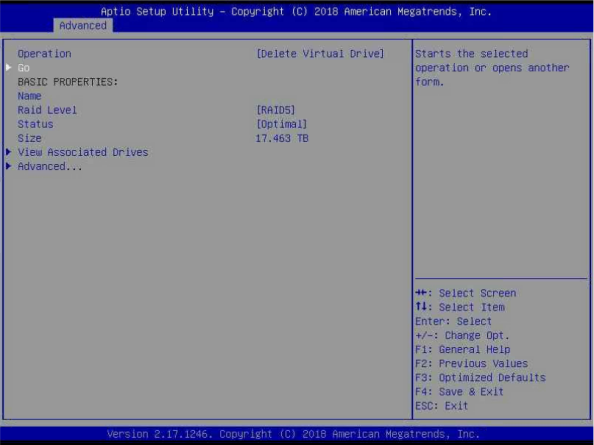
- Press "Enter" and verify the following screen appears.
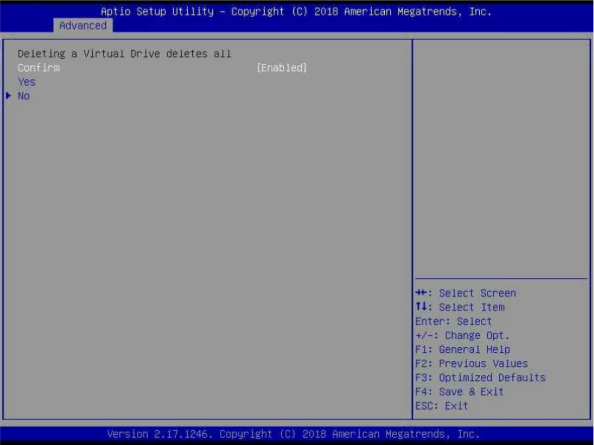
Note: Ensure to see the message (top left of screen): "Deleting a Virtual Drive deletes all."

-
Press the "UP" arrow and select "Confirm" (following screen appears).
- Verify "Confirm [Disabled] is selected (see the following screen).

- Press "Enter" and verify the following screen appears (Confirm [Disabled].

- Press the "Down" arrow to the "Enabled" selection and verify the following screen appears.
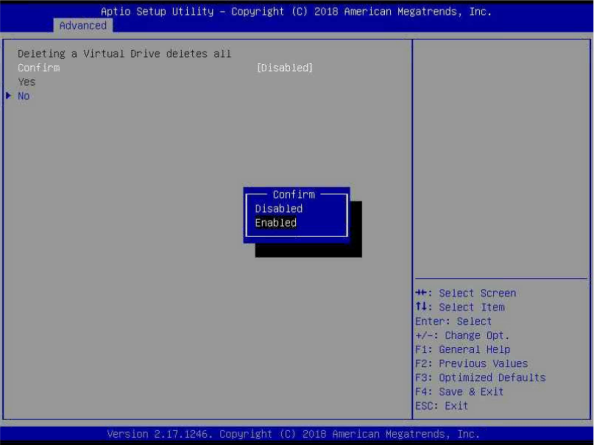
- Press "Enter" and verify the following screen appears (Confirm [Enabled].
- Press the "Down" arrow to select "Yes" and verify the following screen appears.

- Press "Enter" and verify the following screen appears.
Note: Notice the message: "The operation has been performed succ". Also, notice that "OK" is highlighted. Pressing "Enter" at this screen will complete the process of deleting a virtual drive.
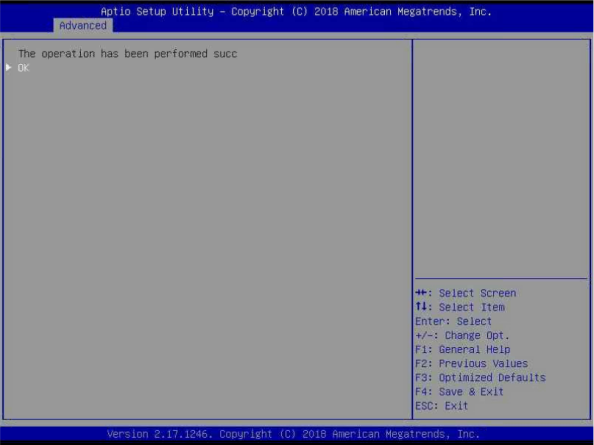
- Press "Enter" and verify the following screen appears.
Note: Notice the message: "Unable to display Virtual Drive summary as there are no Virtual Drives currently available." You have just deleted the RAID group.
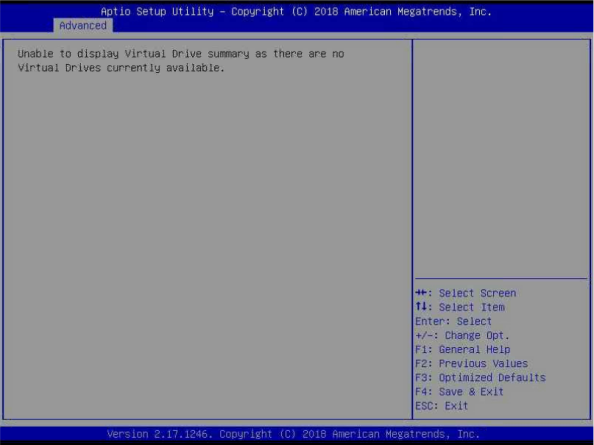
That completes the procedure to delete a RAID configuration/group.
Complete the following procedure:
-
Access the Main Menu screen (representative example below).
- Press the "Down" arrow and select "Configure" (example below).
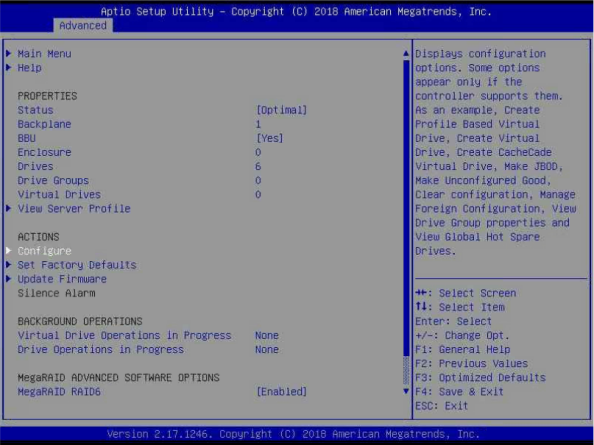
- Press "Enter" and verify that the following screen appears.
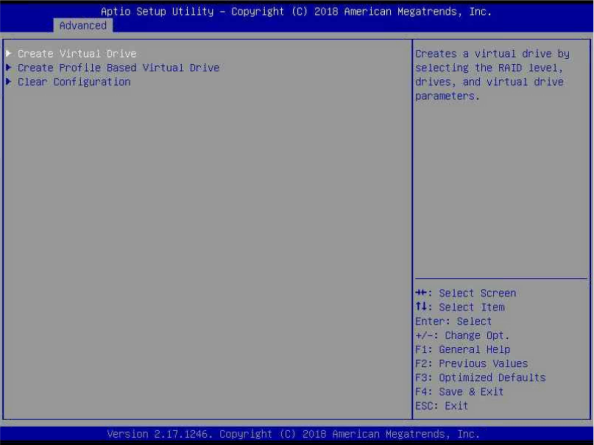
- Verify "Create Virtual Drive" is selected and press "Enter"; the following screen appears.

- Arrow down to "Select RAID Level" (highlighted), press "Enter", and the following screen appears.
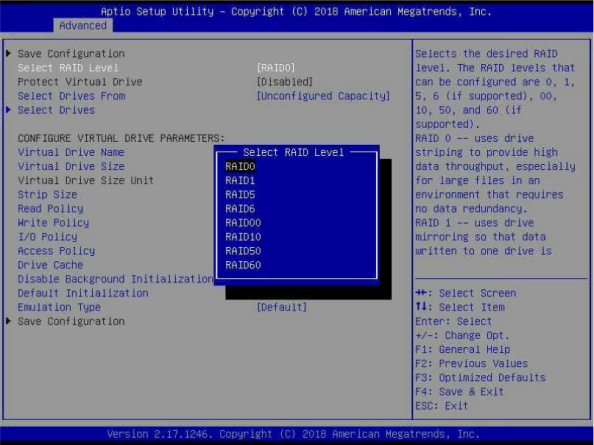
Note: We will create a RAID 6 virtual drive in this example. Notice in the "blue menu options" that you can select a number of different RAID types.
- Arrow "Down" to the "RAID 6" selection (example below).

- Press "Enter" and verify that the following screen appears (Select RAID Level RAID 6).
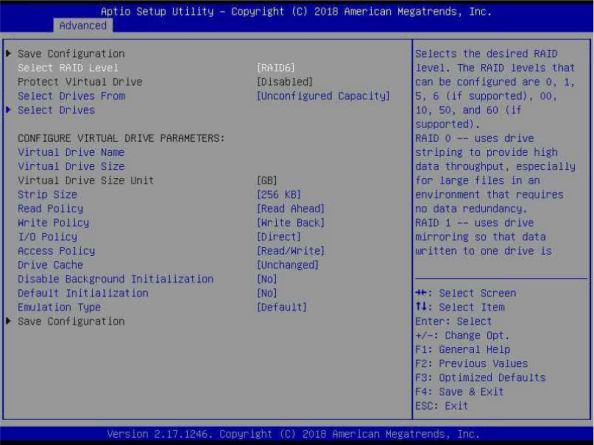
- Arrow "Down" to "Select Drives" (for the RAID 6 configuration).
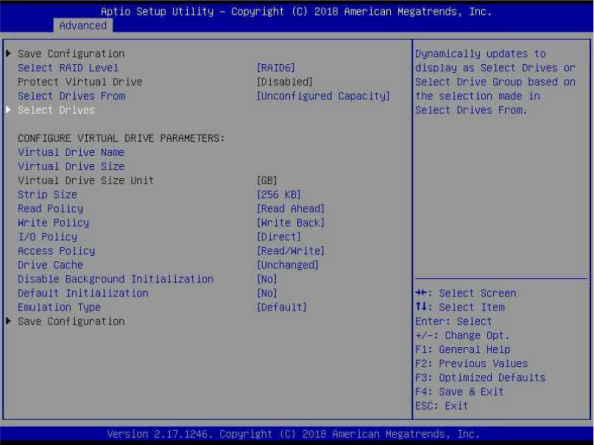
- With "Select Drives" highlighted, press "Enter" and verify the following screen appears
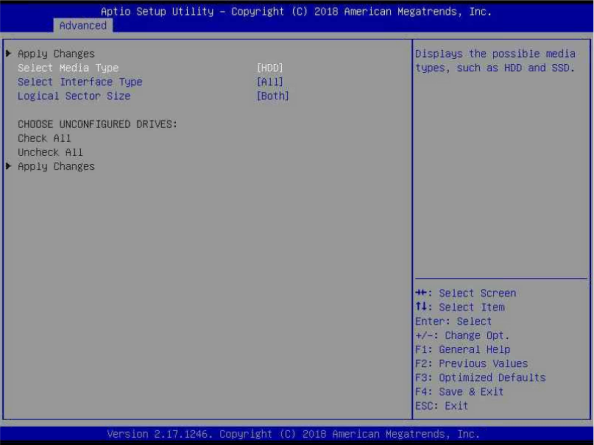
- With "Select Media Type" highlighted, press "Enter" and verify the following screen appears.
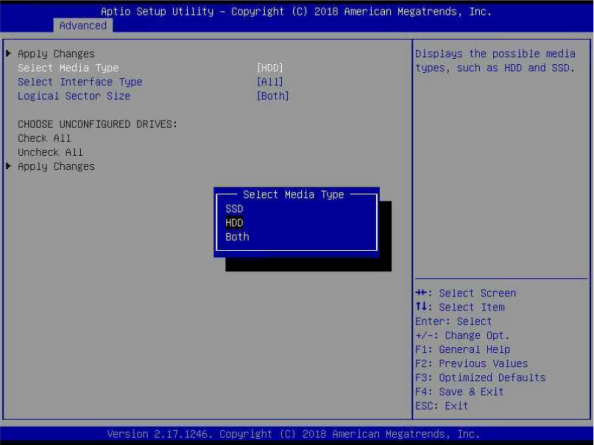
- Arrow "Down" and to select "Both" (for the Select Media Type).
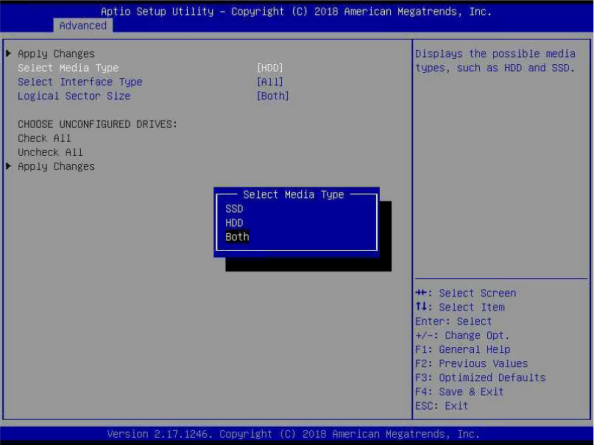
- With "Both" highlighted, press "Enter" and verify the following screen appears.
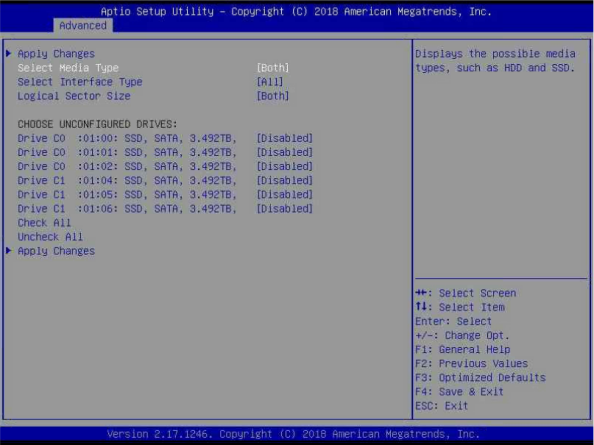
- Arrow "Down" to select "Check All" (for the Choose Unconfigured Drives).
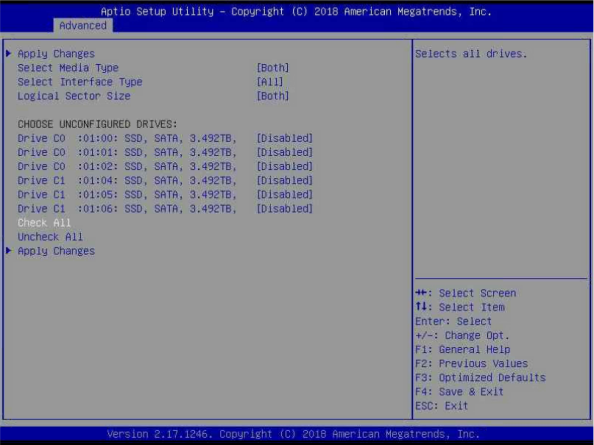
Note: Notice that all six (6) drives within the system are "Disabled".
-
With "Check All" highlighted, press "Enter" and verify the following screen appears.
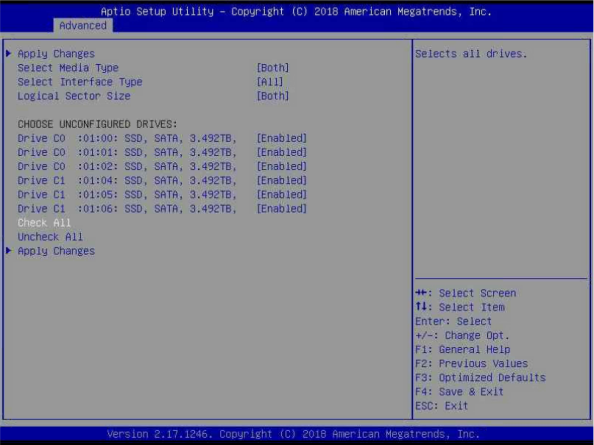
Note: Notice that all six (6) drives within the system are "Enabled".
-
Arrow "Down" to select "Apply Changes" (bottom-left of screen).
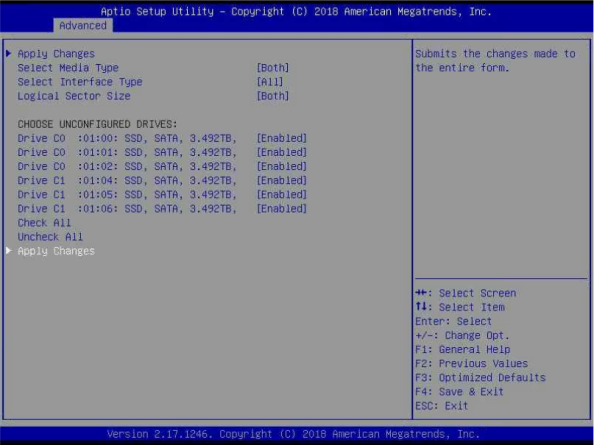
- With "Apply Changes" highlighted, press "Enter" and verify the following screen appears.
Note: Notice the message: "The operation has been performed succ."

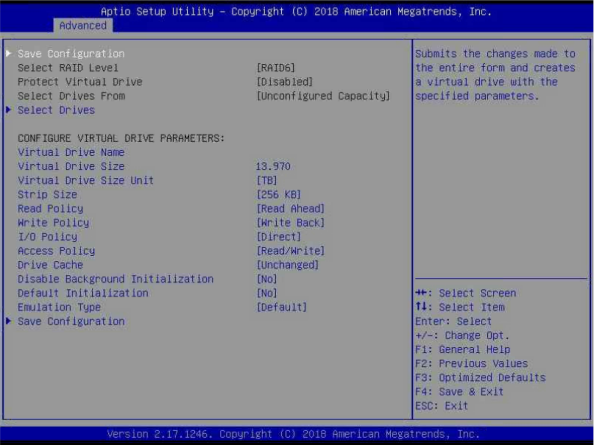
- Use the "Up" to go to the "Configuration" screen (shown below).
- Arrow "Up or Down" to select "Disable Background Initialization" (see example below).

- With "Disable Background Initialization" highlighted, press "Enter" and verify the following screen appears.
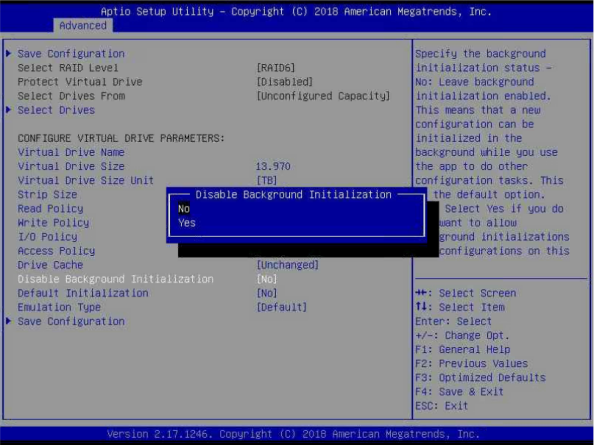
- Arrow "Down" to select "Yes" (see example below).

- With "Yes" highlighted, press "Enter" and verify the following screen appears.
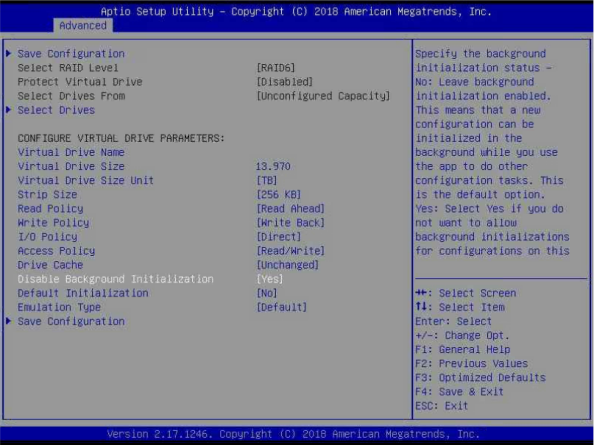
- Arrow "Down" to select "Default Initialization" (see example below).
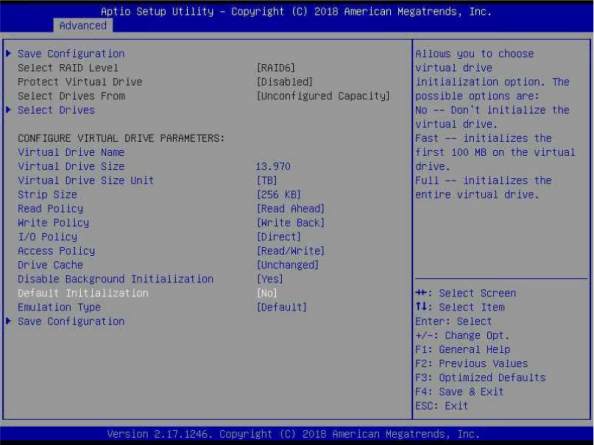
- With "Default Initialization" highlighted, press "Enter" and verify the following screen appears.
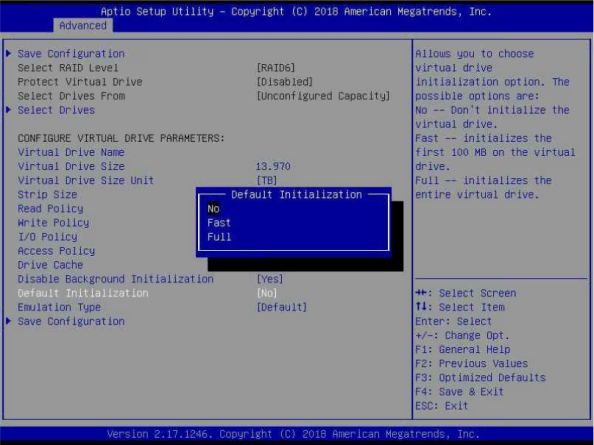
- Arrow "Down" to select "Fast" (see example below).
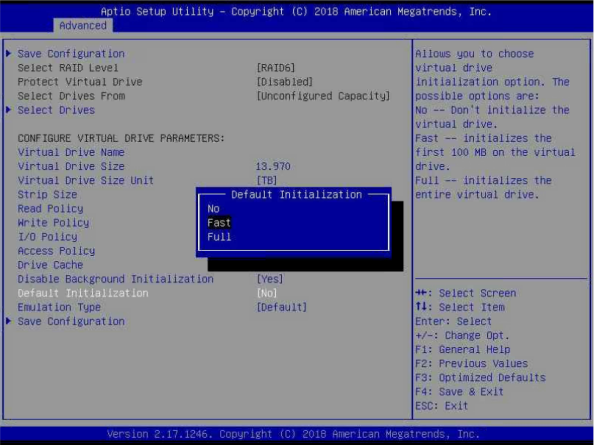
- With "Fast" highlighted, press "Enter" and verify the following screen appears.

-
Arrow down to each of the following "Configure Virtual Drive Parameters" and select the listed options as shown:
- Drive Cache: [Disabled" (required setting)
- Recommended settings include: Stripe Size: [128K] (Quantum recommends using a stripe size matching the I/O size of the application.)
Note: Ensure to set the "Read Policy" as shown below for HDDs versus SSDs. This is Quantum's recommendation.
- Read Policy for HDDs: [Read Ahead]
- Read Policy for SSDs: [None]
- Write Policy: [Write Back] (Quantum recommends this selection to ensure the best write performance.
- I/O Policy: [Direct] (default setting)
- Access Policy: [Read/Write] (default setting)
- After making the above selections. press "Enter" and verify the following screen appears.

- Arrow "Down" to select "Save Configuration" (see example below).
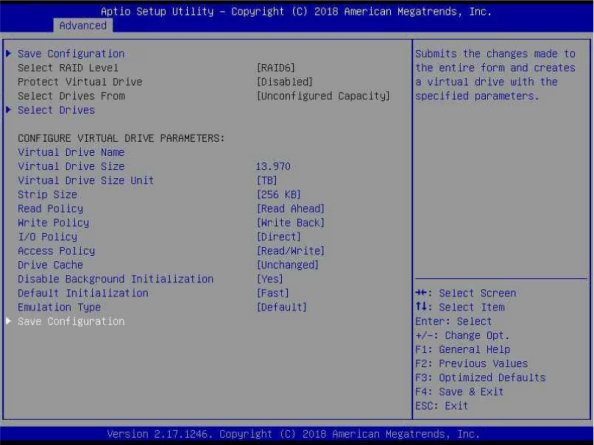
- With "Save Configuration" highlighted, press "Enter" and verify the following screen appears.
Note: The RAID 6 configuration is being created; however, the configuration is currently "Disabled".

- With "Confirm" highlighted, press "Enter" and verify the following screen appears.

- Arrow "Down" to select "Enabled" (see example below).

- With "Enabled" highlighted, press "Enter" and verify the following screen appears.

- Arrow "Down" to select "Yes" (see example below).
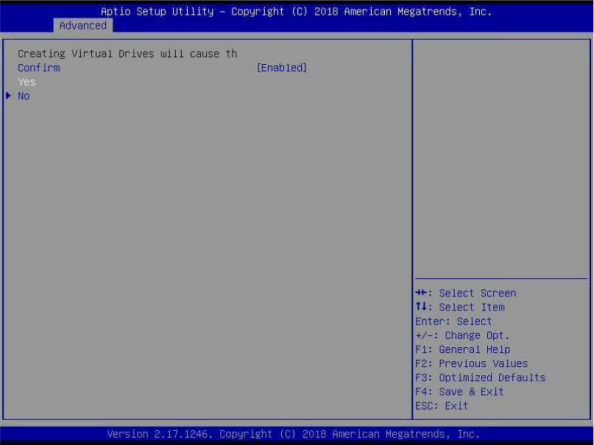
- With "Yes" highlighted, press "Enter" and verify the following screen appears.
Note: Notice the message that the "Virtual Drive creation was successful".

- Press "F4" to access the "Save & Exit" screen (see below).
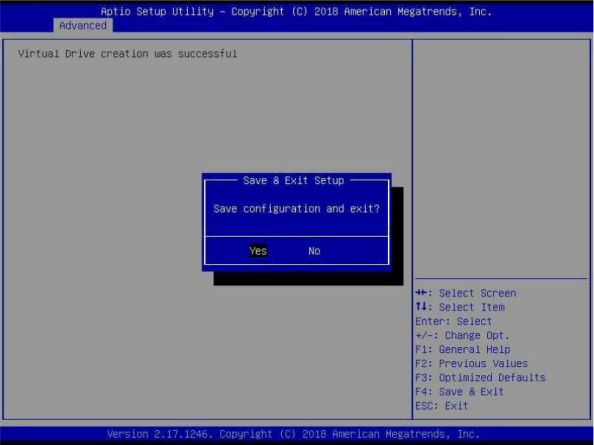
- Select "Yes", press "Enter" to save and exit the RAID 6 configuration process.
Note: The system automatically reboots. The new RAID 6 has been created. Don't forget to access the GUI to label, mount, and share the new file system (RAID 6) you just created.
Note: If the OMV/GUI defaults have been changed, use that data to log onto the system.
Complete the following process to use the GUI to create a file system for the new RAID group.
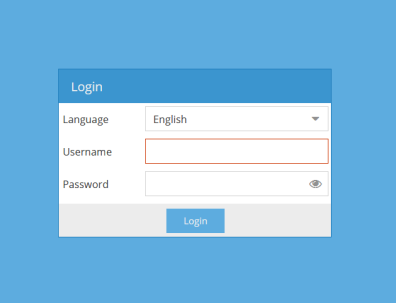
- Access the OMV/GUI.
- Default Address:
10.0.0.1 - Default Username:
admin - Default Password:
password
- Default Address:
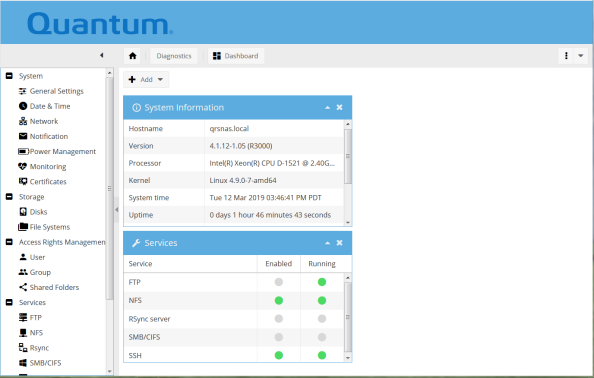
- Ensure the following screen appears.
-
Select the following:
> Storage > File Systems - Ensure the following screen appears.
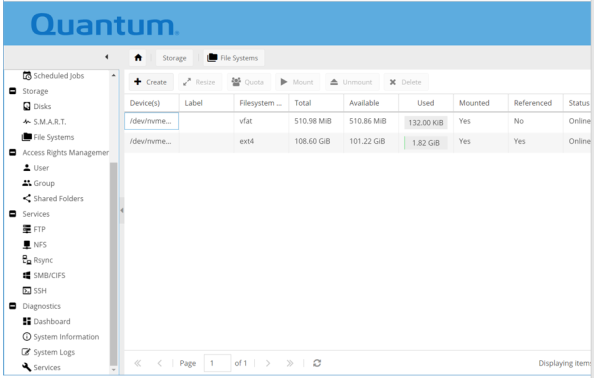
-
Click the "Create" button (located above the listed file systems).
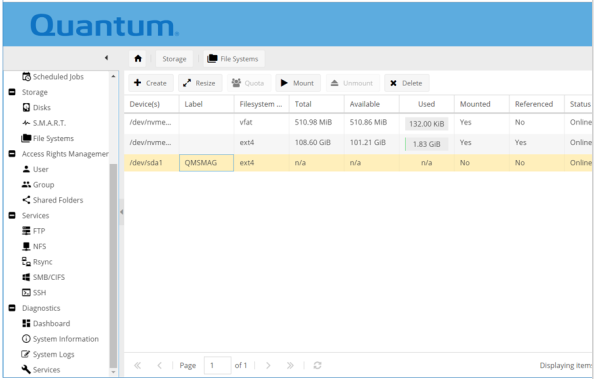
- Ensure the following screen appears.

Note: The RAID 5 group is a virtual disk and is identified as in the drop-down menu:
/dev/sda - Click on the "Device" drop-down menu" and select the /dev/sda RAID 5 group (45.47TB in this example).
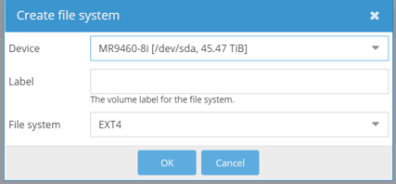
Note: Use "QMSMAG" as a standard label for the drive magazines. The label applied here should be the same across the company drive magazines to avoid having to mount the file system every time a magazine is removed from the vehicle and taken to the data center and vice versa.
- Type in the "Label" name: QMSMAG (shown in the below screen).
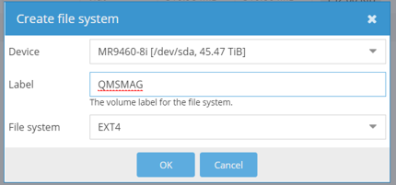
- Click "OK" and ensure the following screen appears (format this device).
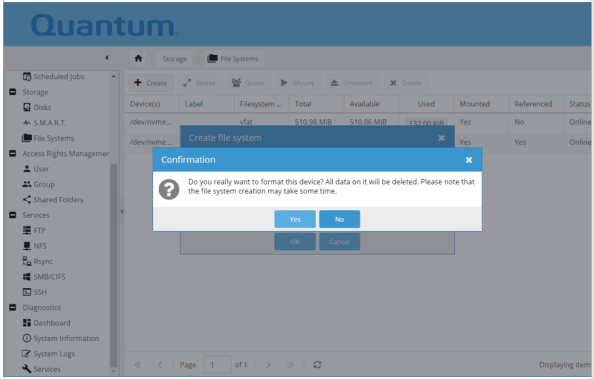
-
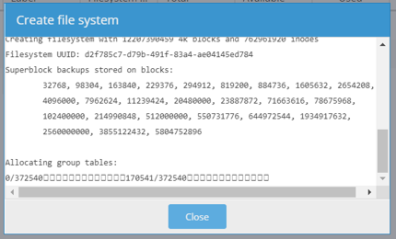
Click "Yes" and ensure the following screen appears ("Creating filesystem ...").
Note: Creating a new file system will take up to 24 hours to complete. If you remove power from the system during file system creation, the file system will become corrupted and will need to be recreated.
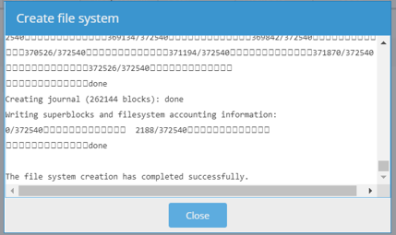
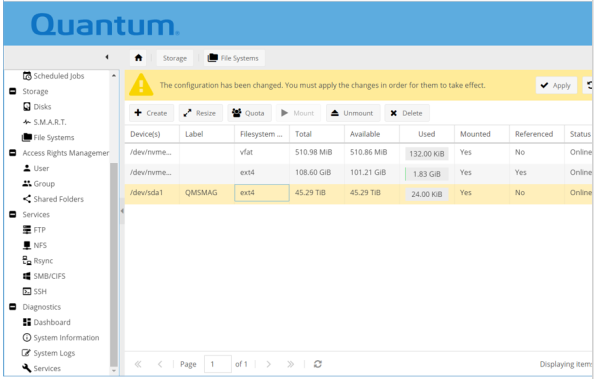
- Verify the following screen appears after the file system has been created.
Note: Notice at the bottom of the screen the following message: "The file system creation has completed successfully." Also, after the file system is created, you must mount the file system.
- Click on the device "
/dev/sda" and ensure it is highlighted. - Click on "Mount".
- After you click on "Mount", ensure the following screen appears.
Note: Notice the message: "The configuration has been changed. You must apply the changes in order for them to take effect."
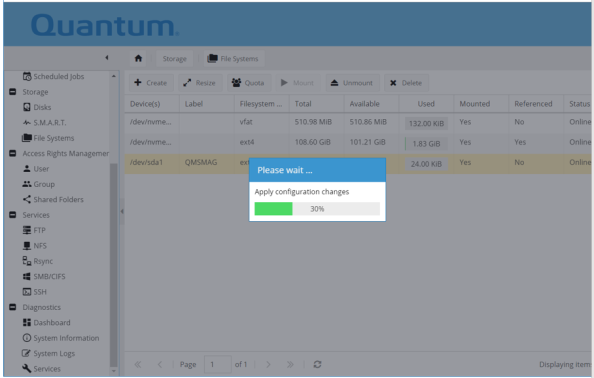
- Click "Apply", ensure the following screen (pop-up) appears.

- Click "Yes", ensure the following screen (pop-up) appears.
Note: Once the file system has been created and mounted, you must set up the "Services".
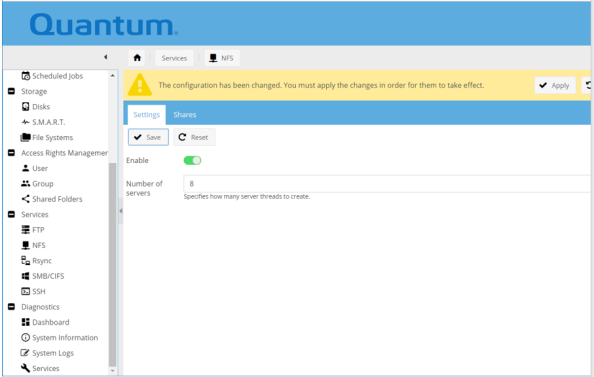
- Select the following:
> Services > NFS > Settings - Verify the following screen appears.
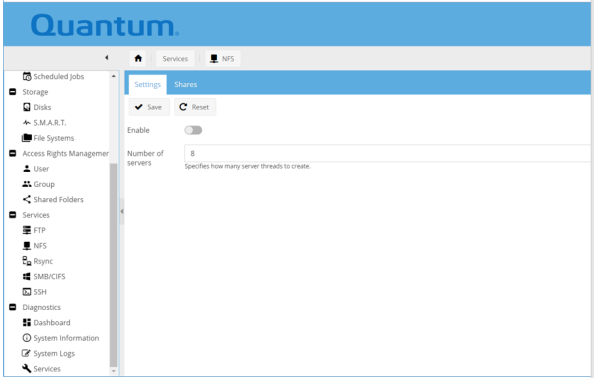
- Slide the "Enable" toggle switch to the right, then click "Save".
- Verify the following screen appears.
Note: Notice the message: "The configuration has been changed. You must apply the changes in order for them to take effect."
- Click "Apply", ensure the following screen (pop-up) appears.
- Click "Yes", ensure the changes are saved.
That completes the procedure to use the GUI to create a file system for the new RAID group.
