Permanently Remove a Drive
-
Remove the drive from it's partition by deselecting the check box associated with it in the Resources screen.
WARNING: DO NOT vary off the drive.
 Remove Drive from a Partition
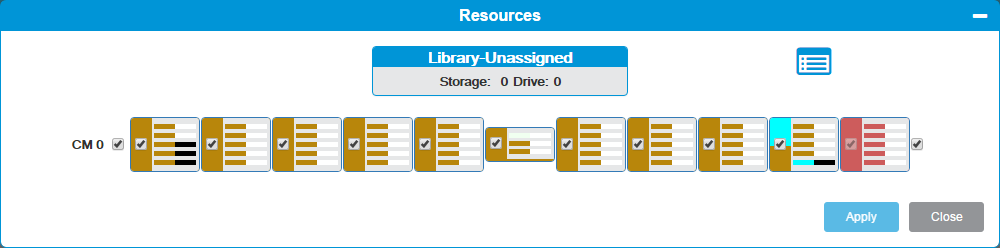
The Resources window allows you to view current assigned drives, slots and other elements for a selected partition and add drives and slots to existing partitions. The library assigns colors to each resource in the partition so you can tell which slots or drives are assigned to which partitions. The window also has a legend icon
 you can hover over to see which colors are assigned to your partitions or other resources, such as I/E or cleaning slots.
- From the Navigation panel, select Partitions
-
From the Operation panel, select Resources.
Item Description Action Library Unassigned Displays the number of available drives and storage slots that can be assigned to the selected partition. Display only. Library Legend Icon A small icon in the upper right of the window that describes what the colors indicate in the visual display.
- Green - unassigned drives and storage slots
- Violet - drives and storage slots allocated to a specific partition
- Red - slots allocated as I/E slots
- Light Blue - Slots allocated to cleaning
Display only. Module number To the left of each visual representation of a module is its number that shows its position in the library. The CM will always be module 0. Modules above the CM will be positive numbers (1, 2, etc) and modules below the CM will be negative numbers (-1, -2, etc).
Display only. Check boxes You can use various check boxes to change the assignment of magazines, slots, and drives:
Check box to the left or right of each magazine - assigns the entire magazine to the selected partition. Clear to unassign the magazine.
Check box in a magazine - assigns all five (5) slots to the selected partition. Clear to unassign.
Check box between magazines - assigns all available drives to the selected partition. Clear to unassign
See explanations in the previous column. - Make the desired changes to the selected partition and click Apply. The changes are displayed in the row for the selected partition in the North Panel.
-
Click Close to exit the window.
-
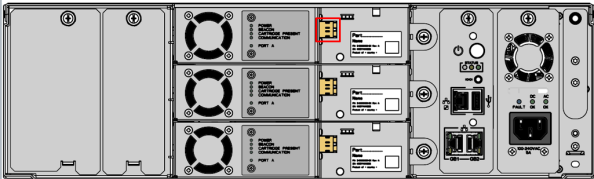
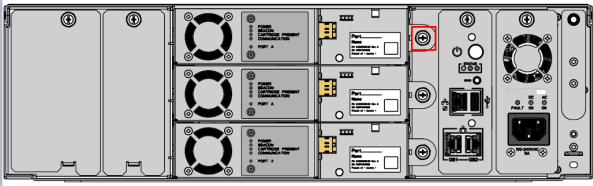
Identify the drive.
- From the Navigation panel, select Drives.
- In the North Panel, select the check box next to the drive(s) you want to identify.
- In the Operations panel, click Identify On or Identify Off.
-
Disconnect the drive cable from the drive if necessary.
-
Loosen the drive thumbscrew.
-
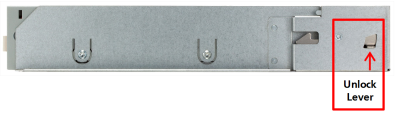
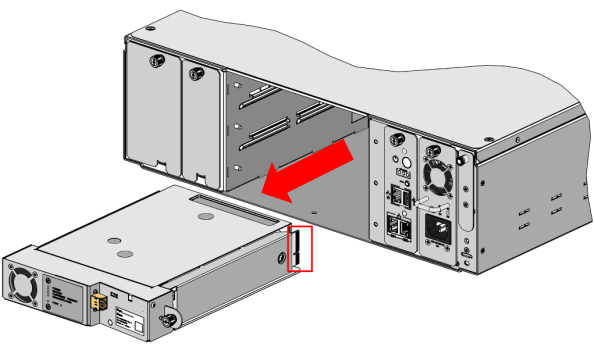
On the left of the drive sled, press the lock button down and slide the drive out of the drive bay.
- In the empty drive bay, reinsert the drive cover plate.